
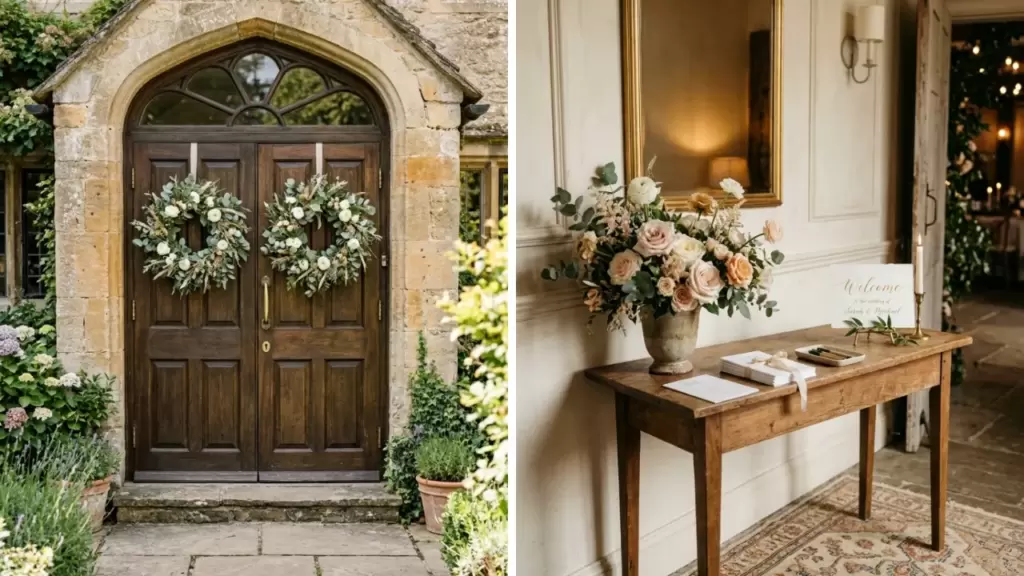
Wedding venue decorations work best when they respond to the space you have. An entrance, a ceiling installation, or a well-dressed table can each become a focal point without covering every surface.
These 100 ideas span ceremony areas, reception rooms, gardens, tables, and guest displays. Choose a few compatible concepts, then adapt their scale to your venue, guest routes, and setup time.
Confirm attachment rules, installation responsibilities, candle policies, and removal requirements before ordering. Large structures and overhead pieces need an appropriate supplier and venue-approved installation.
As an Amazon Associate I earn from qualifying purchases.
Entrances and Arrival Spaces
1. Frame the Main Doorway with Asymmetric Flowers
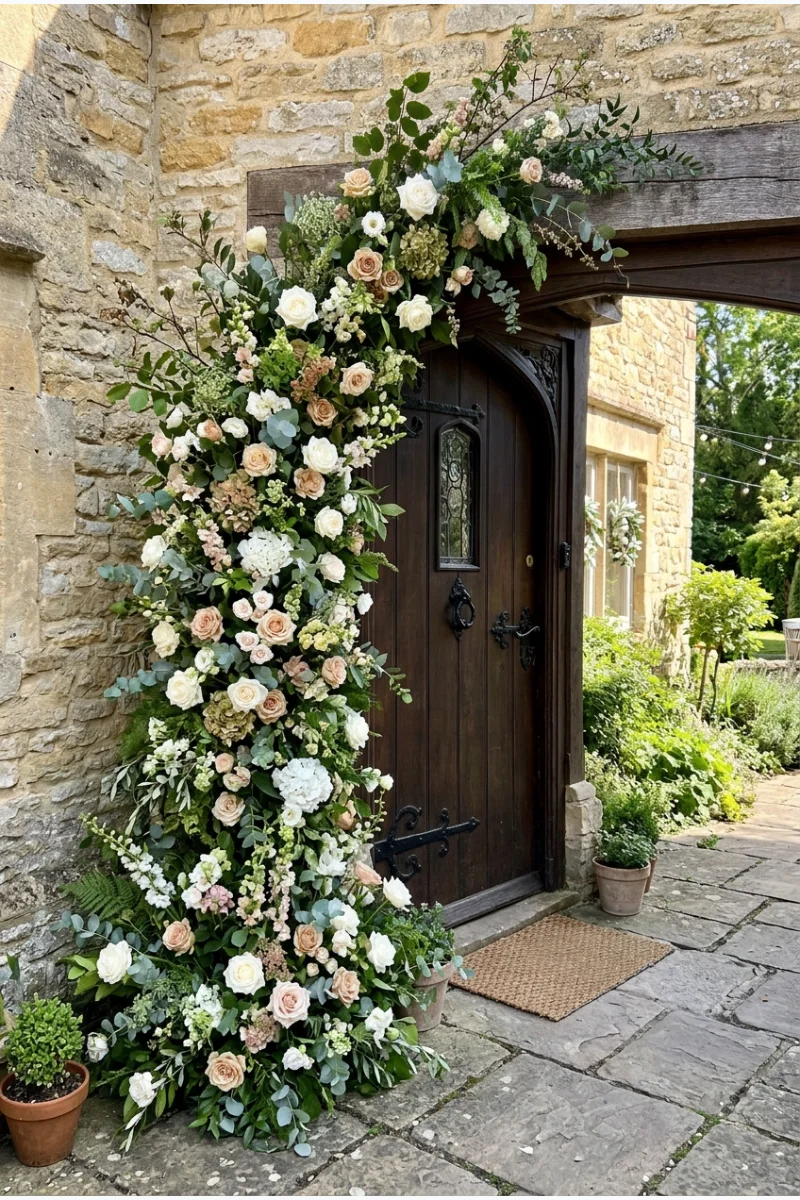
Build a floral installation up one side of the entrance and across part of the lintel. The uneven outline emphasizes the doorway without hiding its shape.
Keep door swings, handles, and the walking opening clear. Concentrate flowers where guests see them approaching rather than covering every side equally.
2. Hang Matching Wreaths on Double Doors
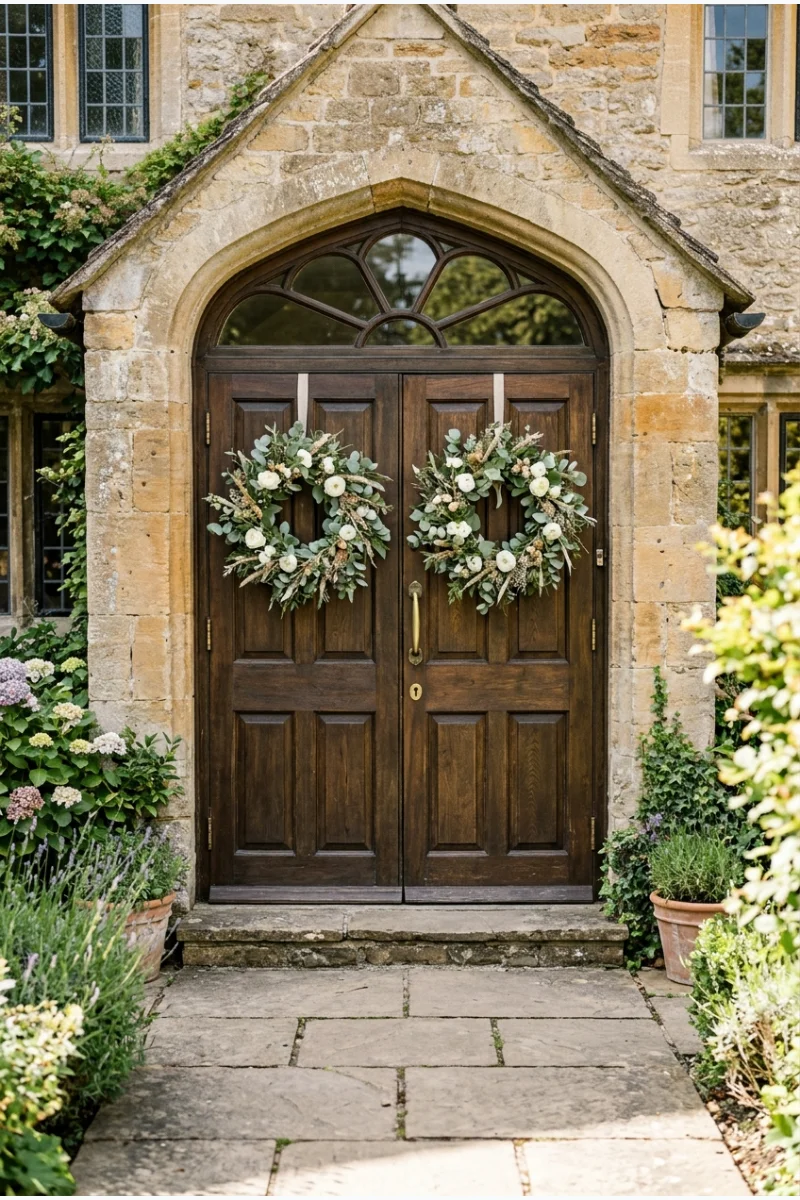
Place a wreath on each leaf of a pair of doors. The repeated circles make the entrance feel dressed while leaving most of the original finish visible.
Use venue-approved hangers and check that both doors still open fully. Choose wreath proportions that stay clear of handles and glass inserts.
3. Create a Rug-and-Console Welcome Vignette
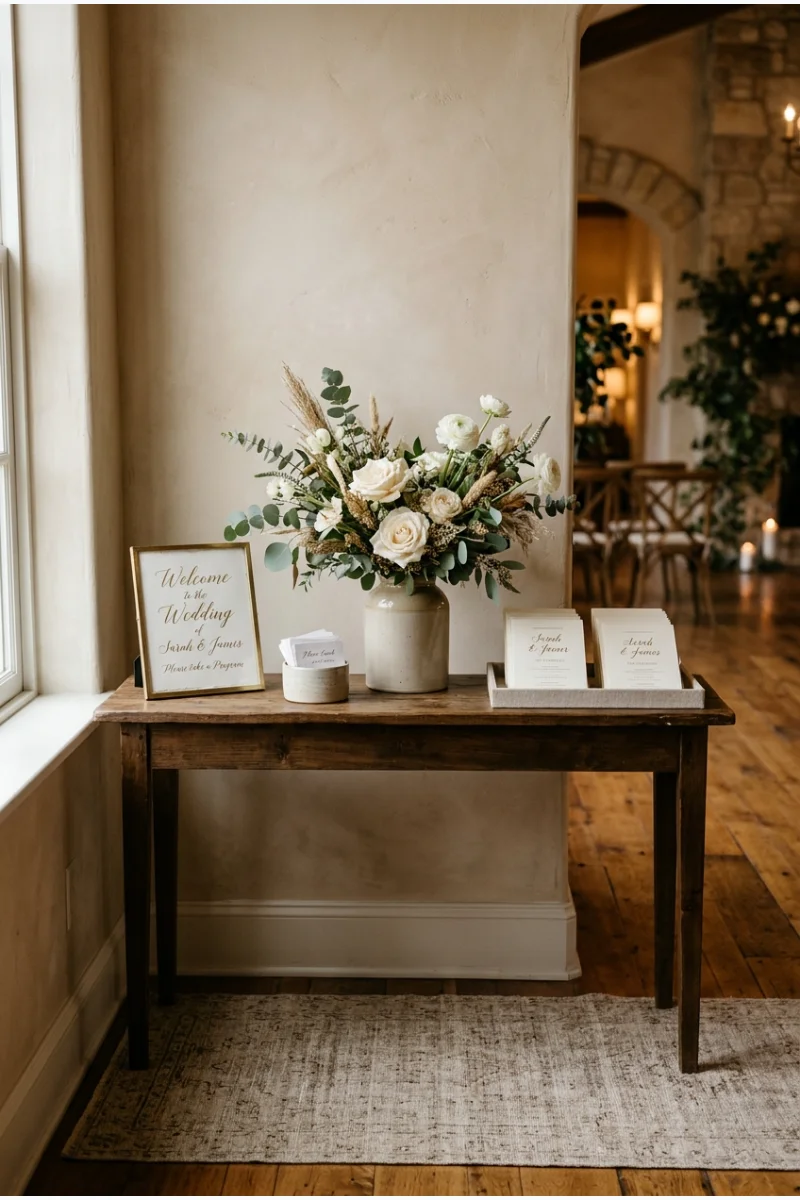
Anchor a narrow welcome console with a flat rug, then add flowers and a small welcome card. This gives a large lobby a more personal arrival point.
Keep the rug secured and the console beside the circulation route. Leave enough tabletop space for programs instead of filling it entirely with decor.
4. Nest a Welcome Sign inside a Floral Frame
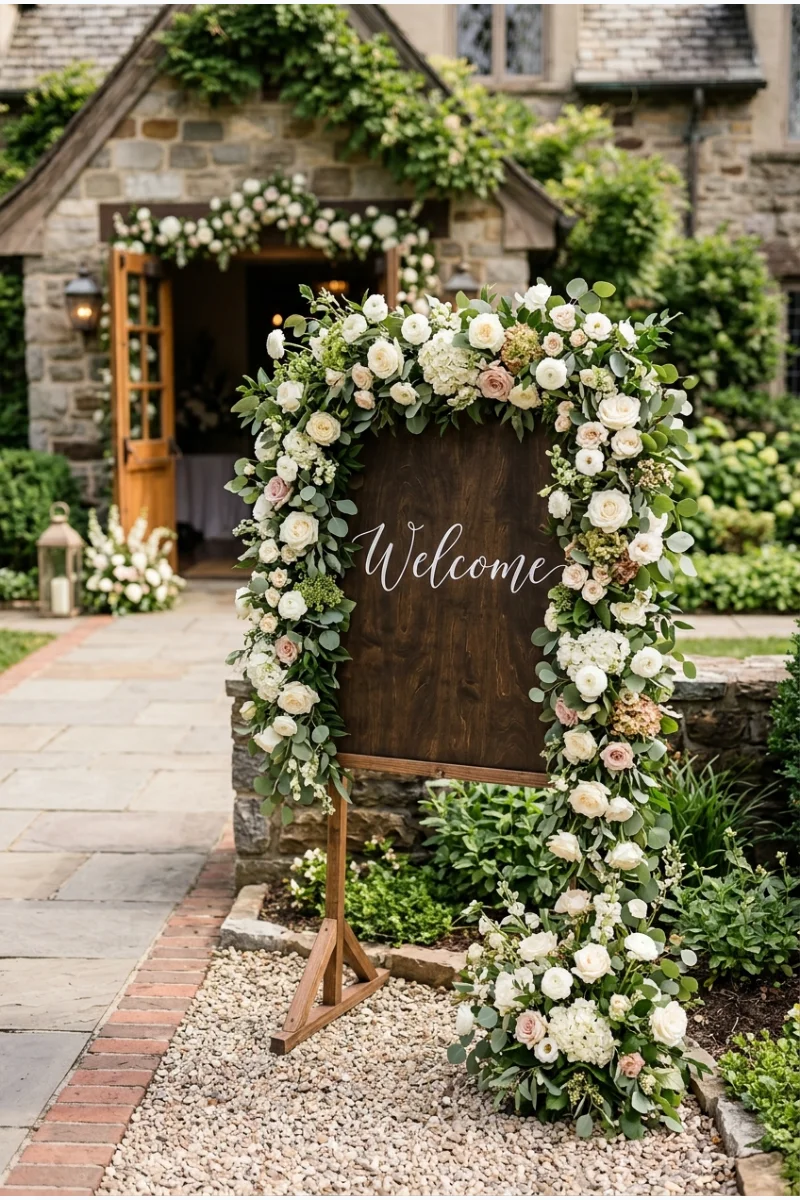
Surround a simple welcome panel with a freestanding frame of flowers. Guests see the message and the decorative focal point together without searching the foyer.
For supporting floral placement, adapt the welcome-display suggestions in these bridal shower setup ideas to your wedding entrance.
Check lettering size from the arrival route and keep the frame base outside the walkway.
5. Make an Oversized Entrance Bow
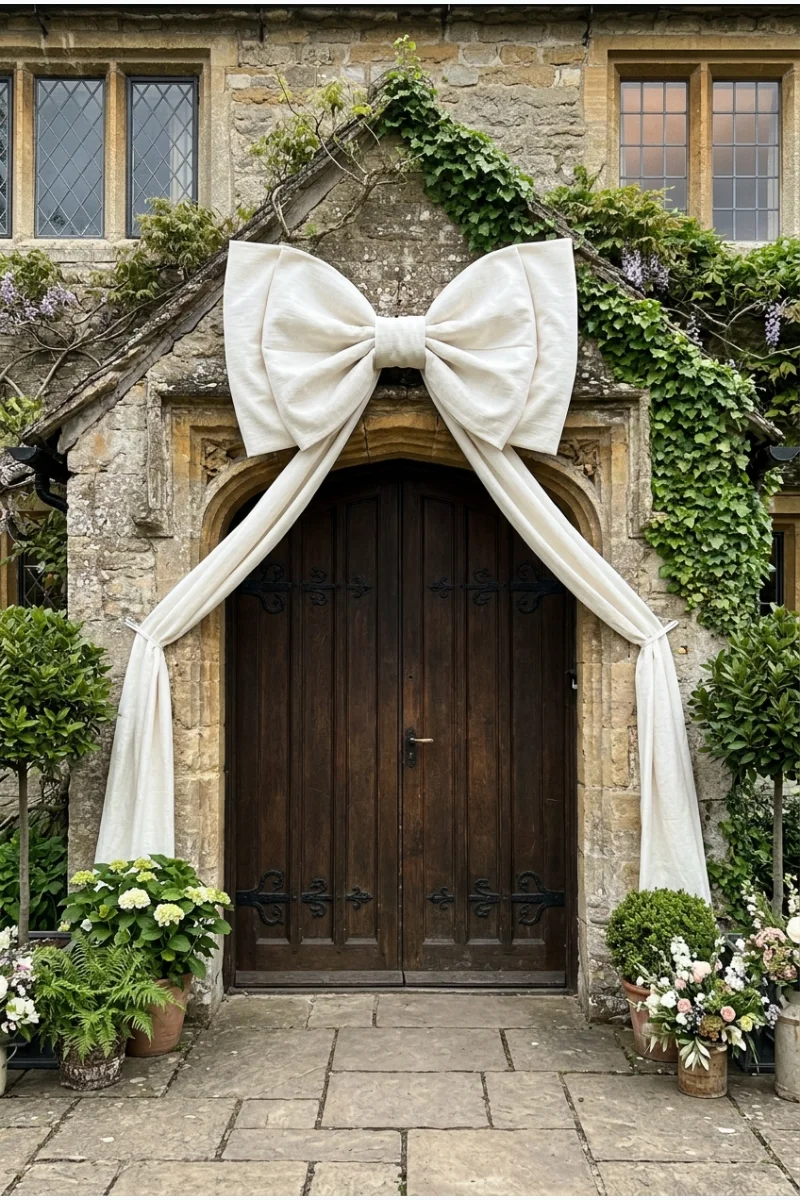
Tie a large, structured fabric bow above the entrance, with its tails secured against the surrounding frame. Its sculptural shape becomes the main decoration.
Choose fabric that holds the intended form and have the attachment approved. Keep tails clear of doors, stairs, and guests moving through the opening.
6. Flank the Entrance with Topiary Urns
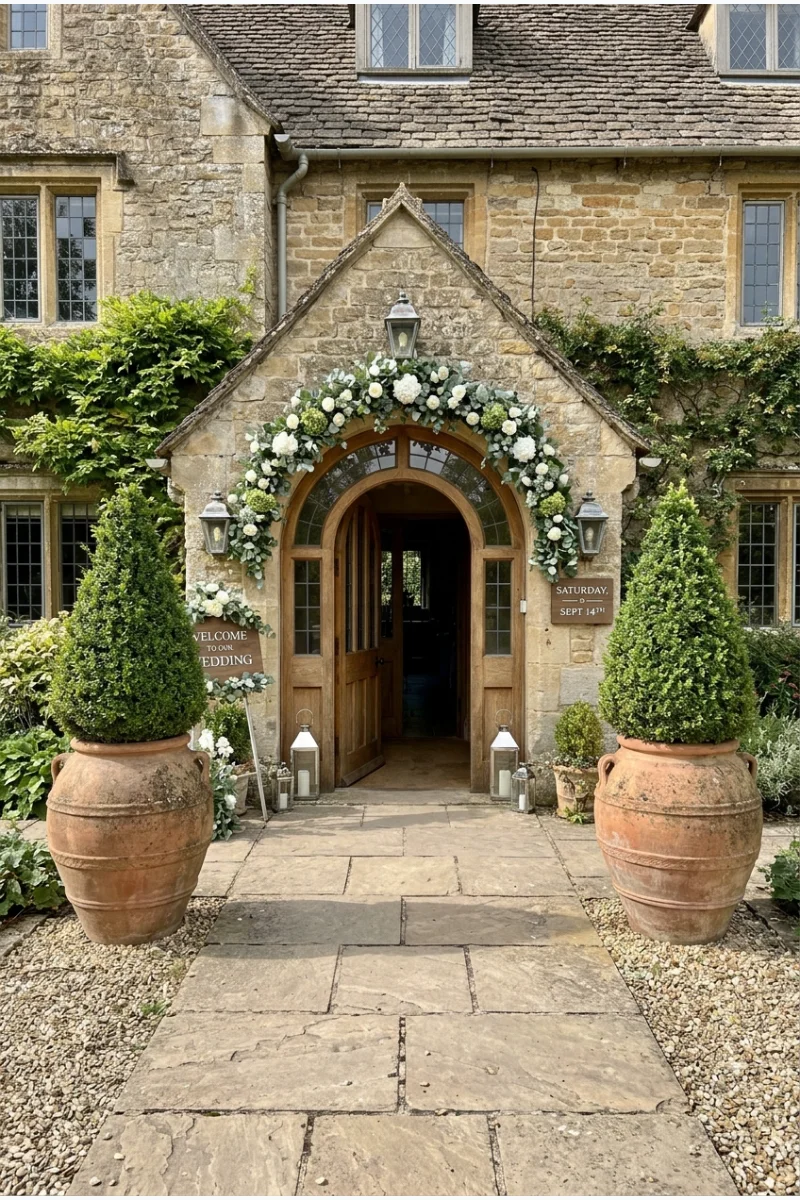
Place a pair of potted topiaries in substantial urns beside the entrance. Their upright shapes add definition when a building already has strong architectural details.
Confirm container stability and protect the floor beneath each pot. Set them far enough apart to preserve the full entrance width.
7. Follow a Stair Rail with a Flower Garland
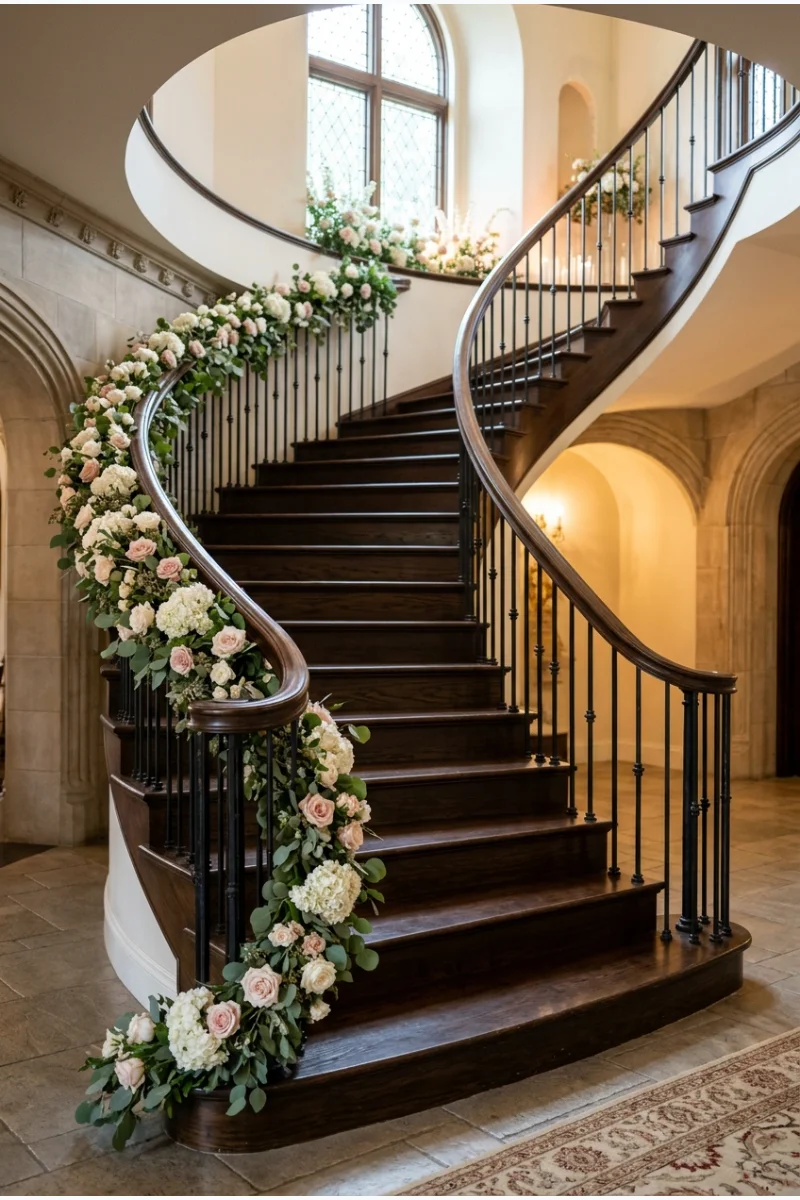
Run a floral garland along the outside of a staircase railing, allowing the curve of the stairs to guide the design.
Leave the handrail usable and keep flowers off the treads. Ask the venue which attachment methods protect its finish.
8. Add a Ribbon Curtain to an Entry Frame
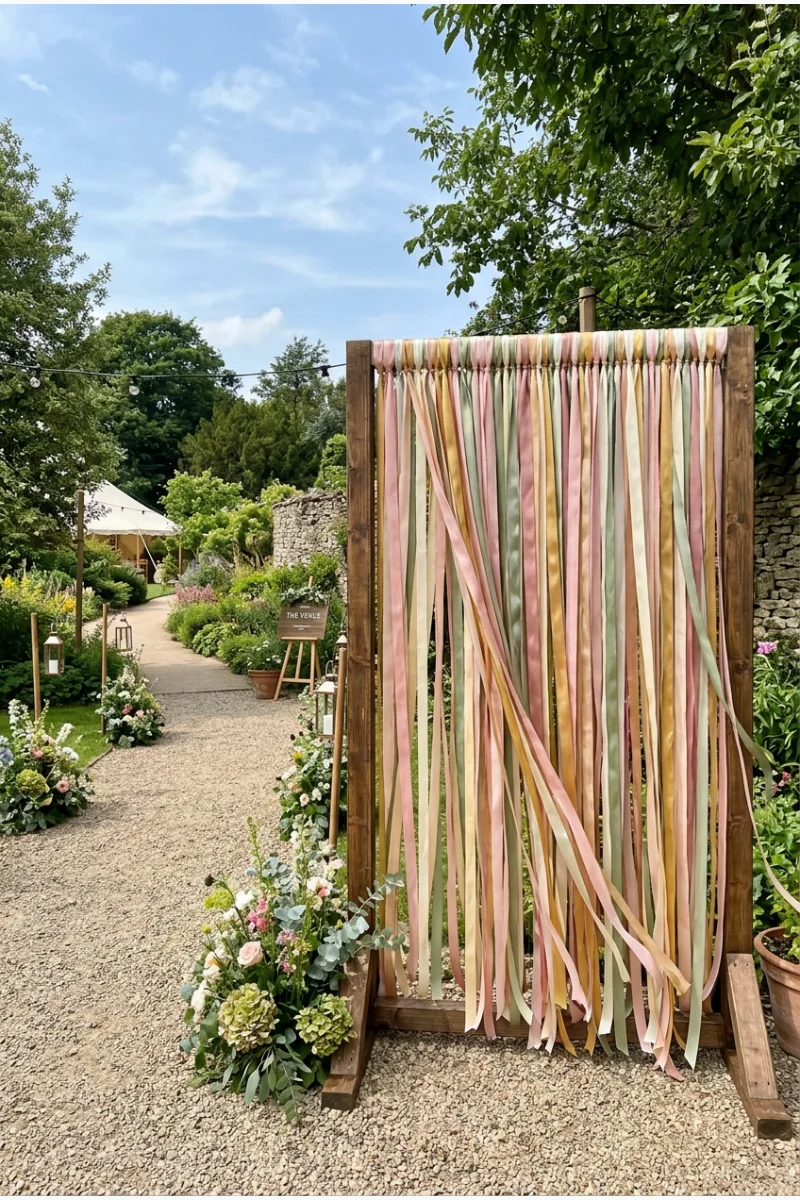
Suspend closely spaced ribbons from a freestanding frame beside the arrival area. The vertical strips create movement and a distinct surface without requiring dense flowers.
Position it as a decorative side feature rather than forcing guests to walk through it. Secure outdoor installations for the expected conditions.
9. Build a Repeating-Hoop Entrance Passage
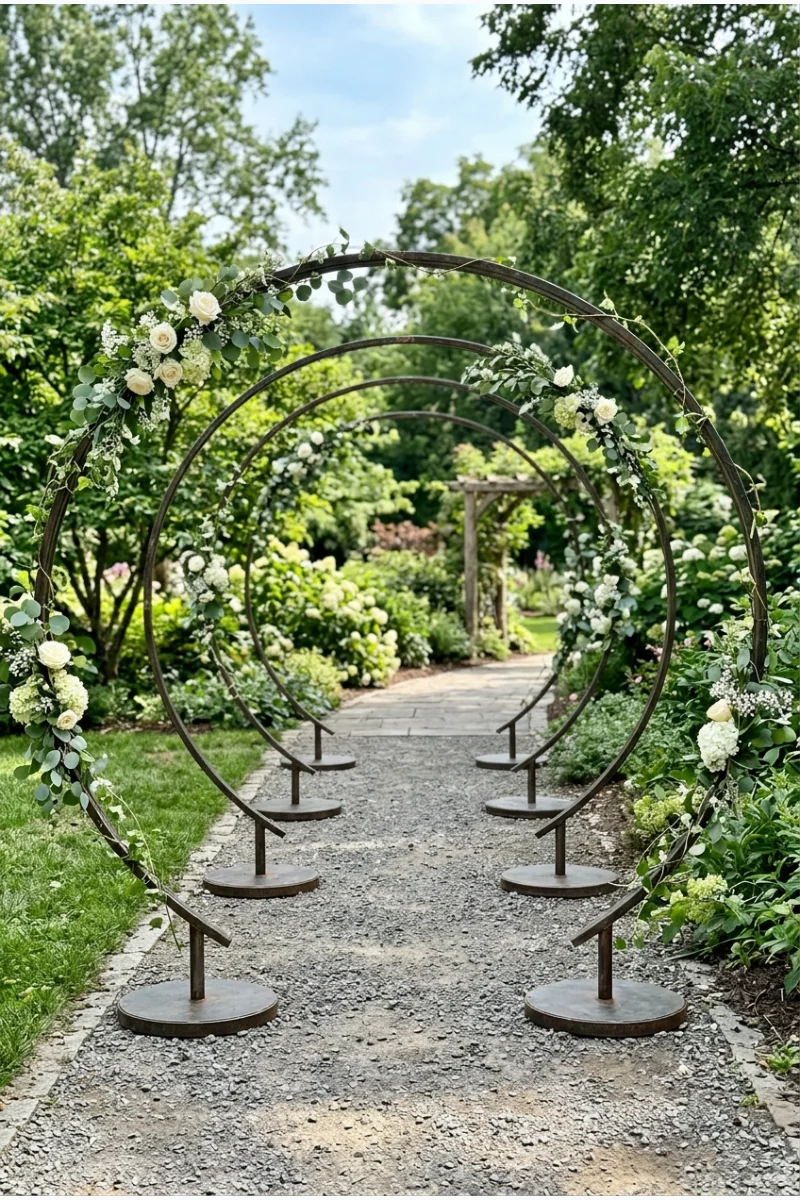
Arrange a short sequence of freestanding hoops along an approach, with sparse floral accents connecting their outlines. Repetition makes the transition into the venue visible.
Have the supplier plan stable bases, overhead clearance, and the usable passage width. A short, well-proportioned sequence is enough to establish the idea.
10. Bring a Small Tree Grove into the Foyer
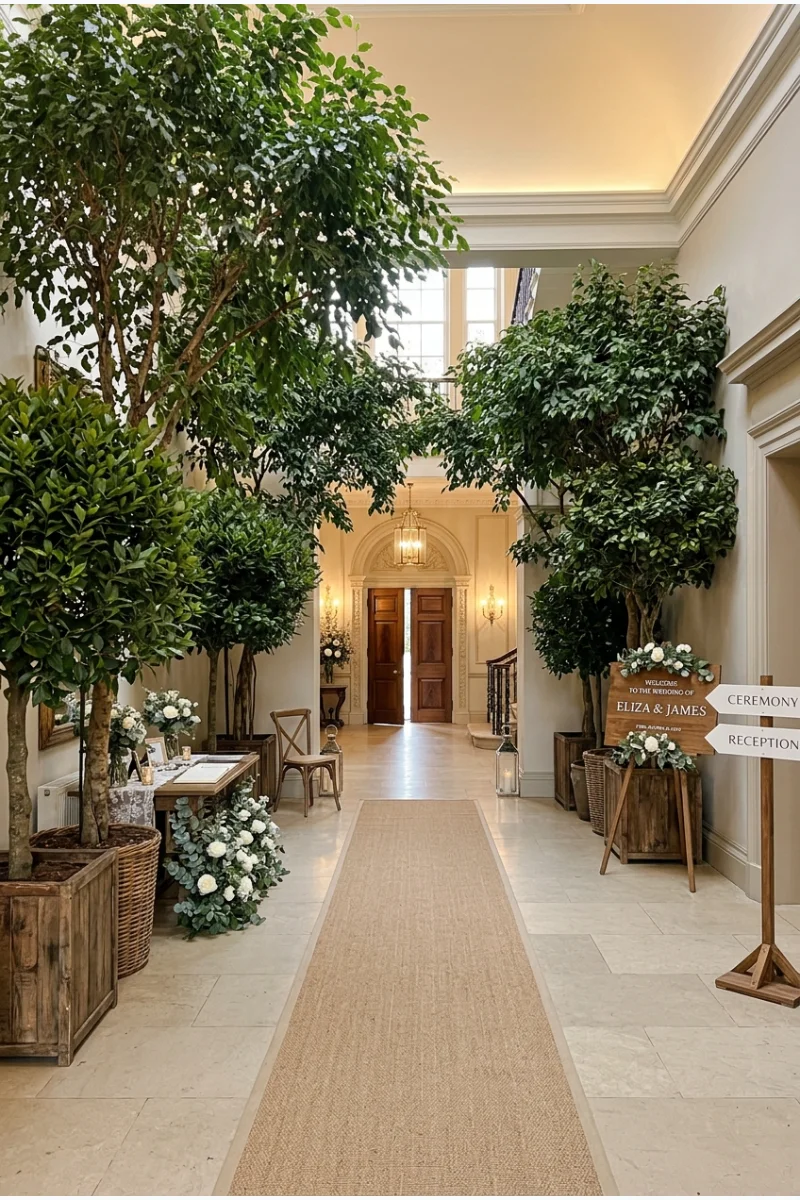
Group rented potted trees around the edges of a spacious foyer. Their canopies create a garden-like arrival without putting a tree at every table.
Keep entrances, signs, and service routes visible. Use floor protection beneath the containers and check that the plants fit through delivery doors.
Ceremony Backdrops and Aisle Details
11. Use a Broken Floral Arch
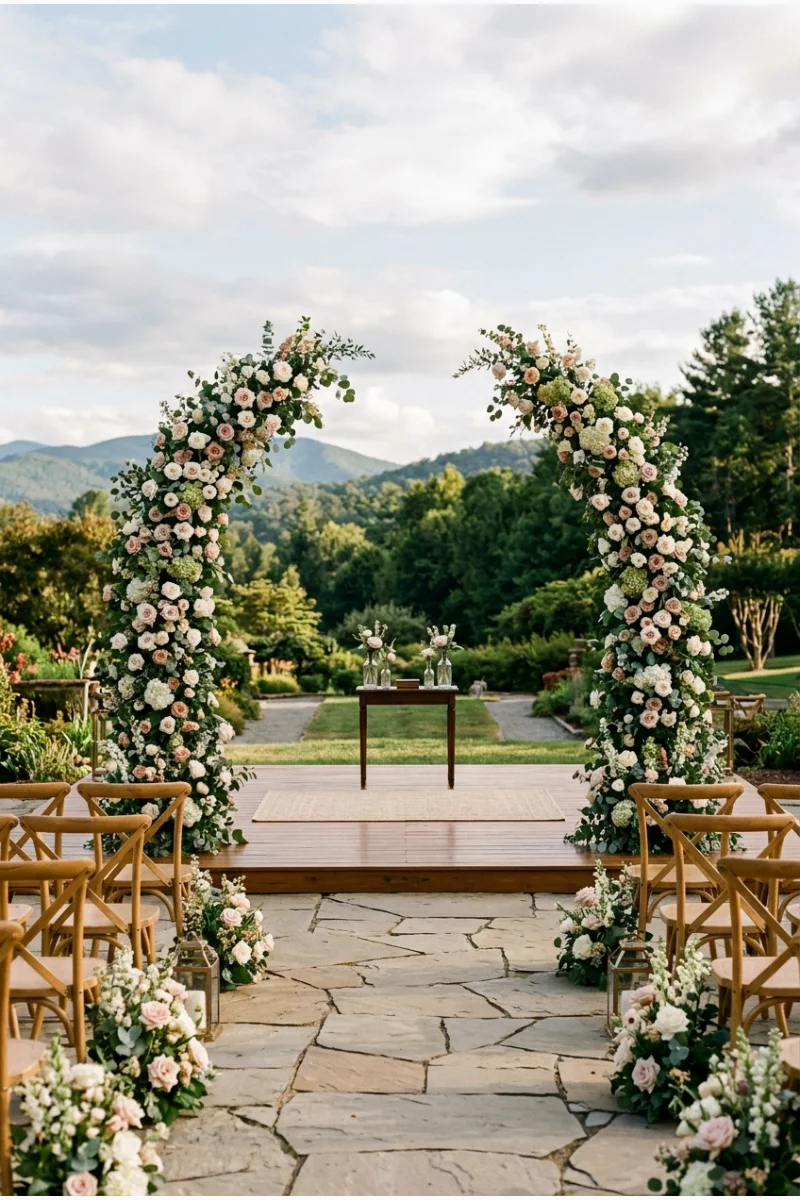
Frame the vow space with two curved floral sections that stop before meeting overhead. The open gap keeps the ceremony backdrop from feeling enclosed.
Choose stable frames and leave room for the officiant and ceremony movements. Show the florist the view from the last row before finalizing the scale.
12. Outline the Vow Space with a Floral Crescent
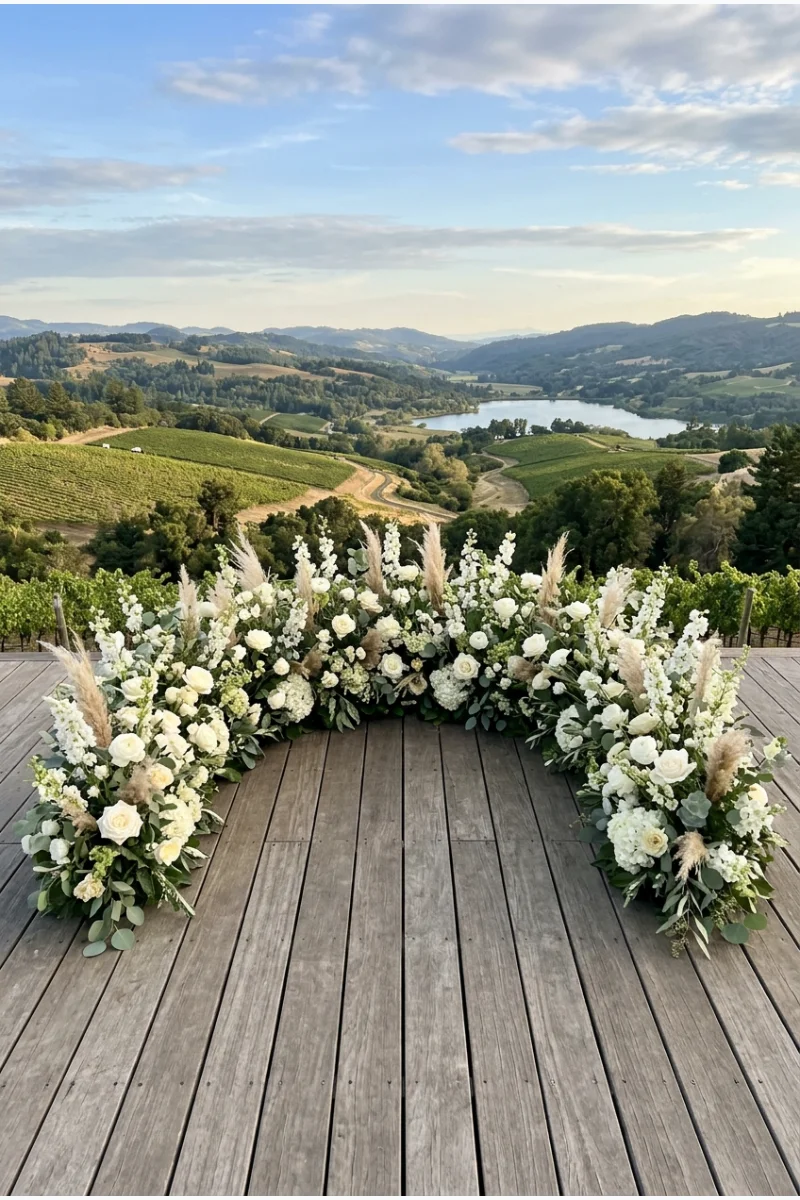
Create a low crescent of flowers behind the ceremony standing area. It defines the space while preserving the view above it.
Keep water-containing mechanics concealed and the front open. This arrangement suits a view or architectural backdrop you want to remain visible.
13. Personalize a Cloth Chuppah
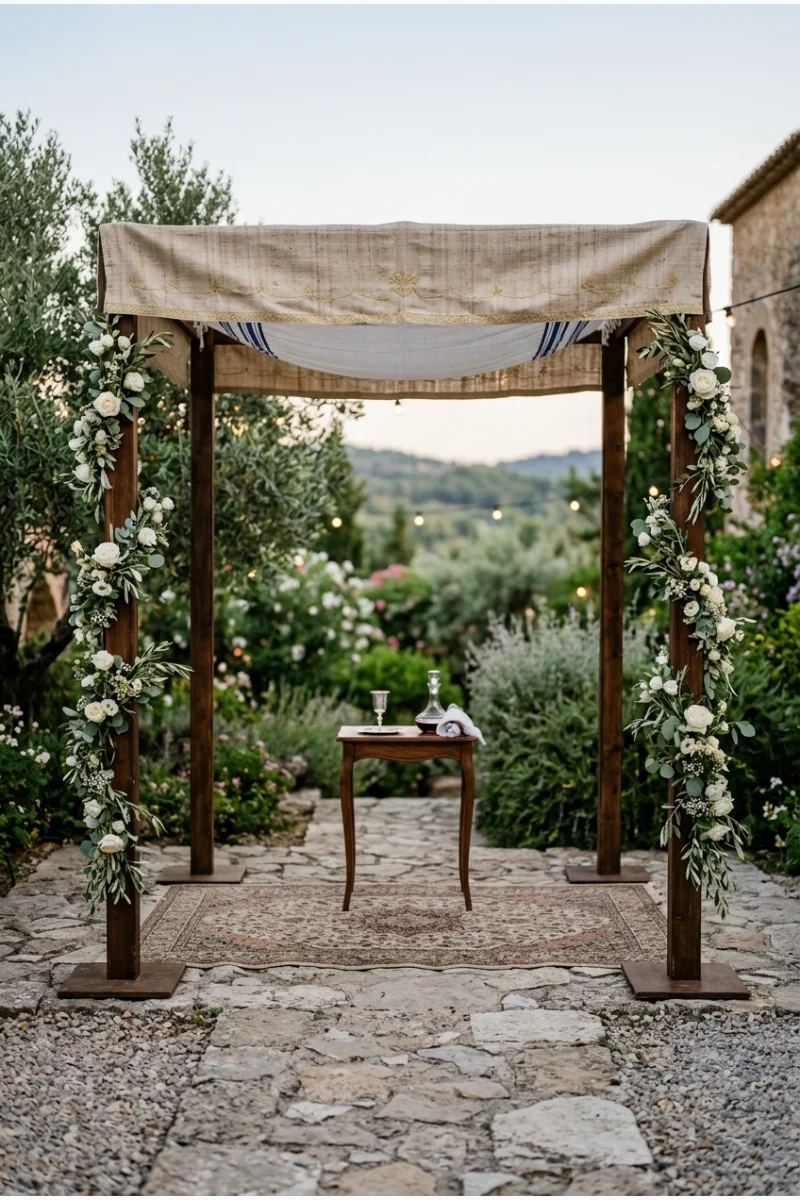
For a Jewish wedding, make the chuppah canopy the focal textile, supported by four posts. A meaningful cloth can carry the design without heavy embellishment.
Coordinate the canopy and ceremonial requirements with your officiant. Keep the sides open and decorations clear of the space needed beneath it.
14. Define a Mandap with Hanging Flower Garlands
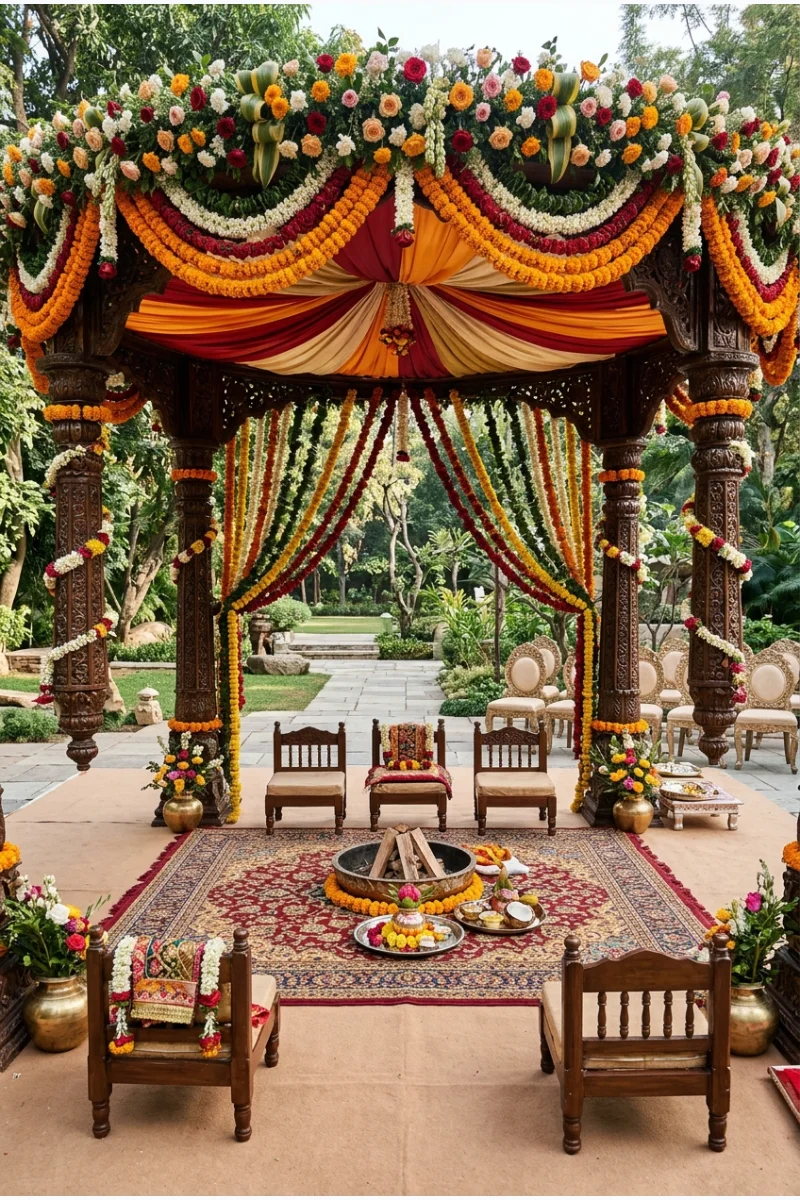
For a Hindu wedding, decorate a four-pillared mandap with flower garlands suspended between its supports. Keep the canopy and ceremonial area clearly defined.
Plan the arrangement with your priest and decorator so ritual access remains practical. Confirm any fire arrangements directly with the venue and ceremony team.
15. Place a Fan-Fold Screen behind the Ceremony
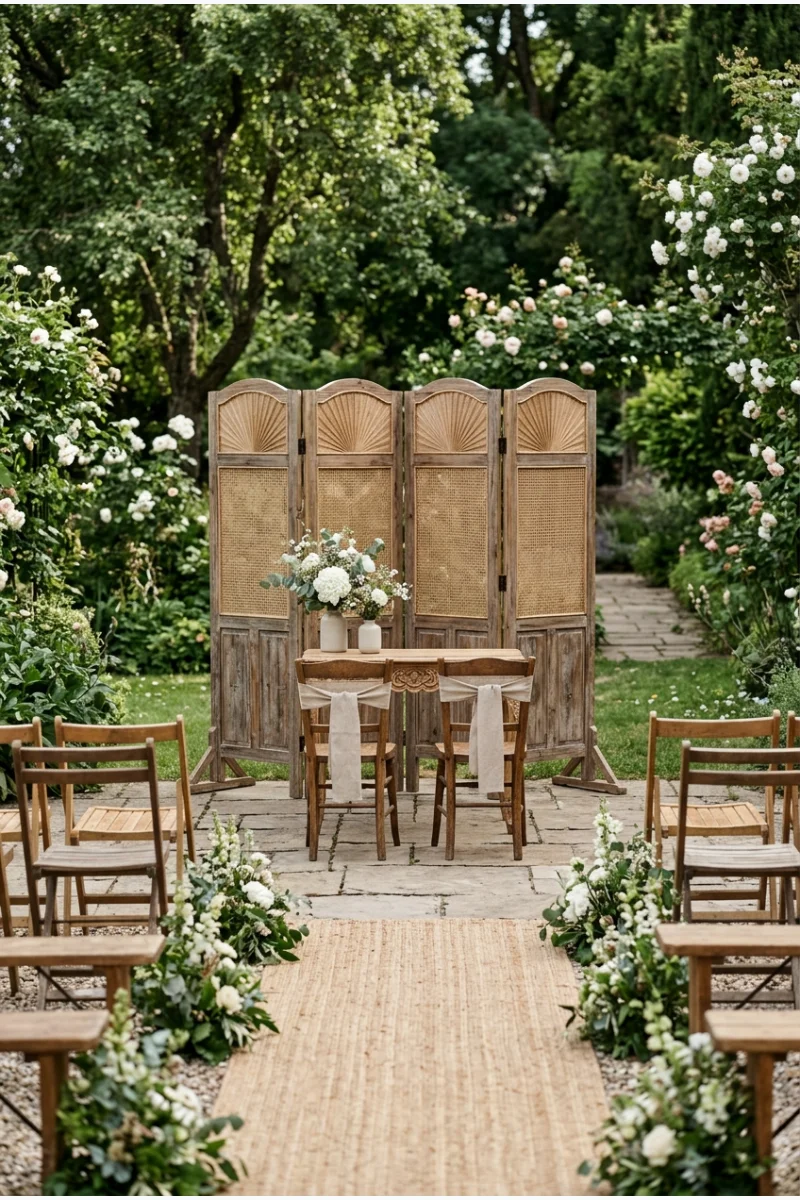
Use a freestanding accordion-fold screen as the ceremony backdrop. Its repeated folds create dimension even when the decorative surface is relatively simple.
Choose a finished screen with stable supports. Position it behind the standing area so its edges do not interfere with entrances or photography.
16. Lay a Patchwork Rug Aisle
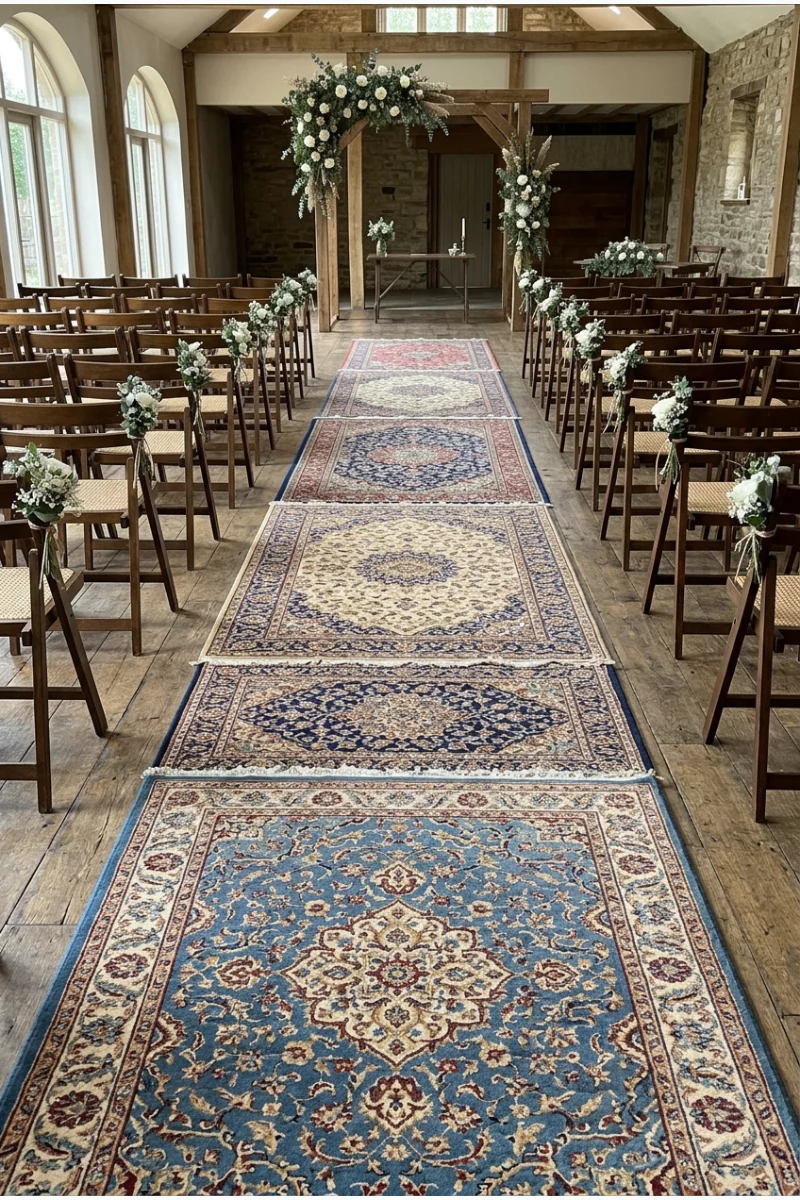
Join compatible flat rugs into a continuous ceremony aisle. The sequence of patterns gives the approach its own visual character.
Have the installer secure every edge and transition. Avoid overlapping raised corners or placing rugs over an uneven surface.
17. Plant a Meadow along the Aisle Edges
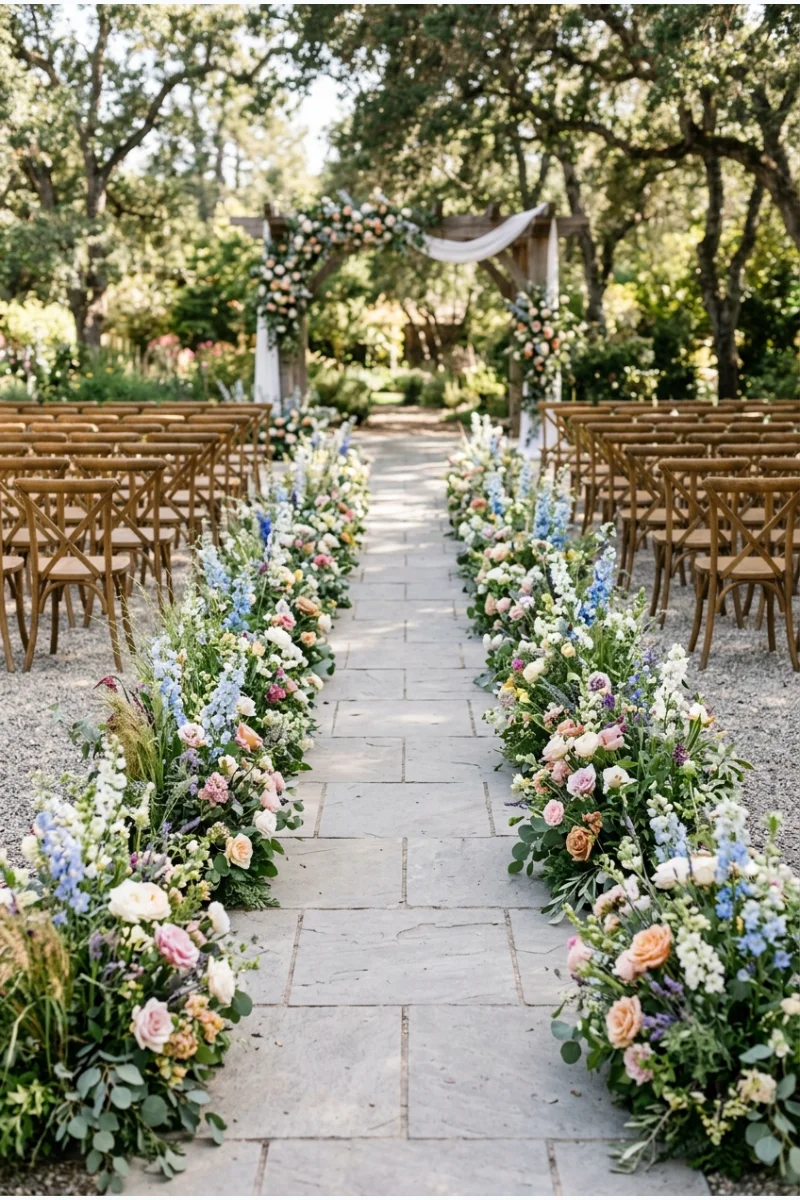
Arrange low flower clusters along both sides of the aisle so the seating appears to emerge from a planted meadow.
Vary flower heights within each cluster while preserving the walking width. Keep floral mechanics covered and away from chair legs.
18. Cluster Lanterns at Selected Aisle Ends
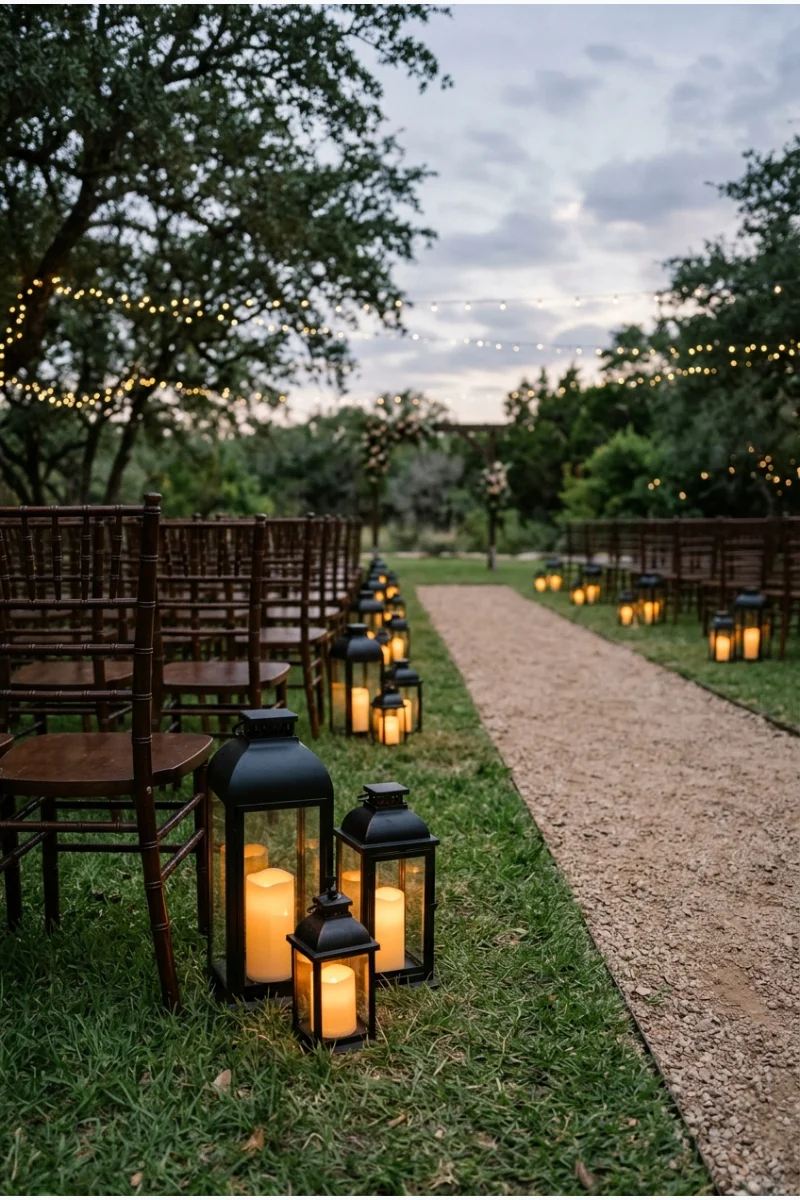
Place lantern groups beside selected aisle ends rather than beside every chair. The repeated pools of light establish a ceremony rhythm.
Use LED candles and stable lanterns, with every base outside the walking route. Test visibility under the actual ceremony lighting.
19. Tie Small Posies to Pew Ends
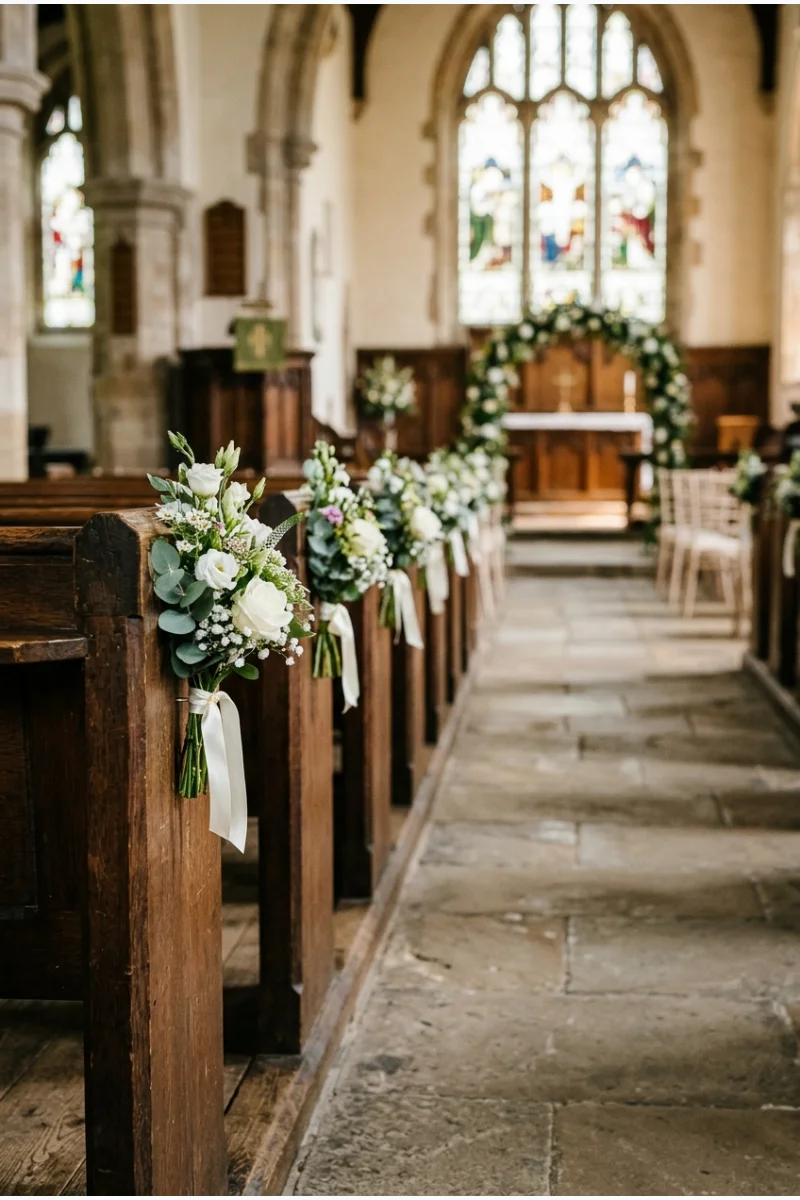
Attach compact flower posies to the outside ends of ceremony pews. Short ribbons connect the flowers to the seating without covering the pew itself.
Ask the venue about approved clips and keep the aisle-facing profile shallow. Avoid long tails where clothing or mobility aids might catch.
20. Dress Ceremony Seats with Shaped Program Fans
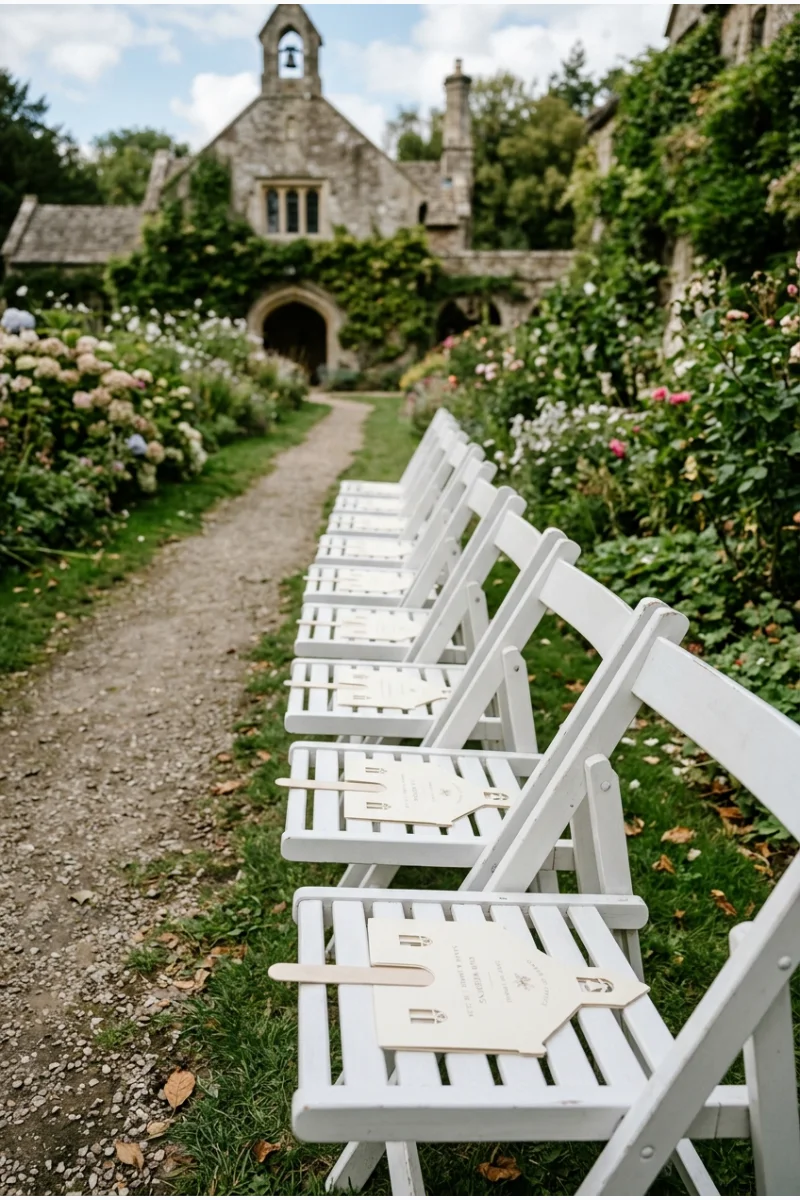
Place program fans cut into a recognizable venue outline on ceremony seats. The repeated paper shapes become part of the seating design.
Keep the printed information brief and the handle comfortable. Use secured placement outdoors so the display does not depend on still air.
Walls, Backdrops, and Room Dividers
21. Hide a Service Wall with Pipe and Drape
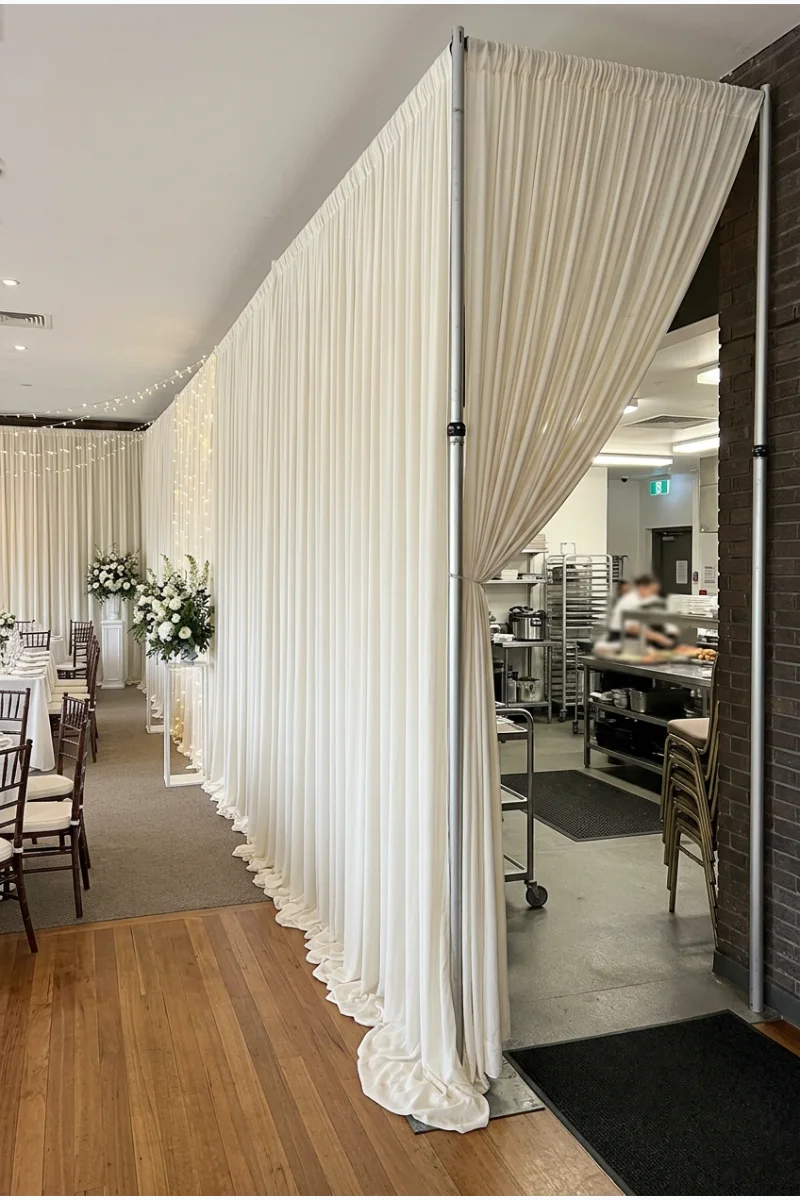
Install a freestanding draped wall in front of a visually distracting service area. One continuous fabric surface can give the reception a clearer boundary.
Keep required exits, signs, vents, and staff access unobstructed. Have the rental team confirm suitable fabric and support for the venue.
22. Make a Theatrical Swag Wall
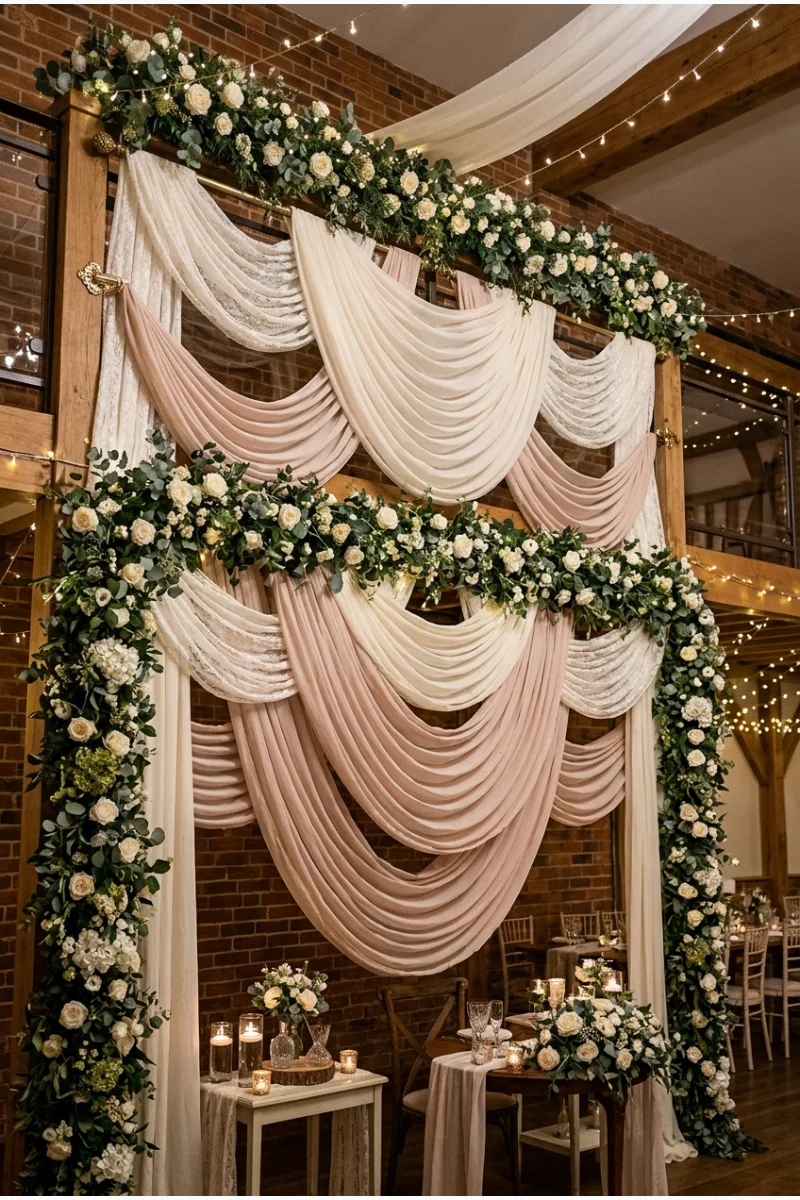
Gather fabric into generous horizontal swags across one feature wall. The curved folds create a deliberate backdrop for a reception focal area.
Use a professional draping plan so the swags look supported rather than loosely pinned. Keep the treatment concentrated on the wall you want to emphasize.
23. Build a Full Flower Wall
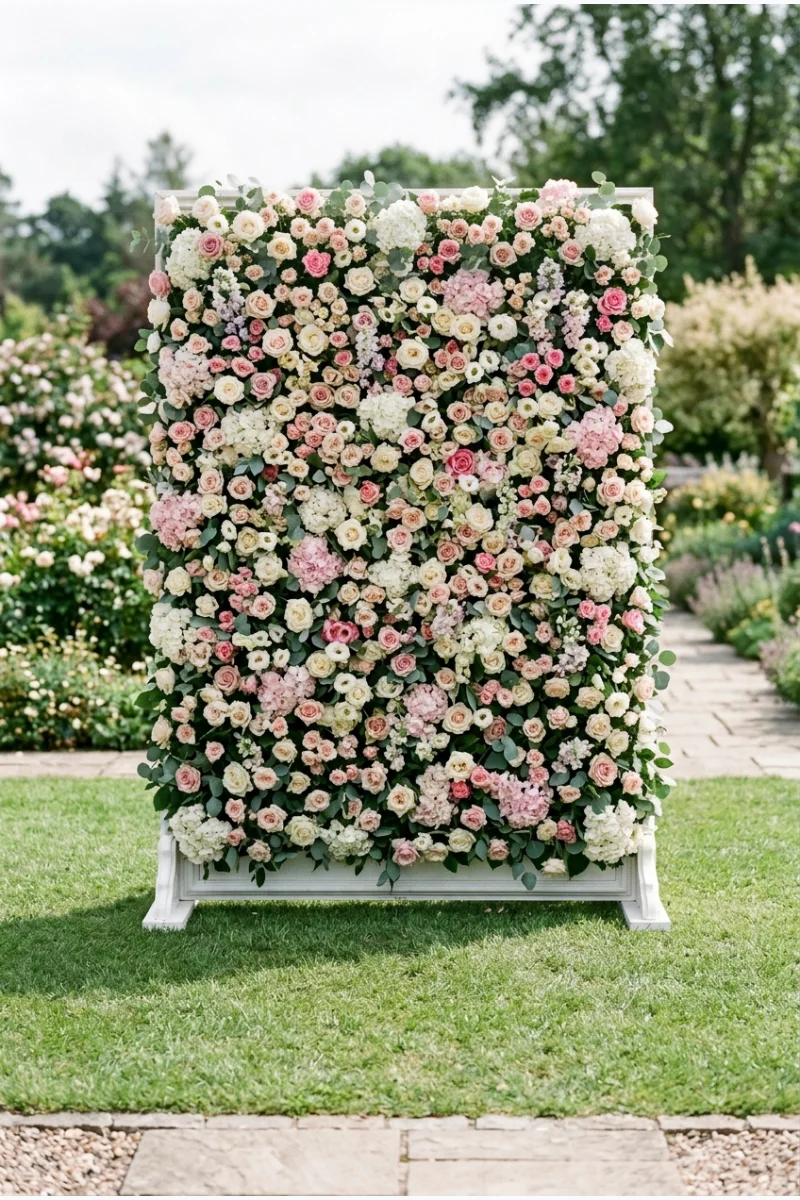
Cover a freestanding wall with a continuous field of blooms. The dense surface gives a photo area or reception focal point a clearly defined boundary.
Decide whether fresh, faux, or mixed flowers suit the location and handling plan. Keep the supporting structure stable and its edges finished.
24. Use a Pressed-Flower Transparent Screen
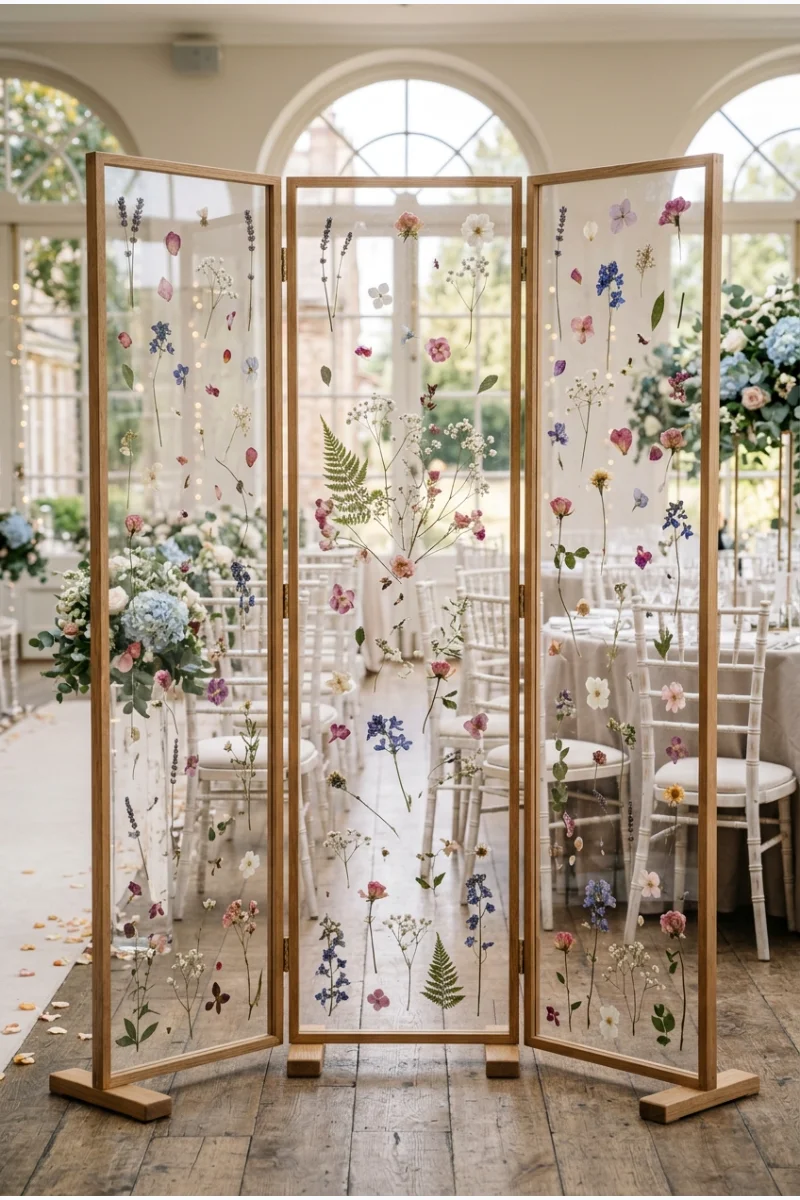
Display pressed flowers between clear panels in a freestanding screen. The flowers appear suspended while light and glimpses of the venue remain visible.
Ask the fabricator to finish panel edges and plan stable bases. Sparse botanical placement makes the pressed shapes easier to appreciate.
25. Hang a Meaningful Textile as Wall Art
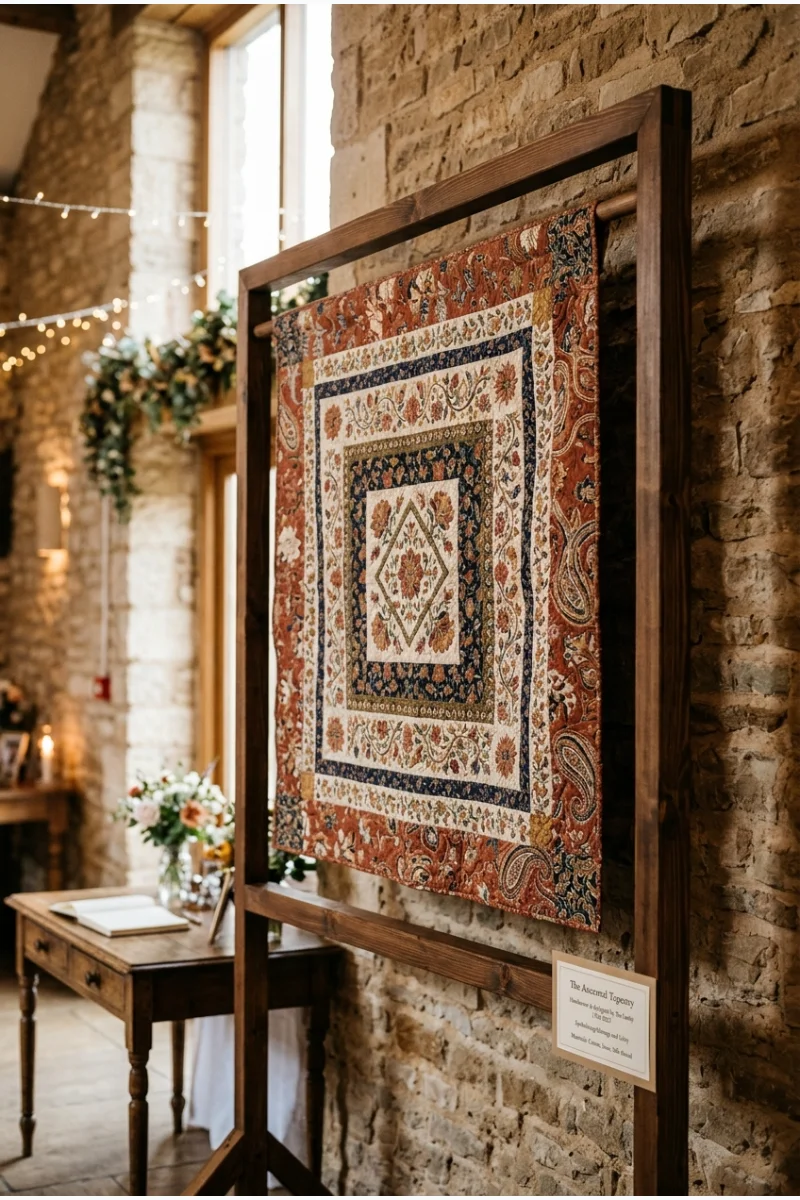
Feature a patterned textile, quilt, or family-made hanging on a dedicated support. Its existing design can give the venue a personal focal point.
Choose a display method that protects the fabric and keeps it away from food or moisture. Explain its significance on a separate small card.
26. Let Flowers Follow an Existing Mantel
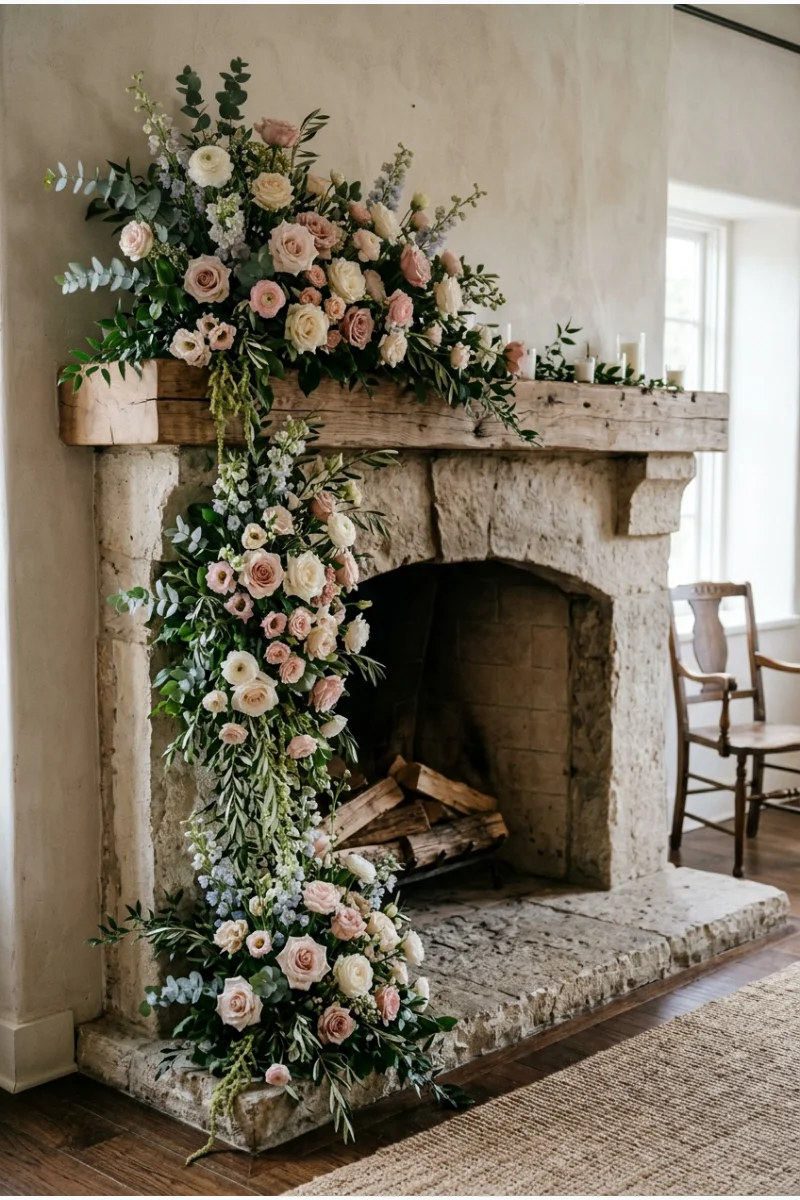
Arrange flowers across one end of a venue mantel, allowing a controlled cascade down its side. The fireplace remains recognizable beneath the decoration.
Confirm that the fireplace will remain off and use protective containers. Keep flowers and water away from vulnerable finishes.
27. Layer Freestanding Scenic Arch Panels
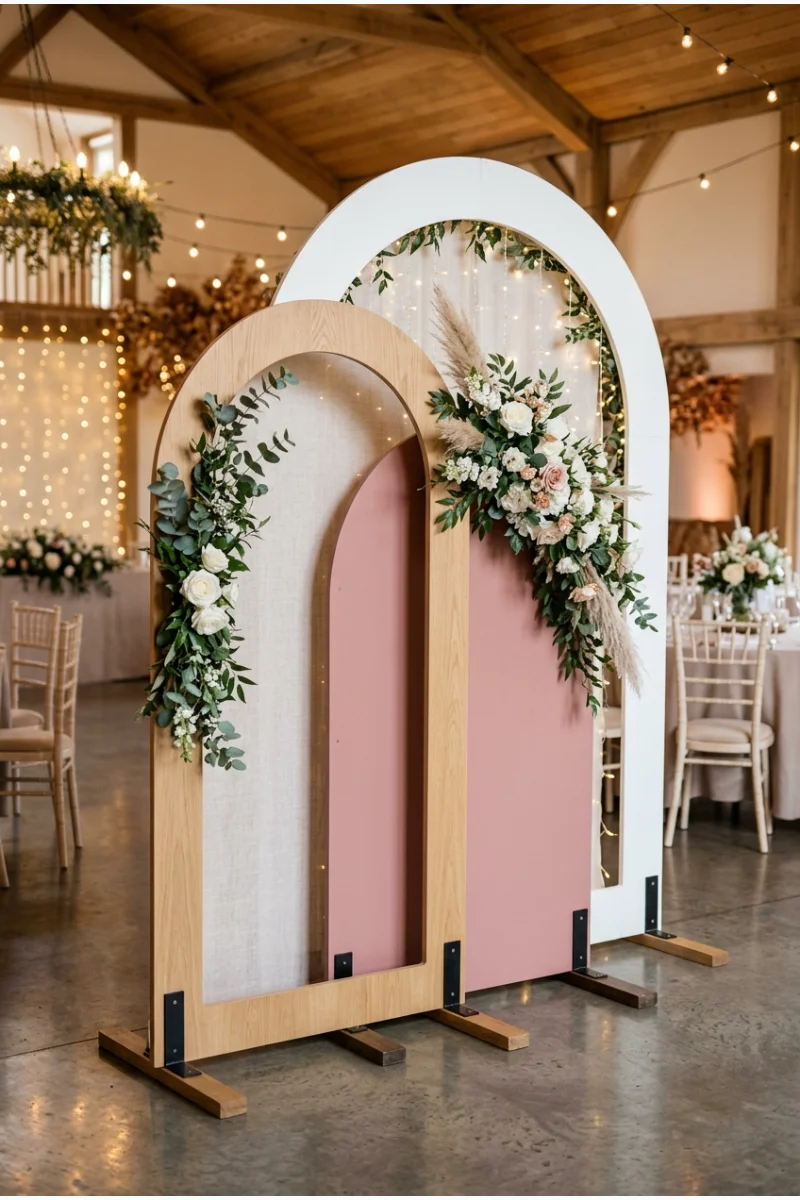
Overlap solid arch-shaped panels at different depths to create a sculptural backdrop. The layered outlines provide dimension without a fully covered wall.
Use finished panels with concealed supports and stable bases. Leave clear space around the arrangement rather than squeezing it between guest tables.
28. Cover a Feature Wall with Oversized Paper Flowers
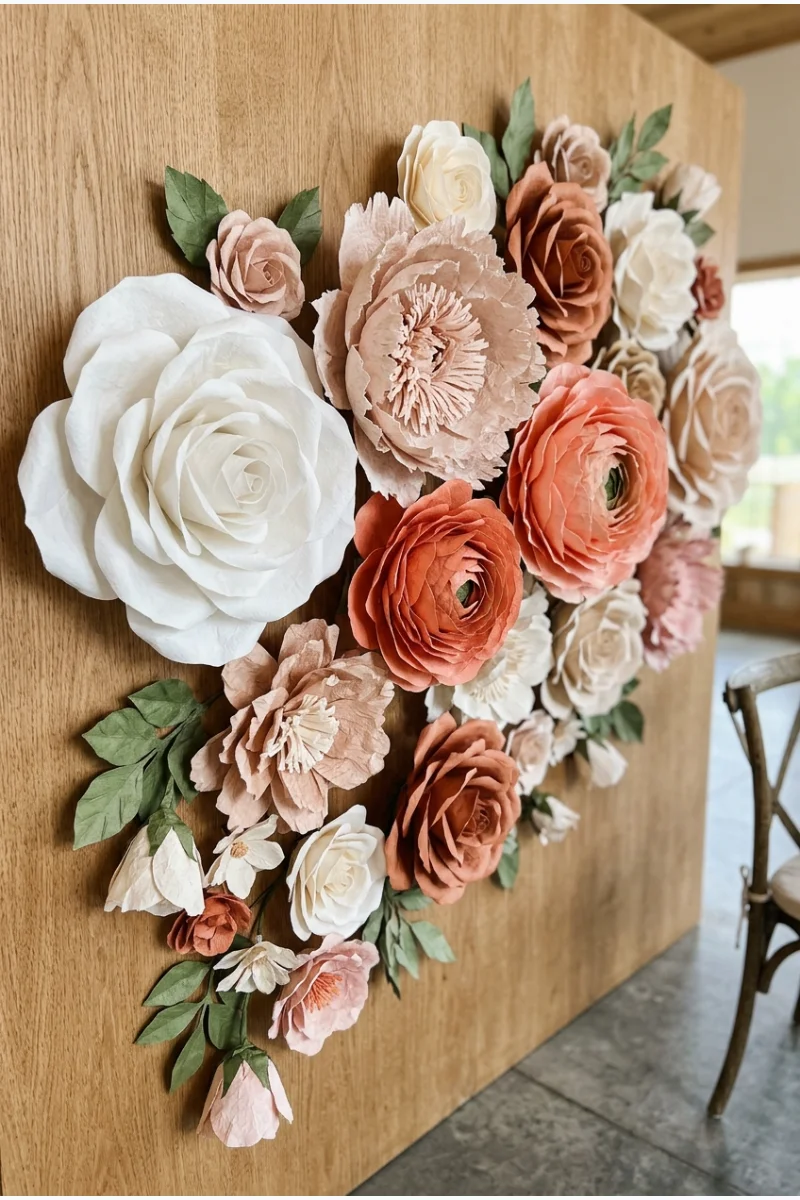
Arrange oversized handmade paper flowers across one wall in a deliberately uneven cluster. Their scale makes the construction itself the decorative feature.
Mount them to a freestanding backing when wall attachments are restricted. Keep paper away from heat, flames, and areas exposed to moisture.
29. Use Mirrored Panels to Reflect the Room
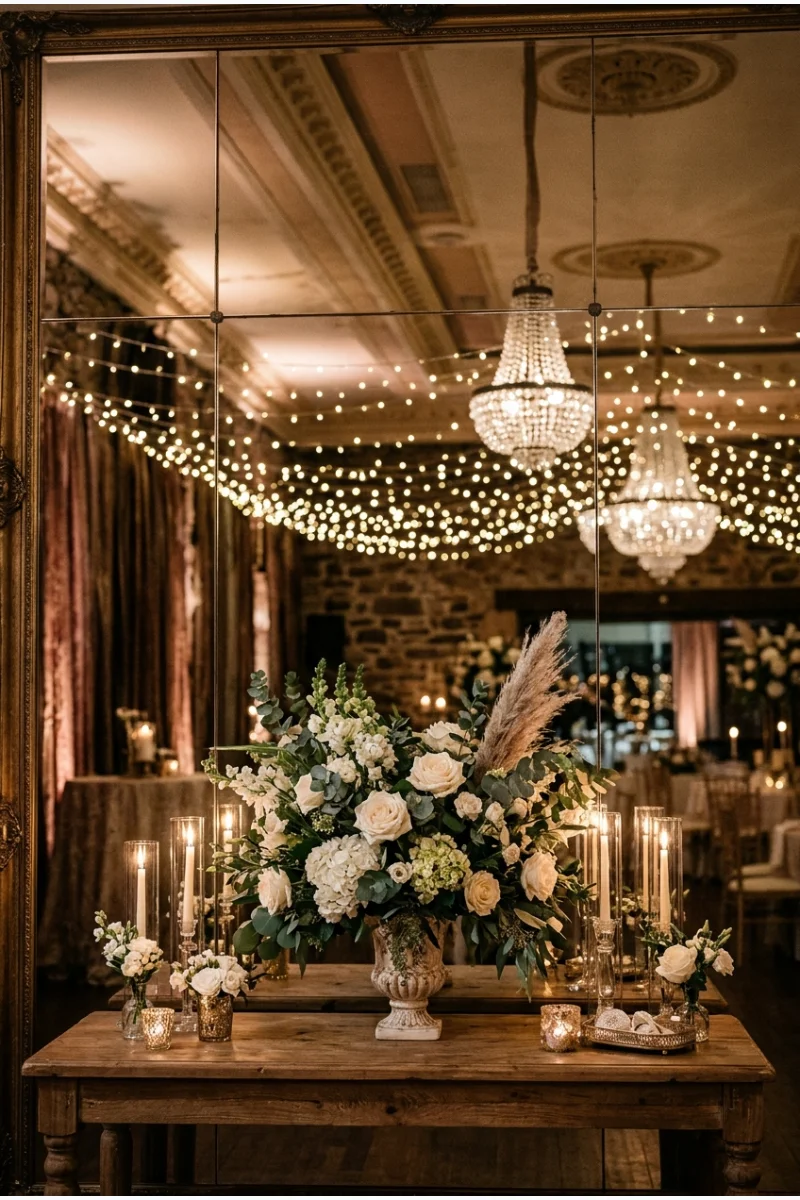
Stand mirrored panels behind a decorative vignette to reflect flowers and reception light. The reflected depth can make a narrow feature area feel more layered.
Choose professionally supported panels and check the reflection from guest viewpoints. Avoid directing glare toward dining seats or important signage.
30. Divide Spaces with a Living Plant Screen
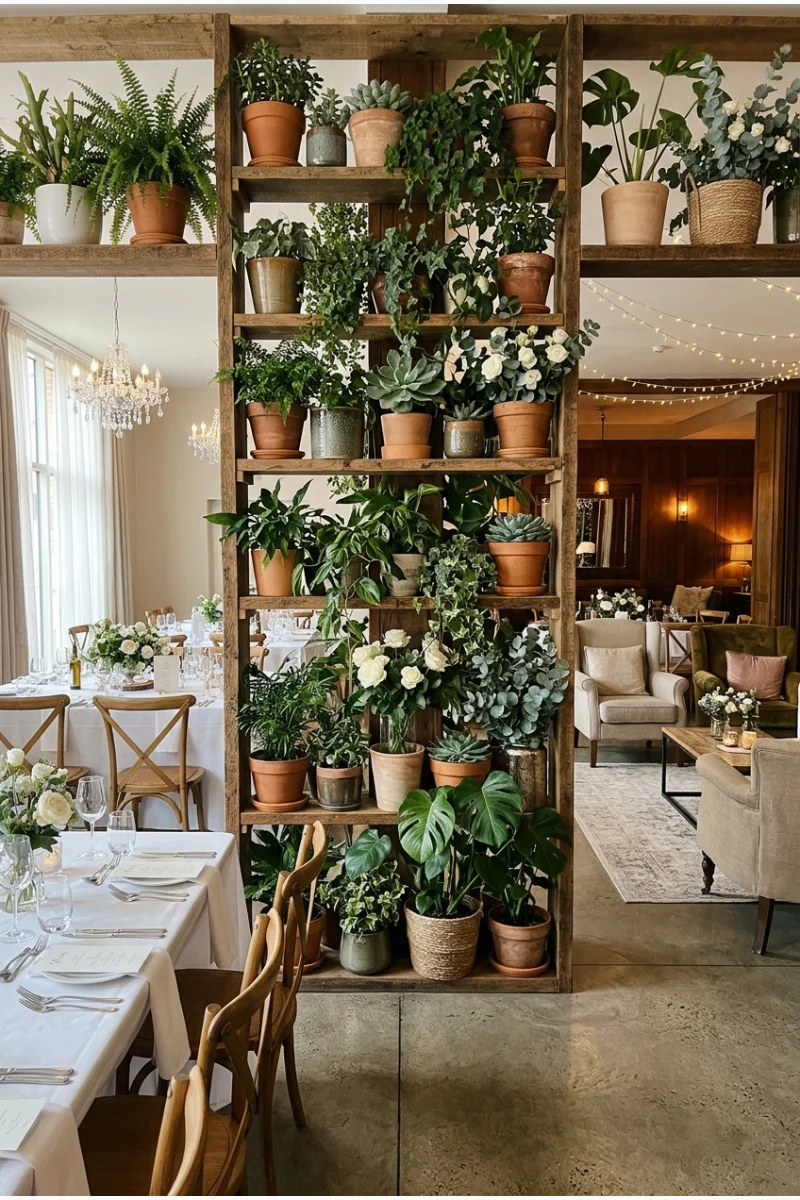
Arrange dense potted plants on a purpose-built divider to separate dining from a lounge or service edge. Gaps can preserve sightlines between the zones.
Use protected containers and a stable structure. Keep the division partial enough that guests can understand where the next space begins.
Overhead Installations
31. Draw Tent Fabric toward a Central Point
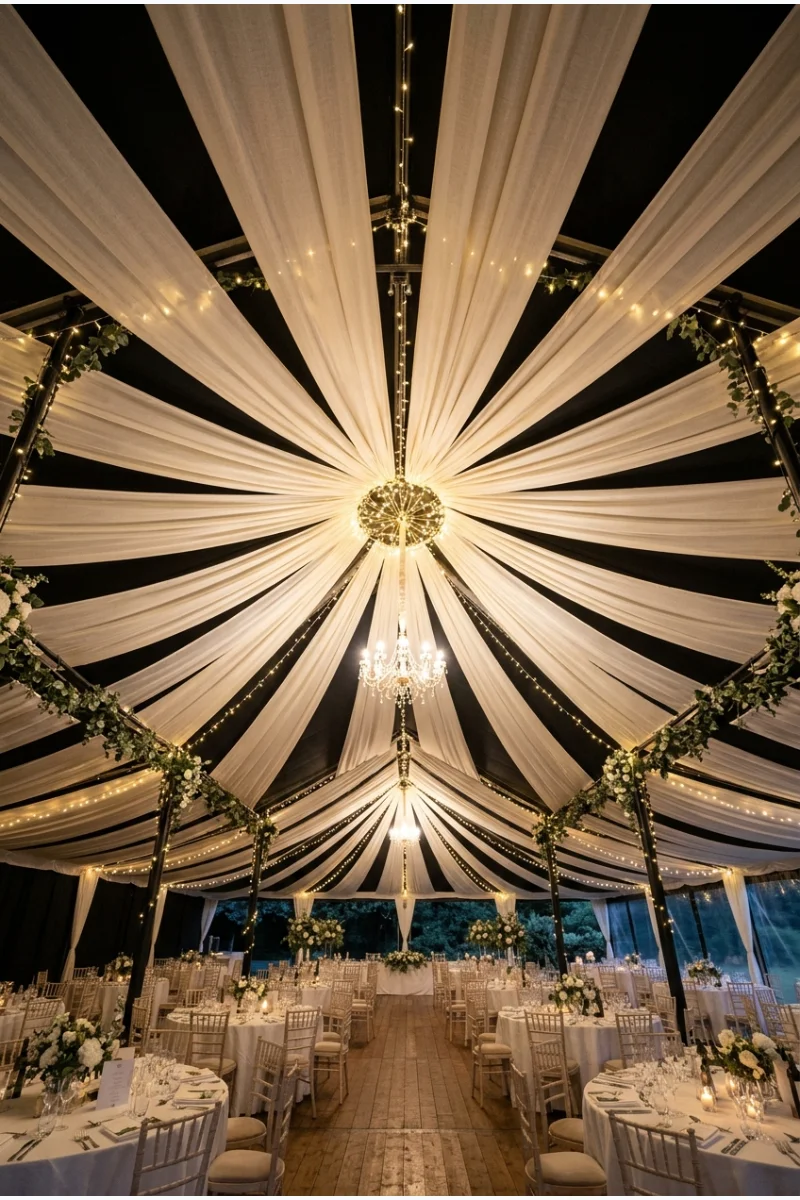
Run broad fabric panels from a tent perimeter toward a central ceiling point. The radial arrangement gives the interior a clear visual center.
Have the tent and draping suppliers coordinate approved supports and clearances. Keep the design independent of sprinklers, lighting, and required exits.
32. Suspend Parallel Ribbon Bands
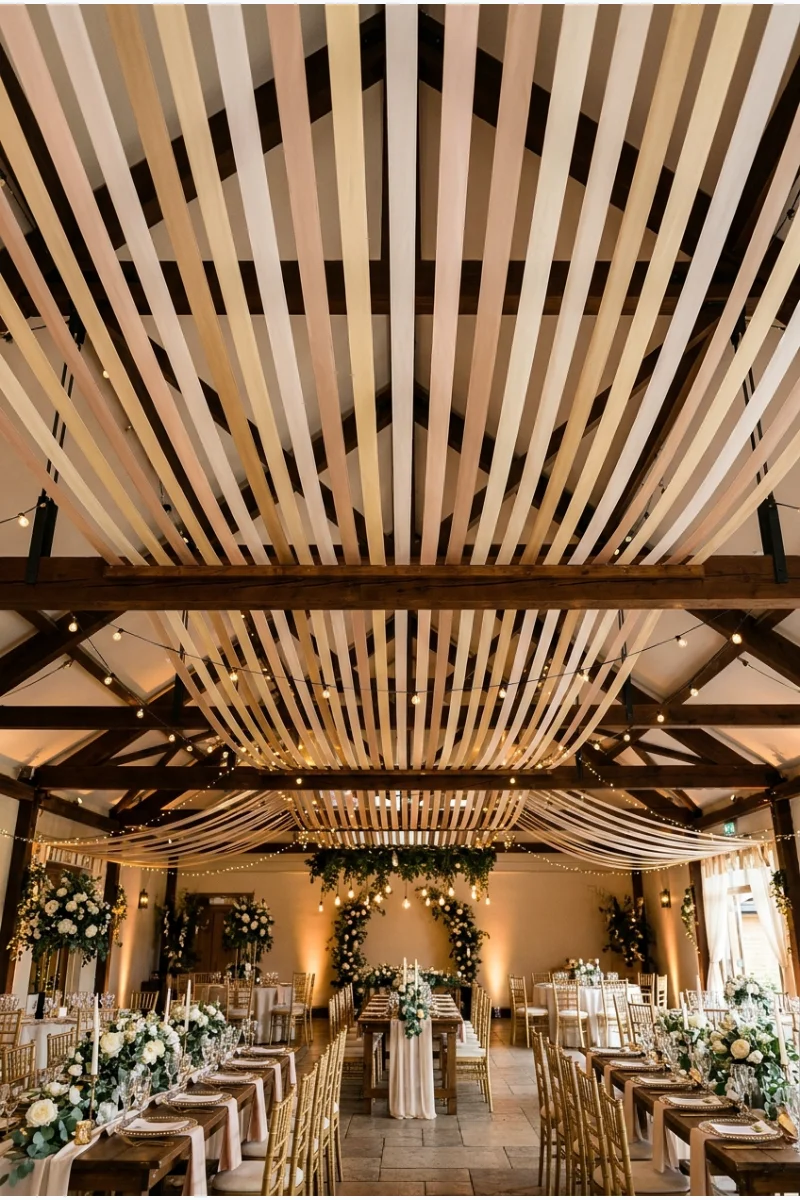
Hang long ribbon bands in parallel lines above a reception zone. The repeated strips establish a directional ceiling treatment rather than a single hanging centerpiece.
Choose spacing that leaves the venue visible between bands. Have the installer handle support, headroom, and any nearby lighting.
33. Hang a Floral Chandelier over Dinner
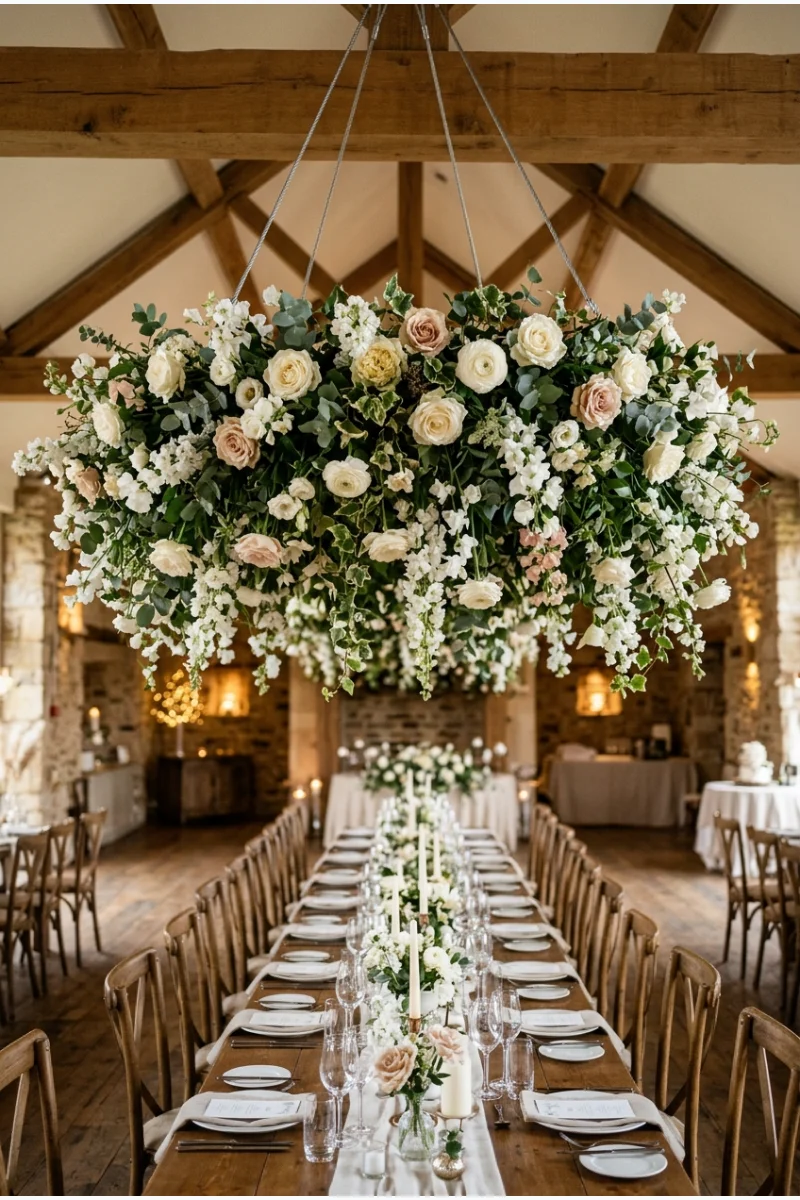
Suspend a flower-covered circular frame above a central dining area. The downward-facing blooms bring the floral focal point above the table.
Use a qualified installation team and approved rigging. Keep table flowers restrained so the overhead arrangement remains the main feature.
34. Run Greenery along an Overhead Beam
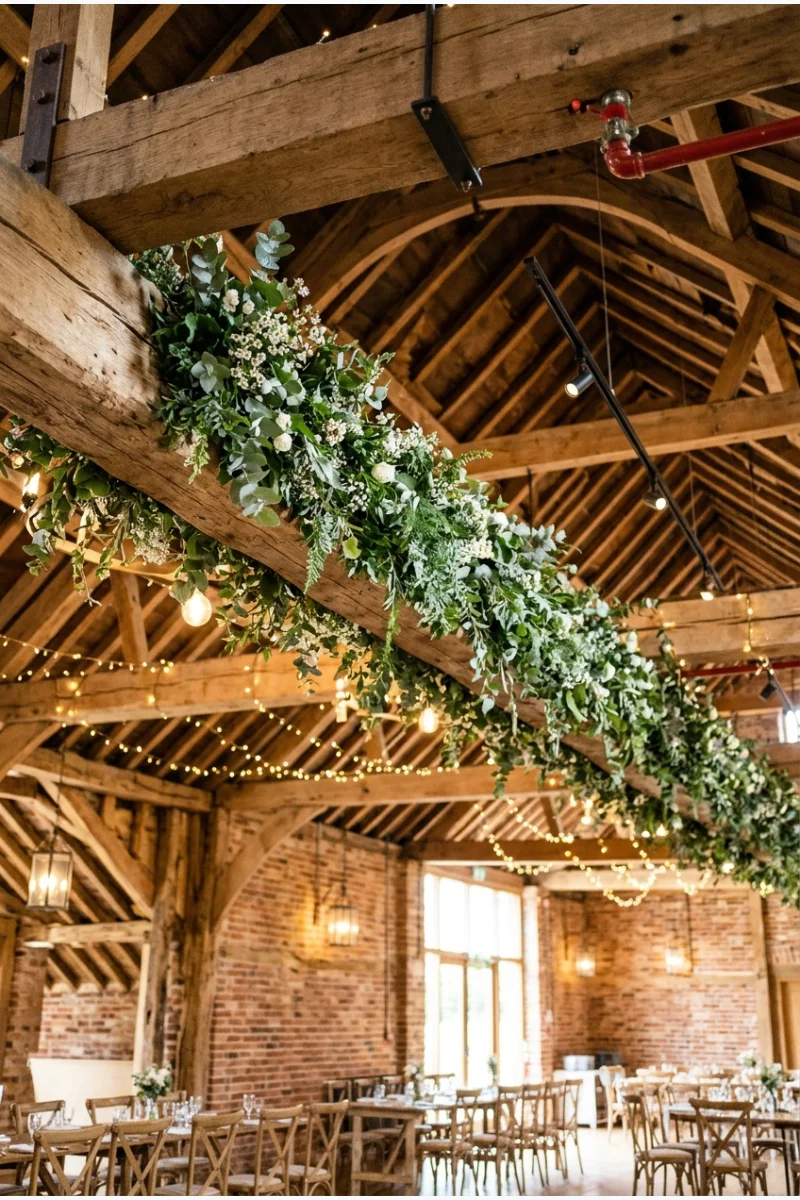
Follow one existing beam with a continuous length of foliage. The installation emphasizes the venue structure rather than hiding the entire ceiling.
Ask the venue and florist to agree on attachments and water protection. Keep leaves away from fixtures and do not cover required safety equipment.
35. Group Paper Lanterns above the Reception
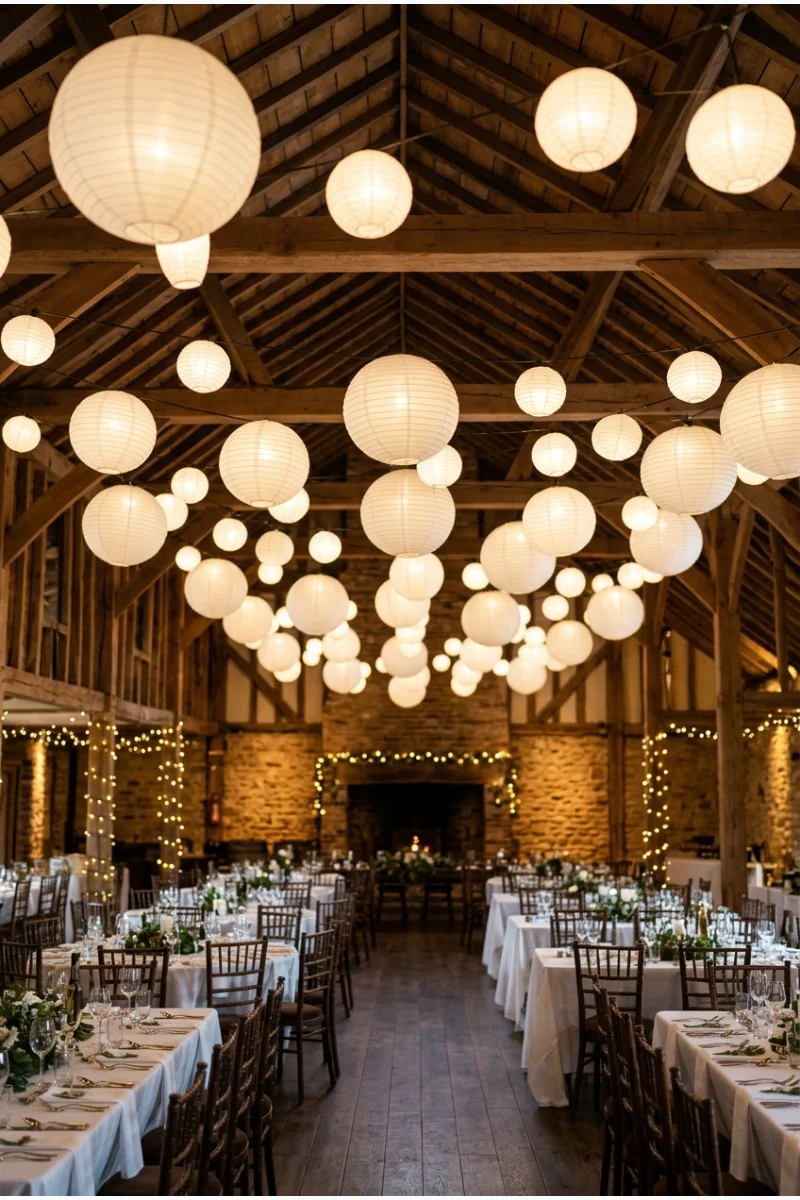
Suspend round paper lanterns at varied heights over a defined gathering area. Repeating the shapes fills overhead space without requiring dense florals.
Use suitable LED lighting and approved supports. Choose a dry interior or a weather plan that protects the paper.
36. Cluster Woven Pendant Shades
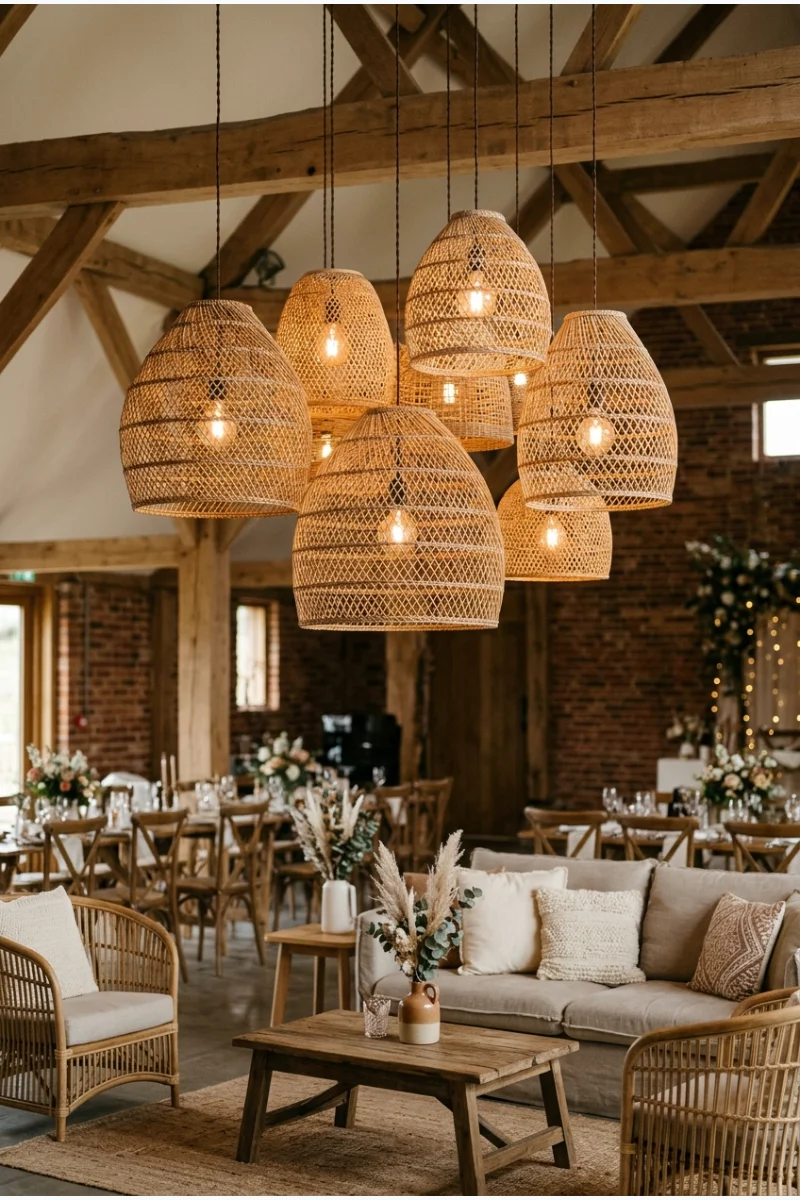
Hang a group of woven pendant shades over a lounge or dining zone. Their open structure becomes the defining texture of that area.
Rent fixtures intended for event installation and check their light output. Keep woven material limited to this feature if it does not suit the rest of the venue.
37. Gather Mirror Balls over the Dance Floor
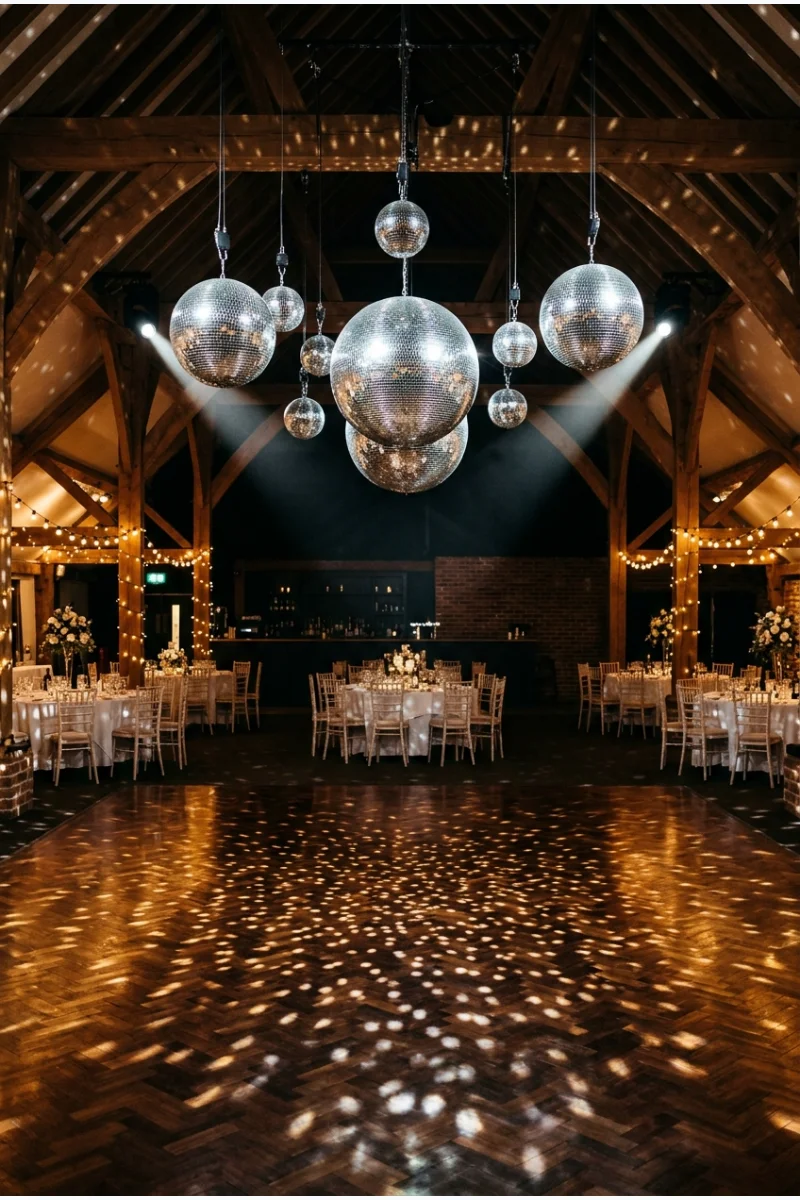
Suspend mirror balls in several sizes above the dance area. Their repeated reflective surfaces give that zone a distinct identity before dancing begins.
Coordinate rigging and focused lighting with the production team. Position reflections so they enhance the floor without dazzling seated guests.
38. Suspend an Origami-Bird Installation
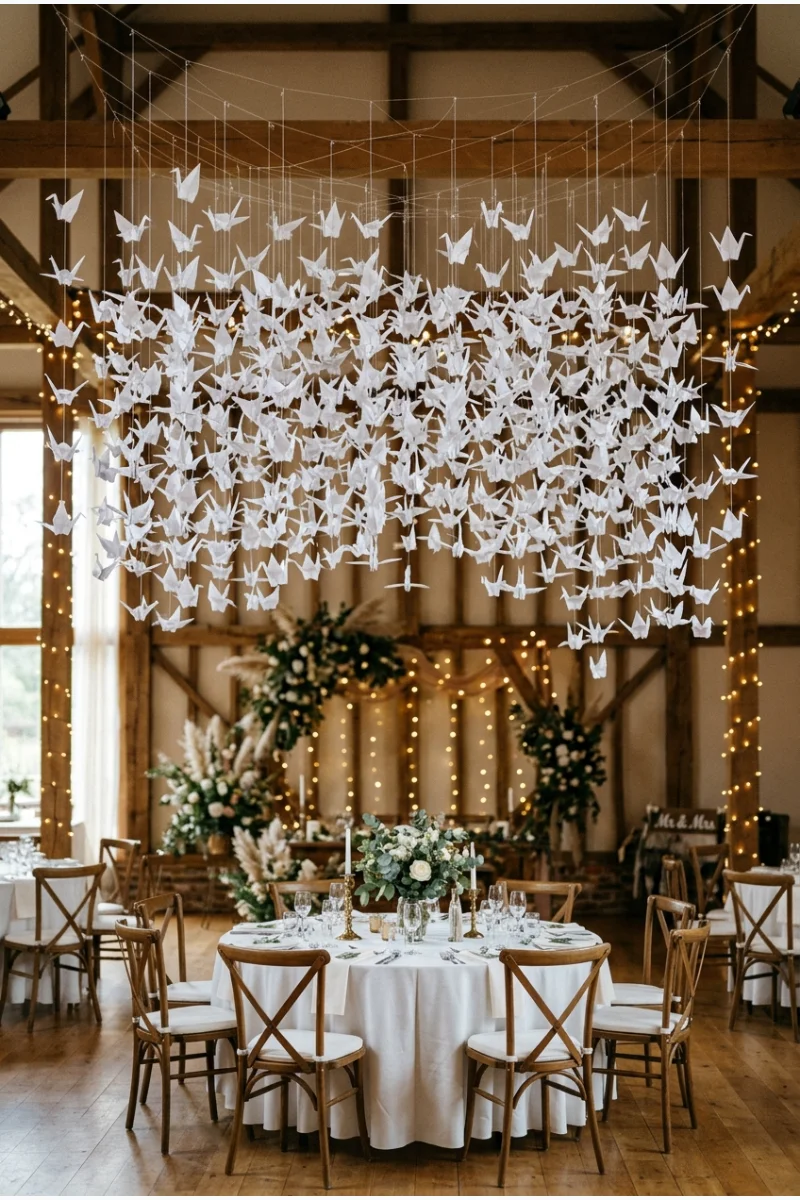
Create a suspended field of folded paper birds above a reception feature. It works especially well when paper craft or the motif has personal meaning.
Group the birds deliberately rather than scattering them throughout every room. Use approved supports and allow enough time for assembly.
39. Float a Sculptural Branch Arrangement
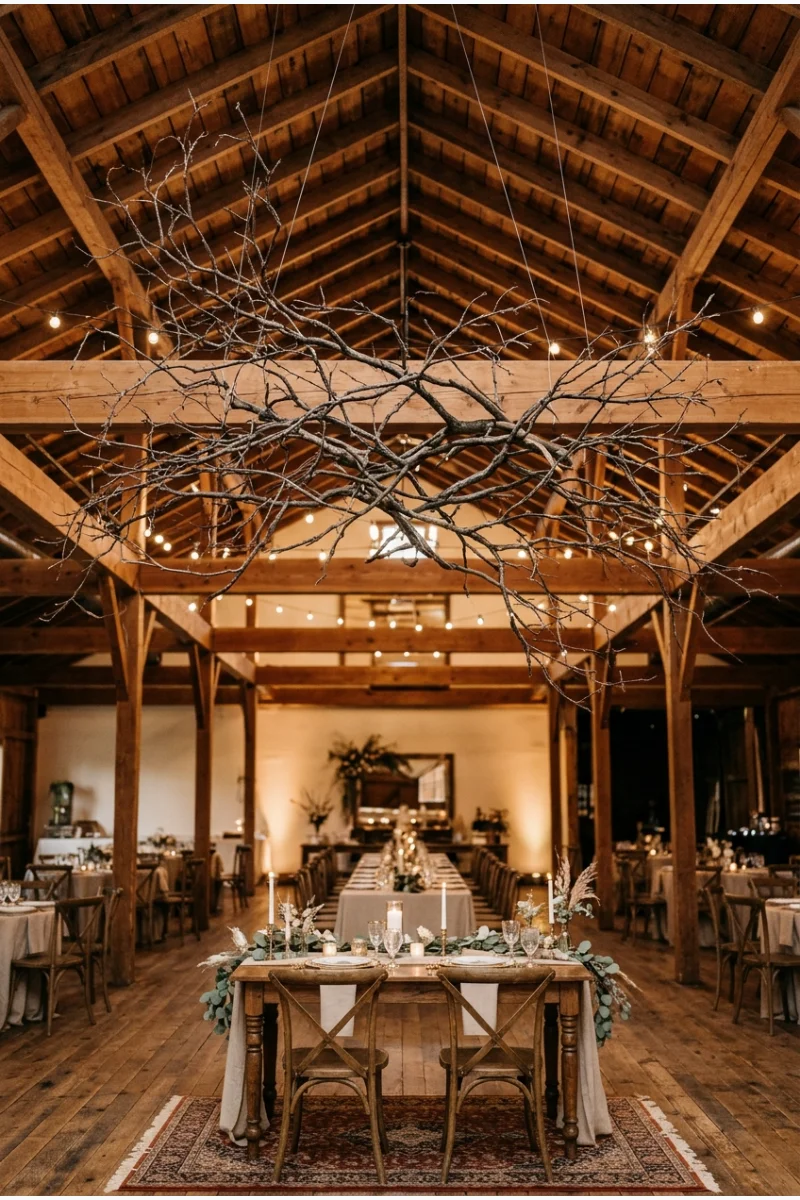
Suspend an arrangement of bare branching forms over a reception focal area. The open silhouette adds volume while keeping much of the ceiling visible.
Have the florist and rigger assess every attachment and the finished weight. Keep the branch outline distinct rather than adding flowers until it becomes another floral cloud.
40. Make an Inverted Umbrella Ceiling
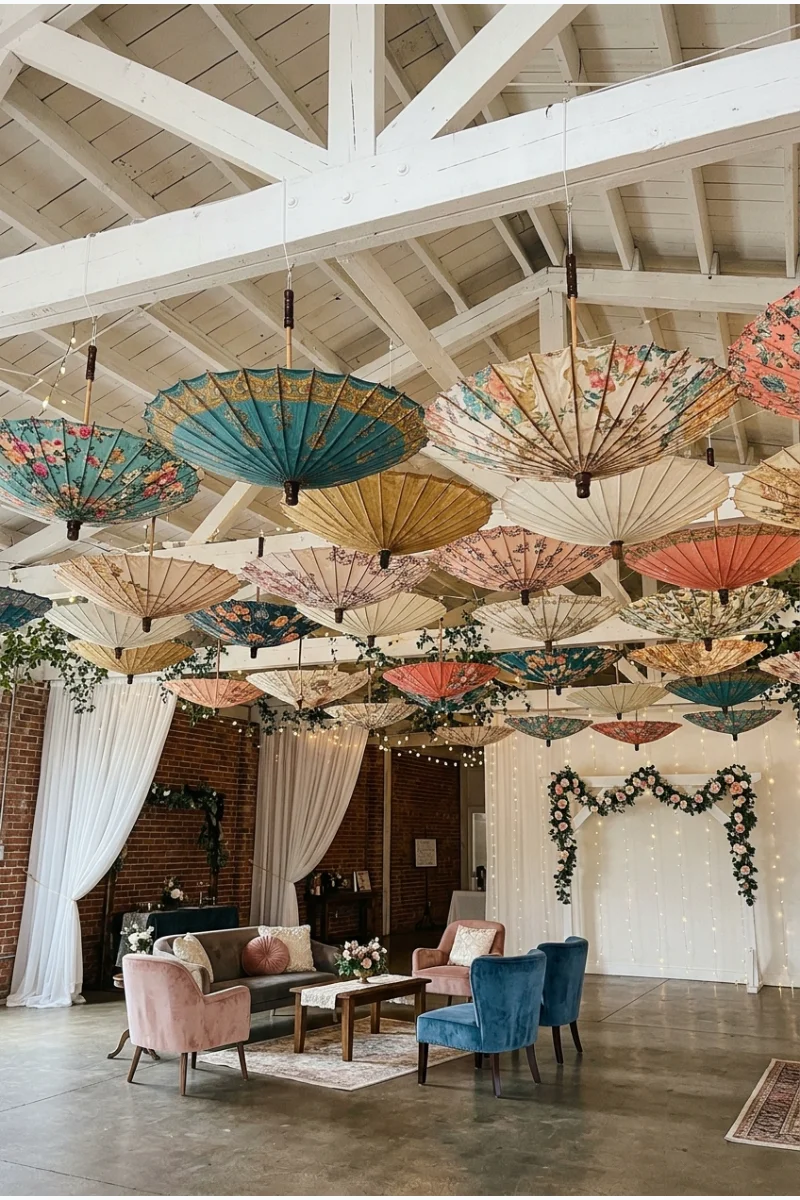
Hang open decorative umbrellas upside down above a lounge or photo area. Their visible ribs and repeated bowl shapes create an unmistakable overhead feature.
Use a controlled indoor installation with approved rigging. Keep umbrellas high enough that guests cannot catch clothing or reach their edges accidentally.
Lighting That Shapes the Venue
41. Use Uplighting to Reveal Architectural Columns
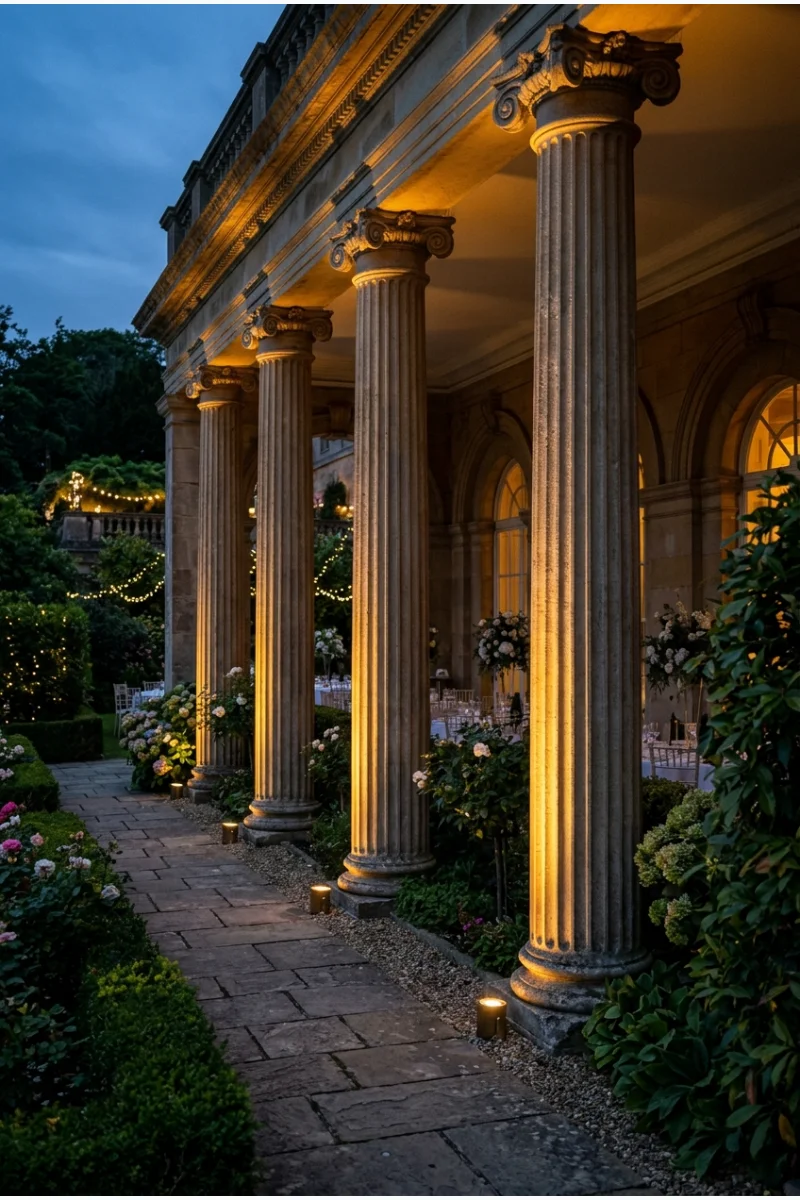
Place uplights at the bases of selected columns so their vertical forms become visible after dark. The architecture provides the decoration.
Test the light on the actual surface and keep fixtures out of traffic. Coordinate the effect with the room lighting rather than choosing it in isolation.
42. Project Botanical Patterns on a Blank Wall
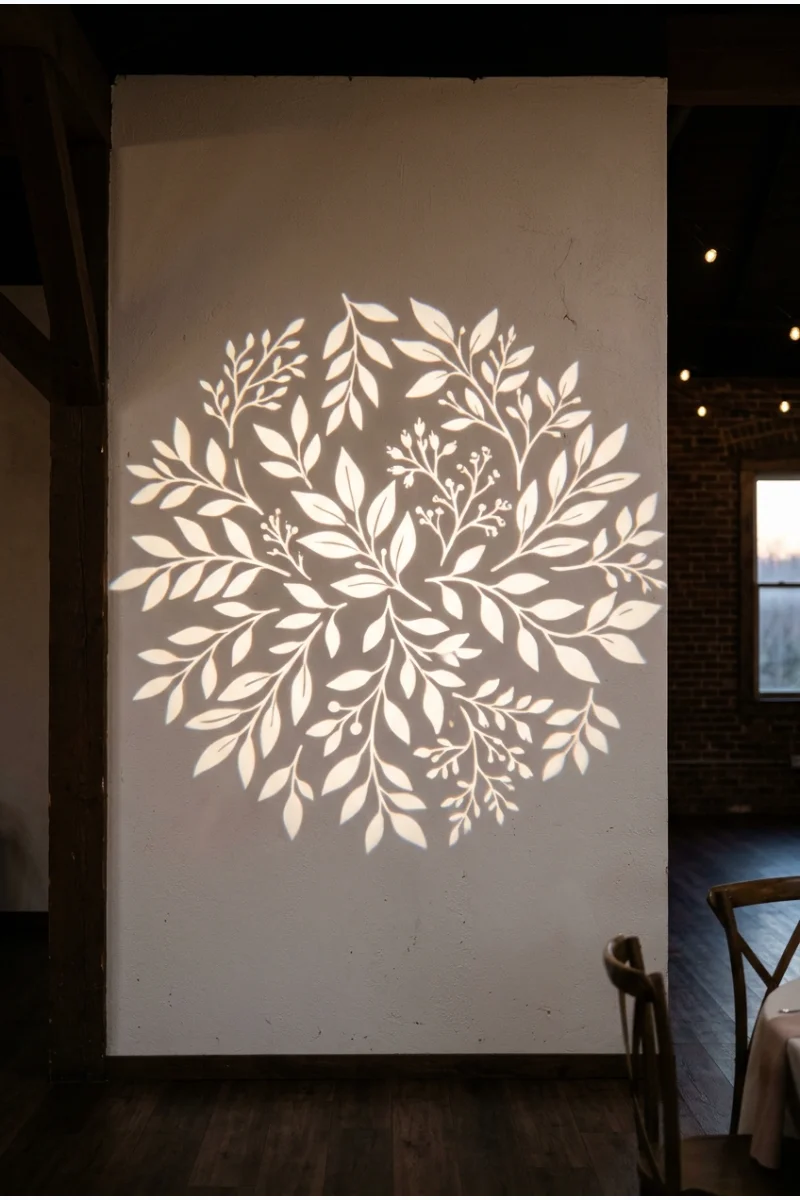
Use a gobo projector to cast leaf or branch patterns onto an otherwise plain wall. The pattern adds a decorative layer without attaching physical foliage.
Preview the scale, focus, and brightness in the venue. Keep projections away from faces, menus, and signs that need to remain readable.
43. Pinspot the Centerpieces
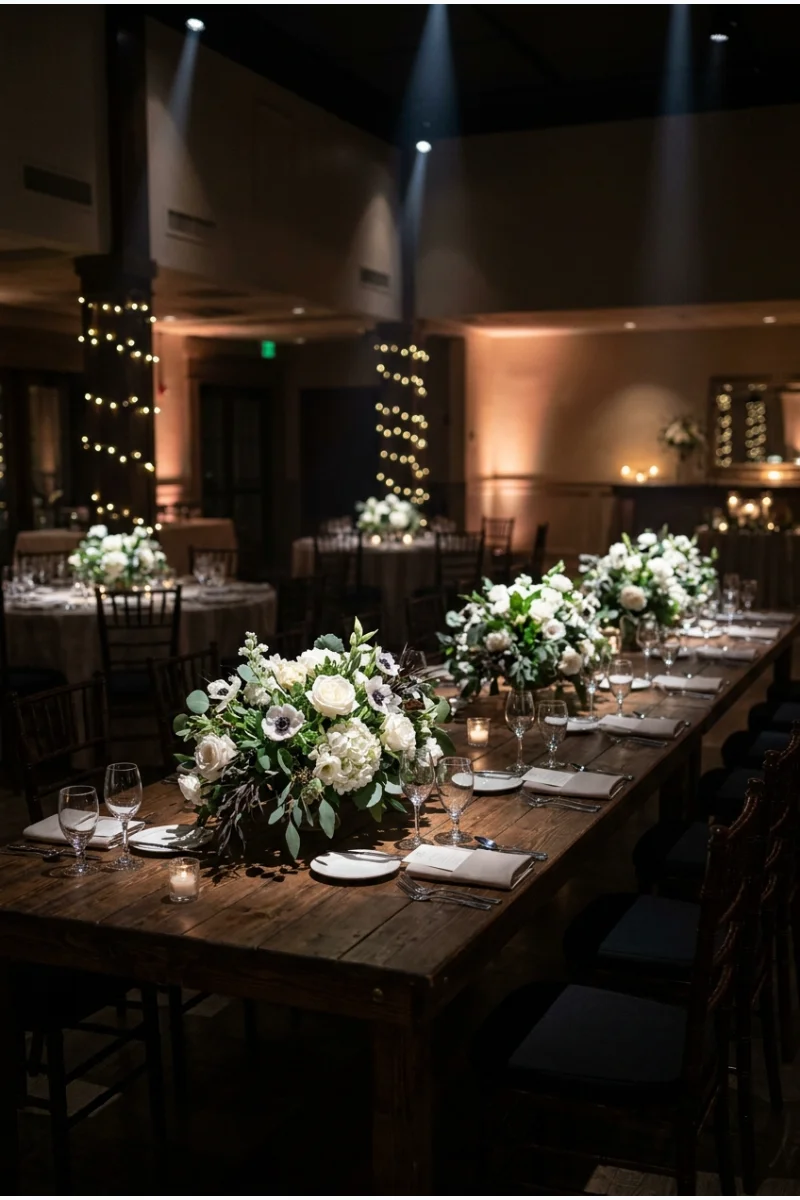
Aim narrow beams of light at selected floral centerpieces. The flowers remain visible even when the wider reception room is dimmed.
Have the lighting team test the angle from seated positions. The beam should land on the arrangement rather than shine into a guest's eyes.
44. String Festoon Lights across a Courtyard
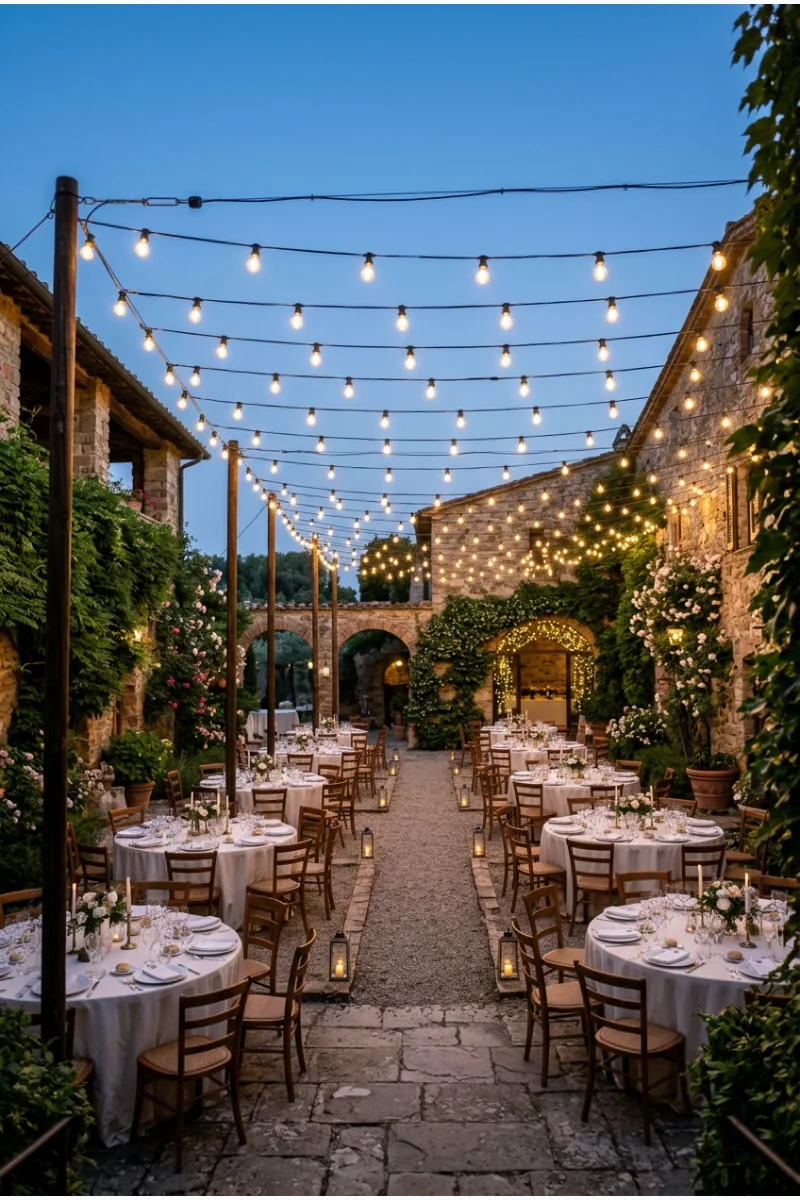
Span a courtyard with festoon lights arranged in clear repeated lines. The illuminated grid gives outdoor dining a visible ceiling.
Use outdoor-rated equipment and supplier-approved supports. Keep cables and anchors out of guest routes and confirm the venue's power plan.
45. Hang a Fairy-Light Curtain
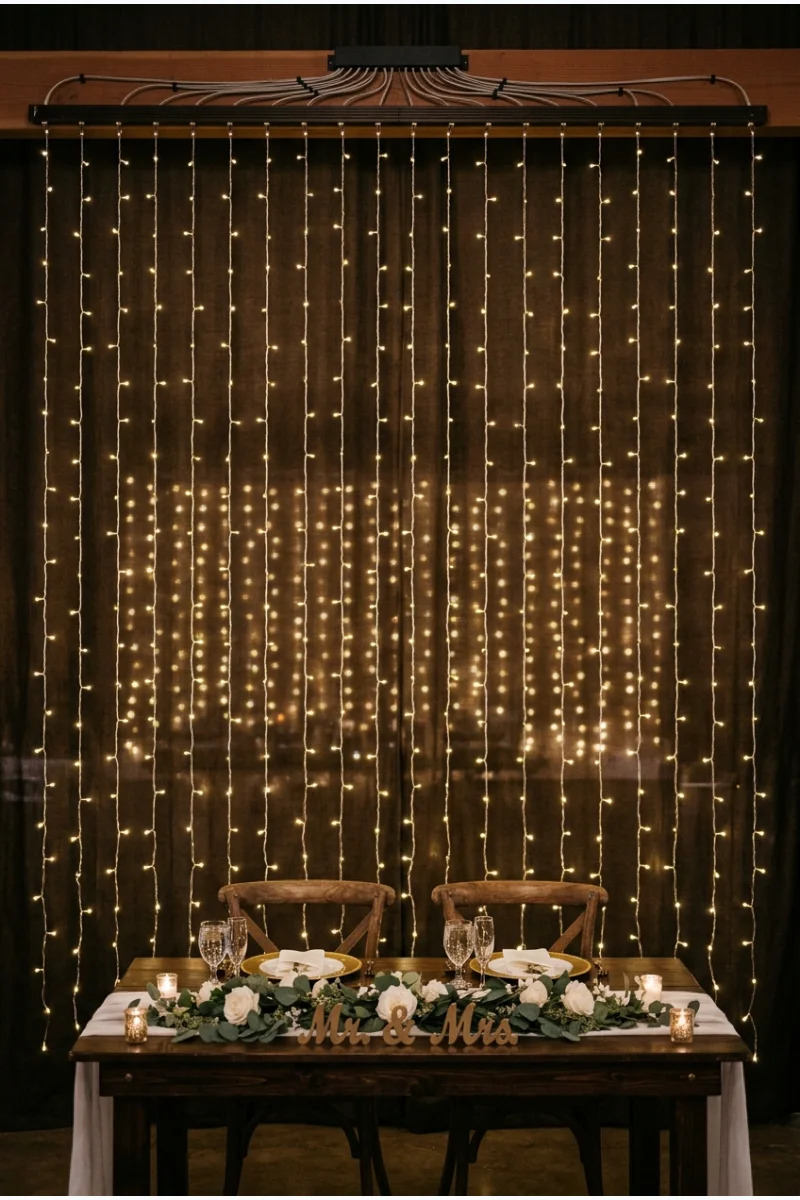
Suspend vertical strands of small lights behind a reception focal point. The repeated points create a luminous backdrop without a solid wall of decorations.
Use the curtain where its wiring can be managed neatly. Check how the lights look in photographs before placing important signage in front.
46. Place Rechargeable Lamps on Guest Tables
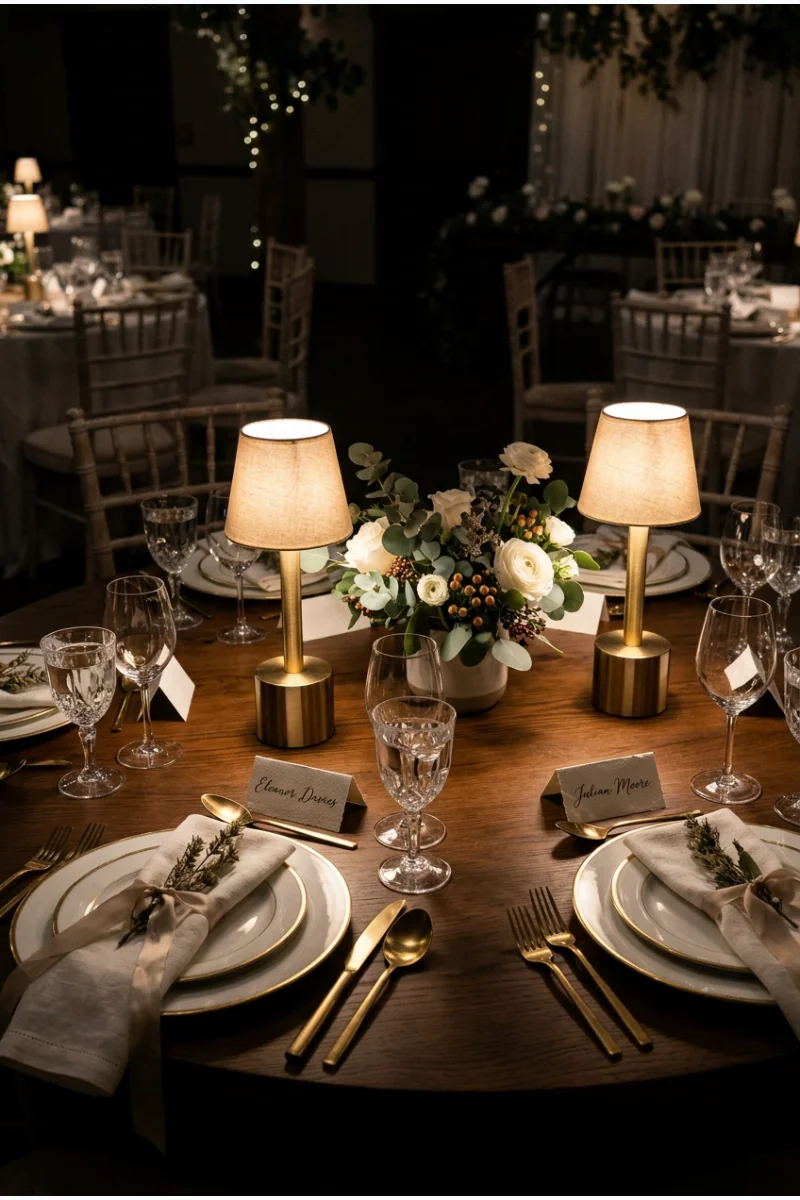
Give each dining table a small rechargeable lamp. The contained pool of light makes place settings and faces easier to see without overhead glare.
Choose suitable brightness and enough operating time for the event. Test a full place setting beneath the lamp before ordering the whole collection.
47. Add a Light Line beneath Stair Edges
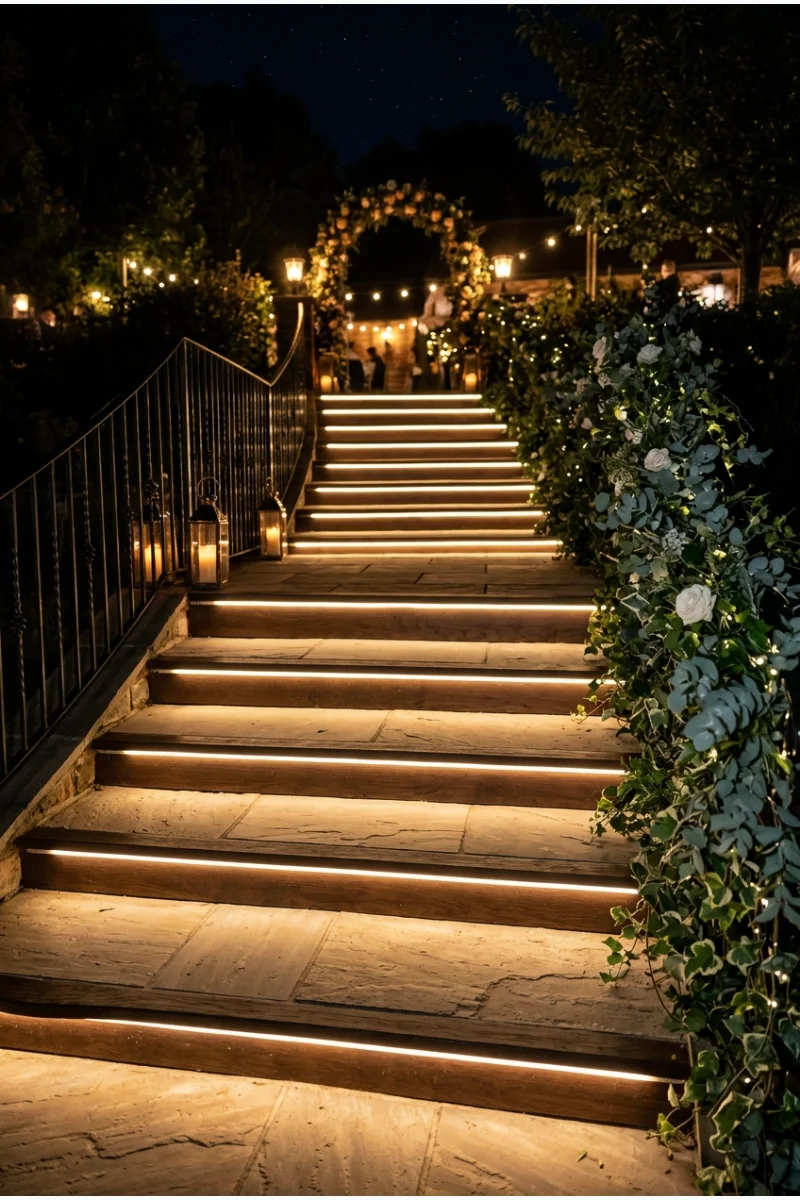
Use a venue-approved lighting system beneath stair nosings to outline an arrival staircase. The repeated lines highlight the architecture after dark.
Have the venue or qualified supplier install the system. Decorative lighting must supplement clear step visibility rather than replace it.
48. Illuminate the Garden Tree Canopies
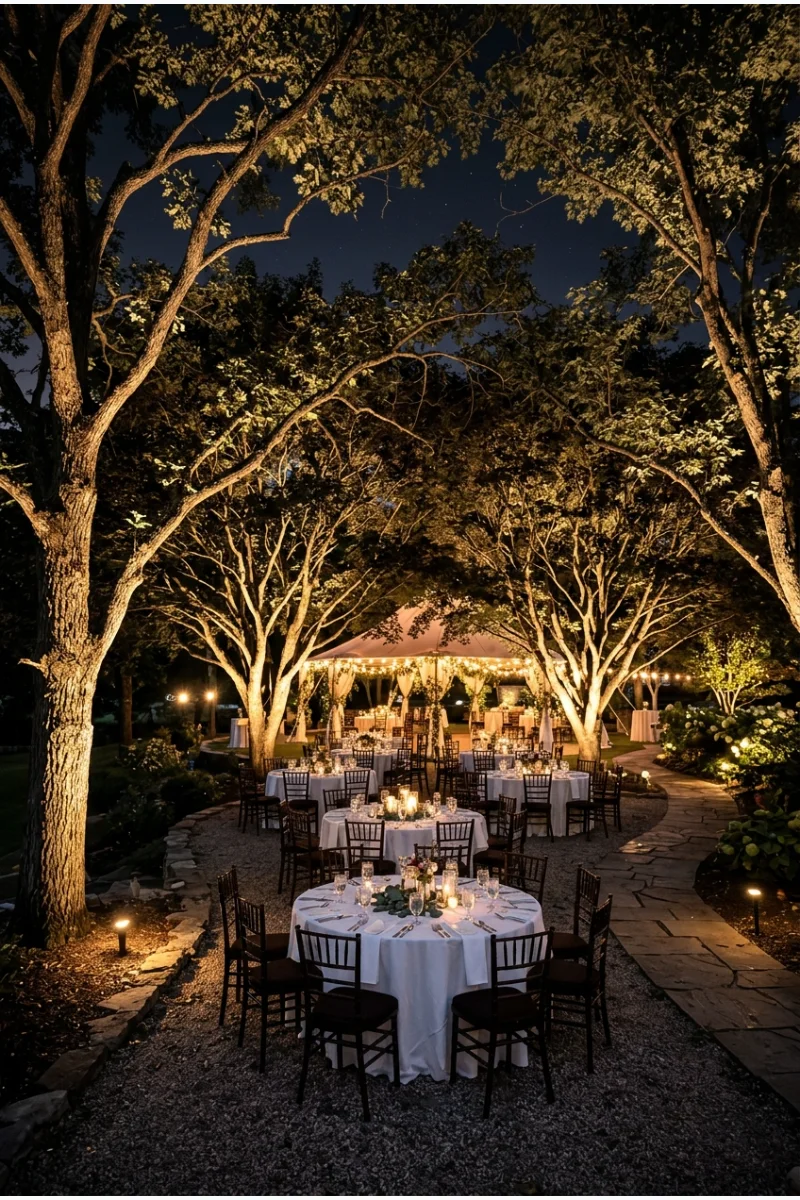
Aim outdoor lights upward into selected garden trees so their branching canopies frame the reception. This extends the visible celebration beyond the tables.
Use a qualified outdoor lighting plan and protect the planting. Keep fixtures and wiring outside guest routes and avoid shining into neighboring properties.
49. Use Light-Up Initials as a Focal Point
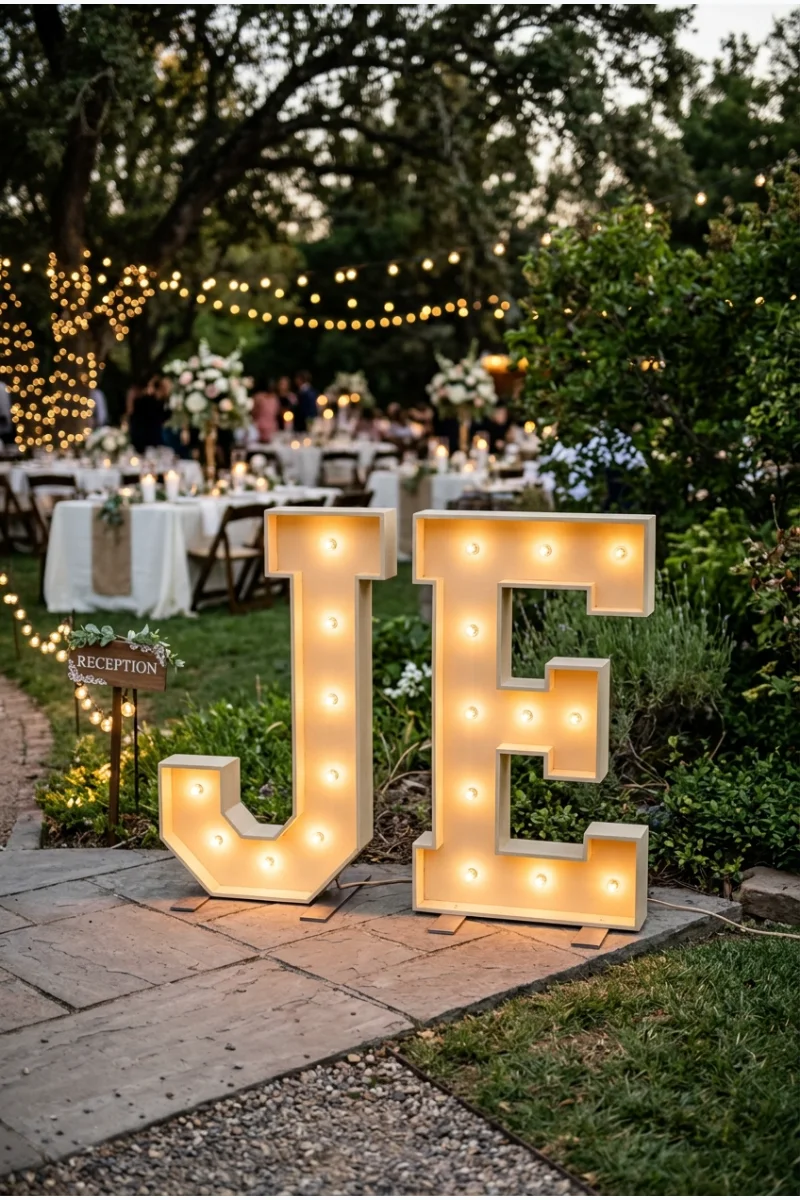
Stand freestanding illuminated initials at the edge of a reception area. Their letter shapes create a personal decorative feature without a long written message.
Choose stable units with a finished back if guests can walk around them. Route power safely and keep the surrounding space uncluttered.
50. Outline the Entertainment Stage with Light
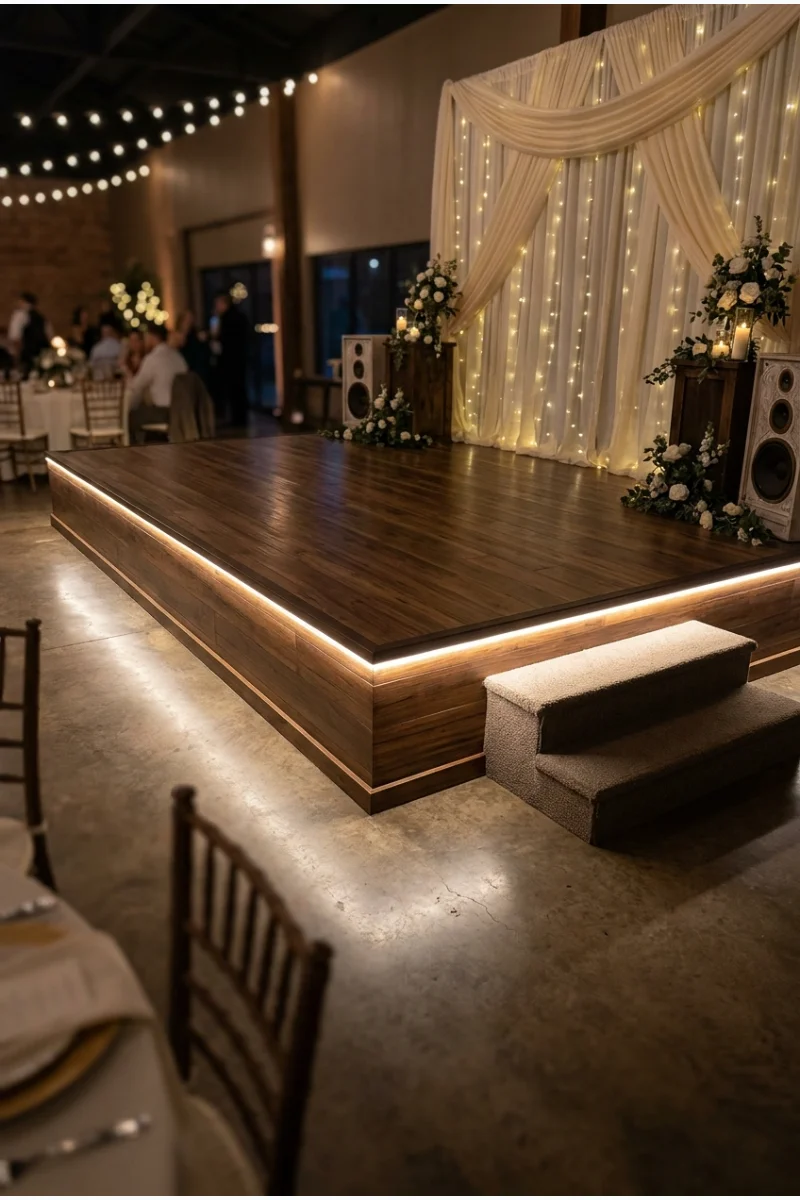
Run a continuous light line along the front edge of the entertainment stage. It gives the performance area a defined outline when the room darkens.
Coordinate the installation with the production team. Leave stage access clear and avoid exposed strips or cables where shoes could catch.
Linens, Stationery, and Chair Details
51. Let a Patterned Tablecloth Lead the Table
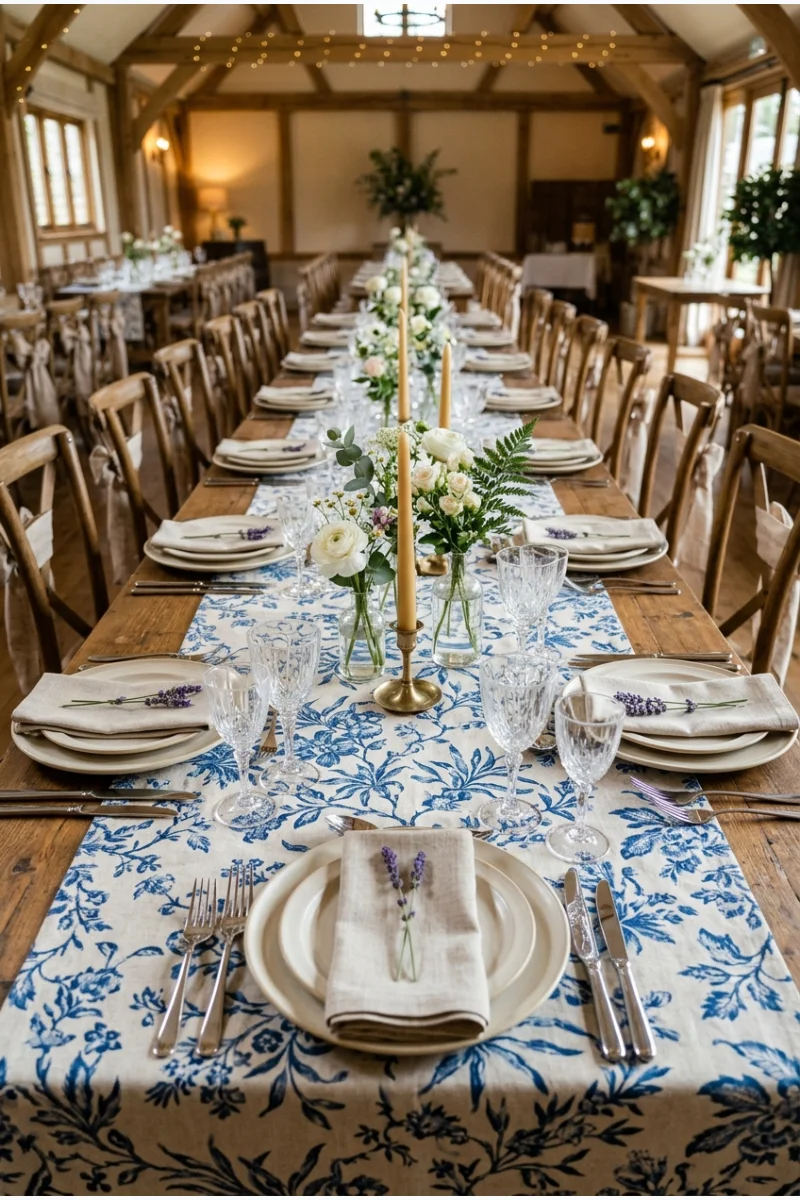
Use a patterned tablecloth as the main decorative surface, then keep the centerpiece and place settings comparatively simple. The pattern carries across the whole table.
These tea party bridal shower ideas offer table-layering inspiration; adapt the details for your wedding rather than copying a complete shower theme.
52. Layer a Sheer Overlay over a Solid Cloth
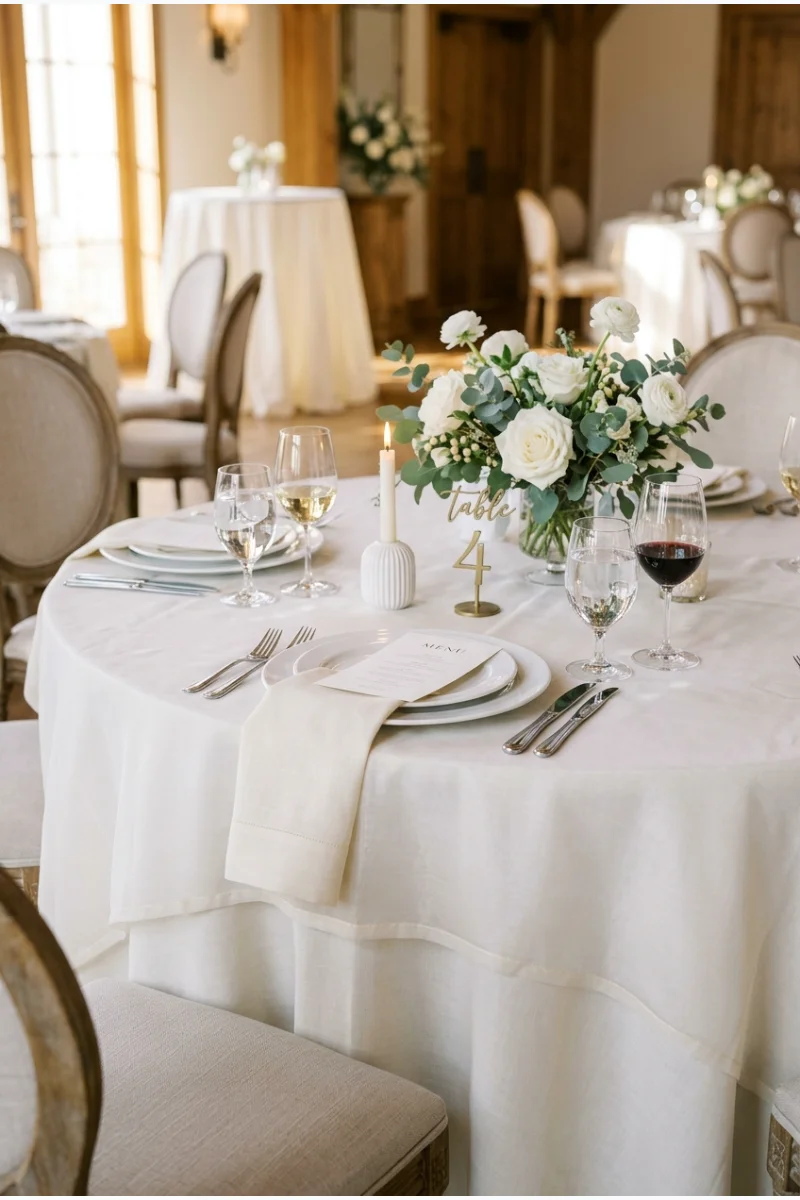
Place a translucent overlay over a solid tablecloth so both layers remain visible. The effect adds depth without requiring a busier centerpiece.
Check the layers together under venue lighting. Choose a finished length that does not gather beneath guest chairs or service routes.
53. Finish a Feature Table with Scalloped Skirting
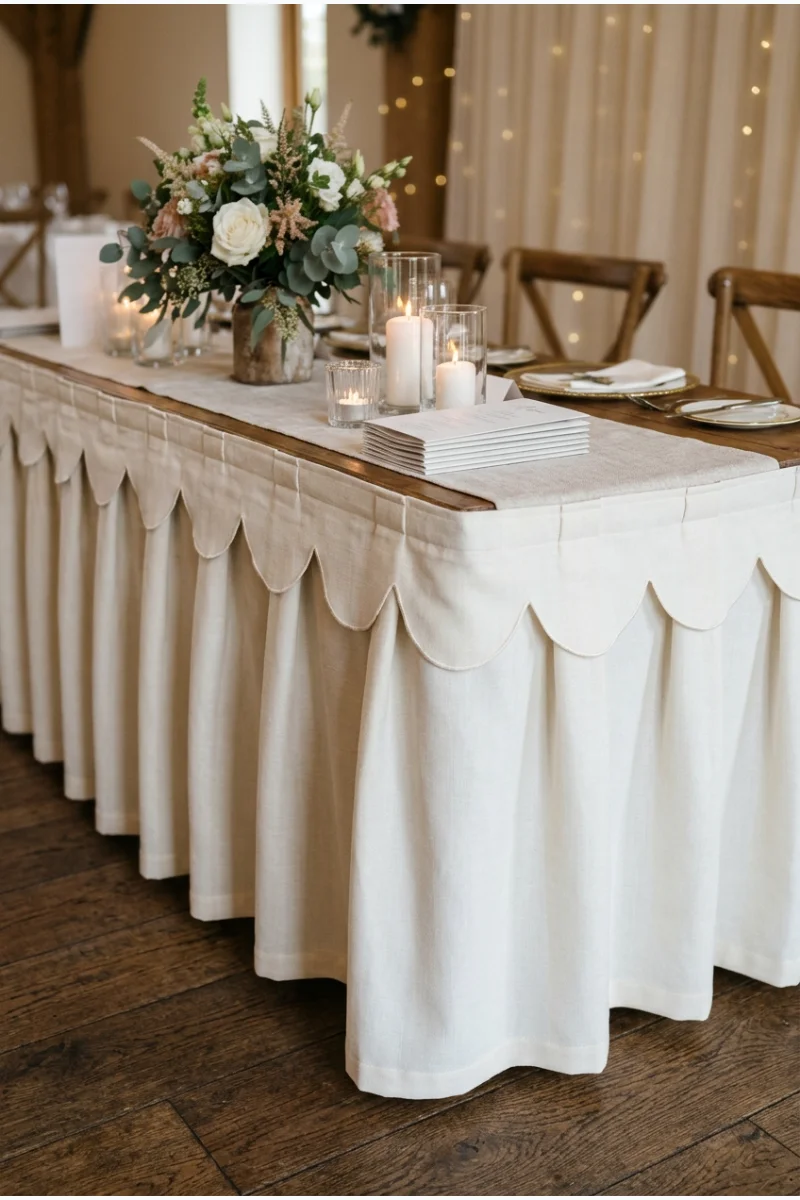
Use scalloped fabric skirting on a cake or welcome table. The repeated curved edge makes a simple table feel like a designed display.
Have the supplier measure the table and secure the skirt evenly. Leave any service side accessible and keep the hem clear of the floor.
54. Let a Gathered Runner Fall over the Table Ends
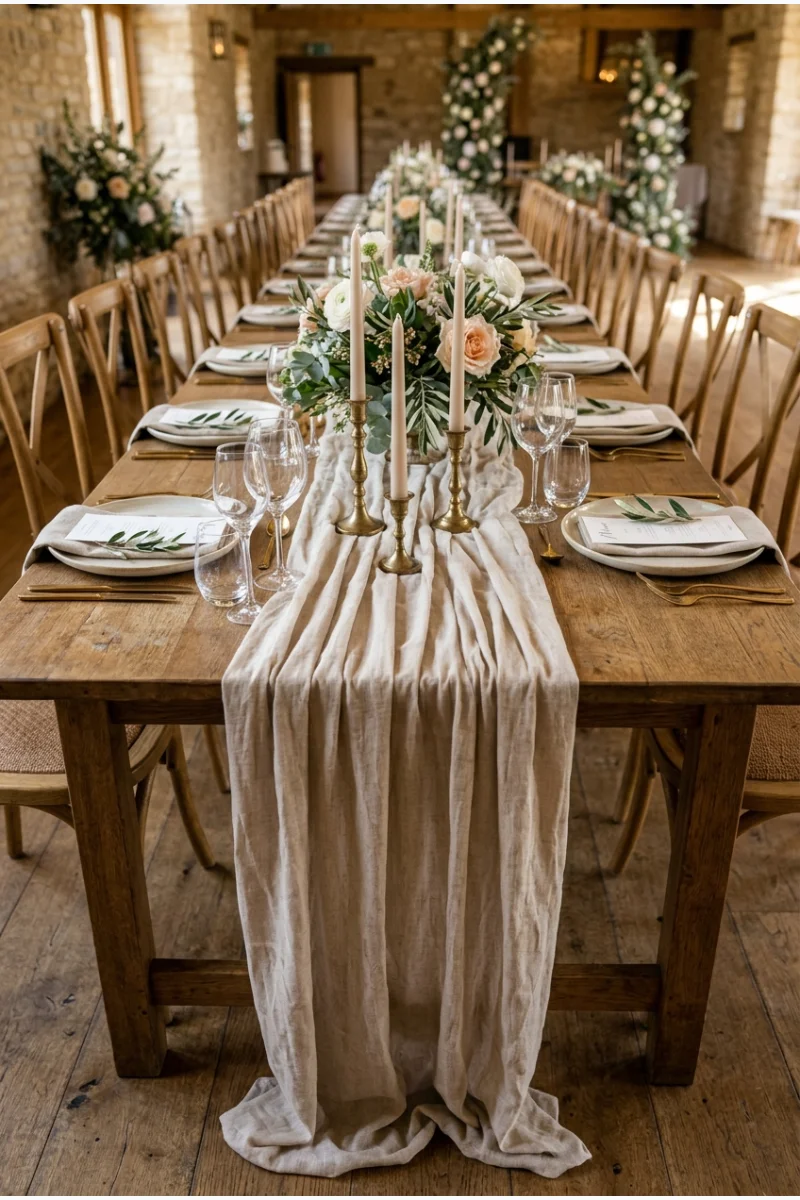
Gather a soft fabric runner through the center of a long table, with controlled falls at the ends. The folds provide movement between place settings.
Keep the fabric within the table footprint where guests sit. Leave flat landing spaces for platters, glasses, and centerpiece bases.
55. Fold Dinner Napkins into Bows
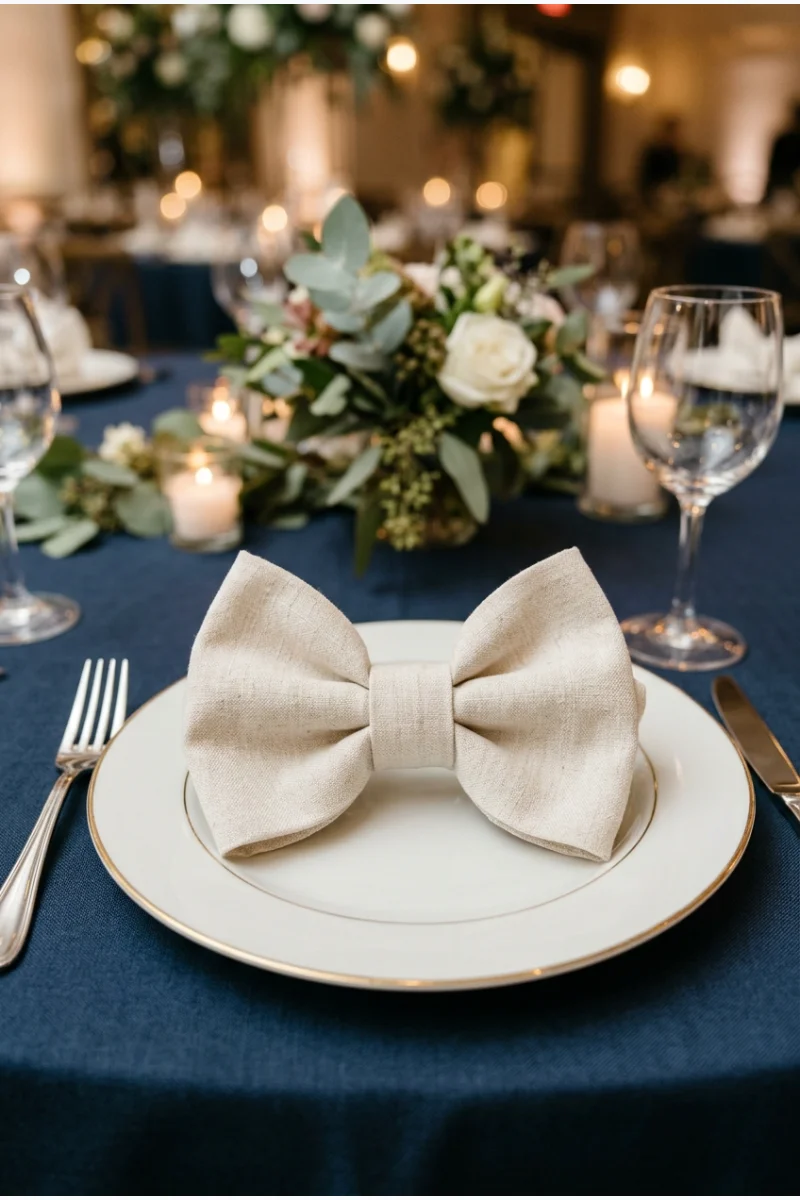
Shape each cloth napkin into a bow and place it on the plate. Repeating the folded silhouette gives the table a distinct detail without another object.
Test the fold with the actual fabric and keep it easy to undo. Avoid fastening it with sharp pins or anything that could be mistaken for food.
56. Frame Menus with Pressed Petals
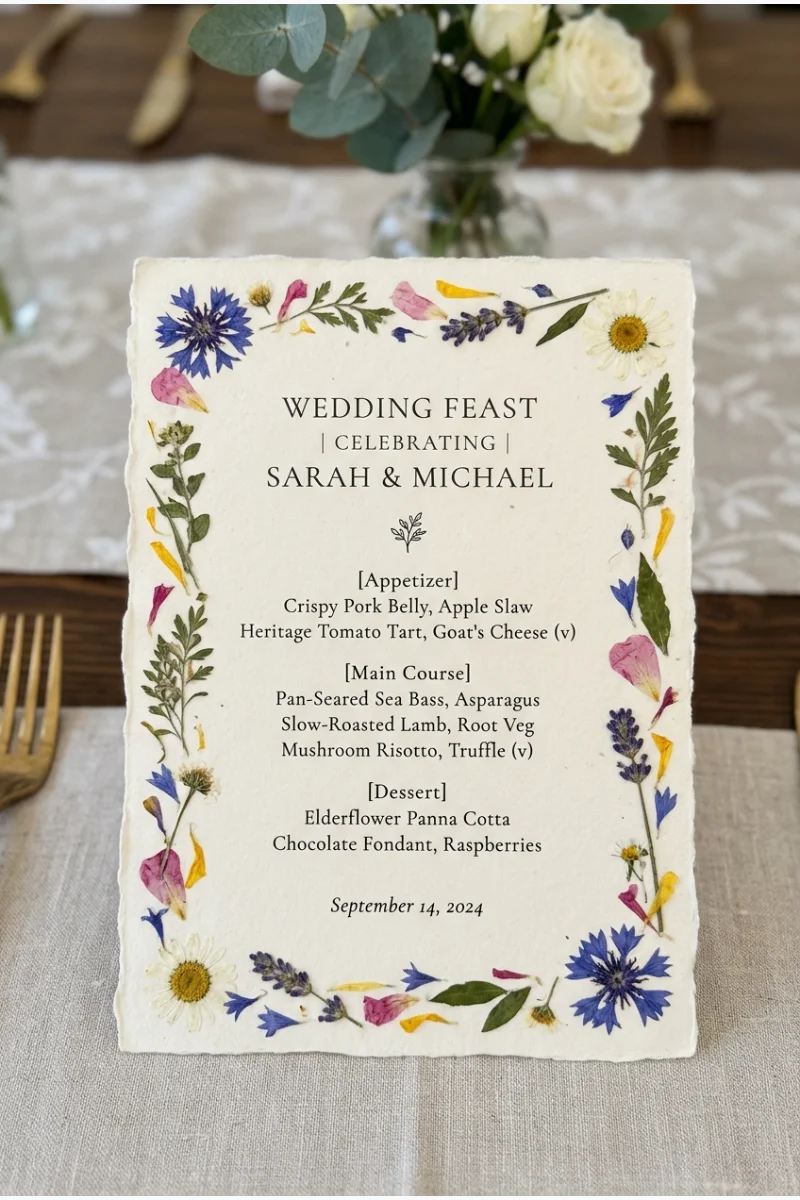
Use menu cards with pressed botanical details sealed into a border. The paper becomes part of the table decoration while the menu stays readable.
Keep flowers away from the food-contact area and leave the text on a clear central field. Ask the stationer for a finished sample first.
57. Commission Illustrated Charger Plates
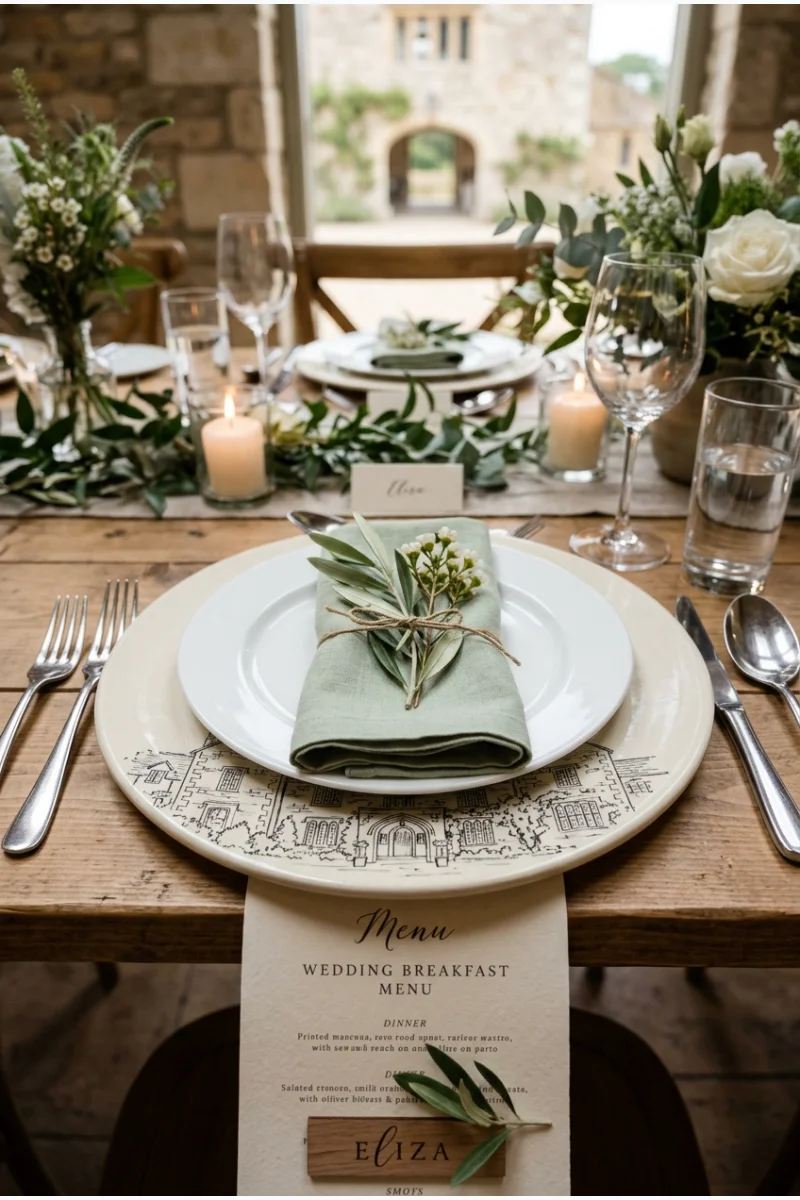
Use charger plates carrying a line drawing of your venue beneath simple dinner plates. A visible illustrated border connects the place setting to the location.
Ask for a fully layered sample so the artwork remains visible. Choose dinnerware intended for actual food service rather than serving directly on decorative artwork.
58. Use Freestanding Acrylic Arch Table Numbers
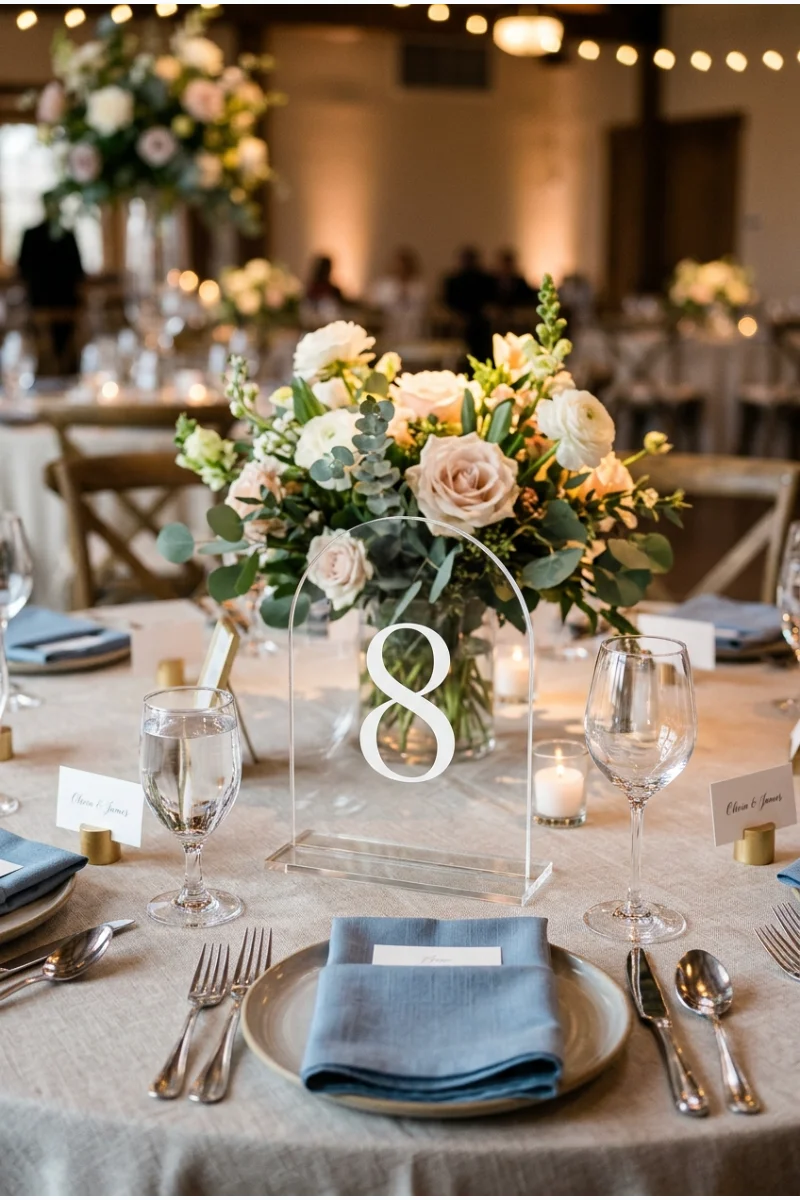
Set arch-shaped acrylic table numbers upright among the place settings. The clear material lets the centerpiece remain visible behind the numeral.
For a DIY version, consider these Yunlly blank acrylic arch signs with stands and add readable numbering. Check the finished contrast against your tablecloth.
59. Mark Seats with Name Tiles
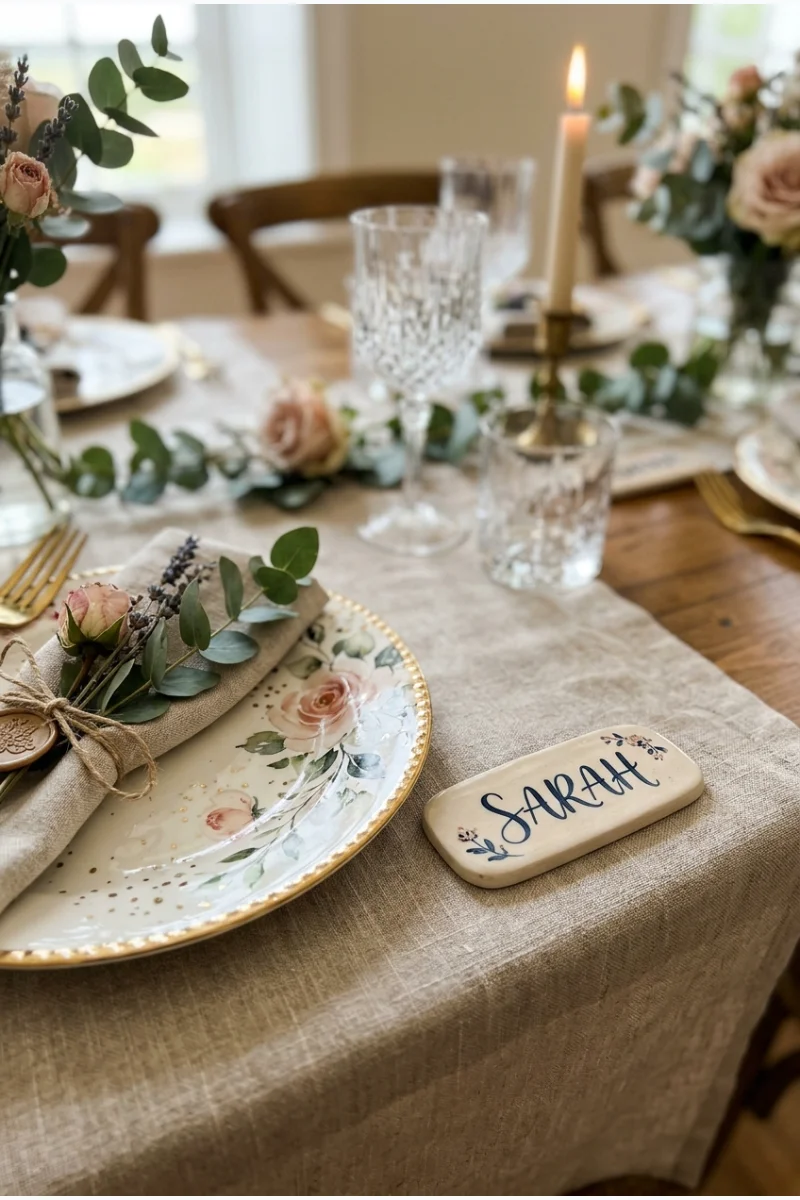
Place a small finished ceramic tile at each setting with the guest's first name. The solid shape works as both a place marker and a table detail.
Choose smooth edges and a writing method that will not transfer onto linens. Keep the tile beside the plate rather than under cutlery.
60. Drape Chair Backs with Fabric Shawls
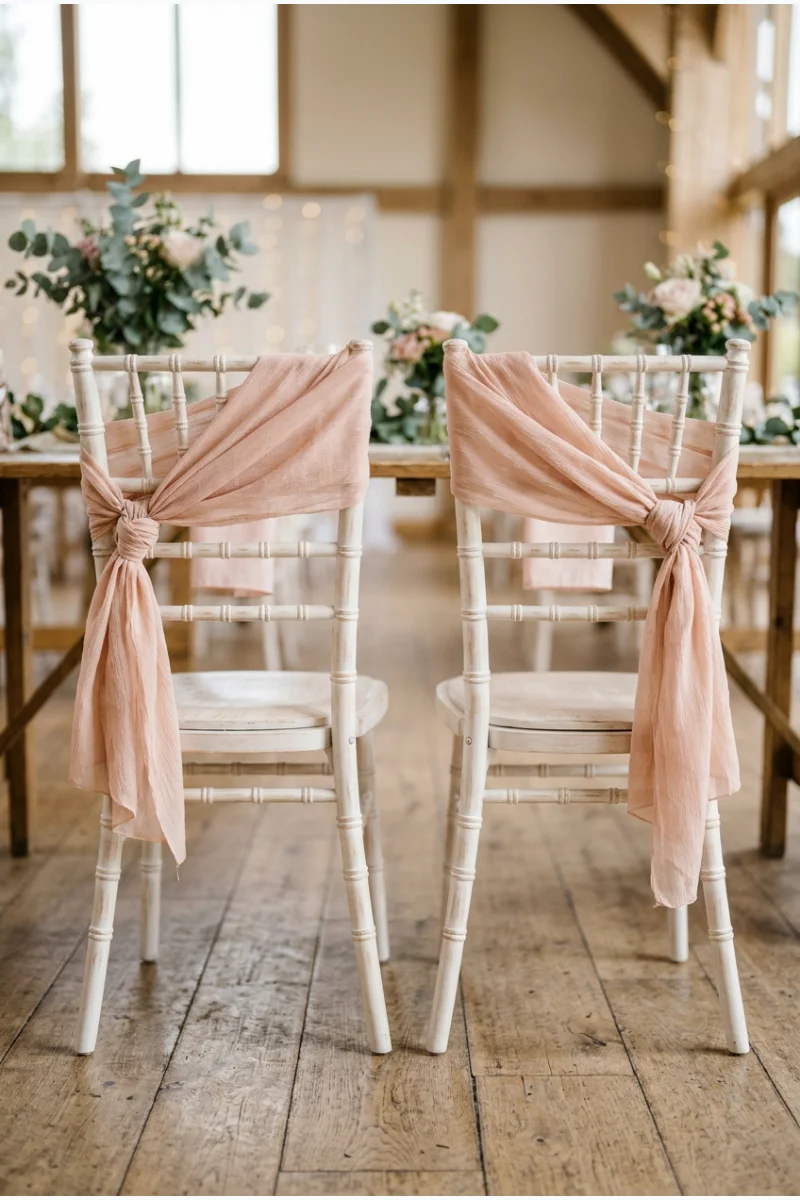
Drape a narrow fabric shawl over selected chair backs, secured into a soft side knot. The long textile shape adds detail where chairs are visible from behind.
Keep the fabric off the floor and clear of the seat. Use it selectively on feature chairs instead of covering every chair automatically.
Centerpieces with Different Shapes and Materials
61. Scatter Small Bud Vases with Open Gaps
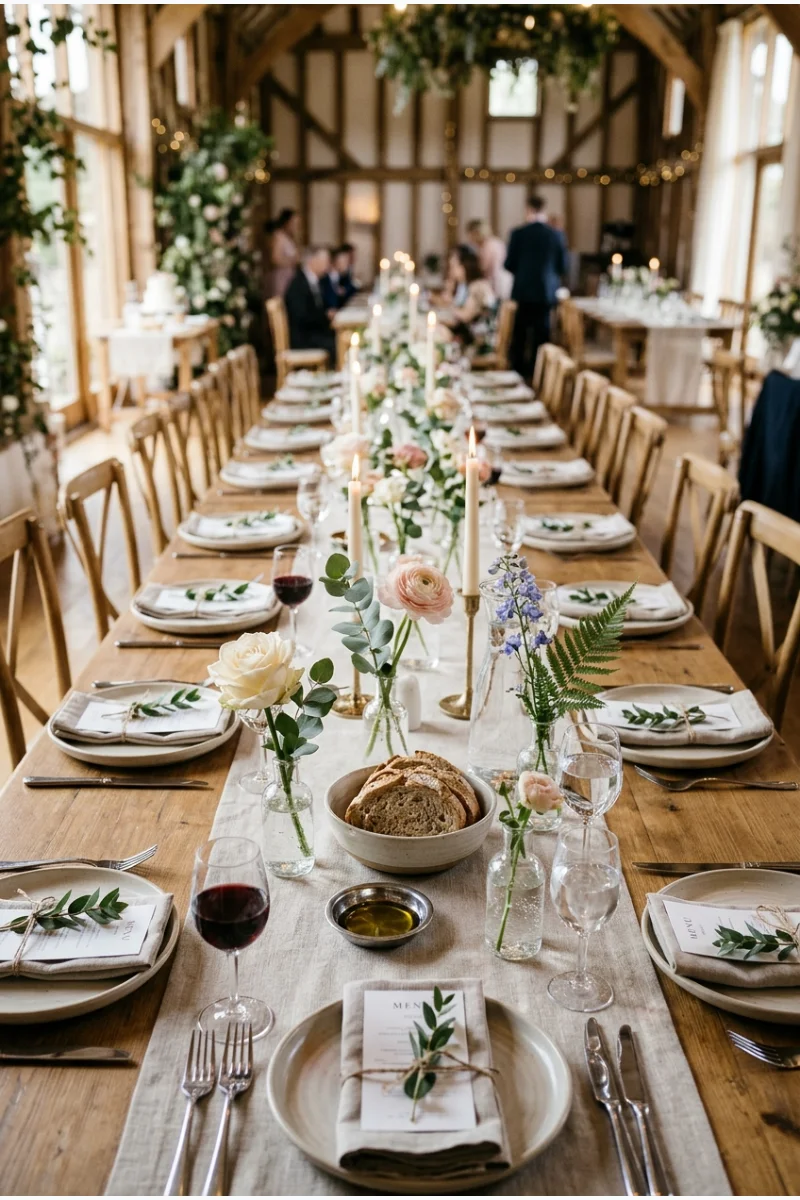
Space small bud vases along the table with generous gaps between them. Separate stems bring flowers close to guests without creating one continuous floral barrier.
Adapt the simple flower suggestions in these budget bridal shower ideas to your wedding, choosing vessels and quantities that fit the actual dining space.
62. Choose Low Compote Arrangements
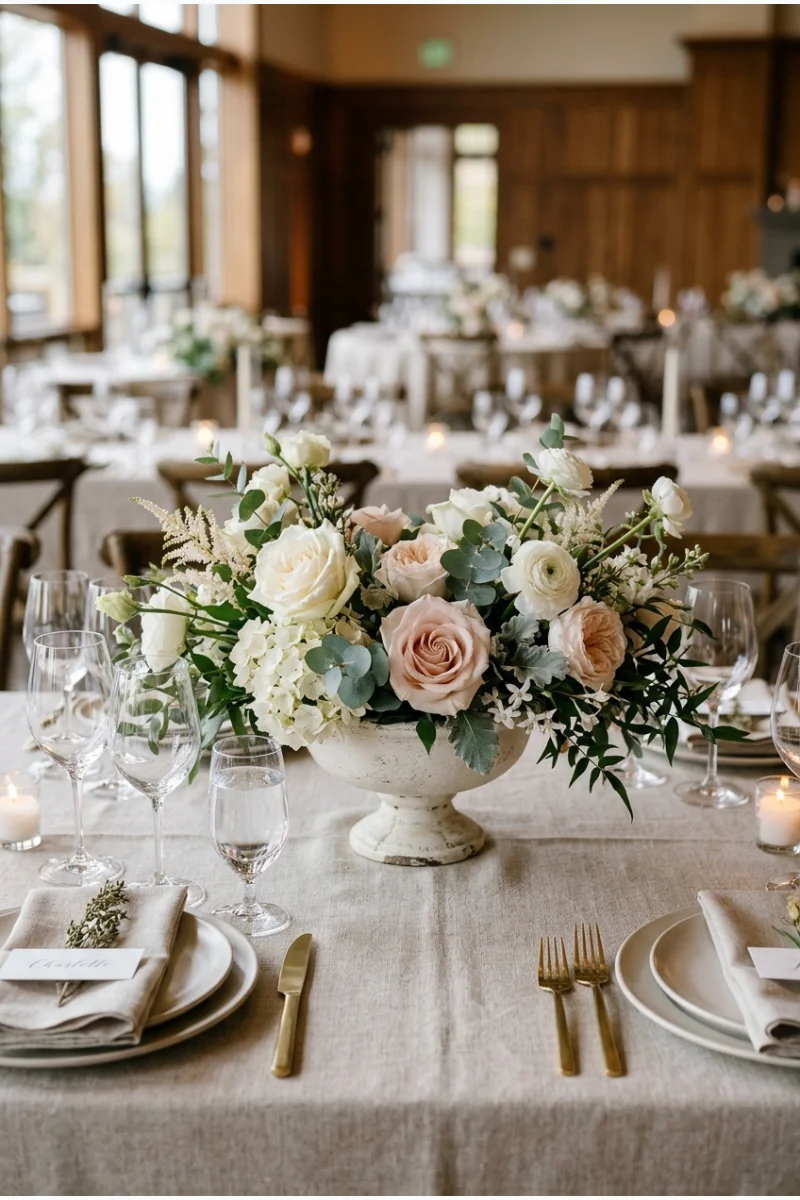
Use a shallow footed bowl to hold a low, spreading floral arrangement. Its broad outline suits tables where guests should be able to talk across the center.
Test the arrangement with seated sightlines and full place settings. Keep stems and water-containing mechanics clear of serving space.
63. Lift Flowers on Open Centerpiece Stands
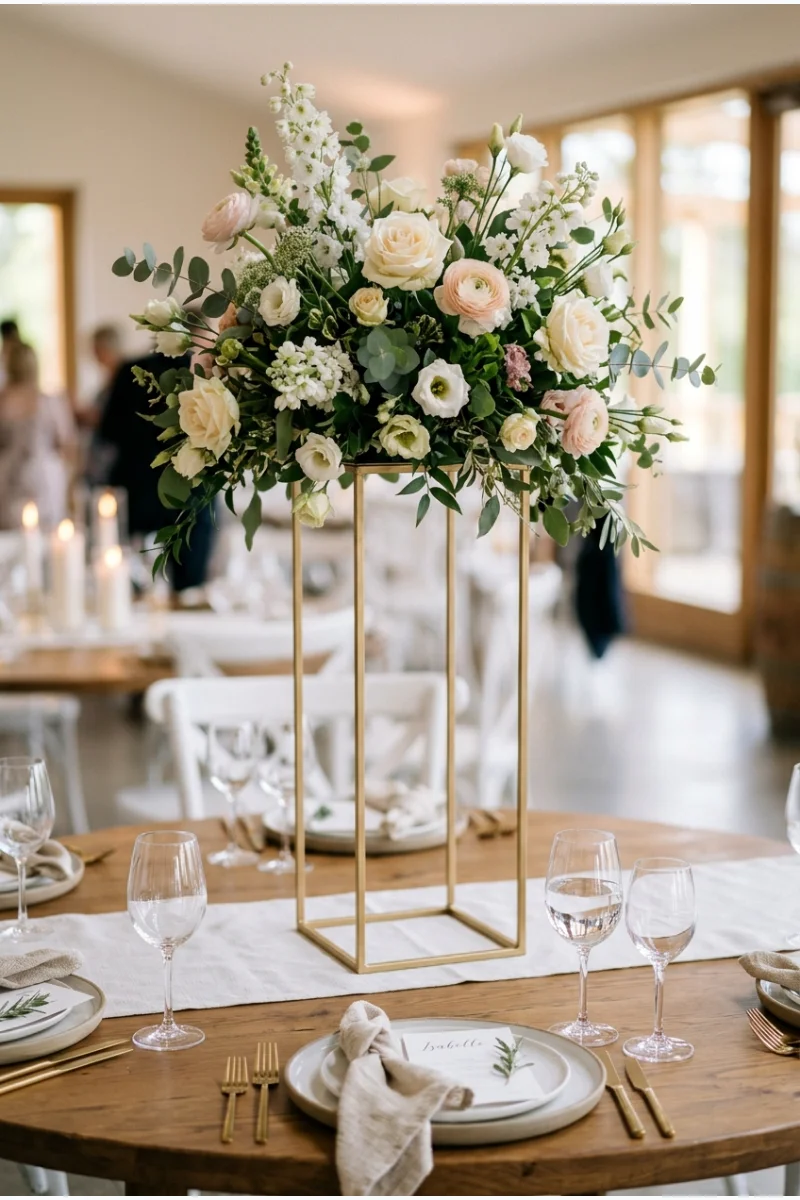
Raise a floral arrangement on an open stand so the tabletop remains visually lighter beneath it. The open frame matters as much as the flowers above.
Choose a stable stand sized for the finished arrangement. Test both the base footprint and the floral height from seated positions.
64. Float Candles in Clear Cylinder Vases
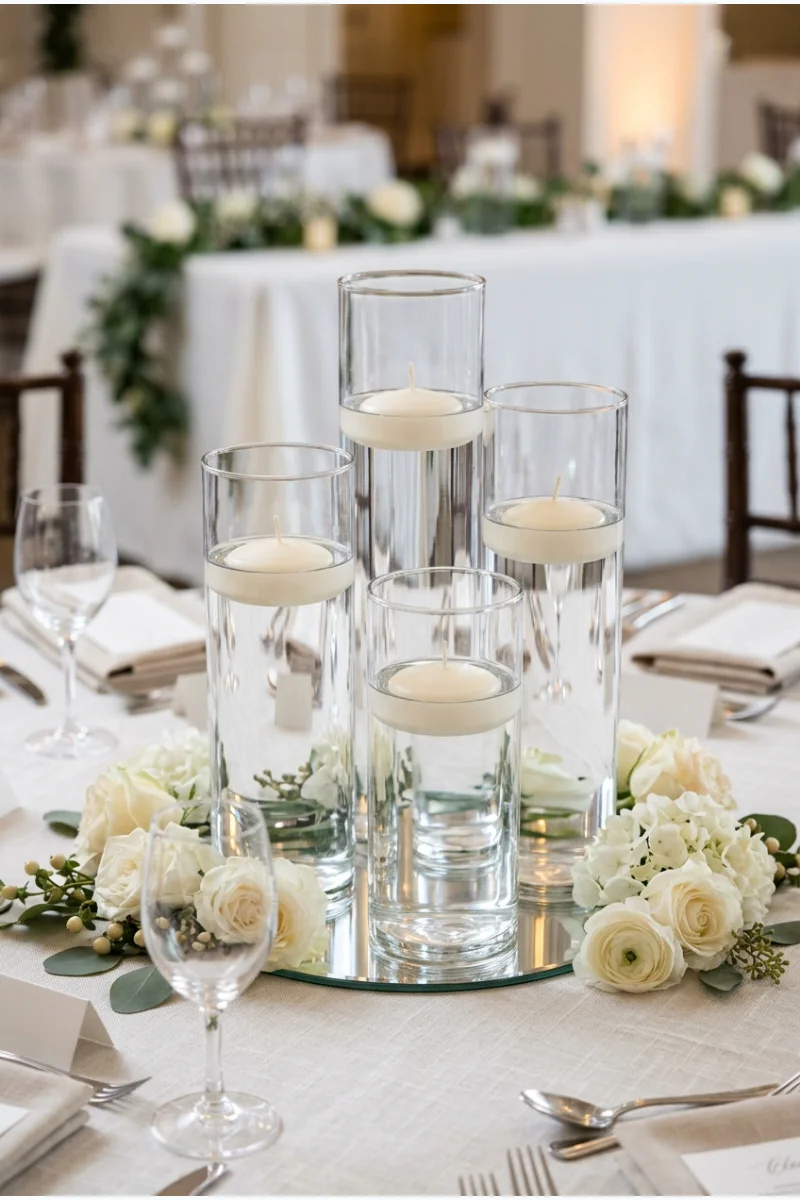
Group clear cylinder vases with water and floating candles as a centerpiece. The visible waterline and separate glass forms define the display.
One supply option is this UDU cylinder-vase and floating-candle set. Confirm the venue permits the intended candle setup and follow the supplied instructions.
Keep the vessels on a stable, level surface away from fabric and guest reach. Use an approved flameless alternative when required.
65. Arrange Flowering Branches in Tall Vessels
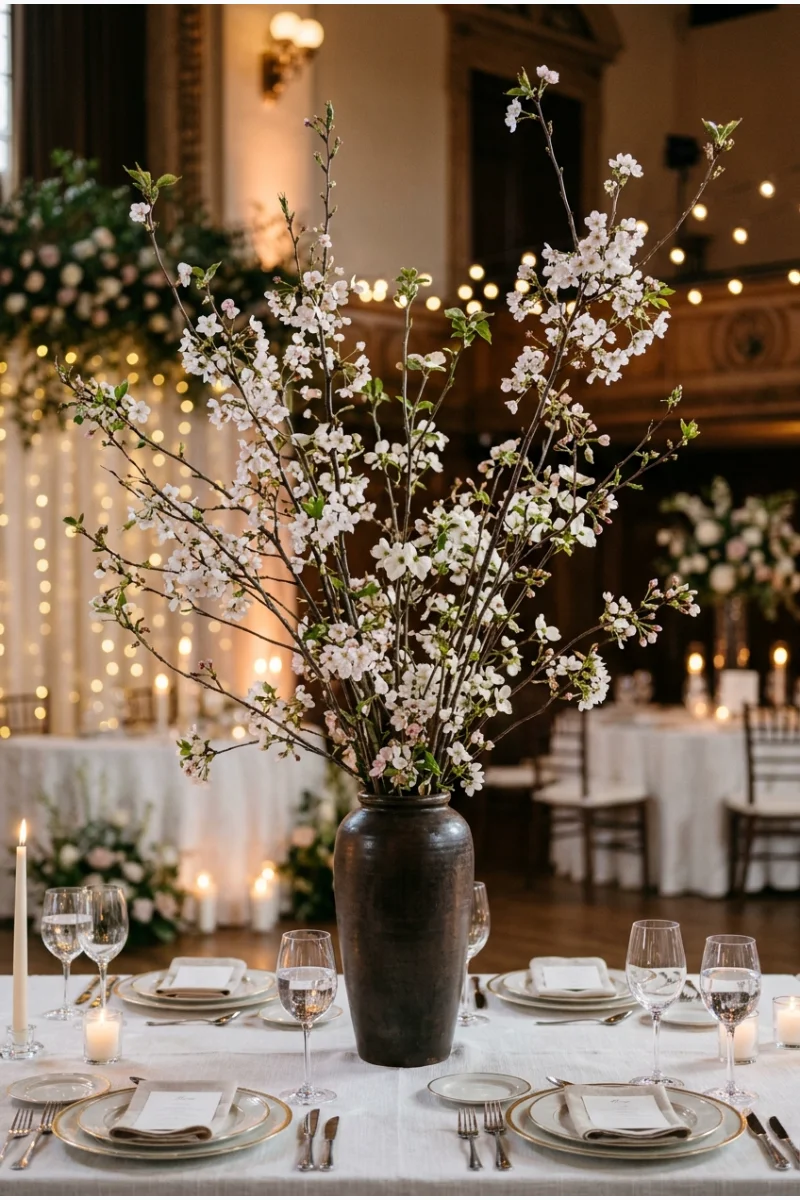
Use branching stems in tall vessels to create an open, upward-reaching centerpiece. Their silhouette leaves visible space between the blooms.
Ask the florist to match stem weight to the container. Keep branches from extending into neighboring seats or service paths.
66. Group Whole Fruit in Shallow Bowls
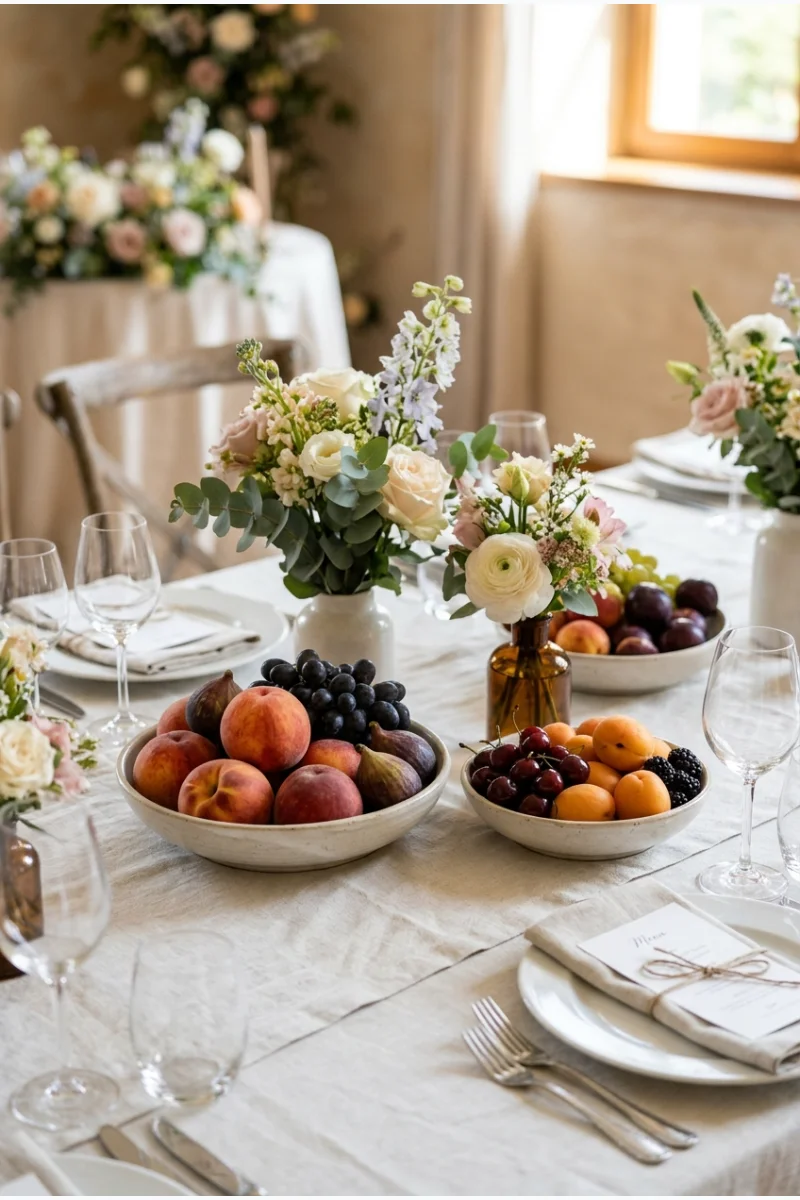
Use shallow bowls of whole seasonal fruit between modest flower arrangements. The larger forms create a table feature that differs from a line of small vases.
Keep decorative fruit separate from ready-to-eat portions. Leave enough open space that the display does not compete with shared dishes.
67. Use Potted Herbs down the Table
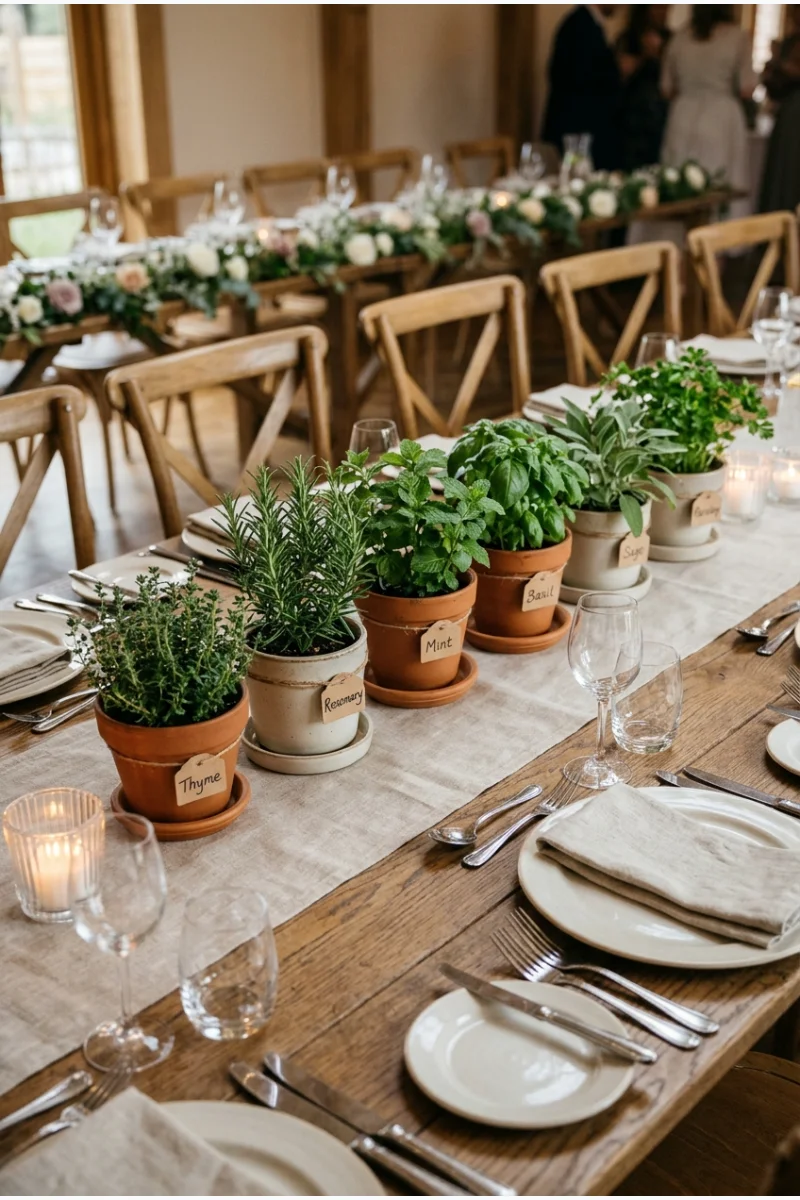
Line the center of a dining table with small potted herbs in clean containers. The plants connect the reception to a garden setting without cut flowers.
Protect linens from soil and drainage with saucers or cachepots. Keep foliage away from plates and avoid treating decorative plants as ready-to-eat garnishes.
68. Make an Orchid Planter the Centerpiece
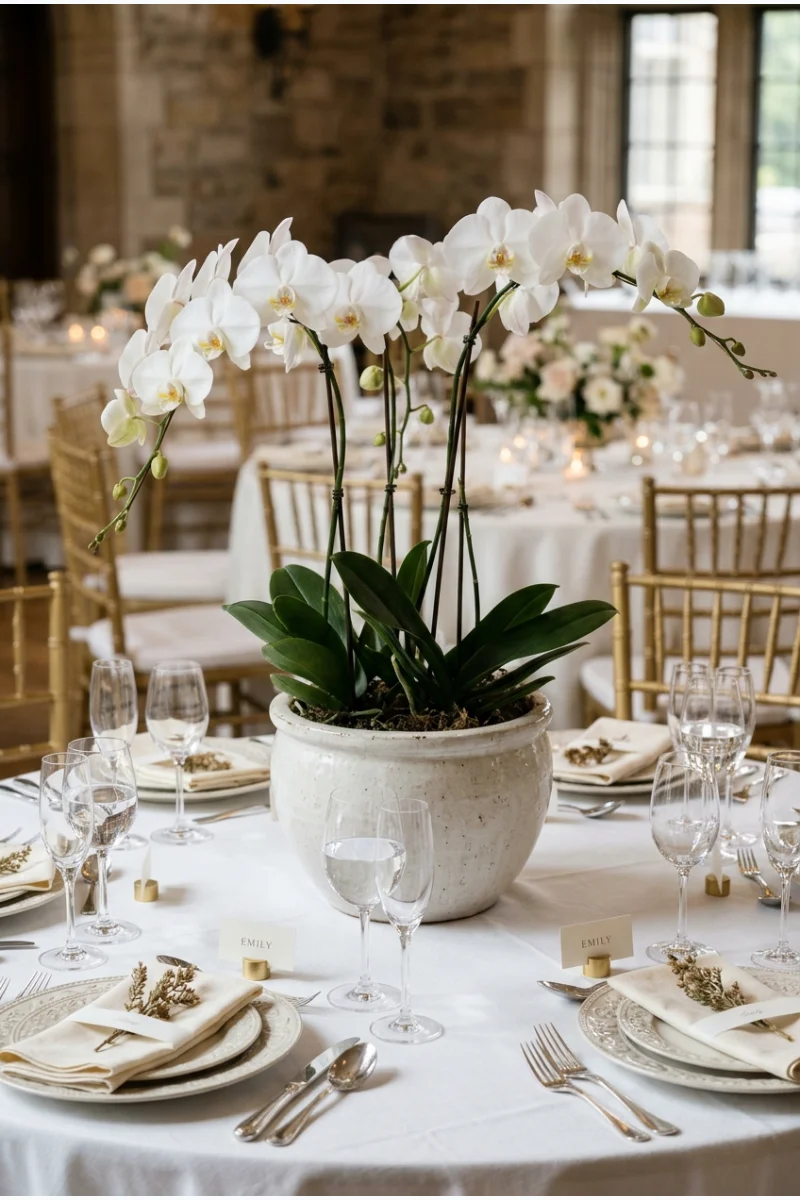
Use one planted orchid arrangement in a substantial container as the table focal point. Its arching stems create a different outline from a rounded bouquet.
Choose a container that hides nursery pots and remains stable. Check that the flowers do not sweep into guests' faces or place settings.
69. Group Sculptural Ceramic Vessels without Flowers
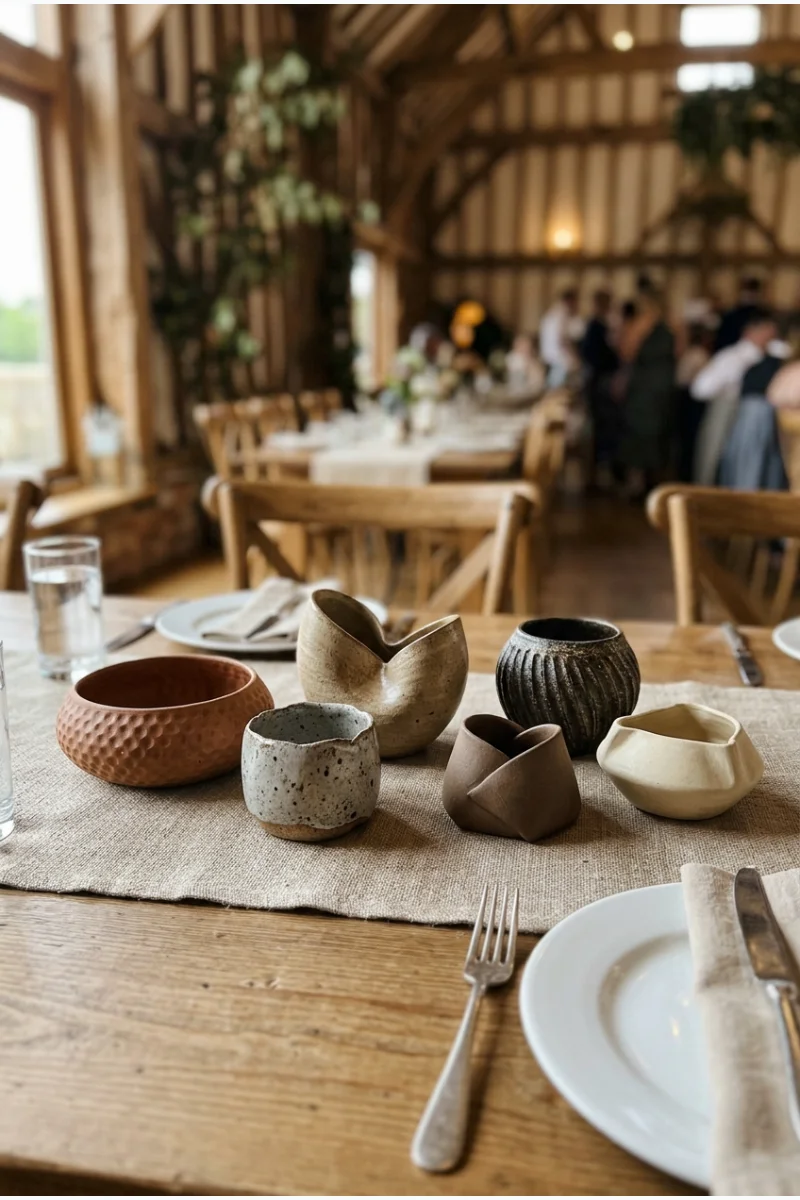
Arrange a small group of ceramic vessels with distinct sculptural shapes as the centerpiece. Empty vessels let form and surface carry the design.
Keep the group low enough for conversation and choose pieces that sit securely. Leave enough separation for each silhouette to remain readable.
70. Make Rows of Flameless Taper Candles
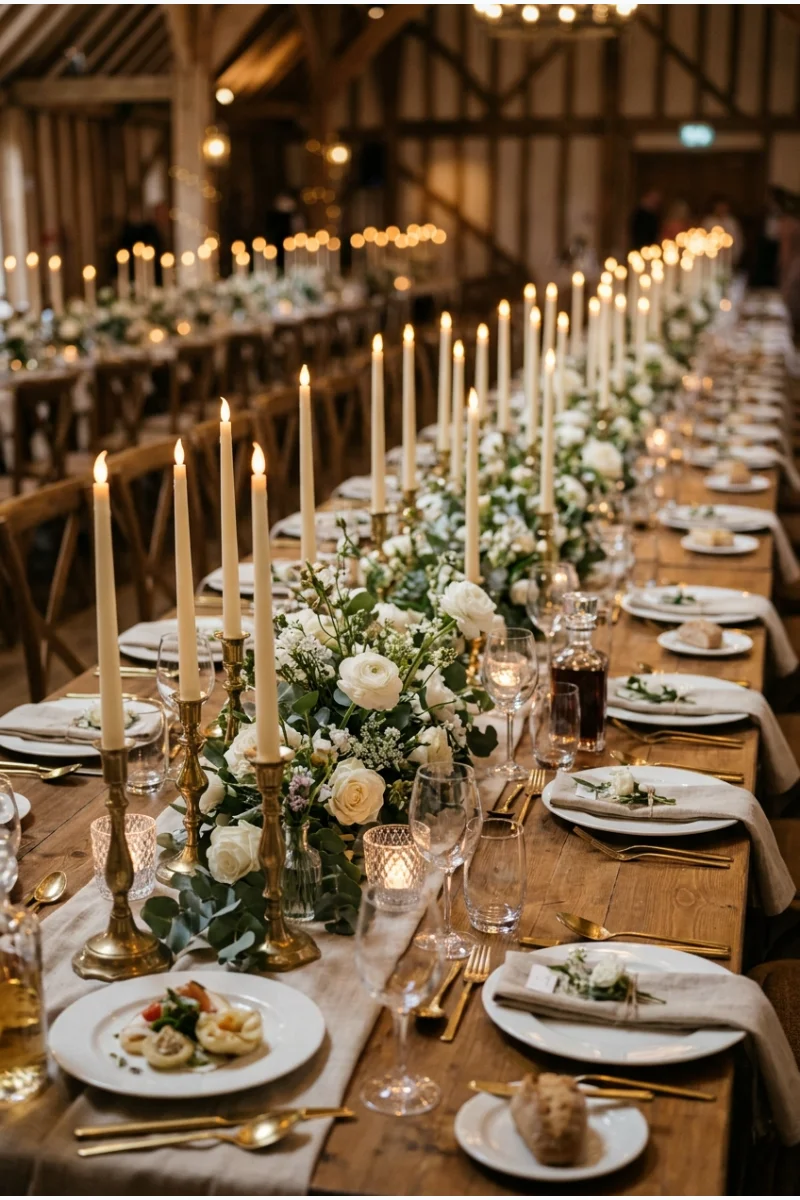
Run rows of battery-operated taper candles through a dining table, leaving clear spaces for flowers and serving dishes. The repeated slender shapes provide the structure.
An optional supply is this Homemory flameless taper candle set with a remote. Check holder fit, battery requirements, and operating instructions before the wedding.
Bars, Displays, and Reception Focal Points
71. Choose a Curved Statement Bar
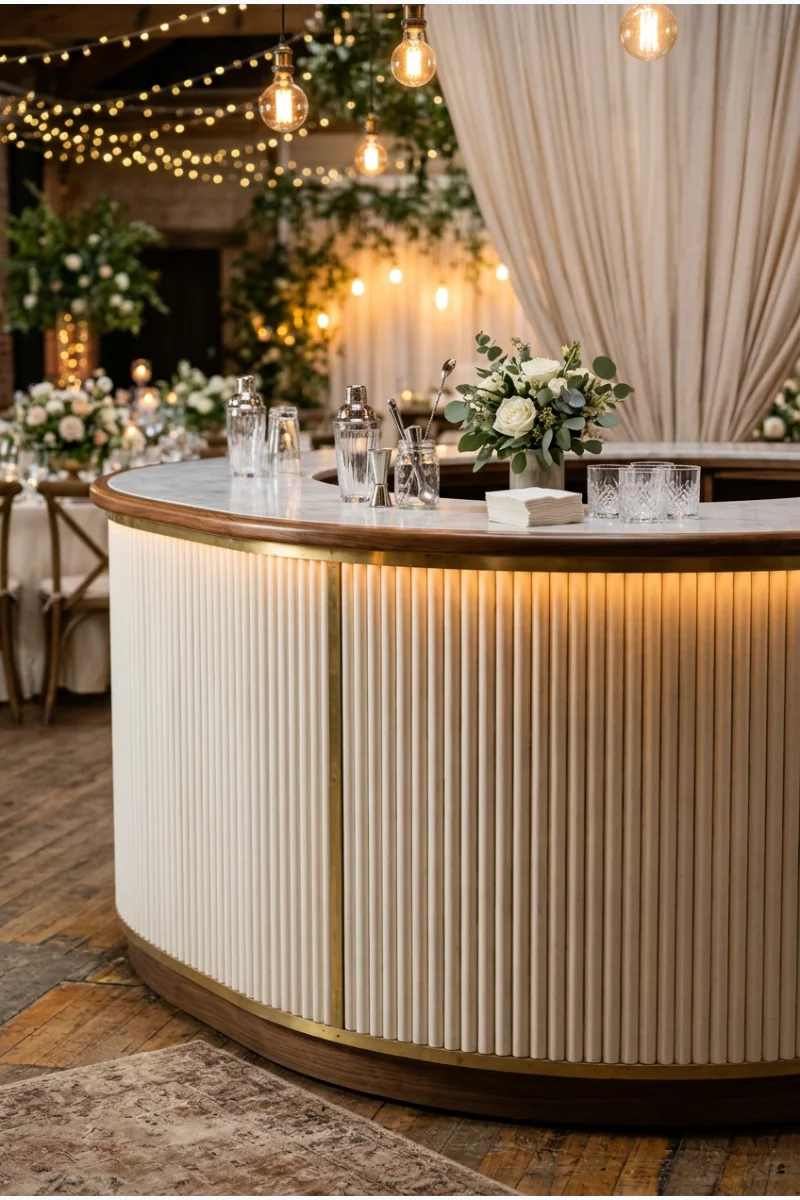
Use a freestanding curved bar with a fluted front as a reception focal point. The shaped facade gives the service area a strong decorative identity.
Keep the top practical for pouring and collecting drinks. Discuss delivery access, working space, and power needs with the bar supplier.
72. Style a Floral Backbar Shelf
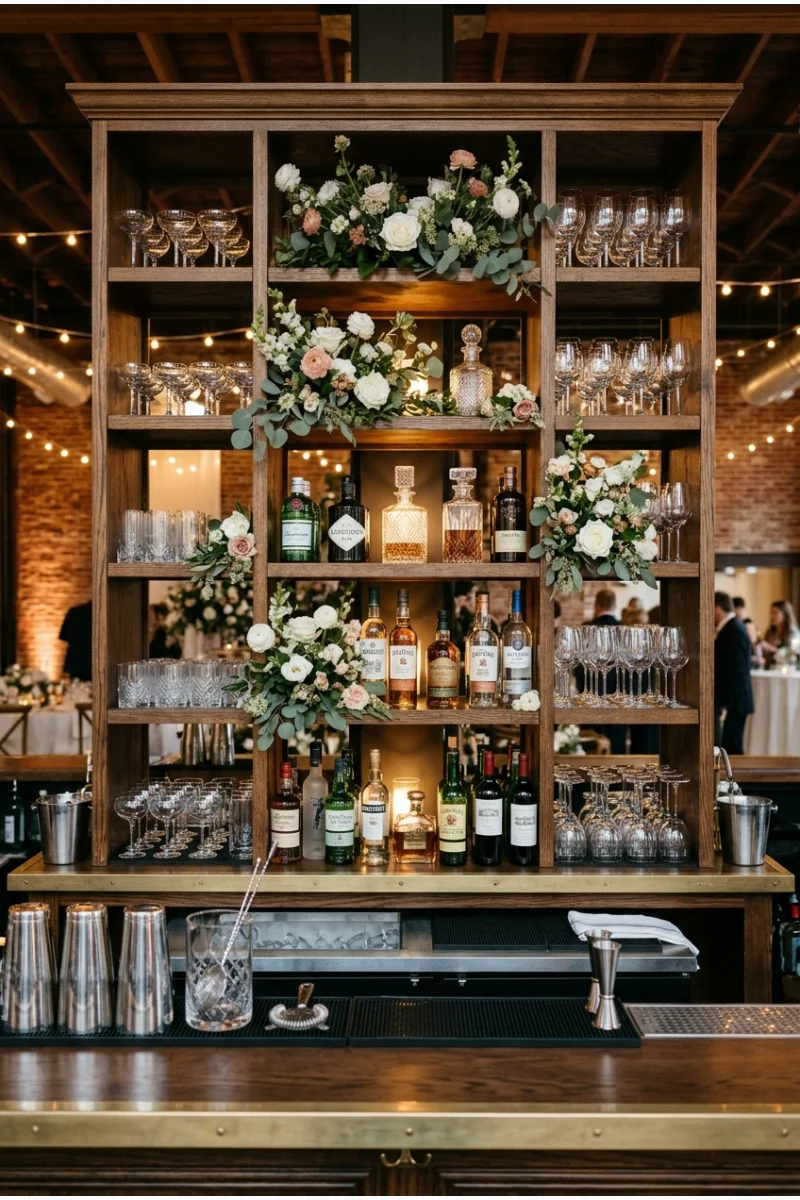
Place a freestanding shelf behind the bar with floral arrangements between glassware and bottles. The vertical display makes the bar visible across the room.
Preserve usable shelf space and access for staff. Keep flowers separate from drink preparation and do not conceal the bartender's working light.
73. Display Desserts on a Plinth Cluster
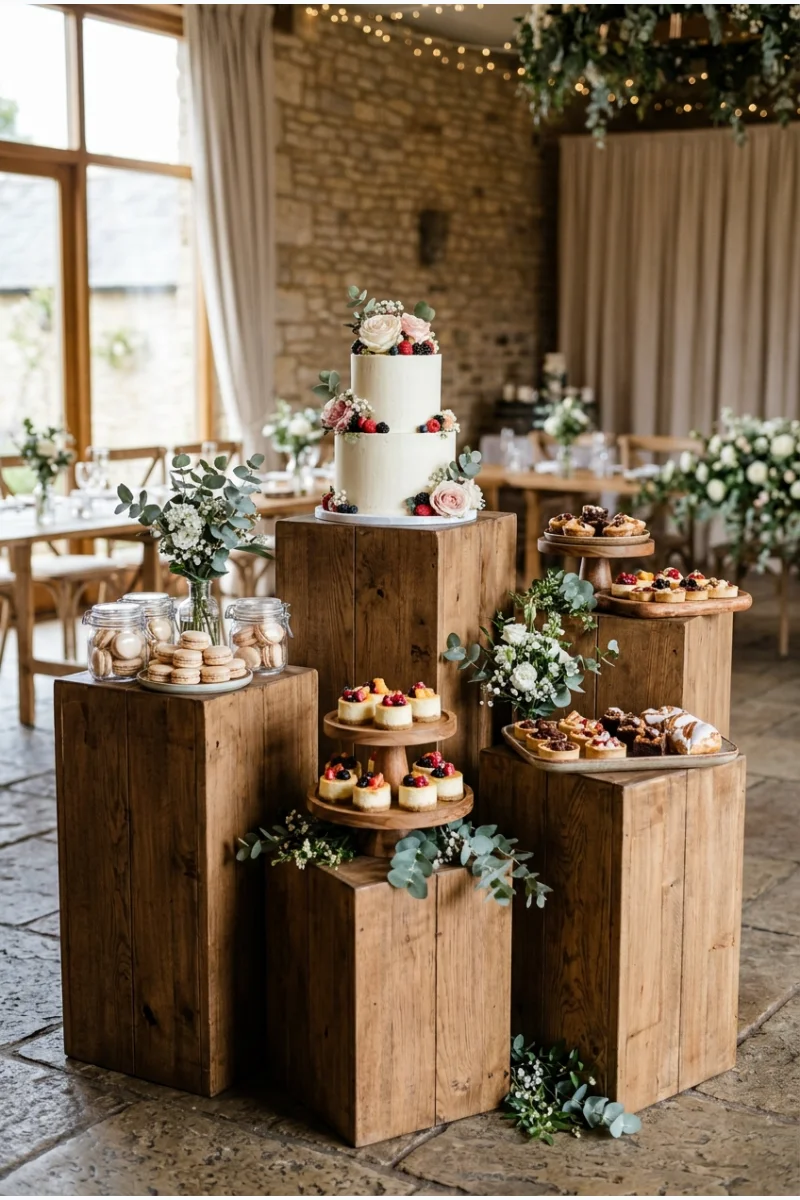
Arrange small dessert displays on stable plinths of different heights rather than one long buffet table. The separate platforms give the sweets a sculptural presentation.
For the food selection, adapt relevant small treats from these bridal shower dessert ideas to your wedding menu and service plan.
Provide reachable serving surfaces and keep the tallest platforms for display rather than guest self-service.
74. Frame the Cake with a Fabric Alcove
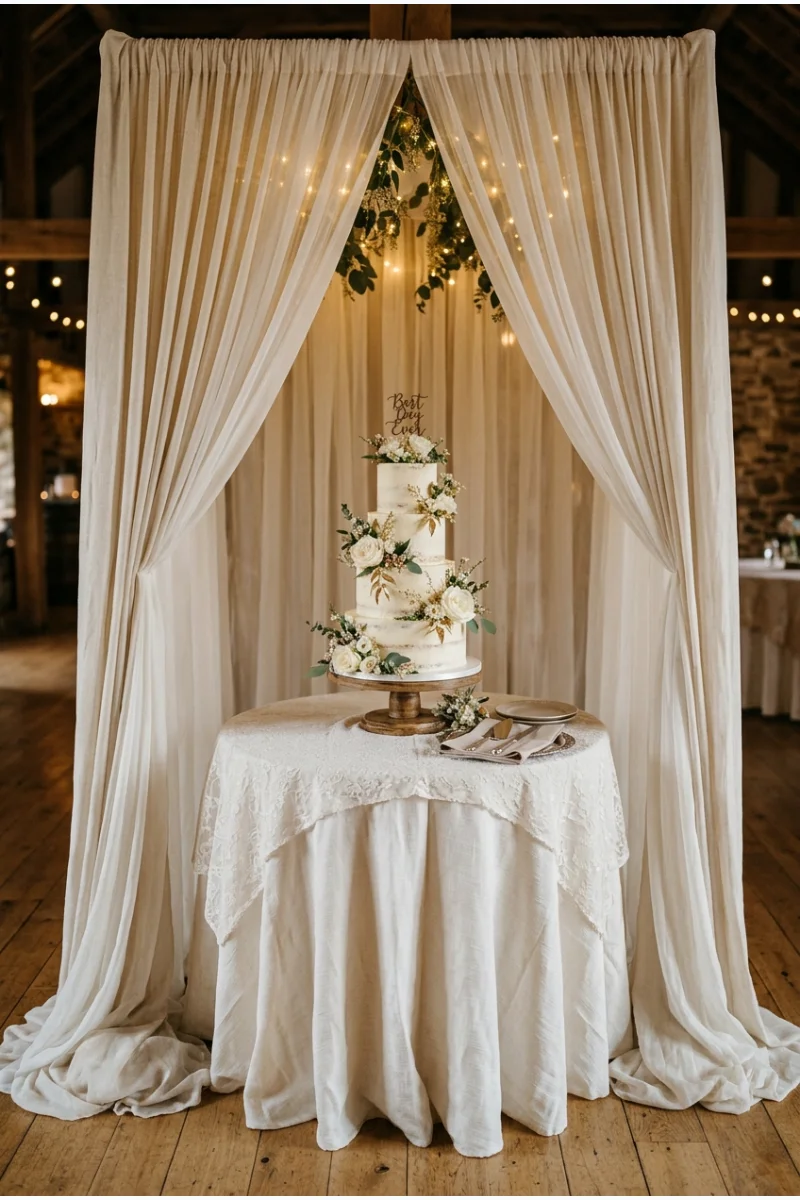
Place the cake table inside a shallow freestanding fabric alcove. The surrounding textile draws attention to the cake without covering the whole reception wall.
The designs in these bridal shower cake ideas can inspire the cake's decorative details; have your baker adapt the scale and finish for your wedding.
Leave room for cutting and photographs, with fabric safely separated from the cake and any lighting.
75. Turn Glassware into an Escort Display
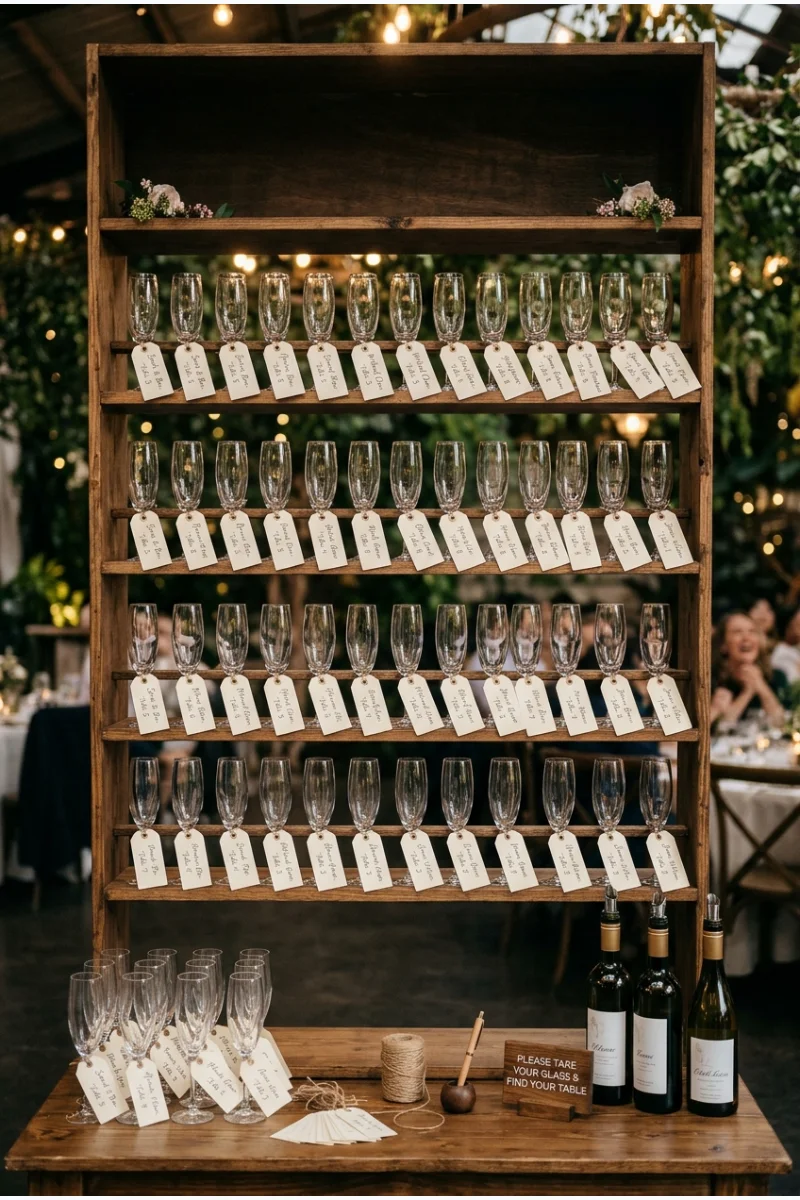
Line open shelves with glasses carrying guest-name tags and table assignments. The repeated glass shapes turn a practical seating display into a reception feature.
Offer an appropriate drink choice for each guest, including alcohol-free options. Arrange staffed filling separately so the display stays clean and easy to browse.
76. Anchor a Lounge with Layered Rugs
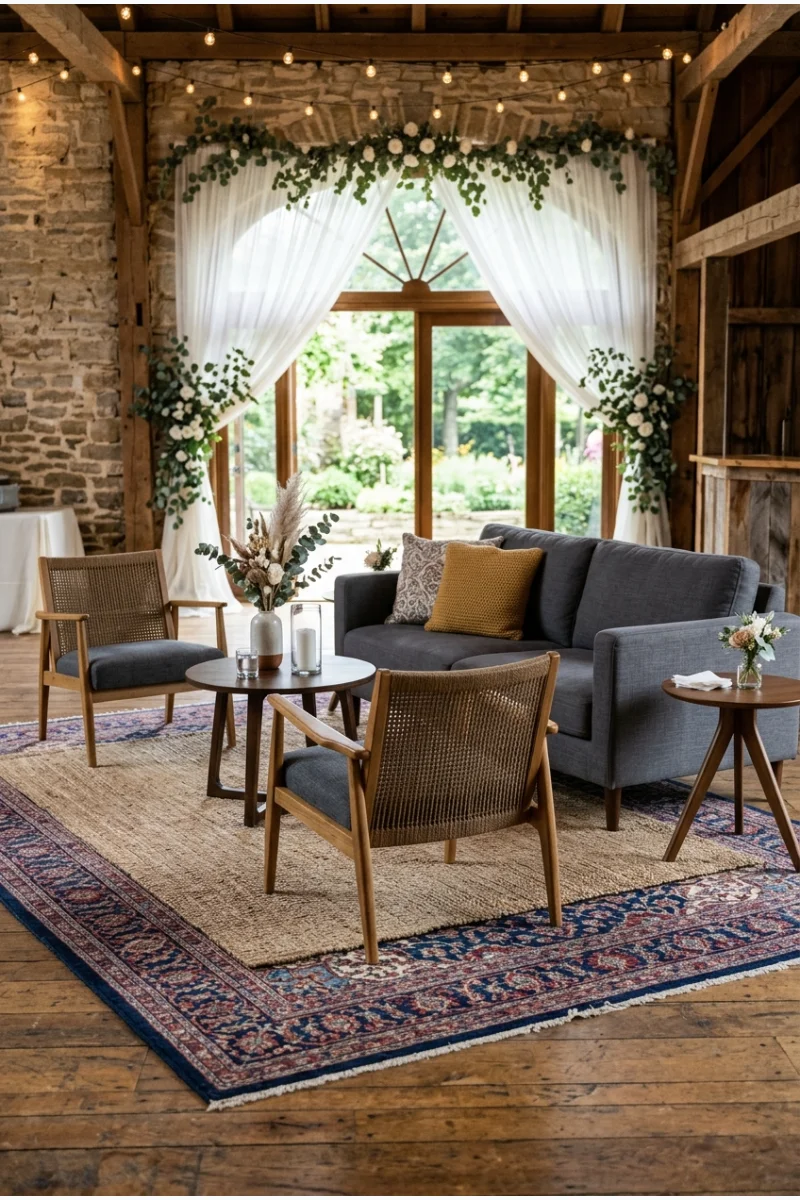
Use compatible rugs beneath grouped lounge furniture to define a conversation area inside a larger room. The textile layers separate the lounge visually from dining.
Secure edges and keep transitions flat. Include supportive chairs and reachable side tables rather than relying entirely on deep sofas.
77. Make a Message Tree Guestbook
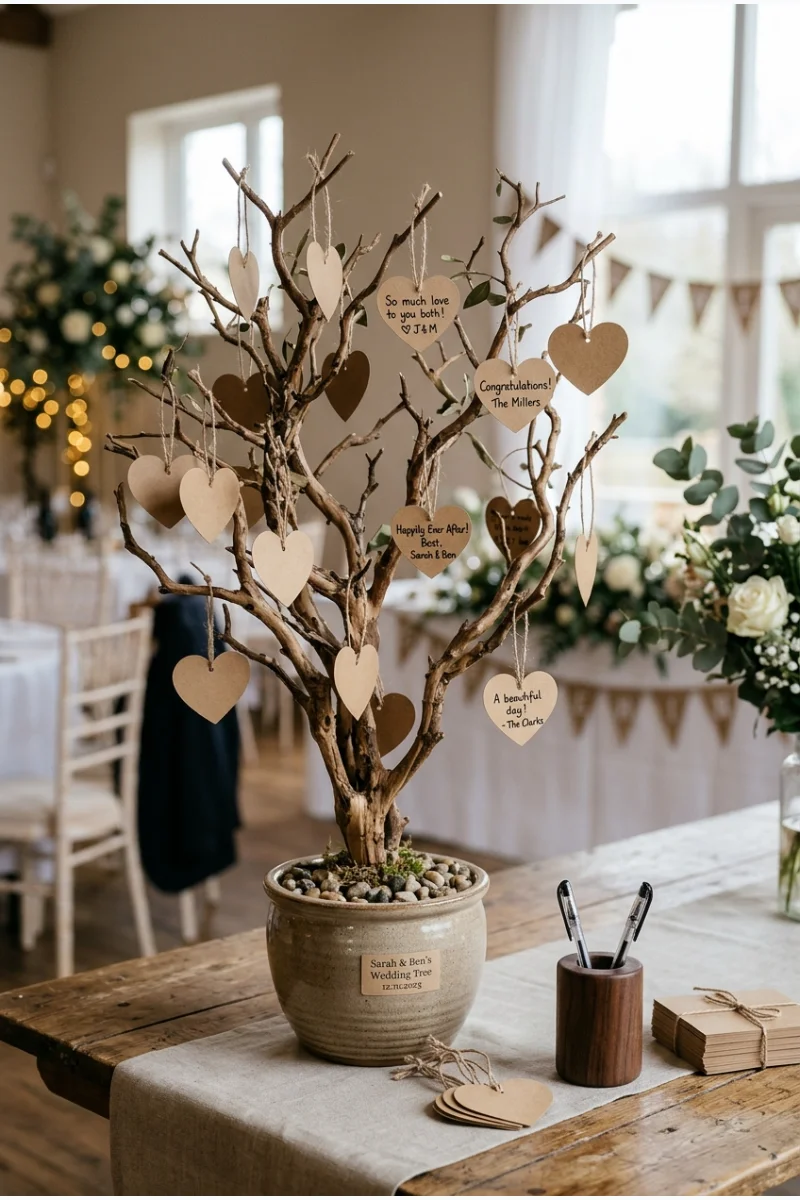
Set branching forms in a stable container and provide small cards for guests to hang. Their messages gradually become part of the decoration.
Use lightweight cards and an accessible writing surface nearby. Keep branches within the display footprint and preserve space for guests to approach.
78. Build a Botanical Audio-Guestbook Alcove
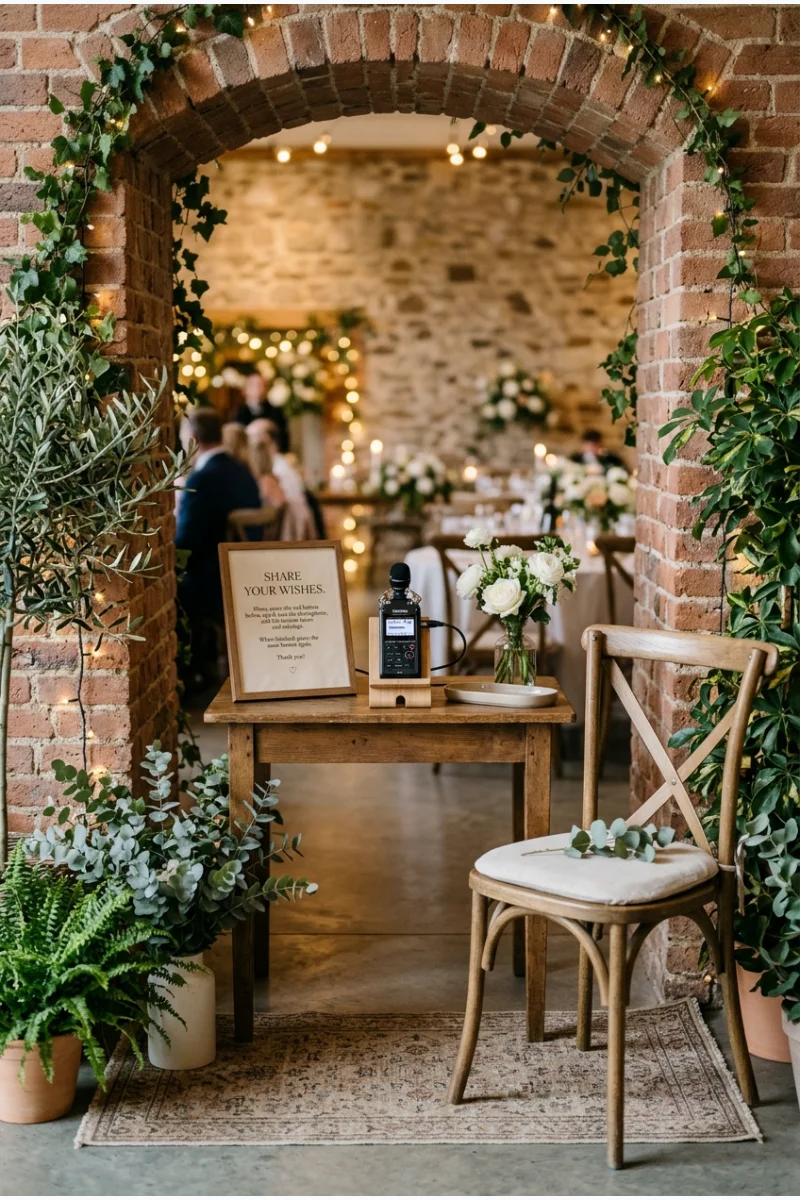
Frame a small recording table with freestanding plants to create a quiet guestbook nook. A standalone audio recorder and empty chair make its purpose clear.
Keep the area away from speakers and test the equipment before guests arrive. Use a short instruction card rather than decorating the table until it becomes unusable.
79. Curve Flowers around a Sweetheart Table
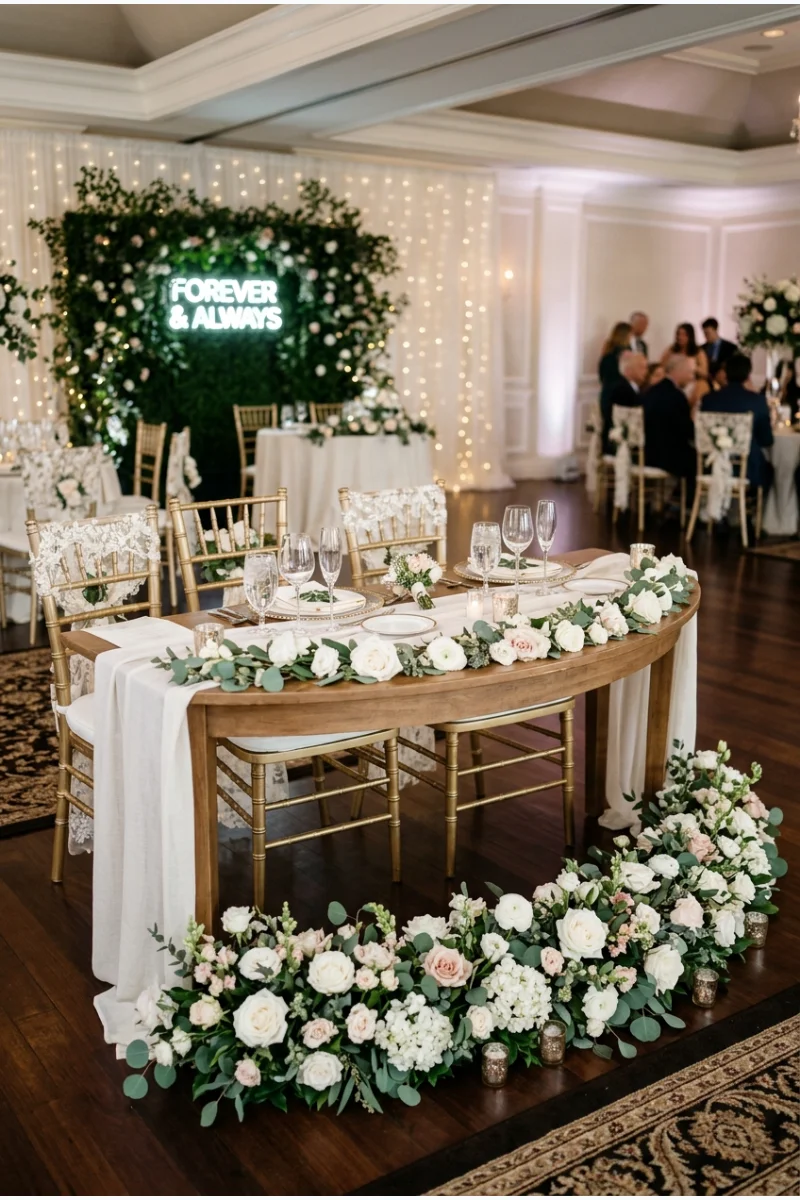
Place a low floral border around the front of a curved sweetheart table. The arrangement gives the couple's seating a distinct outline within the reception.
Leave the rear approach and service space open. Keep flowers below the tabletop so the couple can see and speak with guests.
80. Make a Favor Wall with Individual Niches
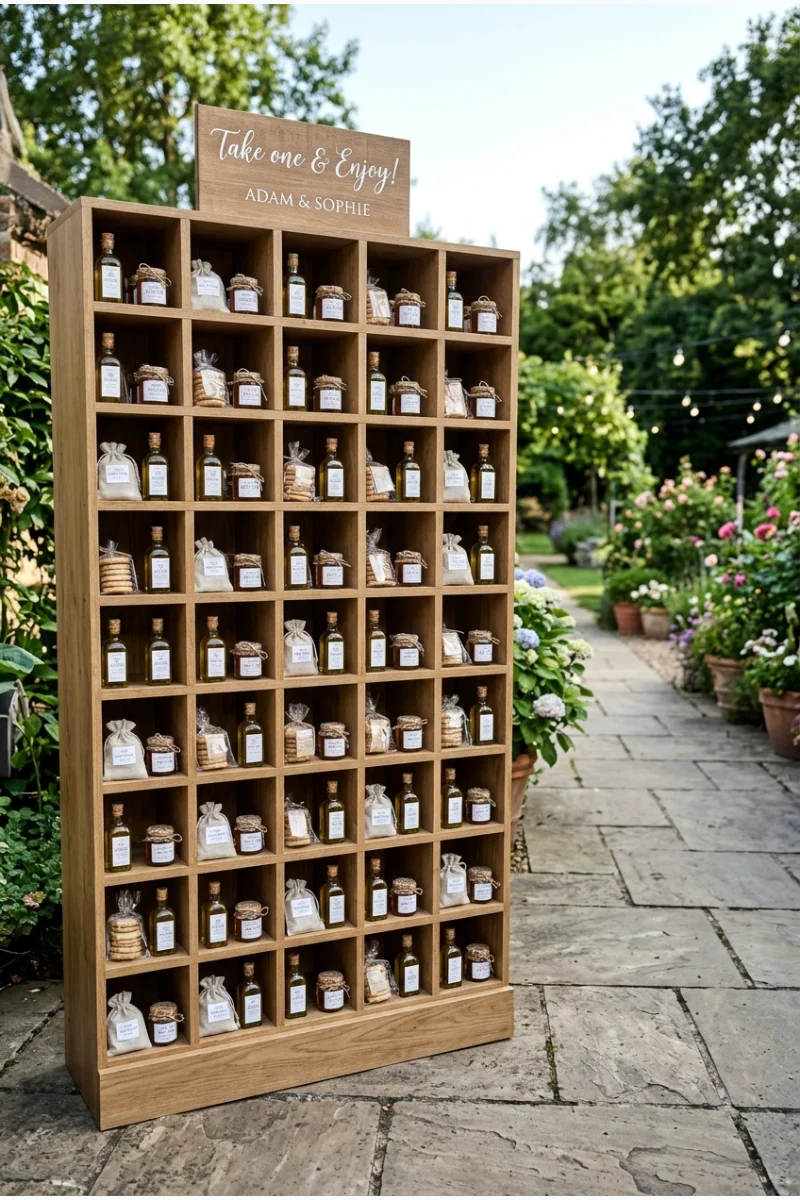
Display favors in a freestanding wall of open cubbies. Repeated compartments give each package a place and make the display readable across the room.
Choose reachable shelf heights and packages that are easy to lift out. Leave the installation near departure without narrowing the exit.
Decorations That Work with the Venue
81. Use LED Candles beneath Chapel Windows
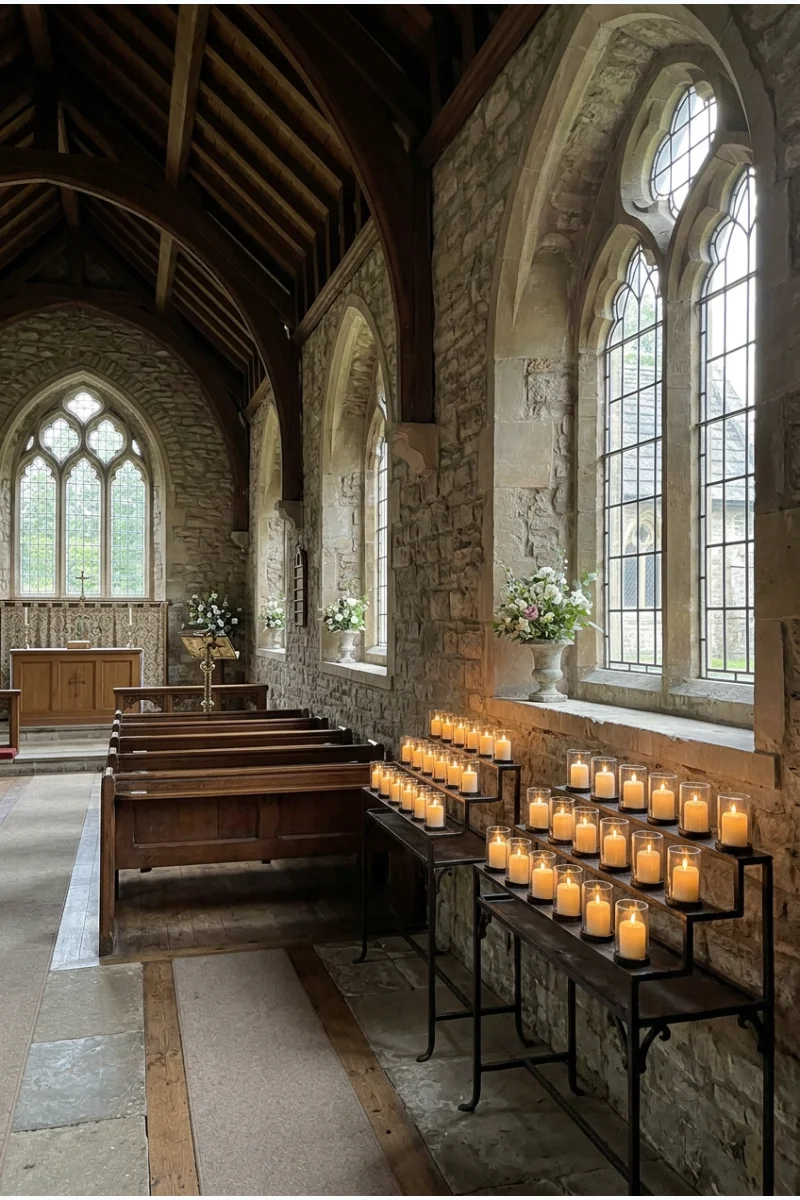
Group enclosed LED candles on approved stands below chapel windows. Their glow highlights the existing architecture without covering the glass.
Coordinate placement with the ceremony venue and keep devotional objects visible. Do not place decorations on surfaces the venue has reserved for worship.
82. Add Floral Bookends to Bookstore Shelves
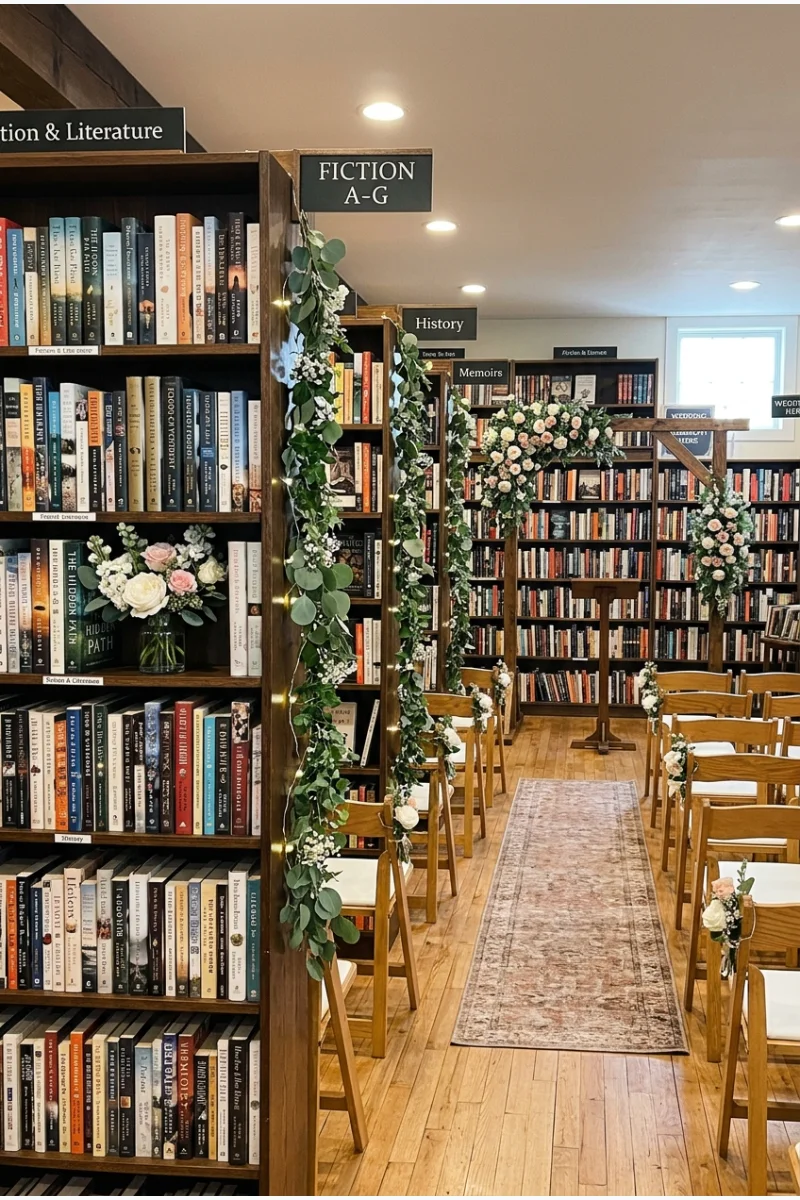
At a bookstore wedding, place compact floral containers in approved gaps at the ends of shelf displays. The books remain the setting's defining feature.
Use sealed containers and protect shelves from moisture. Work with staff so decor does not interfere with stock, browsing routes, or emergency access.
83. Train Flowers up Greenhouse Posts
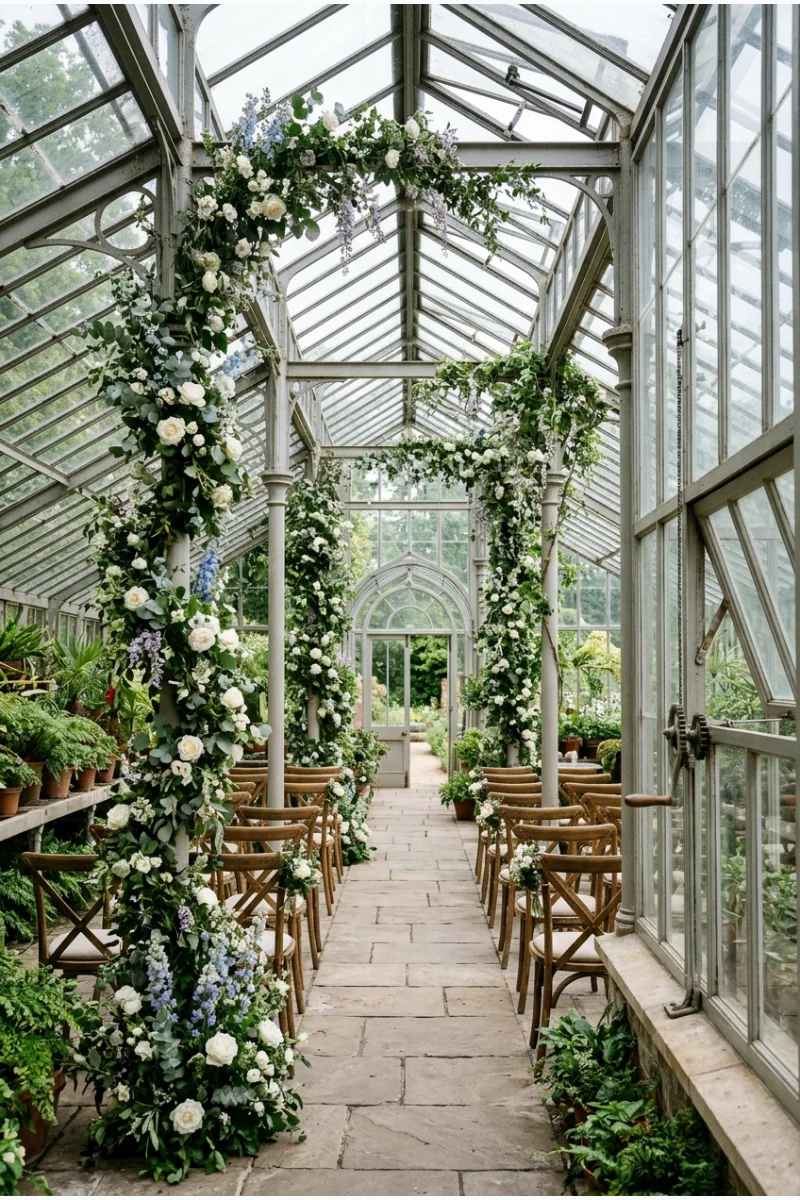
Follow selected greenhouse posts with climbing floral arrangements, leaving the glass panels exposed. The vertical decoration connects the reception to the structure around it.
Have the venue approve every attachment. Keep flowers and mechanics clear of ventilation controls, doors, and any plant-care equipment.
84. Fill Industrial Window Ledges with Floral Troughs
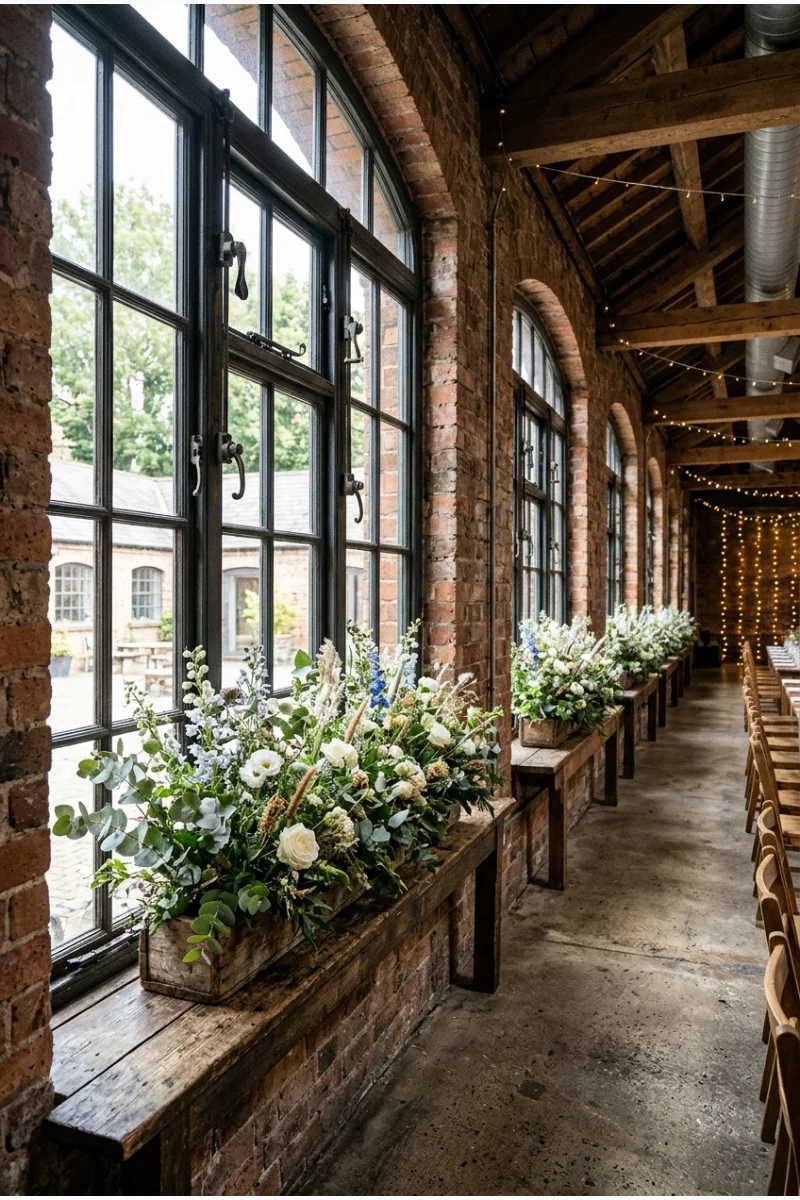
Place long, low floral troughs along selected deep window ledges in an industrial venue. The flowers emphasize the window rhythm without covering the glazing.
Use protected watertight containers and confirm the ledges can support them. Leave window controls and required access clear.
85. Trace Restaurant Banquettes with Greenery
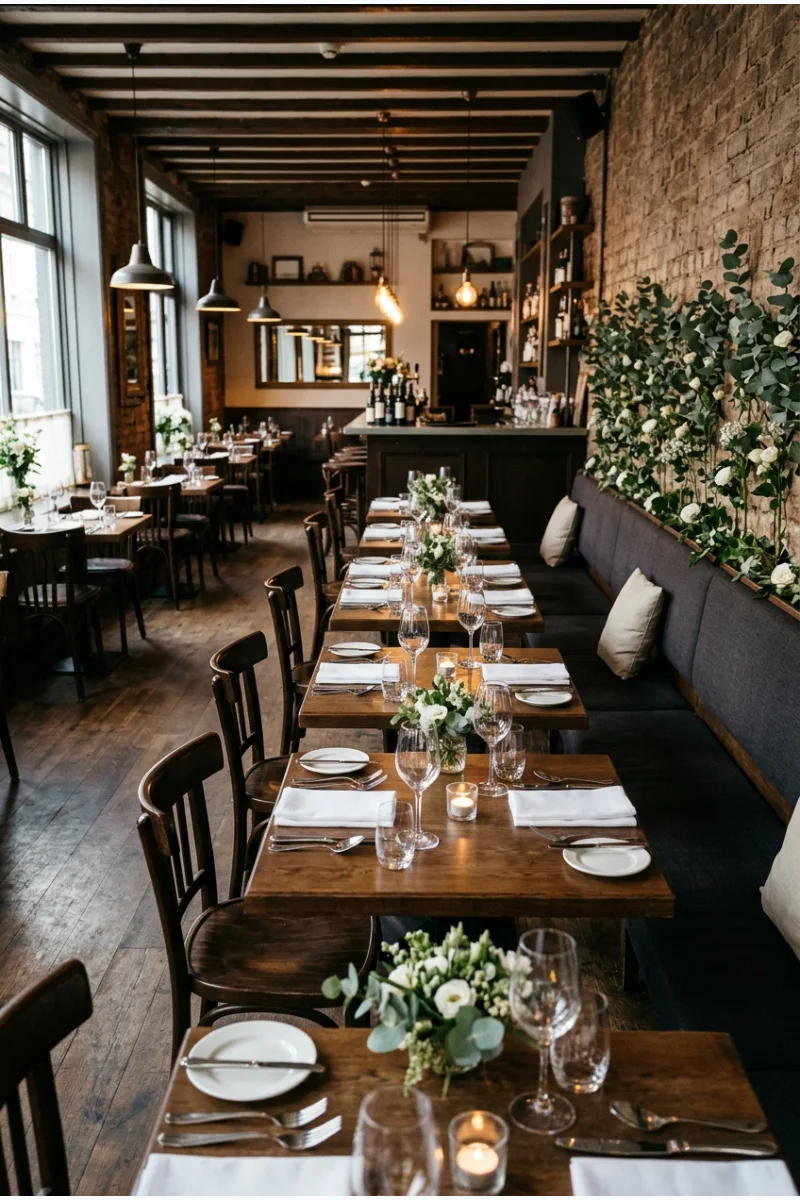
Attach a narrow greenery line behind selected restaurant banquettes. It connects the dining zone to the wedding without replacing the restaurant's furniture.
Ask the venue which surfaces can be dressed and keep leaves away from food and seat backs. Preserve access for staff clearing the tables.
86. Make a Mirrored Ballroom Dance Floor
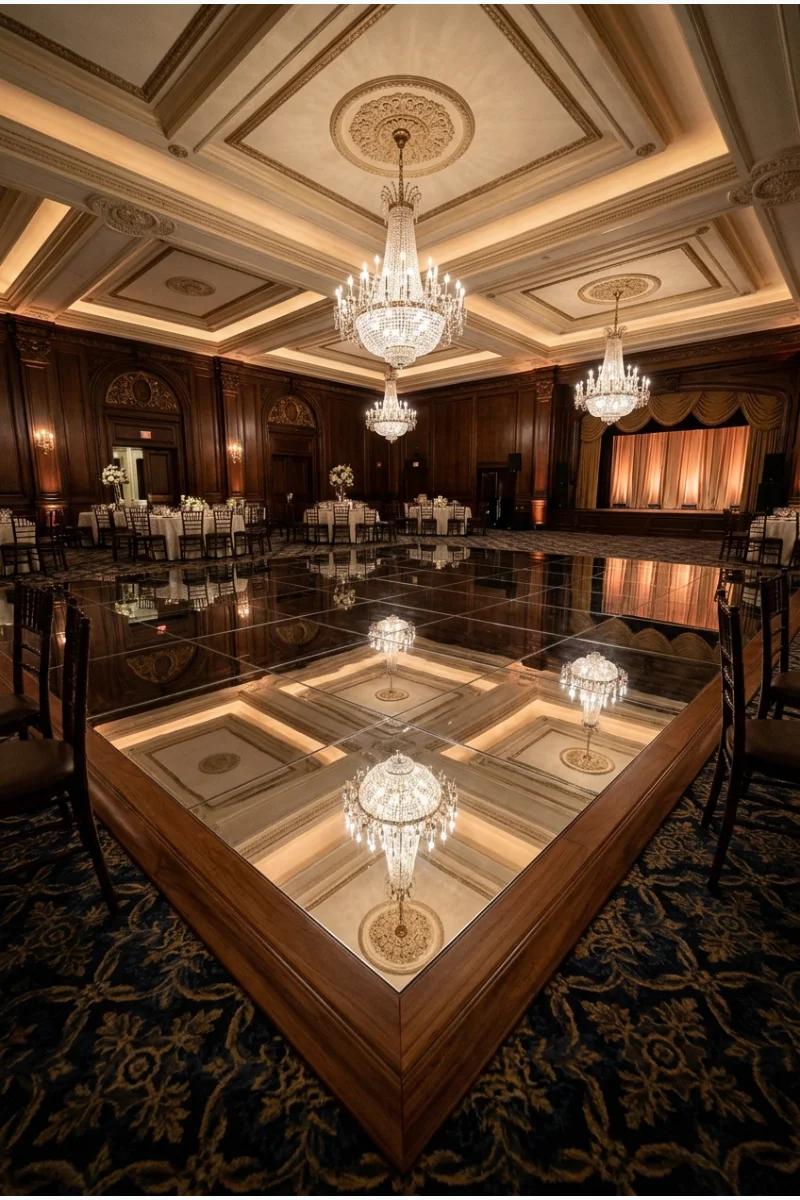
Use a professionally installed mirrored dance floor to reflect the ballroom's ceiling and light fixtures. The floor itself becomes the decorative surface.
Choose an event flooring system intended for dancing and confirm its installation requirements. Coordinate lighting to manage glare and keep transitions clearly visible.
87. Dress the Rim of a Courtyard Fountain
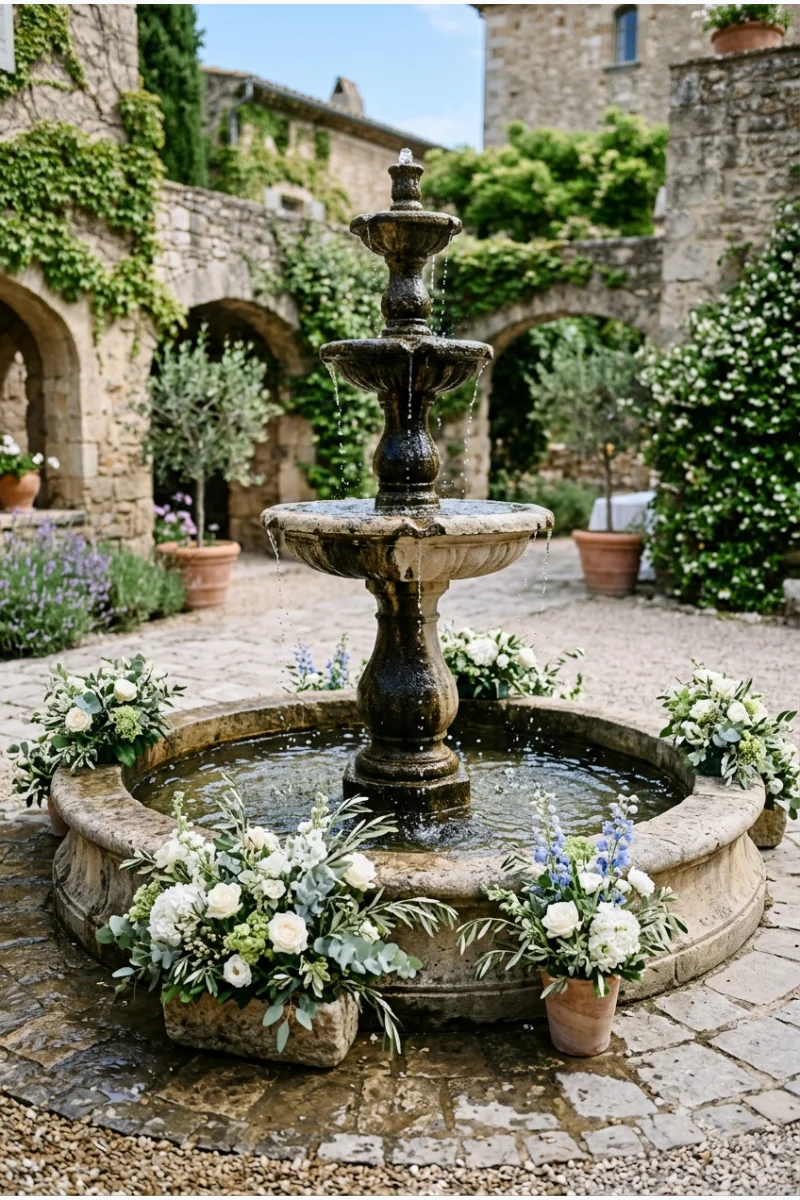
Place low floral arrangements around selected portions of a courtyard fountain rim. The existing water feature remains visible at the center.
Keep containers stable and separate from the fountain's operating equipment. Leave maintenance access clear and do not add loose materials without permission.
88. Tie Dried-Flower Sheaves beside Barn Doors
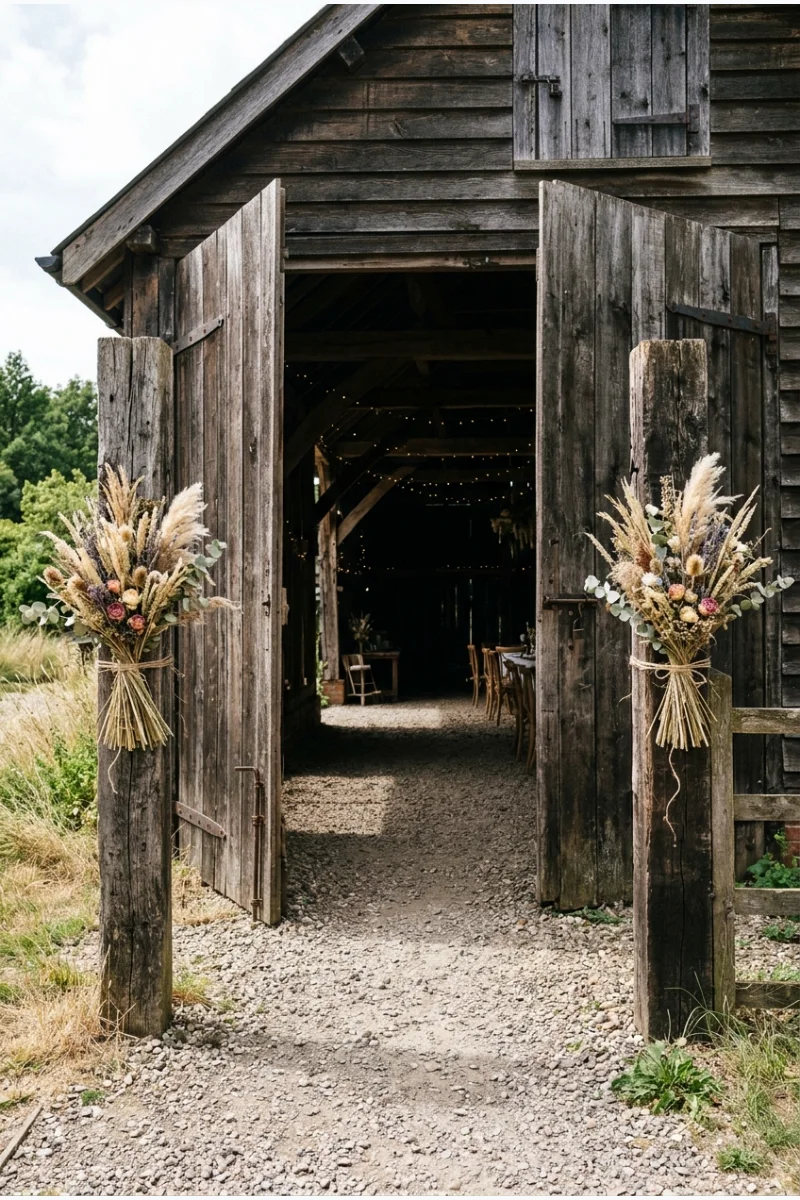
At an actual barn venue, secure dried-flower sheaves beside the open entrance doors. Their gathered forms acknowledge the setting without turning every table into a rustic display.
Keep the doors fully usable and dried material away from heat. Use this treatment only where the venue and your chosen design support it.
89. Apply Botanical Film to Terrace Windscreens
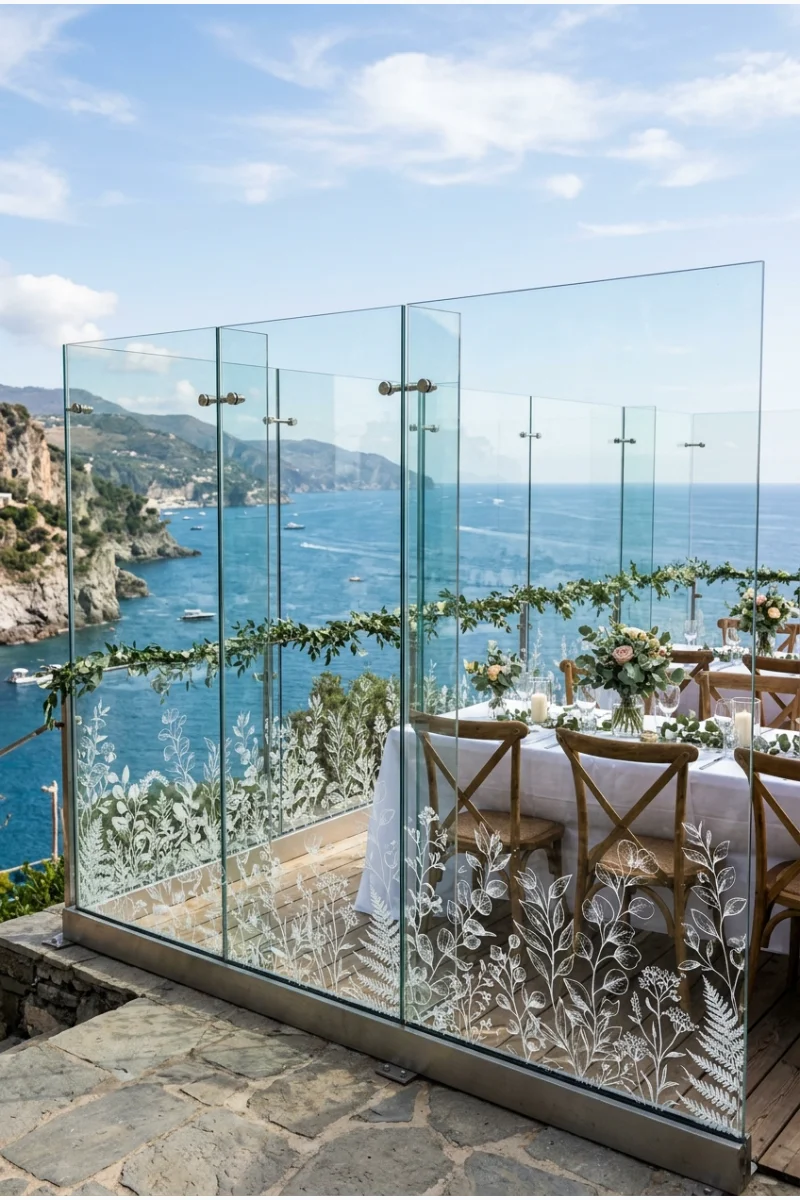
Use removable botanical window film along the lower portion of approved terrace windscreens. The graphic border dresses the edge while preserving the view above.
Have the venue approve the film and its removal method. Keep the treatment away from required safety markings and door hardware.
90. Define a Rooftop Lounge with Shade Sails
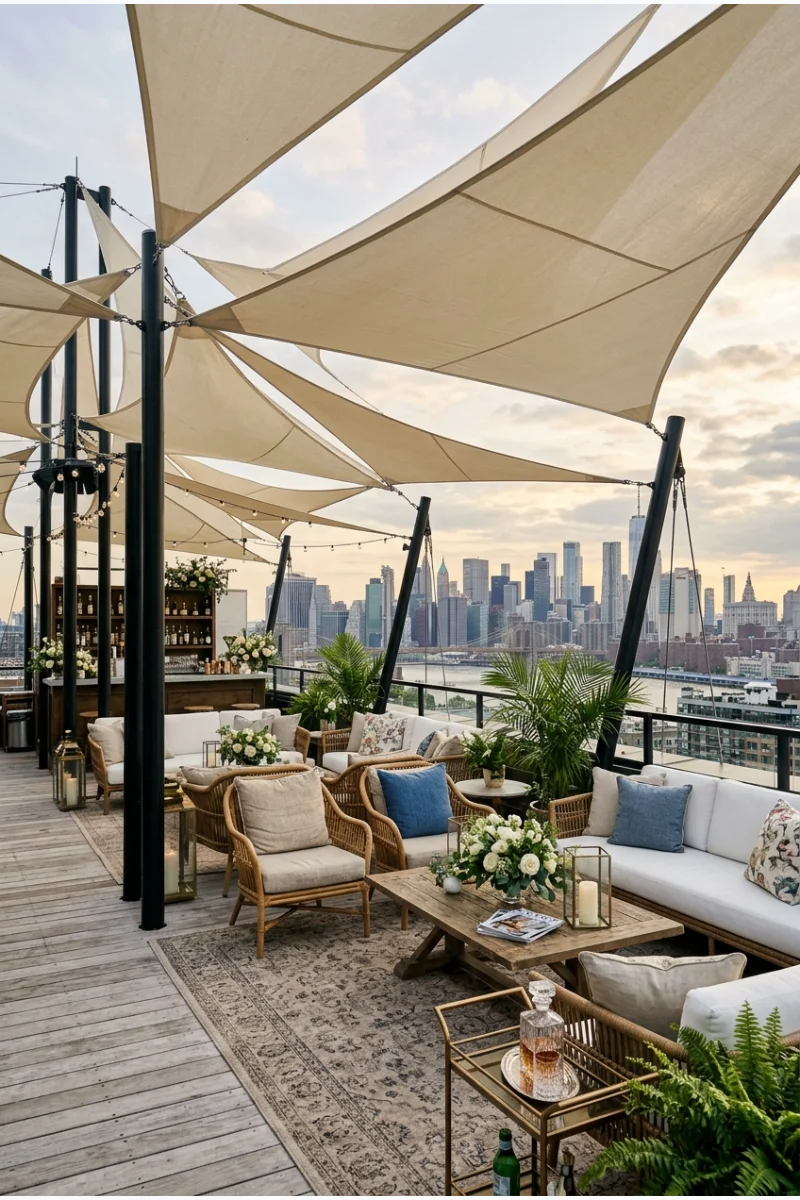
Use professionally installed shade sails above a rooftop reception lounge. Their stretched triangular forms give the seating zone a visible overhead boundary.
Have the venue and supplier assess wind conditions, anchors, and operating limits. Keep skyline views open where guests will sit.
Personal Displays and Finishing Touches
91. Print the Seating Chart on a Fabric Banner
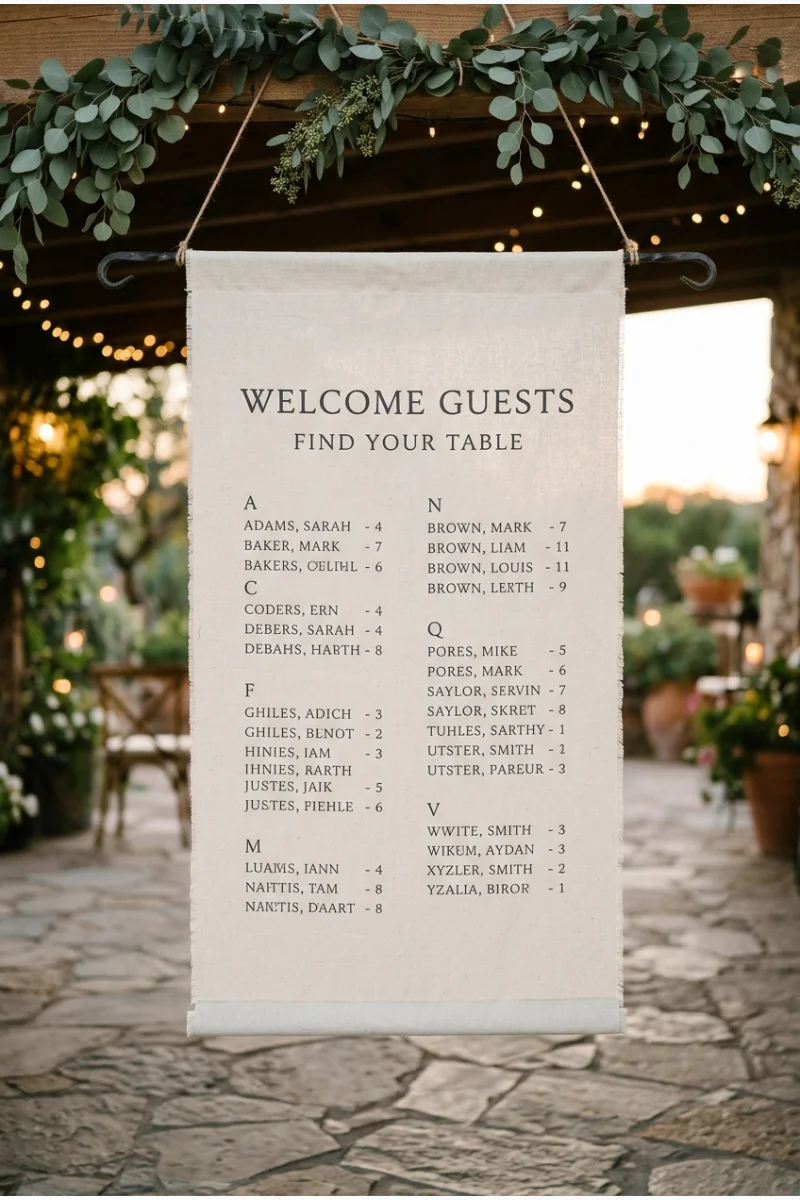
Display table assignments on a hanging fabric banner with a weighted lower edge. The textile softens a practical sign without needing an elaborate surrounding installation.
Keep the lettering large and the layout simple. Position the banner where guests can pause without blocking the reception entrance.
92. Suspend Escort Cards from Ribbon Rows
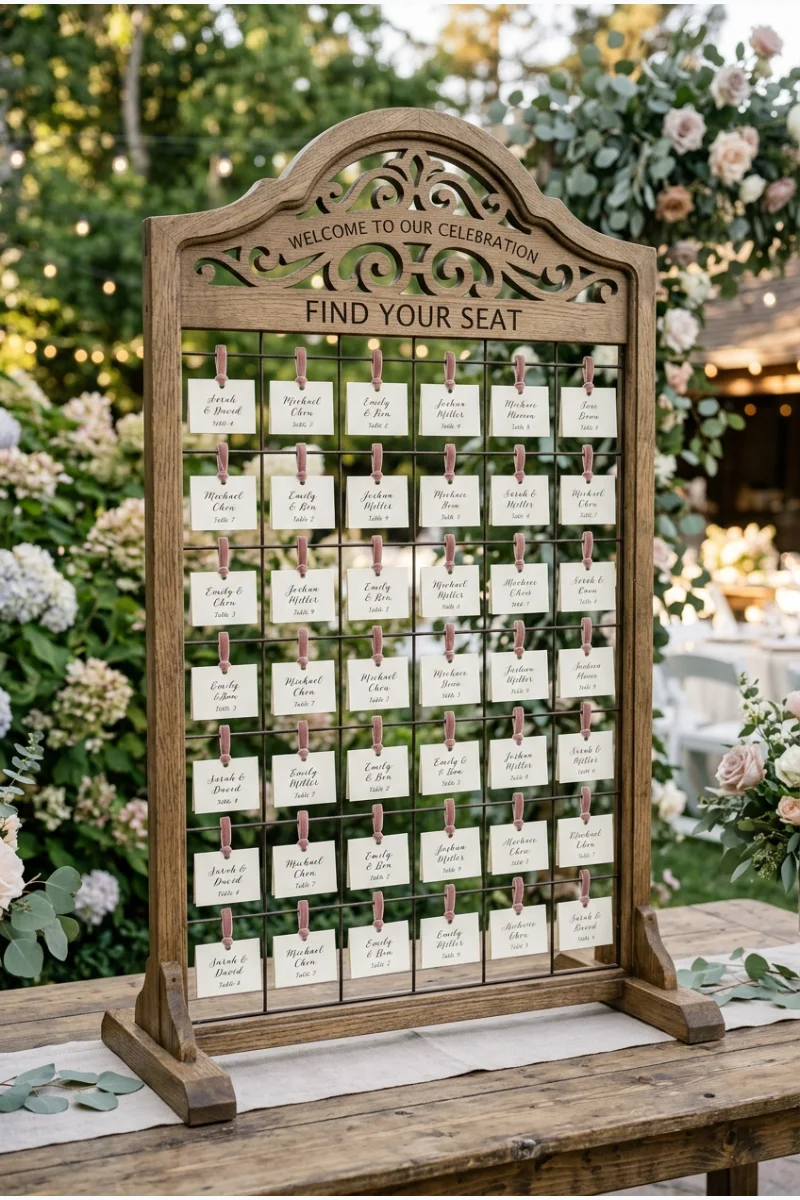
Clip individual escort cards to short ribbons arranged in orderly rows on a freestanding frame. The repeated cards create a decorative grid guests can interact with.
Organize names clearly and keep cards within easy reach. Use clips that release without pulling on neighboring cards or the frame.
93. Use a Sculptural Ceramic Card Box
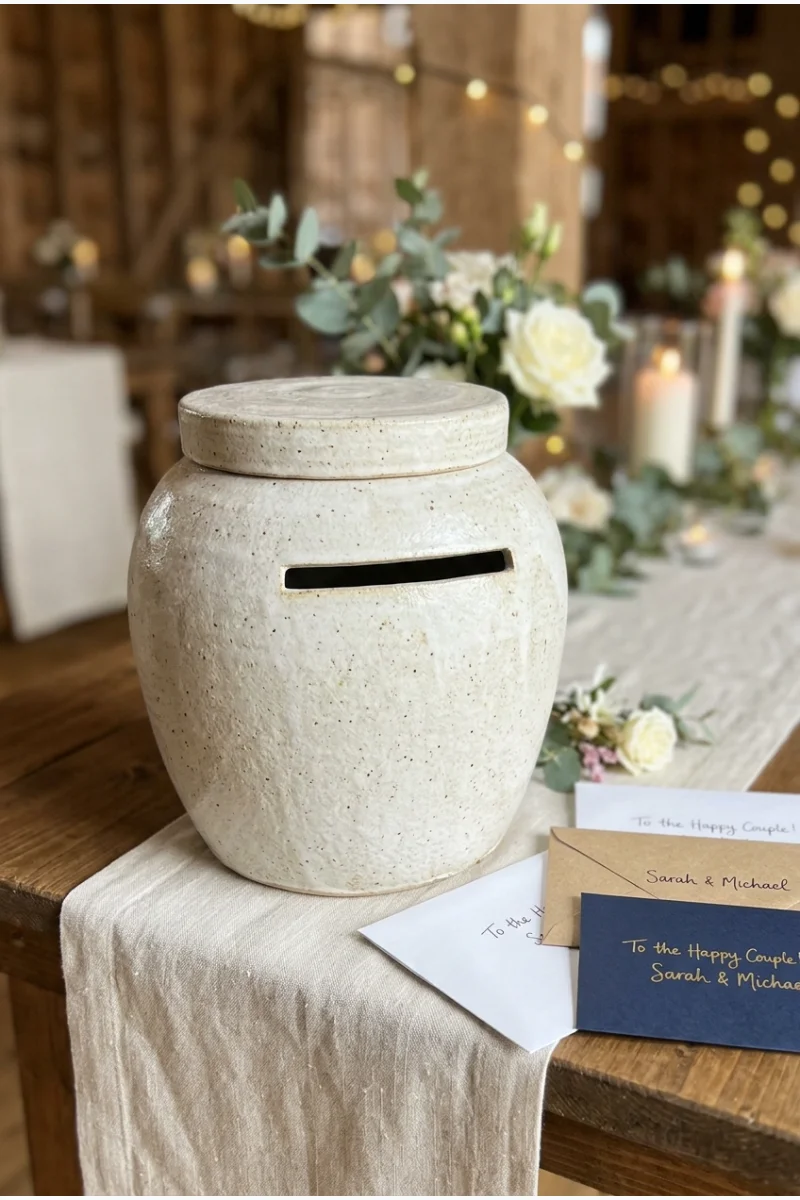
Choose a ceramic card container with a simple slot and a removable secured lid. Its shape can make the gift table feel finished without extra signage.
Confirm that envelopes fit and assign someone to monitor the table. Place the container on a stable surface away from busy drink service.
94. Display Petal Cones on a Tiered Stand
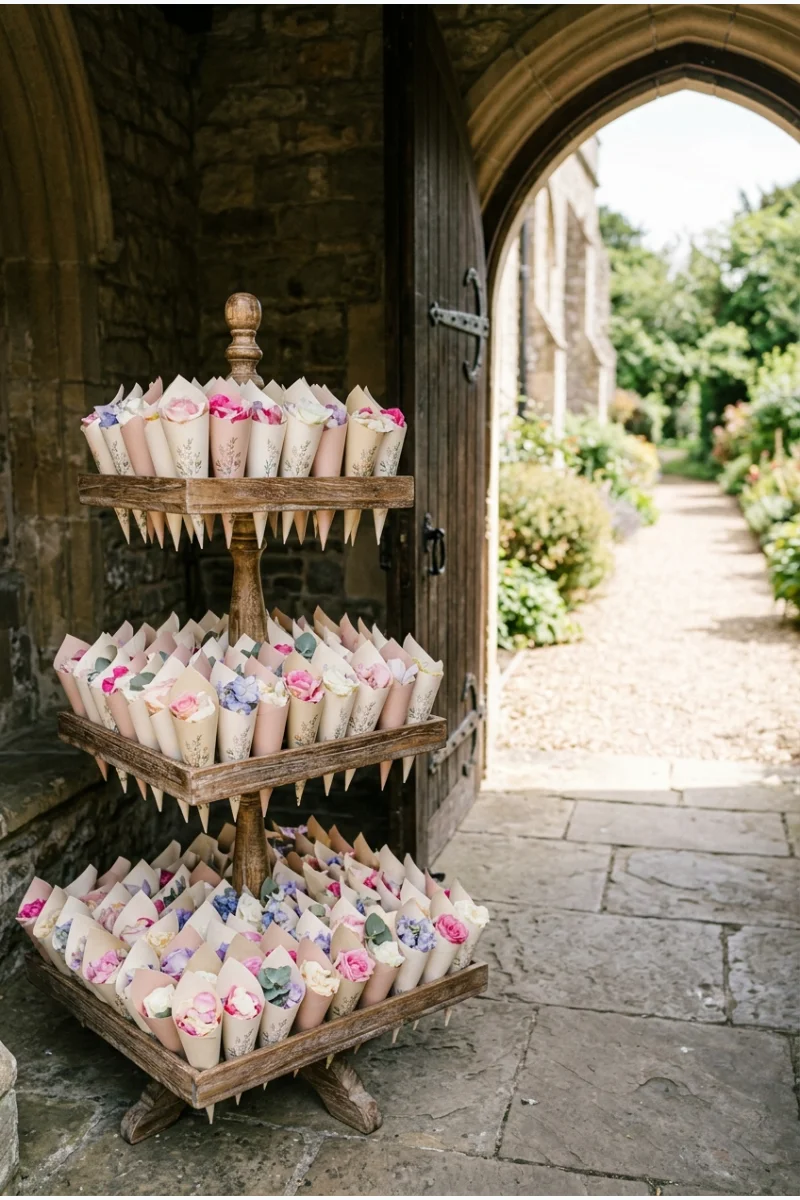
Arrange filled paper petal cones in a tiered holder near the ceremony exit. Their repeated pointed shapes create a decorative display before the recessional.
Use only materials and locations approved by the venue. Keep the stand outside the doorway and arrange cleanup before the celebration begins.
95. Create a Meaningful Heirloom Memory Vignette
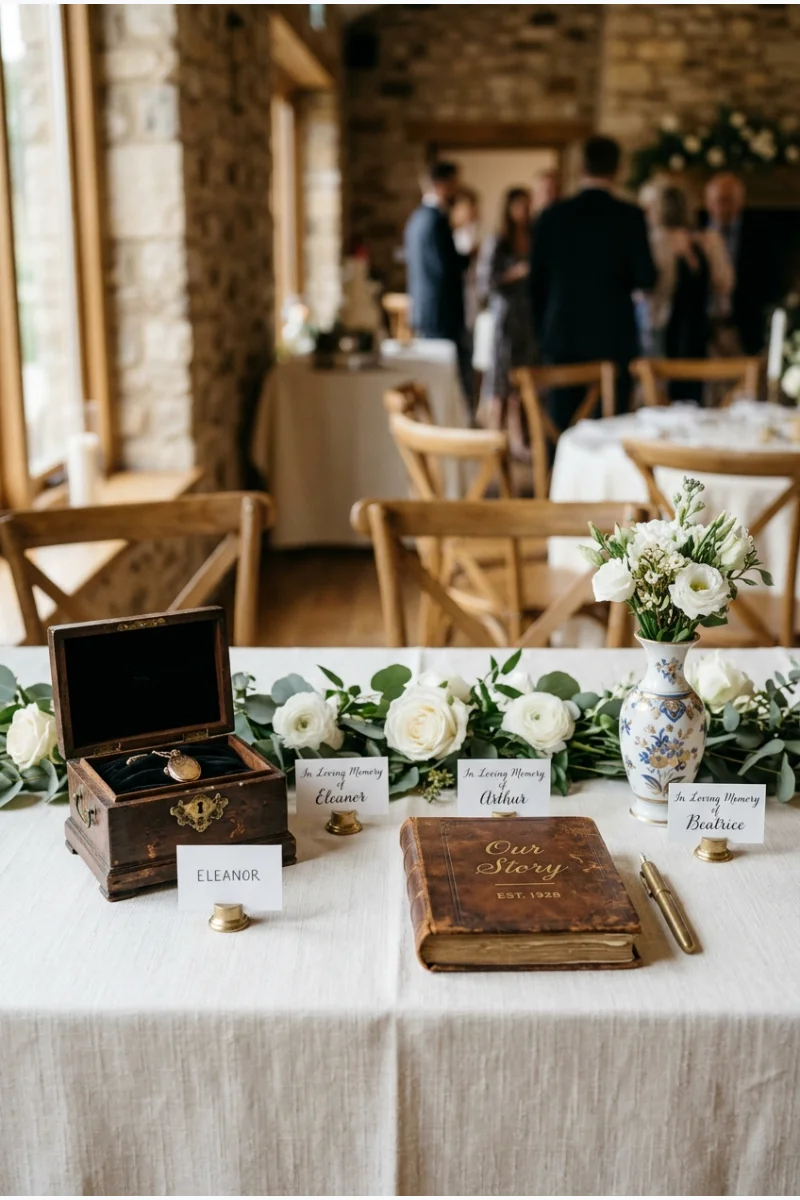
Display a few meaningful objects with small name cards on a dedicated remembrance table. Jewelry boxes, books, or a family vase can carry the tribute without photographs.
Choose pieces you are comfortable displaying and keep valuable originals supervised. Leave enough space between objects for each connection to be understood.
96. Decorate a Children's Table with a Drawing Runner
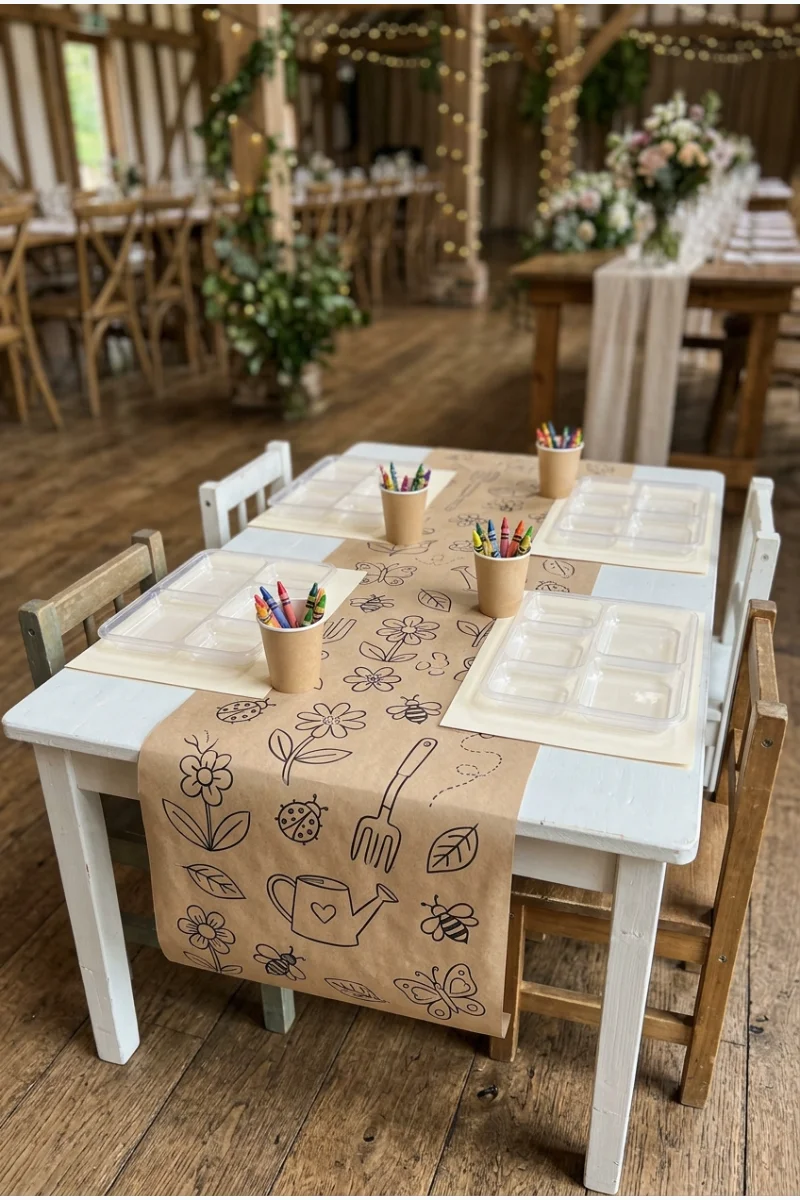
Cover the center of a children's reception table with a paper drawing runner and a few simple garden outlines. Crayons become part of the prepared place settings.
Choose materials suited to the children's ages and keep food space separate. Coordinate supervision and placement with the families rather than treating the table as childcare.
97. Install a Floral Swing for Photos
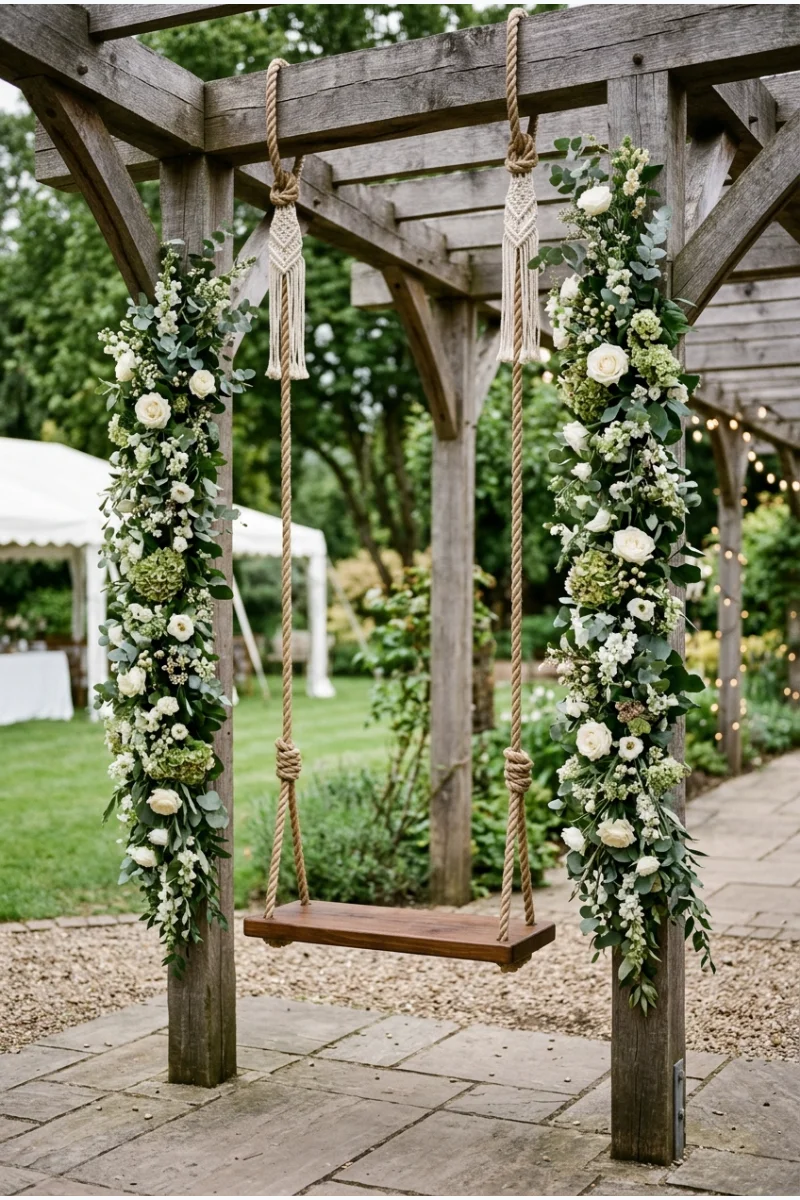
Use a professionally installed swing with flowers on its side supports as a reception photo feature. Keep the seat and suspension clearly visible.
Ask the supplier about load limits, supervision, and suitable use. Leave clearance around the swing and provide regular seating nearby.
98. Edge the Band Stage with Low Flowers
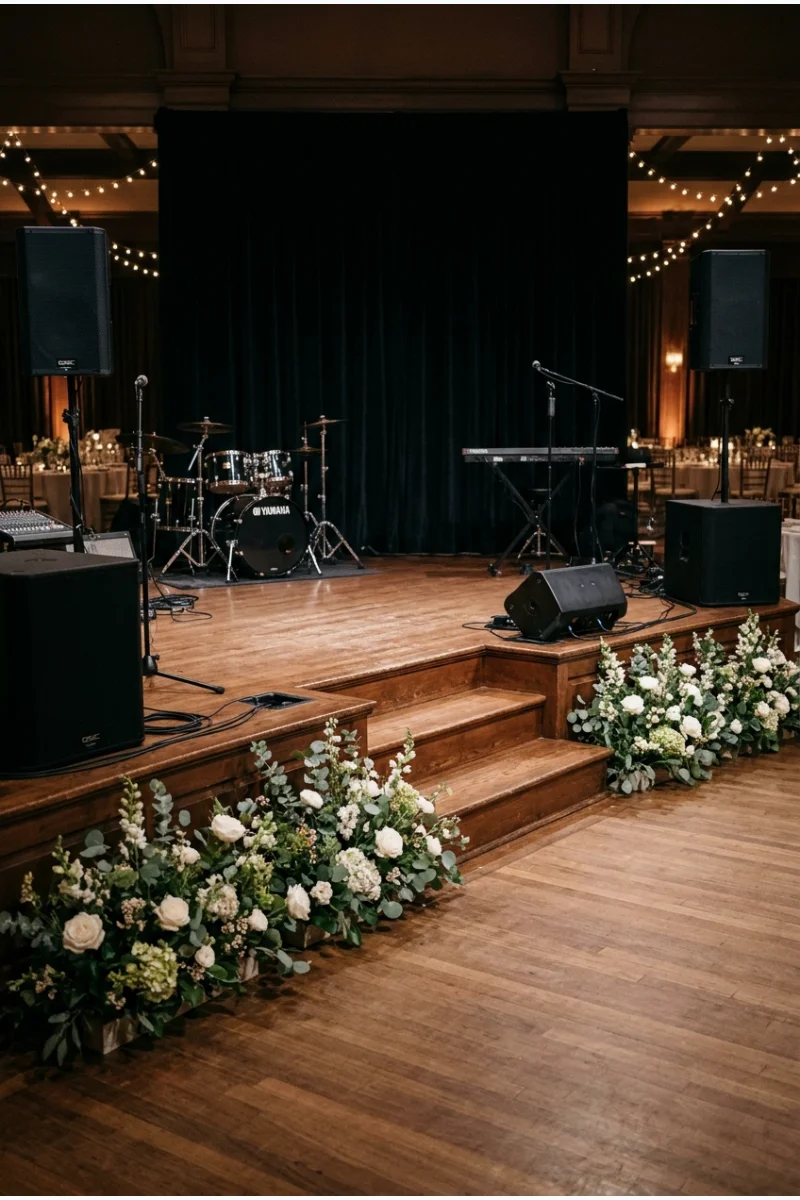
Run a low floral arrangement along selected sections of the band stage front. It connects the performance area to the wedding decor.
Leave steps, speaker clearance, cables, and performer access unobstructed. Ask the production team to approve the placement before flowers arrive.
99. Make a Giant Chess Set a Decorative Feature
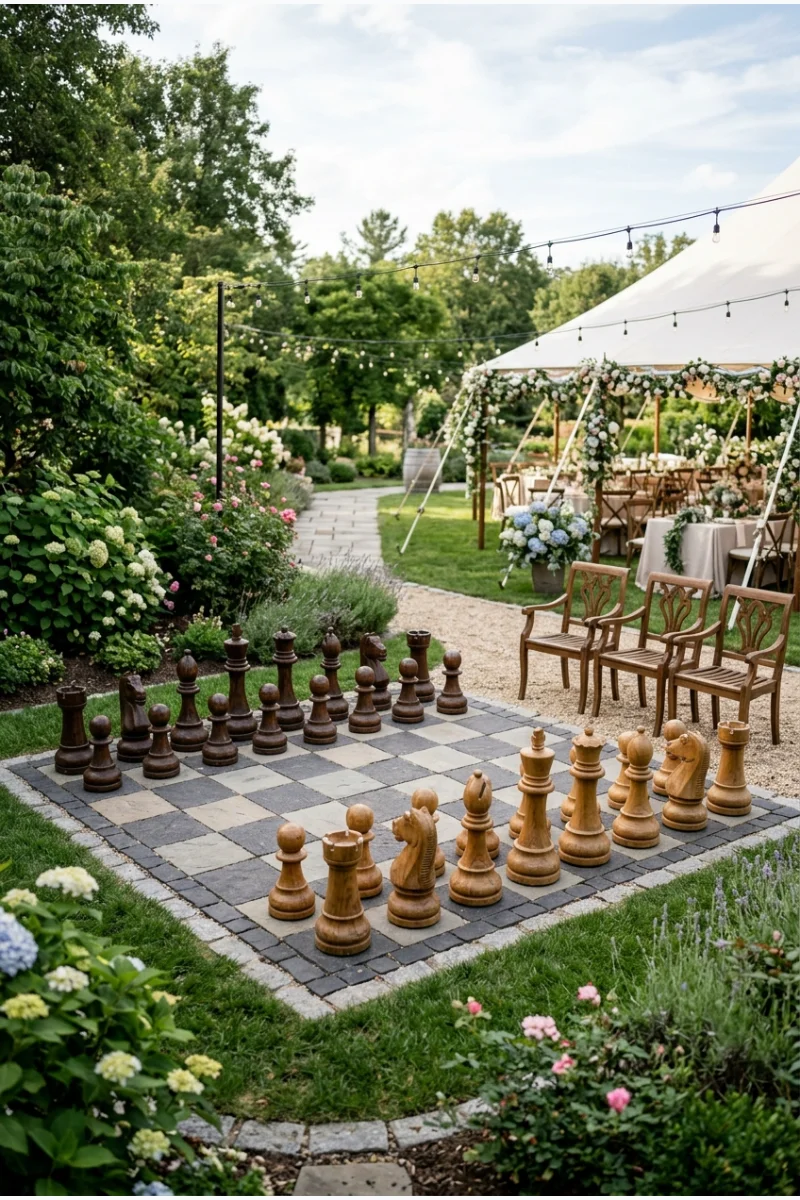
Arrange a large outdoor chess set on its own board beside the reception. The repeated sculptural pieces give a garden gathering an identifiable activity area.
Leave room around the board and keep it separate from service routes. Provide nearby seating so guests can watch without standing in the path.
100. Illustrate the Venue as a Welcome Map
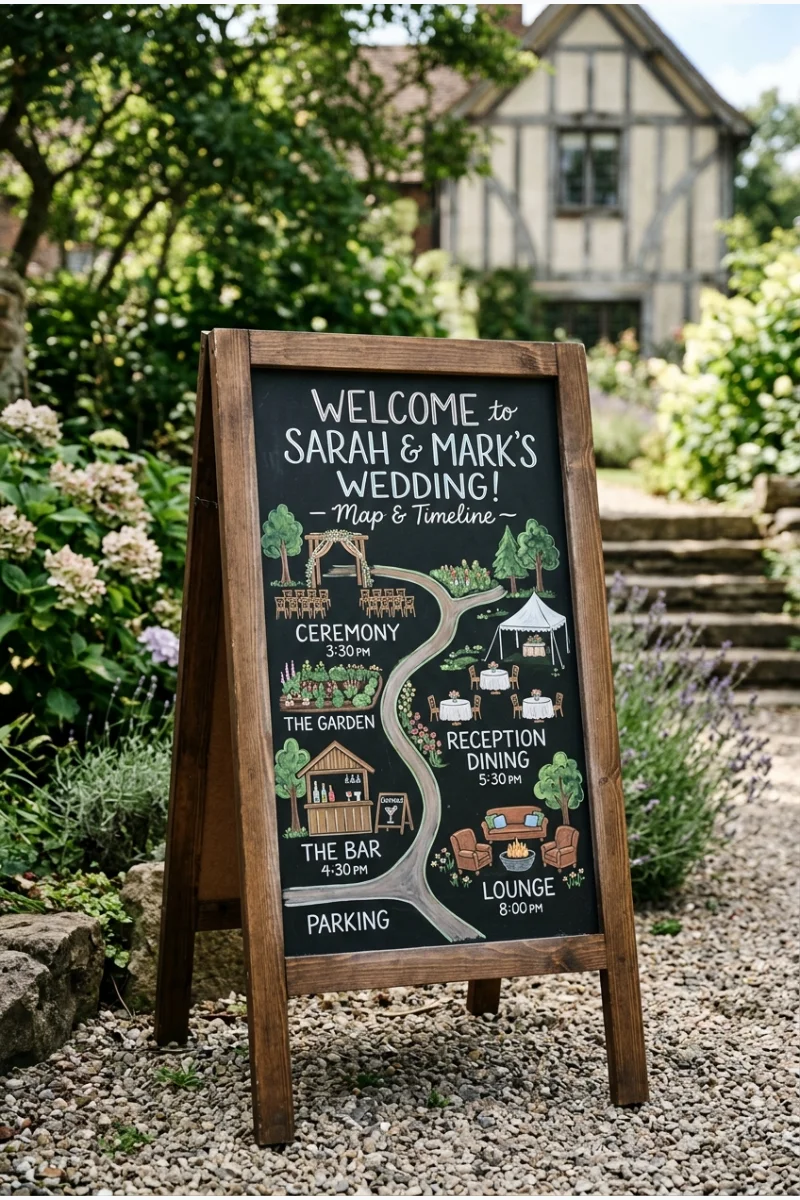
Commission a simple illustrated map showing the venue's ceremony, dining, bar, and lounge areas. The drawing turns wayfinding into a personal decorative feature.
Use recognizable building and garden shapes with short labels. Position it where arriving guests can stop to look without holding up the entrance.
Which venue decorations should we prioritize with a limited budget?
Start with what guests will see repeatedly: the ceremony focal point, dining tables, and the main reception area. Compare complete rental and installation quotes, and use the venue's existing architecture before adding treatments everywhere.
Should we buy or rent our wedding venue decorations?
Compare the full cost of delivery, installation, pickup, cleaning, storage, and disposal. Renting can simplify large installations, while small reusable pieces may make sense to buy. Confirm exactly which services each quote includes.
Can ceremony decorations be moved into the reception?
Often, but plan the move with the supplier before choosing the design. Confirm who will move each piece, whether it fits through the route, and when the reception area will be ready. Fixed or overhead installations may need to stay in place.
This post may contain affiliate links: full affiliate disclosure.