
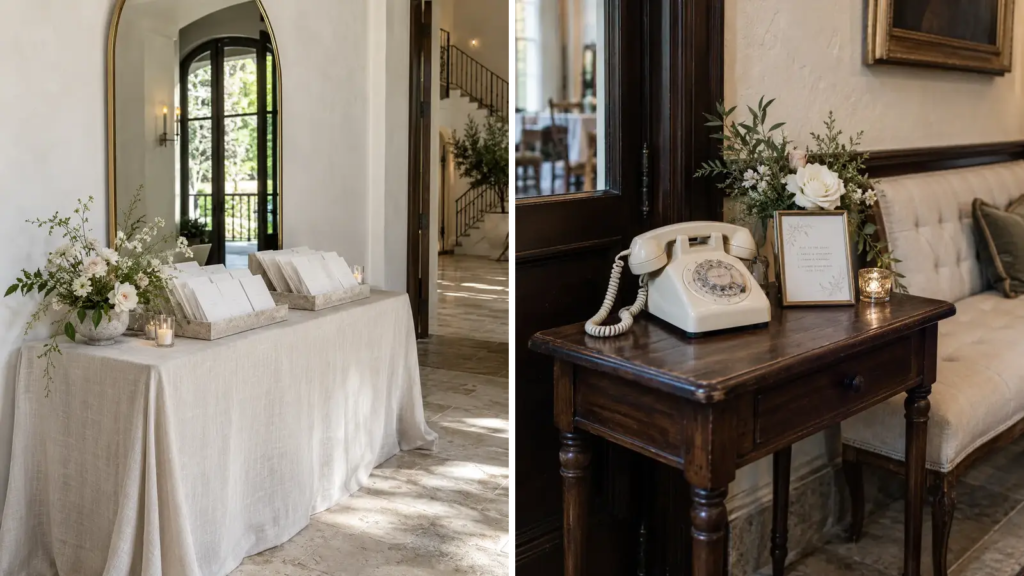
A wedding welcome table has one important job: help guests understand what to do next. The best setups combine a warm first impression with a clear action, whether that means taking a program, finding a seat, leaving a message, or picking up a comfort item.
These 50 ideas are complete, visible setups you can adapt to your venue and guest count. Each one changes the function, physical layout, or keepsake experience, so you can choose a table that earns its space instead of collecting decorative clutter.
Plan quick pickups near the entrance and move longer activities to the side.
Before styling anything, walk the arrival route and notice where people naturally slow down. Keep quick pickups near the entrance, move longer activities to the side, and leave enough open floor space for guests to greet one another without blocking the doorway.
Welcome Signs and Guest-Book Stations
Start with the action you want guests to complete. A clear surface, visible supplies, and one short instruction make these keepsake stations far more inviting than a crowded table with several competing tasks.
1. Mirror Welcome and Program Pickup Table
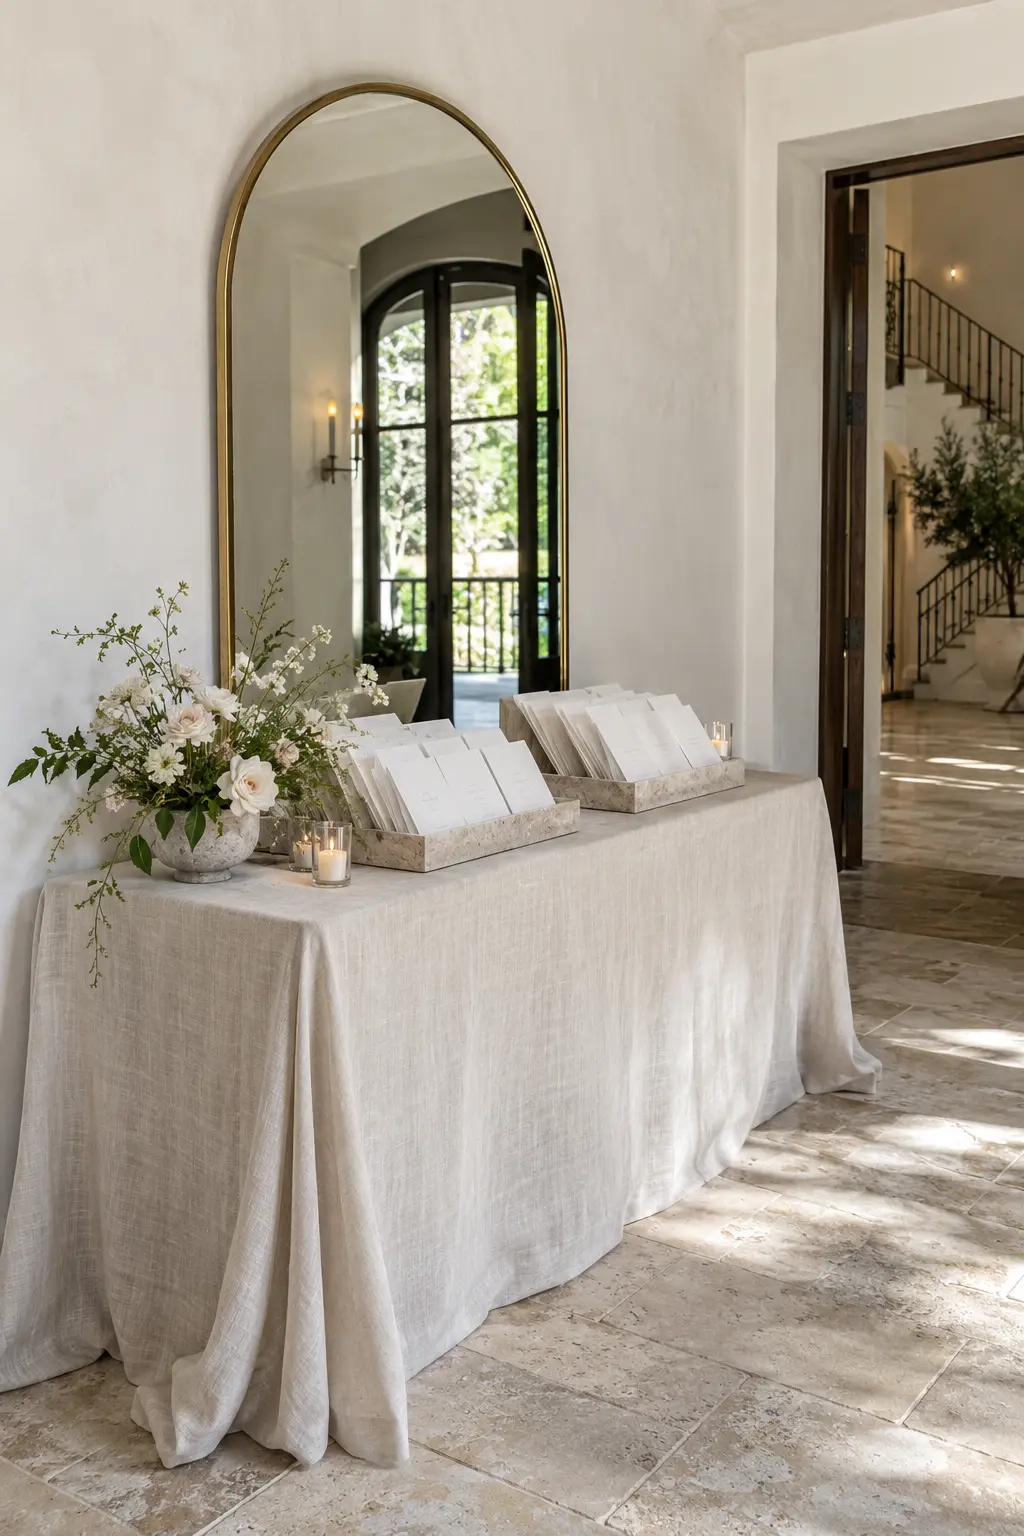
Place an arched mirror behind a narrow console, then arrange programs in two low trays that guests can reach from either side. Keep the mirror message brief and leave the center of the table open, so arriving guests understand the pickup step immediately.
This layout suits a foyer with limited depth because the vertical mirror creates presence without adding another floor display. Count programs into small batches before setup; refilling one tray looks tidier than building a tall stack that can slide.
- Use two shallow program trays for faster pickup.
- Leave the walking lane clear in front of the table.
2. Vintage Telephone Audio Guest Book Table
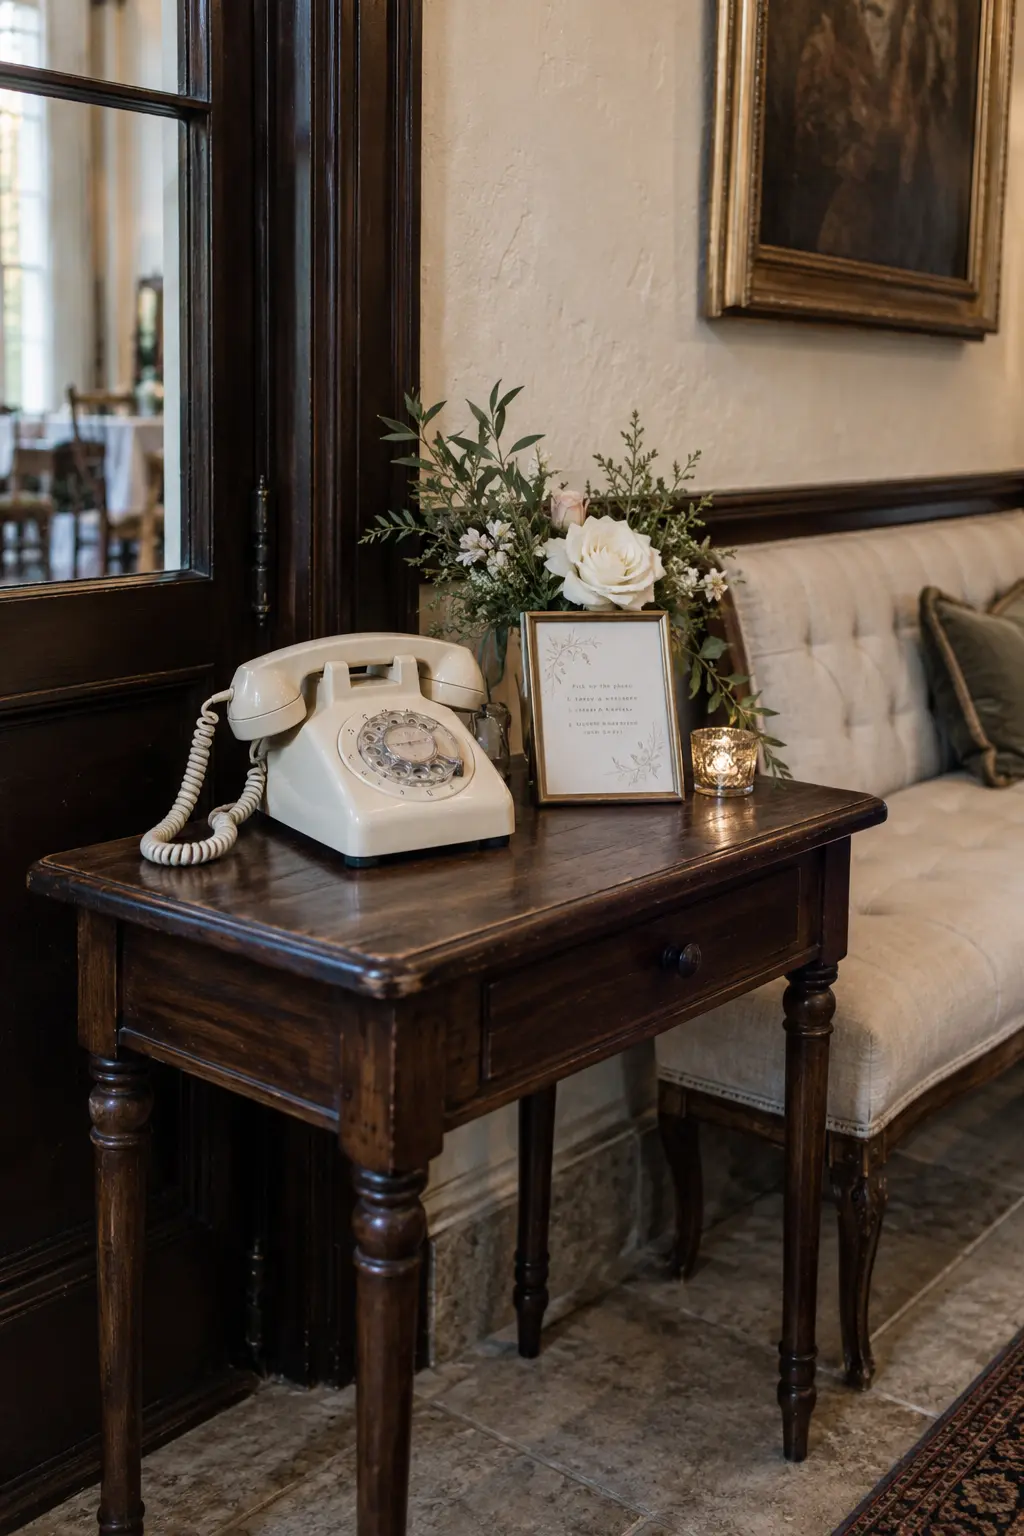
Set a recording telephone on a compact side table in a quieter lobby corner, with a seat nearby and one simple instruction frame. Guests need enough privacy to speak naturally, yet the phone should remain visible from the main arrival path.
Test the power source, recording process, and volume before the doors open. Ask the DJ or coordinator to mention the phone once during cocktail hour, when guests have settled in and are more likely to leave a thoughtful message.
Place an audio guest book away from speakers, coat-check chatter, and the main doorway.
3. Polaroid Guest Book Workstation
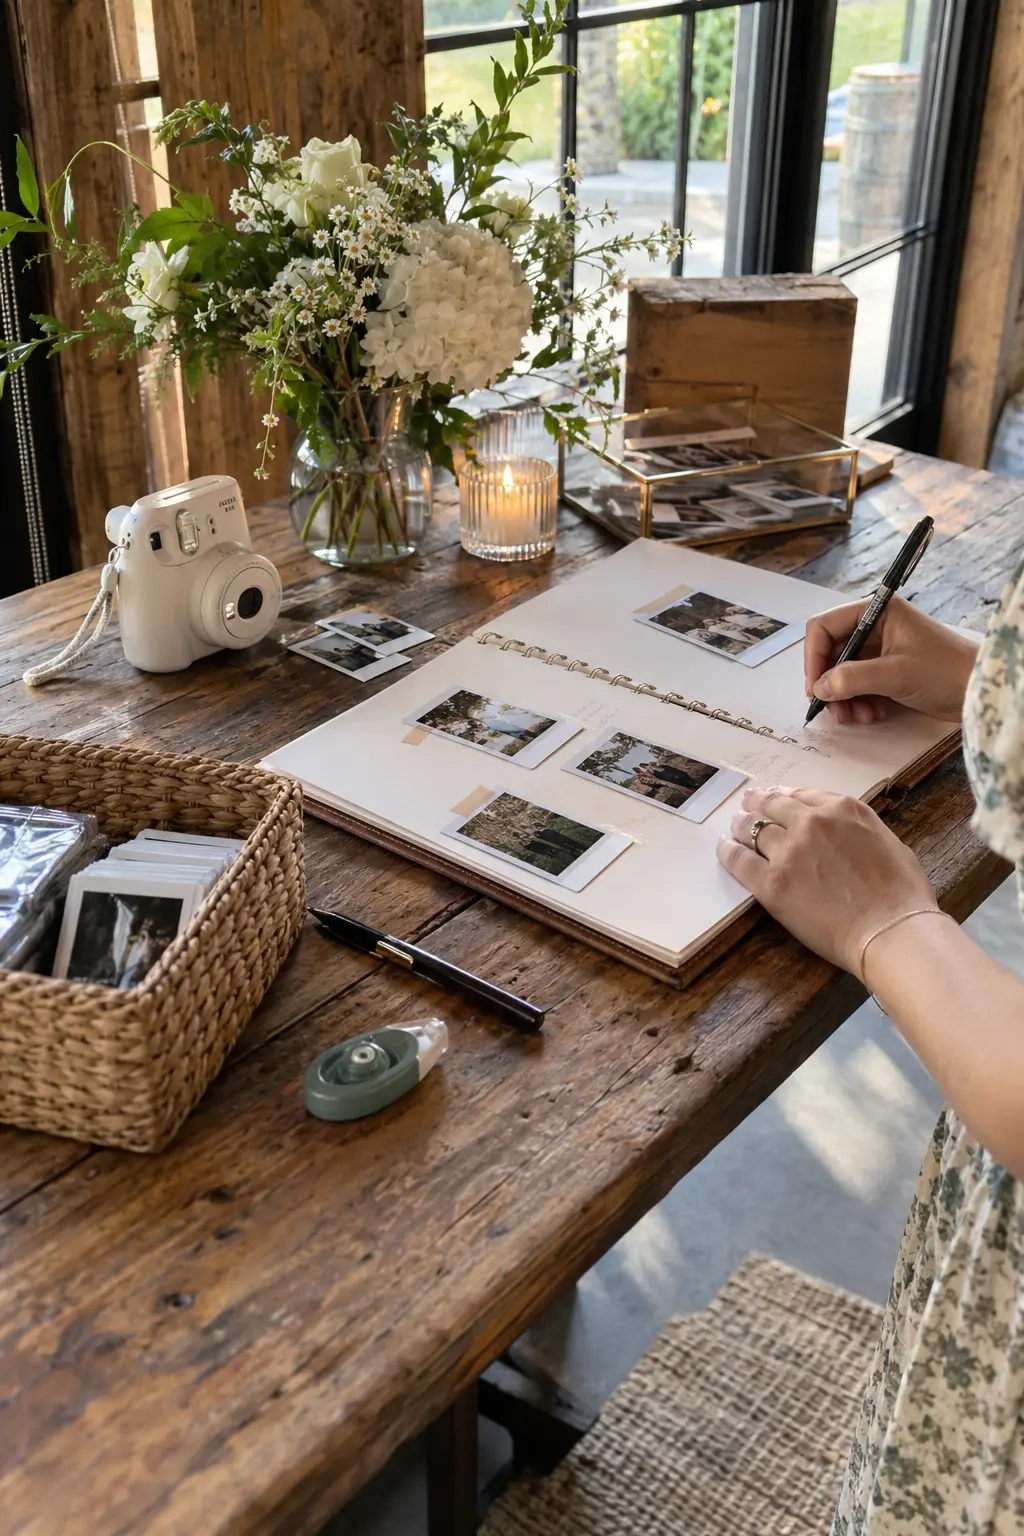
Build a working station with an instant camera, open album, film basket, tape runner, and at least two pens. Separate the photo area from the writing area so one group can take a picture while another attaches a print and adds a note.
Load the first film pack and photograph a sample page before guests arrive. Keep refills with one assigned helper, and provide a small discard envelope for failed prints so the tabletop stays useful throughout the reception.
- Separate the camera, album, and writing supplies.
- Keep refill film with one assigned helper.
4. Postcard Message Writing Desk
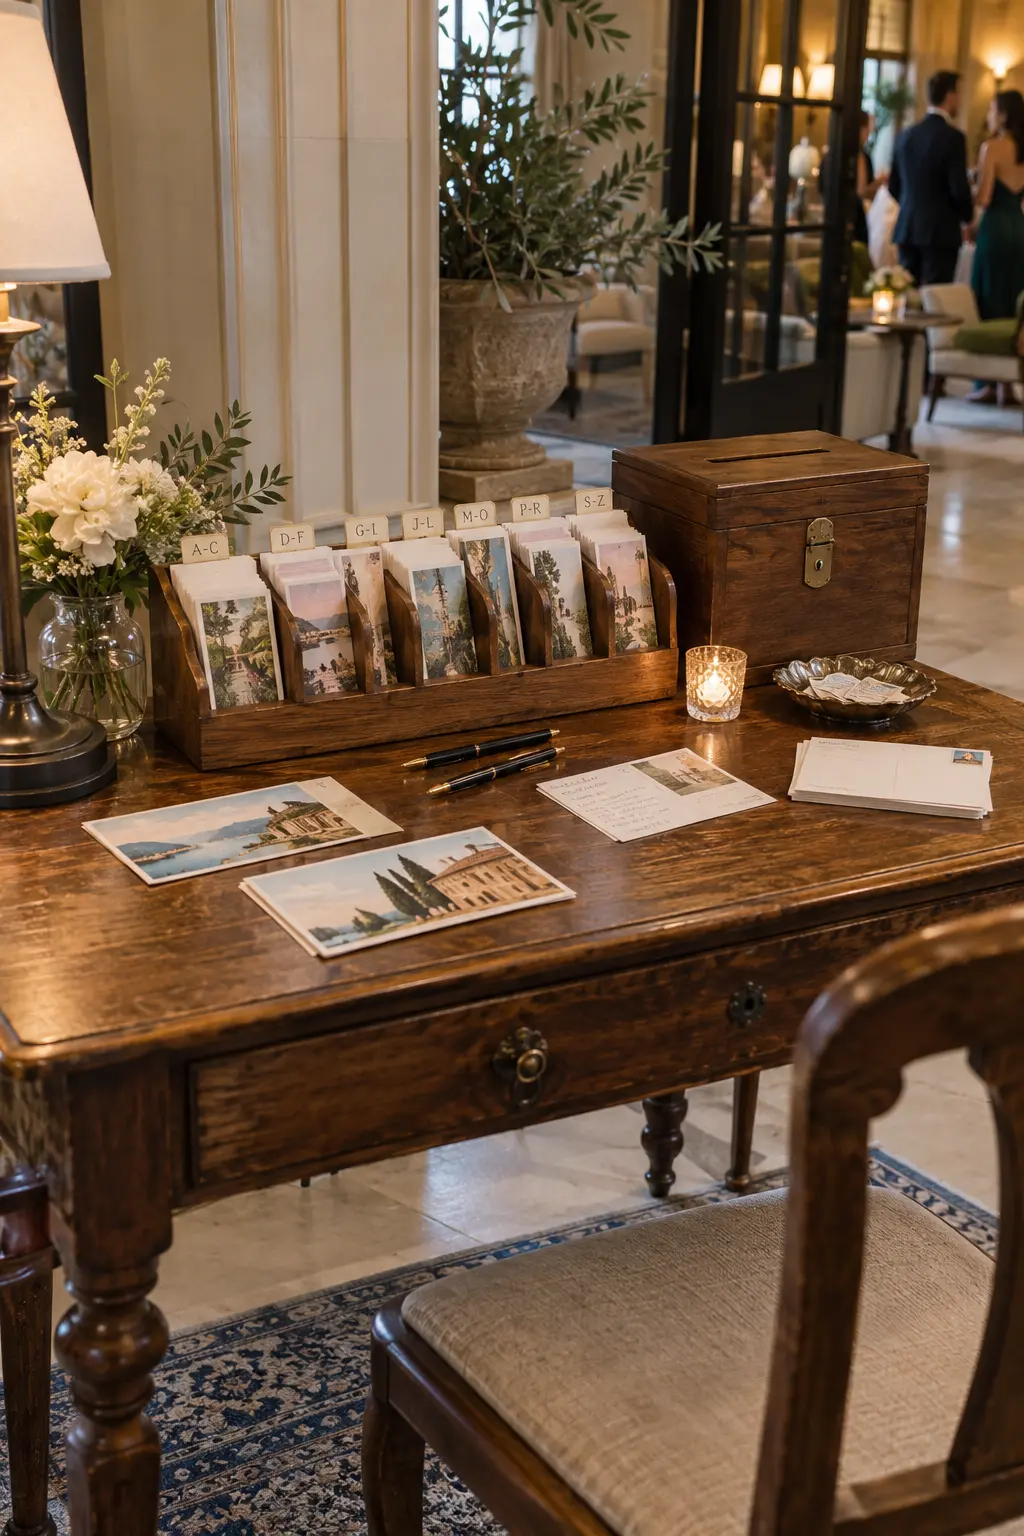
Turn a small writing desk into a postcard station with divided card slots, two comfortable pens, and a closed collection box. Choose postcard prompts such as a favorite memory, marriage advice, or a place the couple should visit together.
A seated desk works well in a hotel lounge or library-style venue where guests may pause before entering dinner. Limit the surface to one activity; a clear writing area matters more than extra flowers or framed photos.
5. Anniversary Envelope Time-Capsule Table
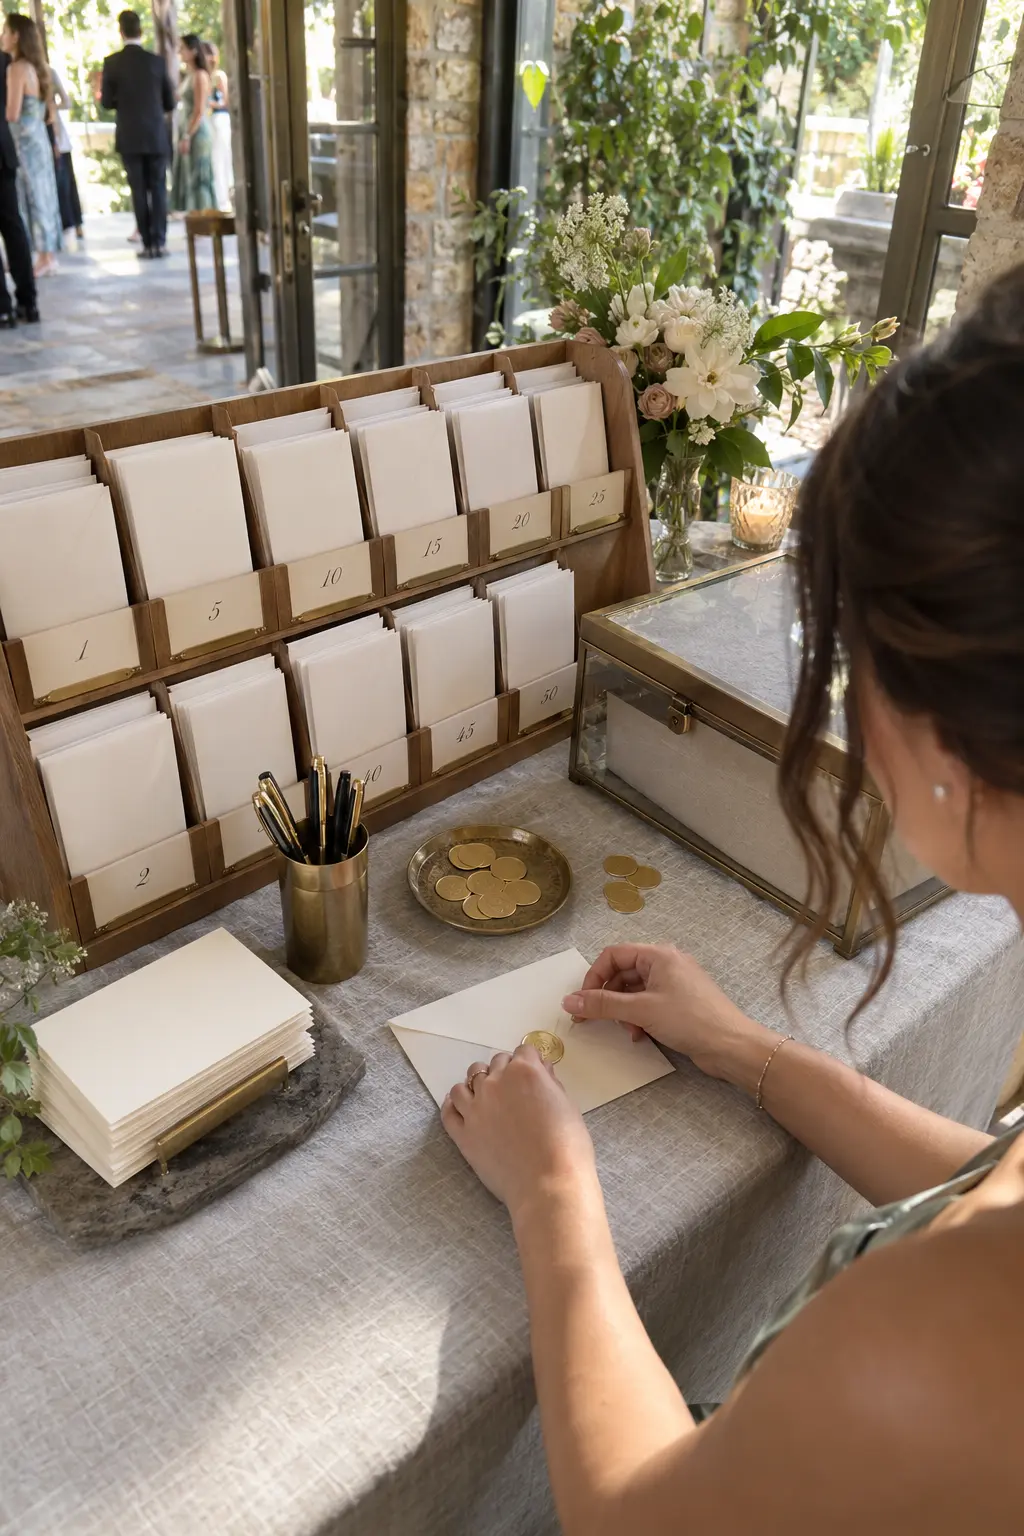
Display envelopes for the first, fifth, tenth, and later anniversaries, then invite guests to choose one year and seal a note inside. A divided rack keeps the years visible while a lidded keepsake case protects completed envelopes.
Prepare more envelopes for the early years, since those tend to fill first. Place sealing stickers beside the writing cards instead of loose wax, which shortens the activity and avoids heat, drips, and cleanup at the entrance.
6. Coffee-Table Book Signing Display
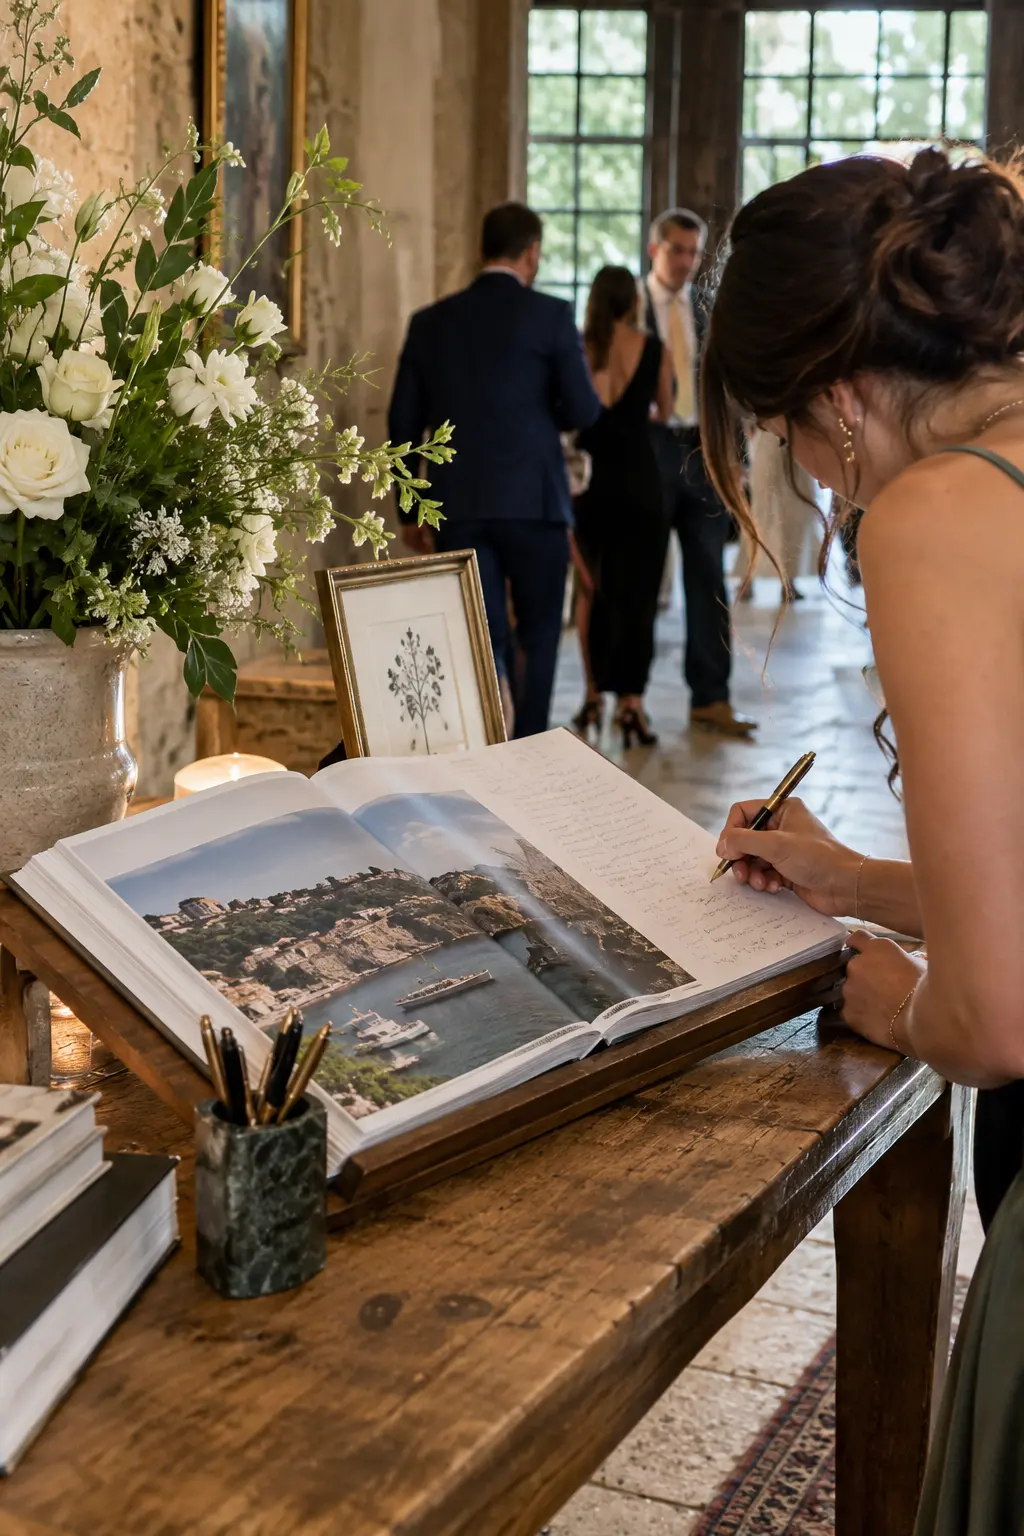
Choose an art, travel, architecture, or photography book that reflects the couple, then open it on an angled cradle. Guests can sign page margins or add notes beside images, creating a keepsake that still feels natural on a living-room shelf.
Use archival pens that will not bleed through glossy pages, and test them on an inconspicuous page. A large book needs a sturdy table and generous elbow room, so avoid squeezing it beside a card box or seating display.
7. Wooden Puzzle Keepsake Table
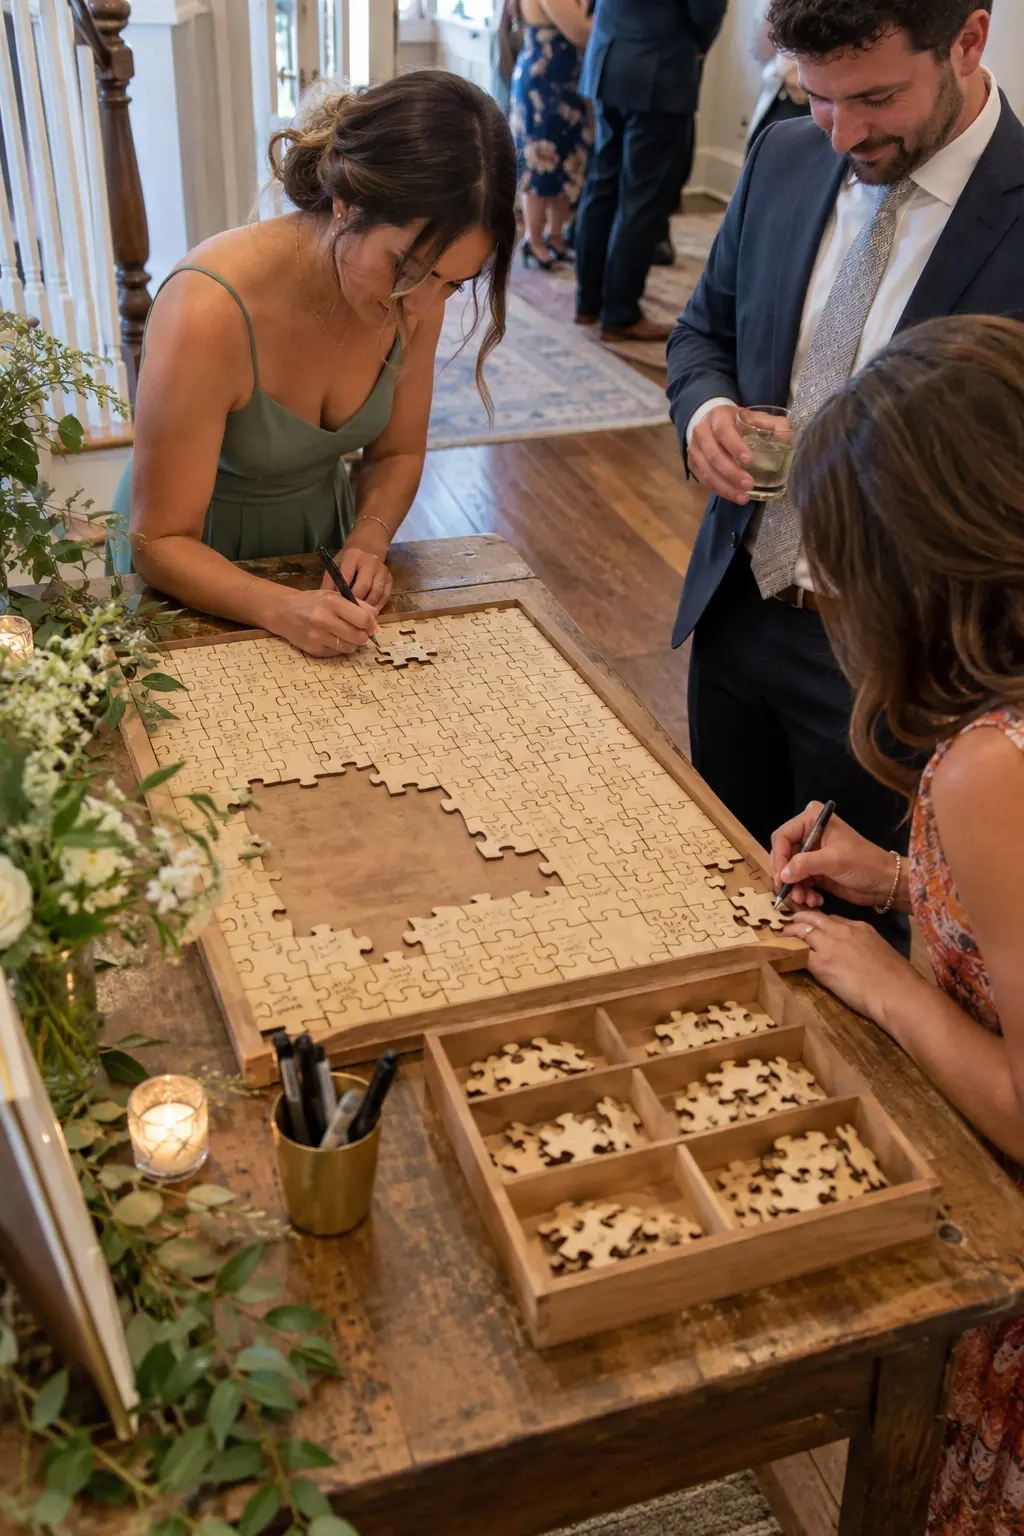
Set a partially assembled wooden puzzle beside a shallow divided tray of blank pieces. Guests sign one piece, return it to the tray, and watch the keepsake gradually take shape as the celebration continues.
Choose a puzzle with pieces large enough for a short note and initials. Fine-tip pens reduce smudging, while a sample piece helps guests understand how much space they have before they begin writing.
8. Vinyl Record Signing Station
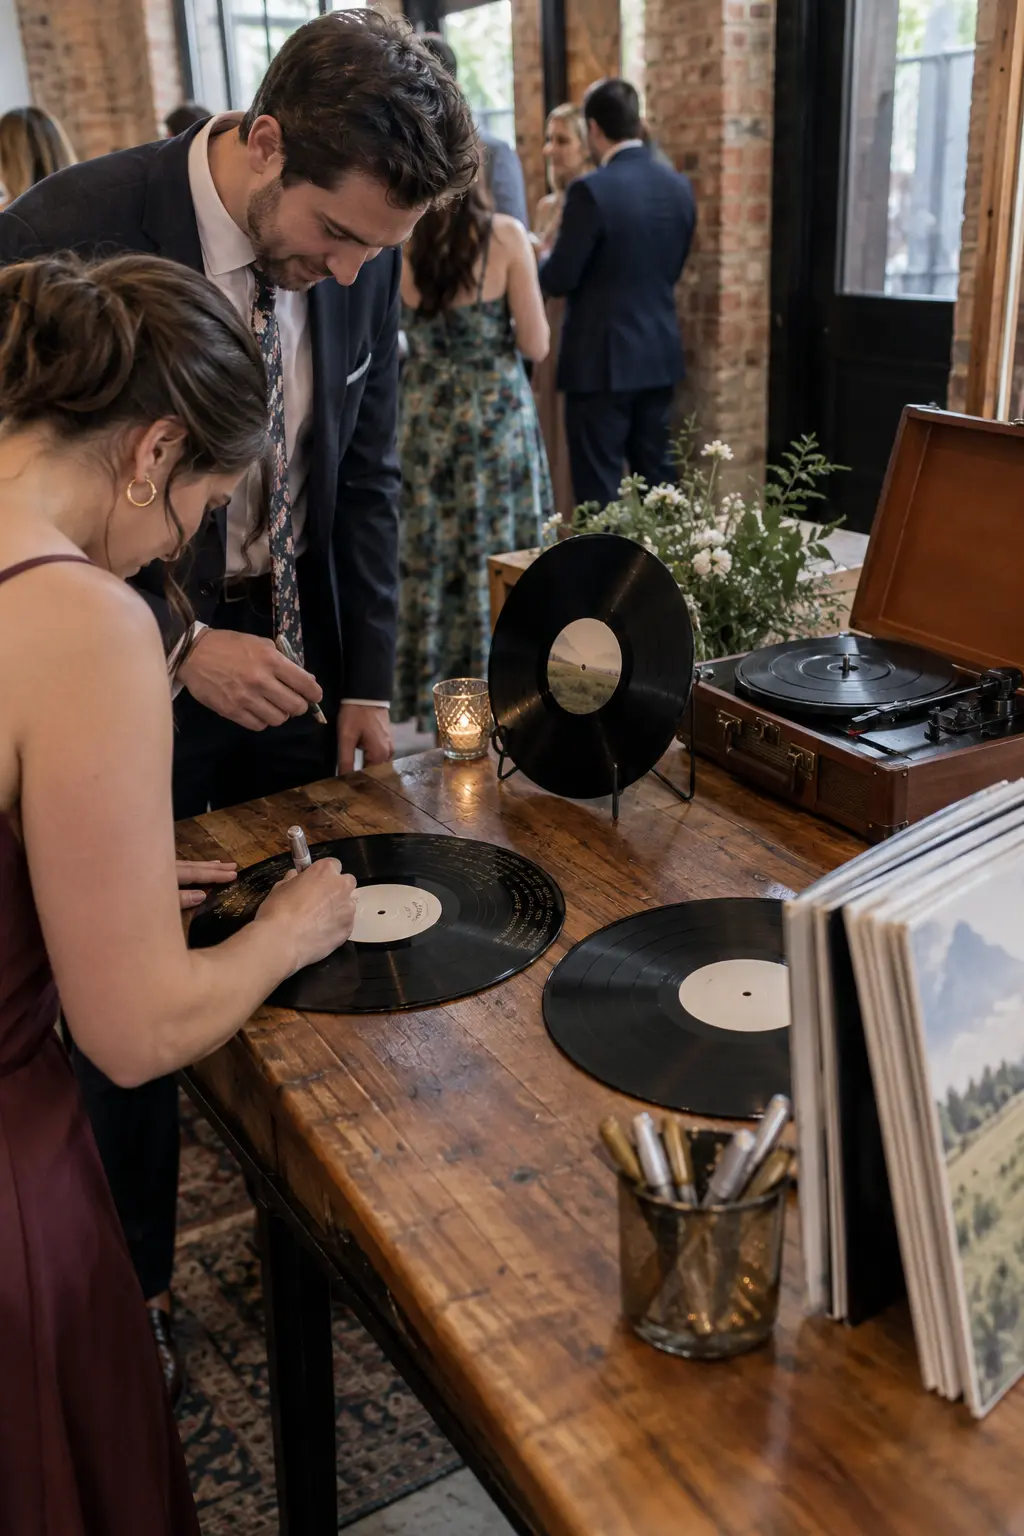
Display matte vinyl records on a console with paint pens, paper sleeves, and one record stand. The dark surface gives signatures strong contrast, and the finished records can later be framed or displayed near the couple's music collection.
Use several records for a larger guest list rather than crowding every message onto one disc. Keep the playing grooves clean if the couple hopes to use the records afterward, or select decorative records intended only for display.
9. Recipe Card Keepsake Table
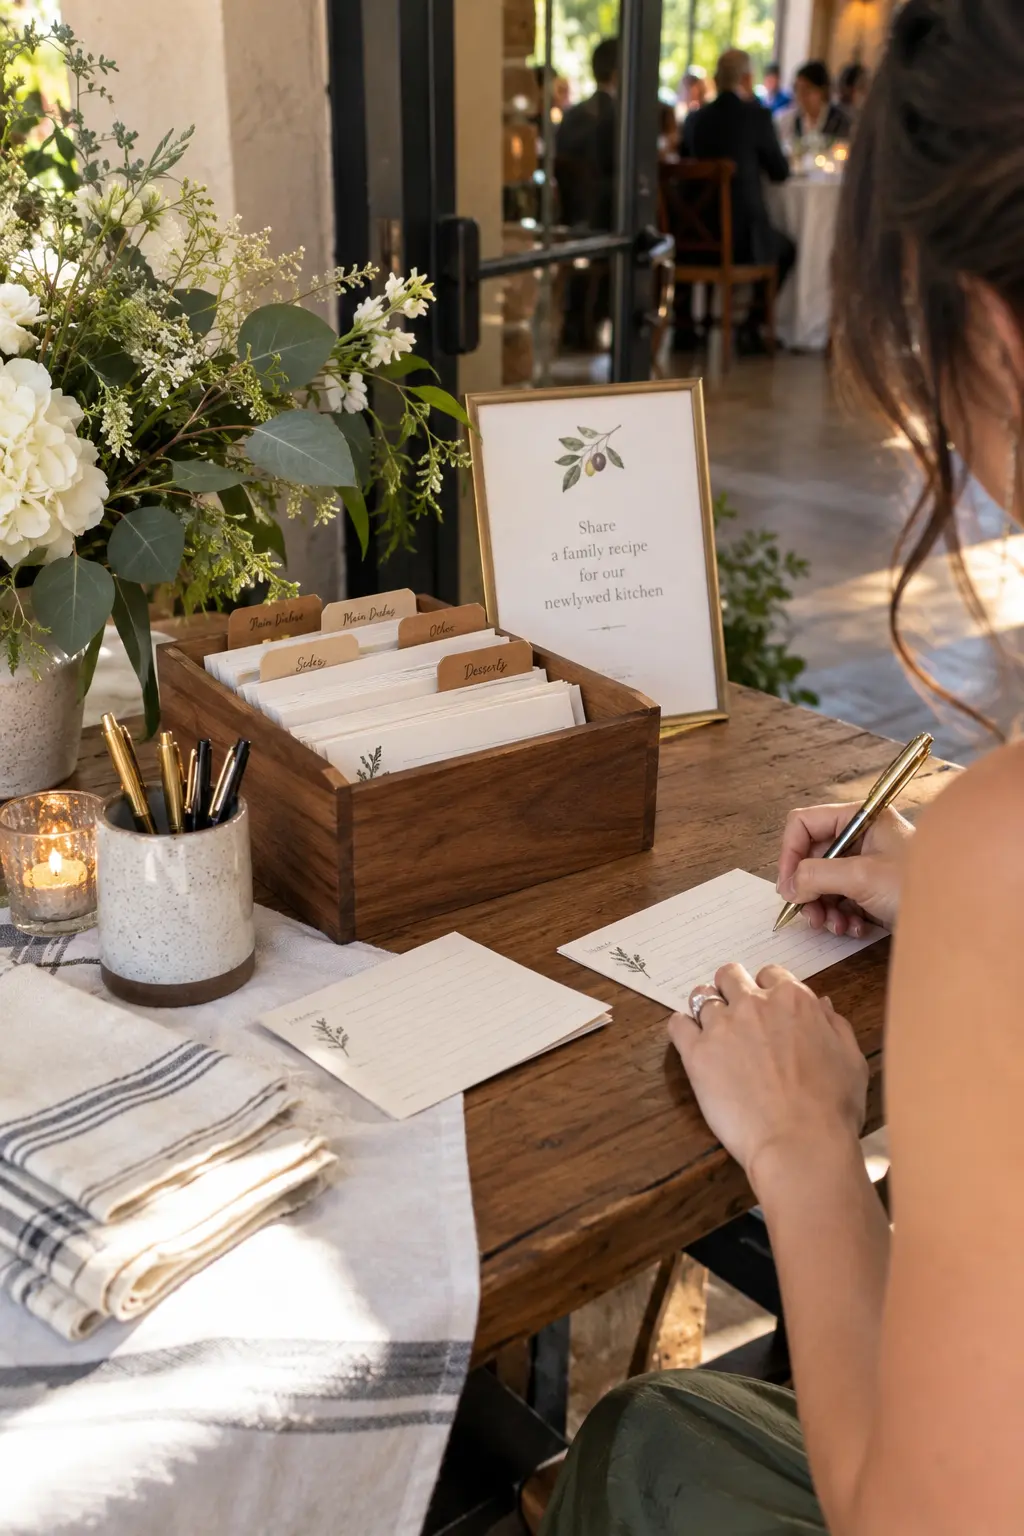
Invite guests to share a family recipe, comfort meal, or hosting tip on prepared cards. A wooden recipe box with clear category dividers makes the finished collection usable, while a sample card shows the level of detail the couple hopes to receive.
Mail blank cards to close relatives before the wedding if you want treasured recipes included even when someone cannot attend. At the venue, provide a few clipboards so several guests can write without waiting for the table surface.
10. Date-Night Jar Writing Table
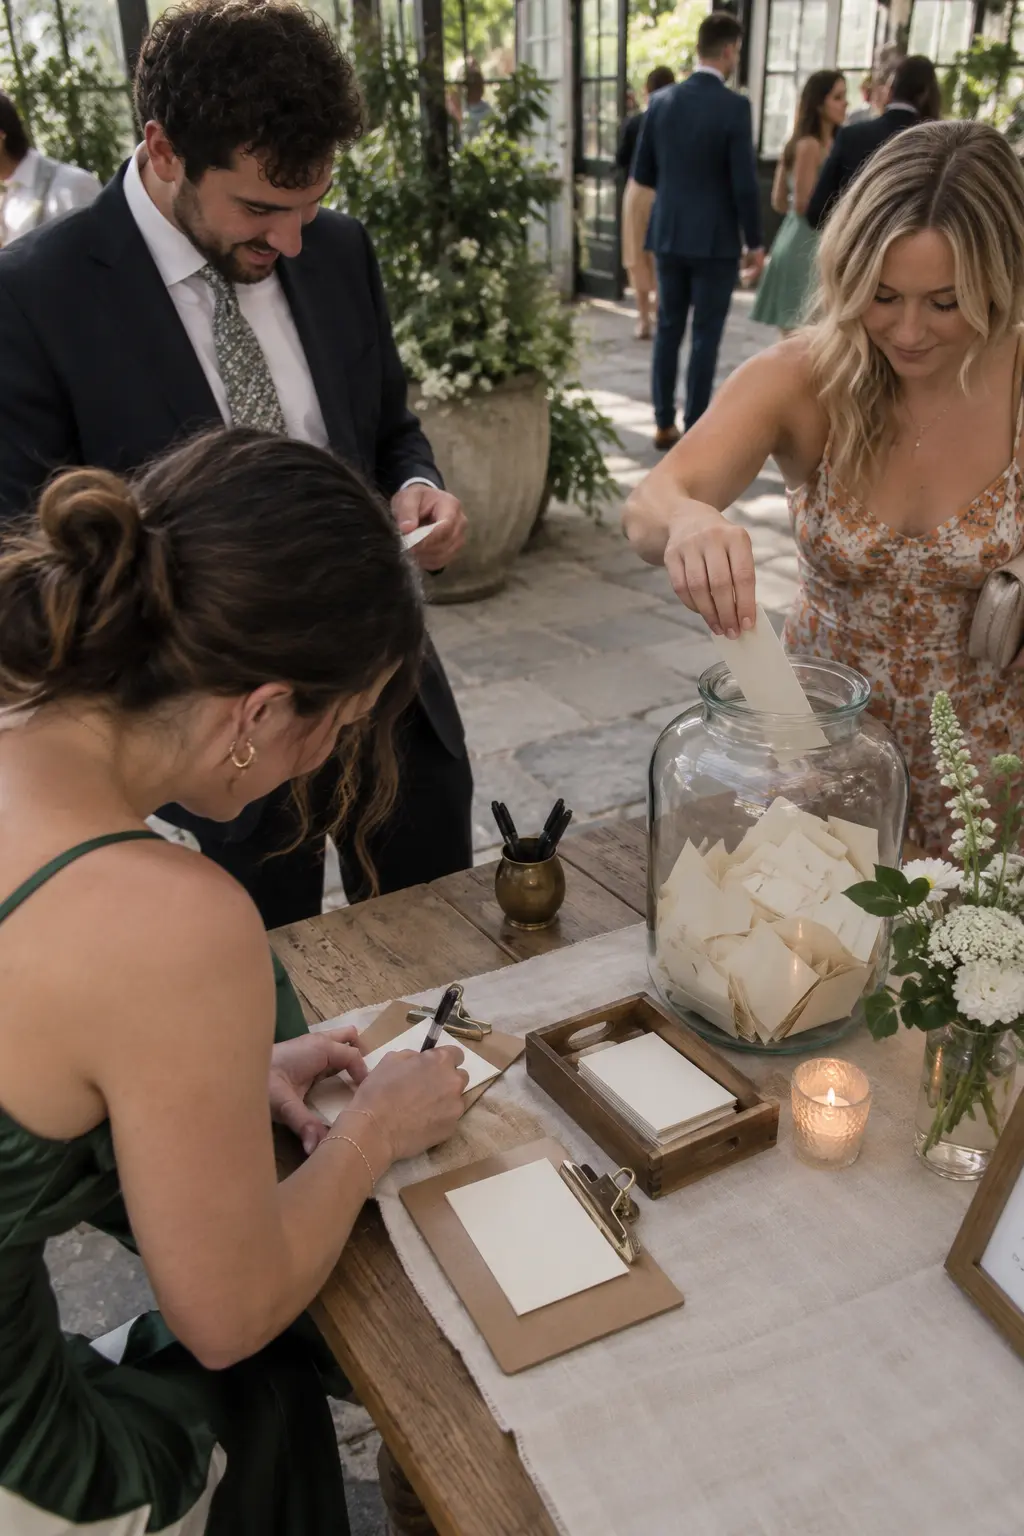
Place a wide-mouth jar beside prompt cards and two clipboards, then ask guests to suggest a future date. Prompts for free, at-home, adventurous, and anniversary ideas produce more useful answers than one completely blank card.
Use a jar opening wide enough for folded slips and a stable base that cannot tip when the table is bumped. Keep the paper size consistent so the finished jar looks full and the couple can draw one suggestion at a time.
Seating, Schedule, and Program Displays
Seating and timing information should be easy to scan while standing. Alphabetical organization usually moves faster than table-number groupings, and a separate pickup ledge keeps guests from leaning over the main display.
11. Alphabetized Escort Card Drawer Table
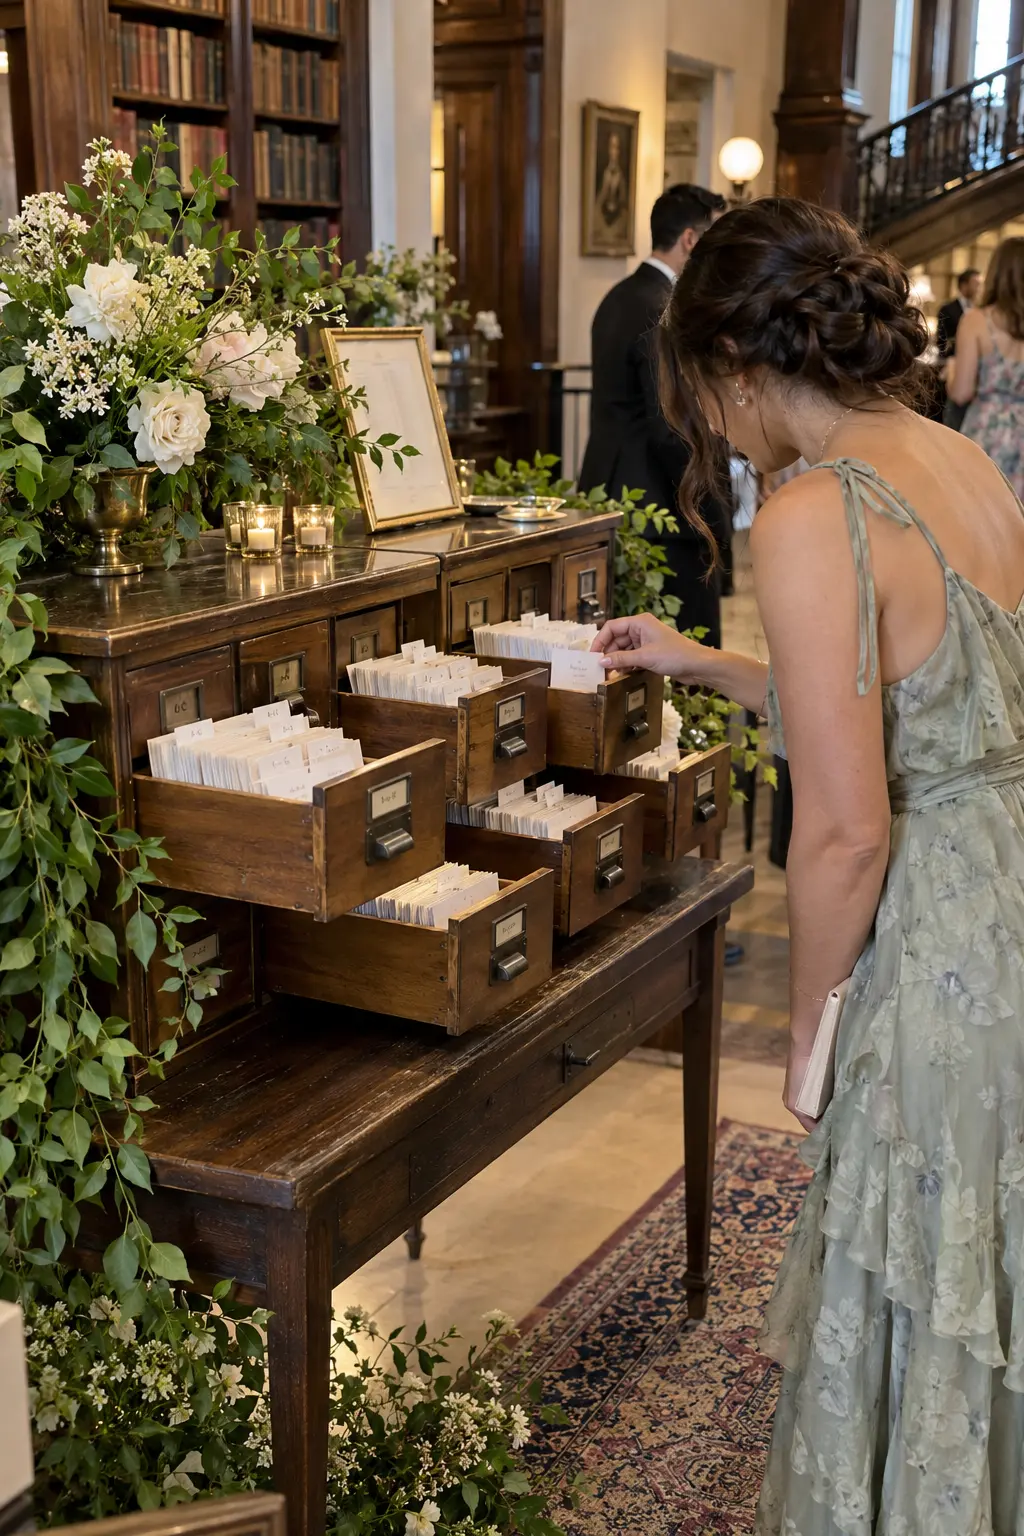
Fill shallow library-style drawers with upright escort cards grouped by surname initial. Pull several drawers open at different depths, creating multiple lookup points and making the system feel like a small check-in desk rather than one crowded stack.
Print letter tabs larger than guest names and leave a slim ledge for sorting. Place late additions in the correct alphabetical section before the doors open; an unmarked extra pile causes confusion exactly when the entrance is busiest.
12. Luggage-Tag Escort Card Suitcase
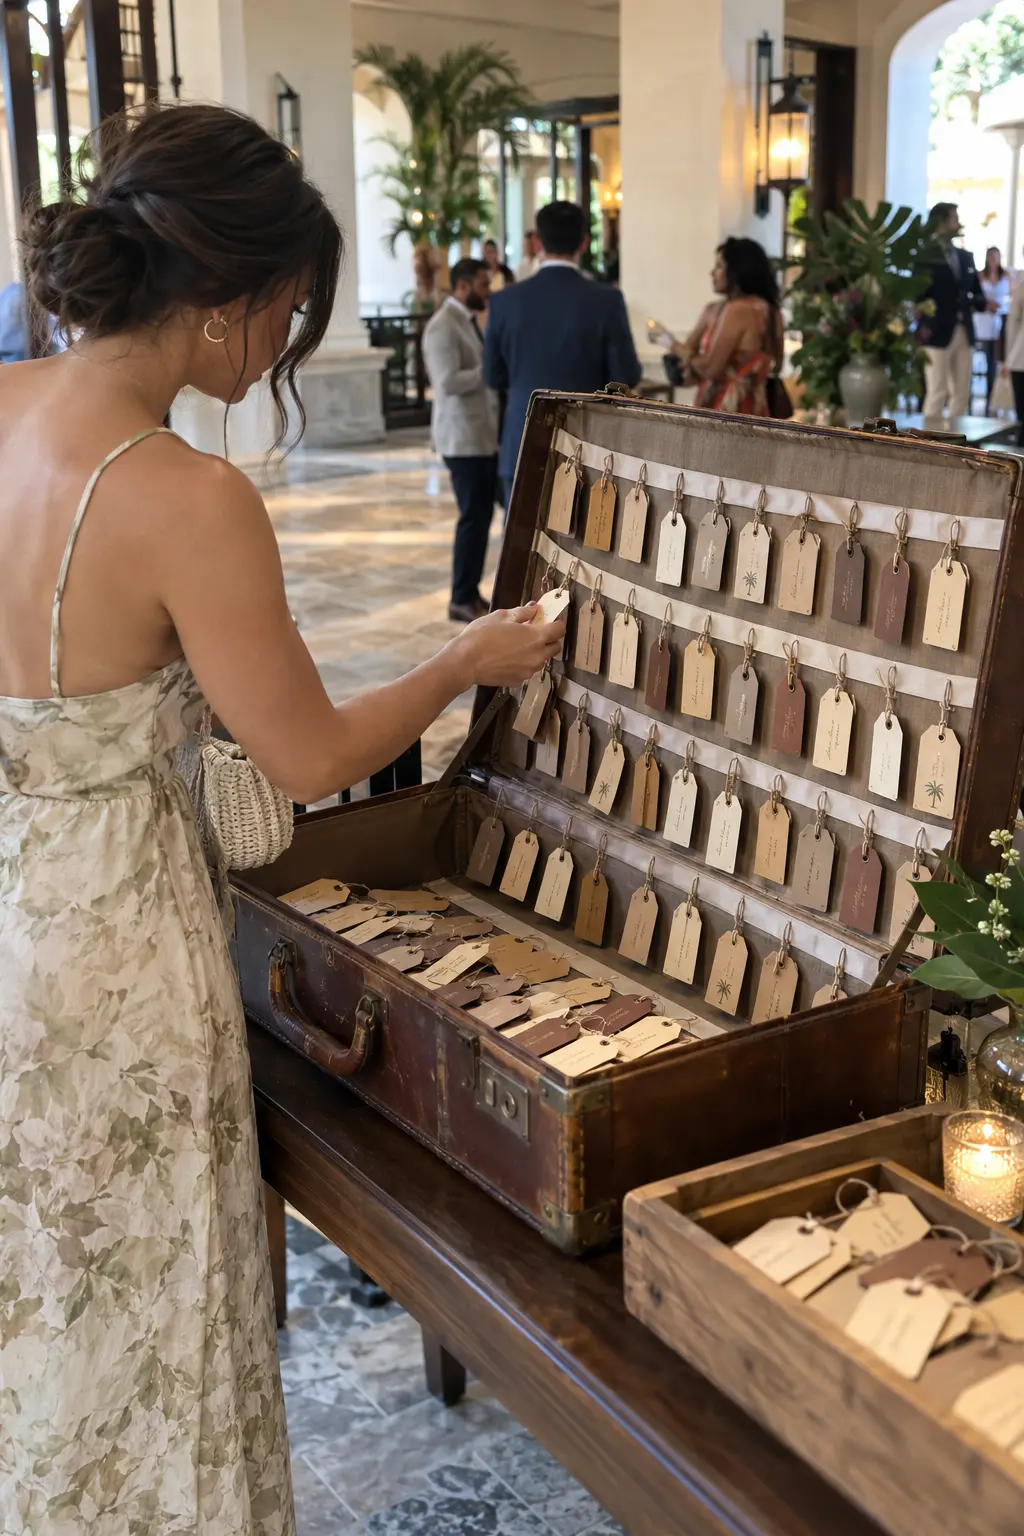
Open a vintage suitcase and hang luggage-tag escort cards across ribbon rows inside the lid. Guests find their name, take the tag, and carry a small travel-themed favor to the assigned table.
Arrange the tags alphabetically instead of by table number, and add a shallow overflow tray beside the suitcase for last-minute changes. Secure the open lid so a bump or breeze cannot collapse the display.
13. Hotel-Key Escort Card Cubby
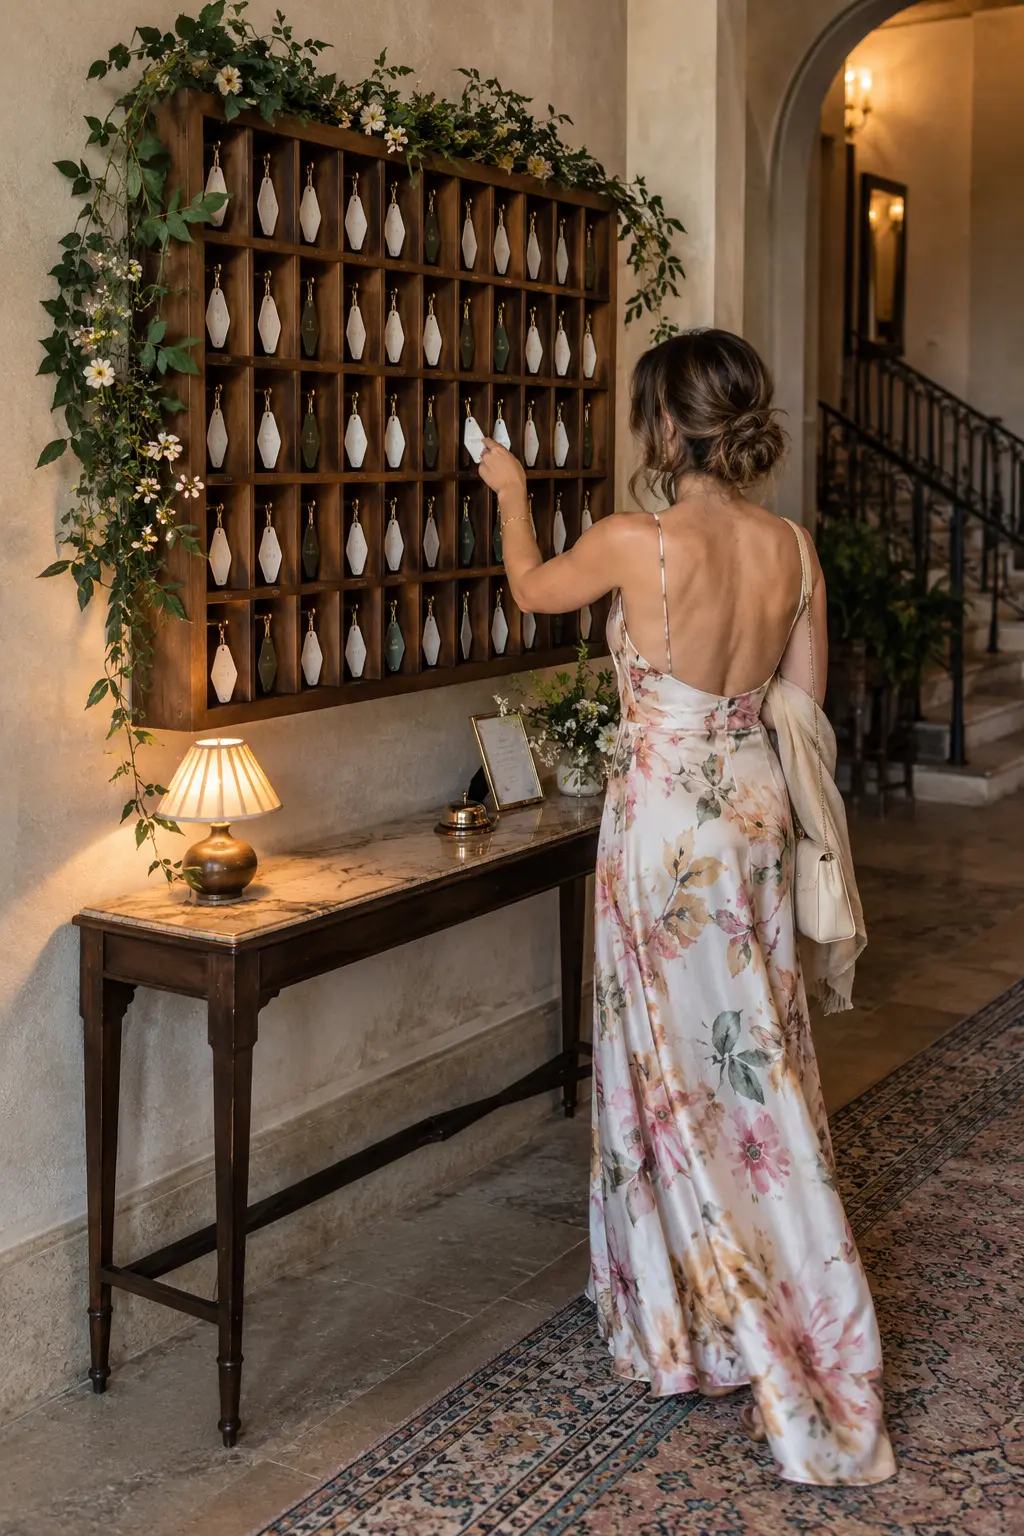
Use a wall cubby or freestanding key rack to display room-key-style tags with guest names and table numbers. The check-in look feels especially fitting at a hotel wedding and gives each guest a clear object to remove.
Label each cubby by surname range, then place the rack above a narrow empty console where guests can set down a purse or drink while searching. Keep decorative keys lightweight so the hooks stay stable.
14. Bud-Vase Escort Card Garden
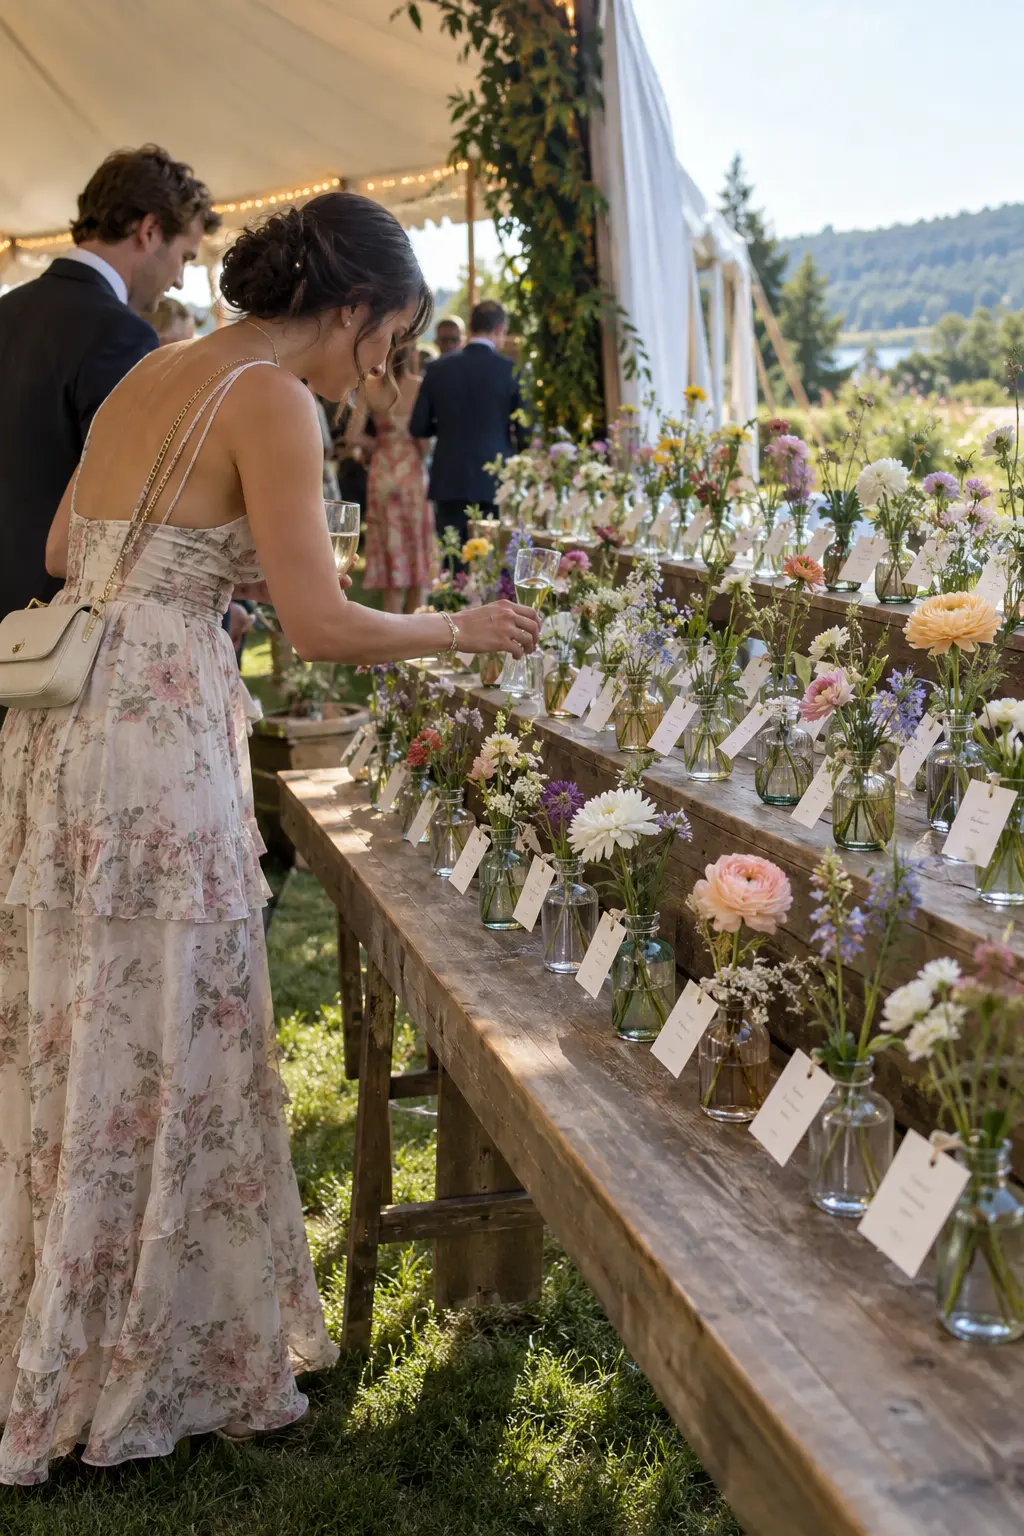
Tie each escort card to a miniature bud vase holding one sturdy stem, then arrange the vases alphabetically across stepped risers. Guests carry the vase to dinner, where it becomes a favor or joins the table decor.
Use low-water vessels with stable bases and avoid flowers that shed pollen. Build the display close to its final location, because moving dozens of filled vases after setup creates spills and mixed-up names.
15. Seed-Packet Escort Card Display
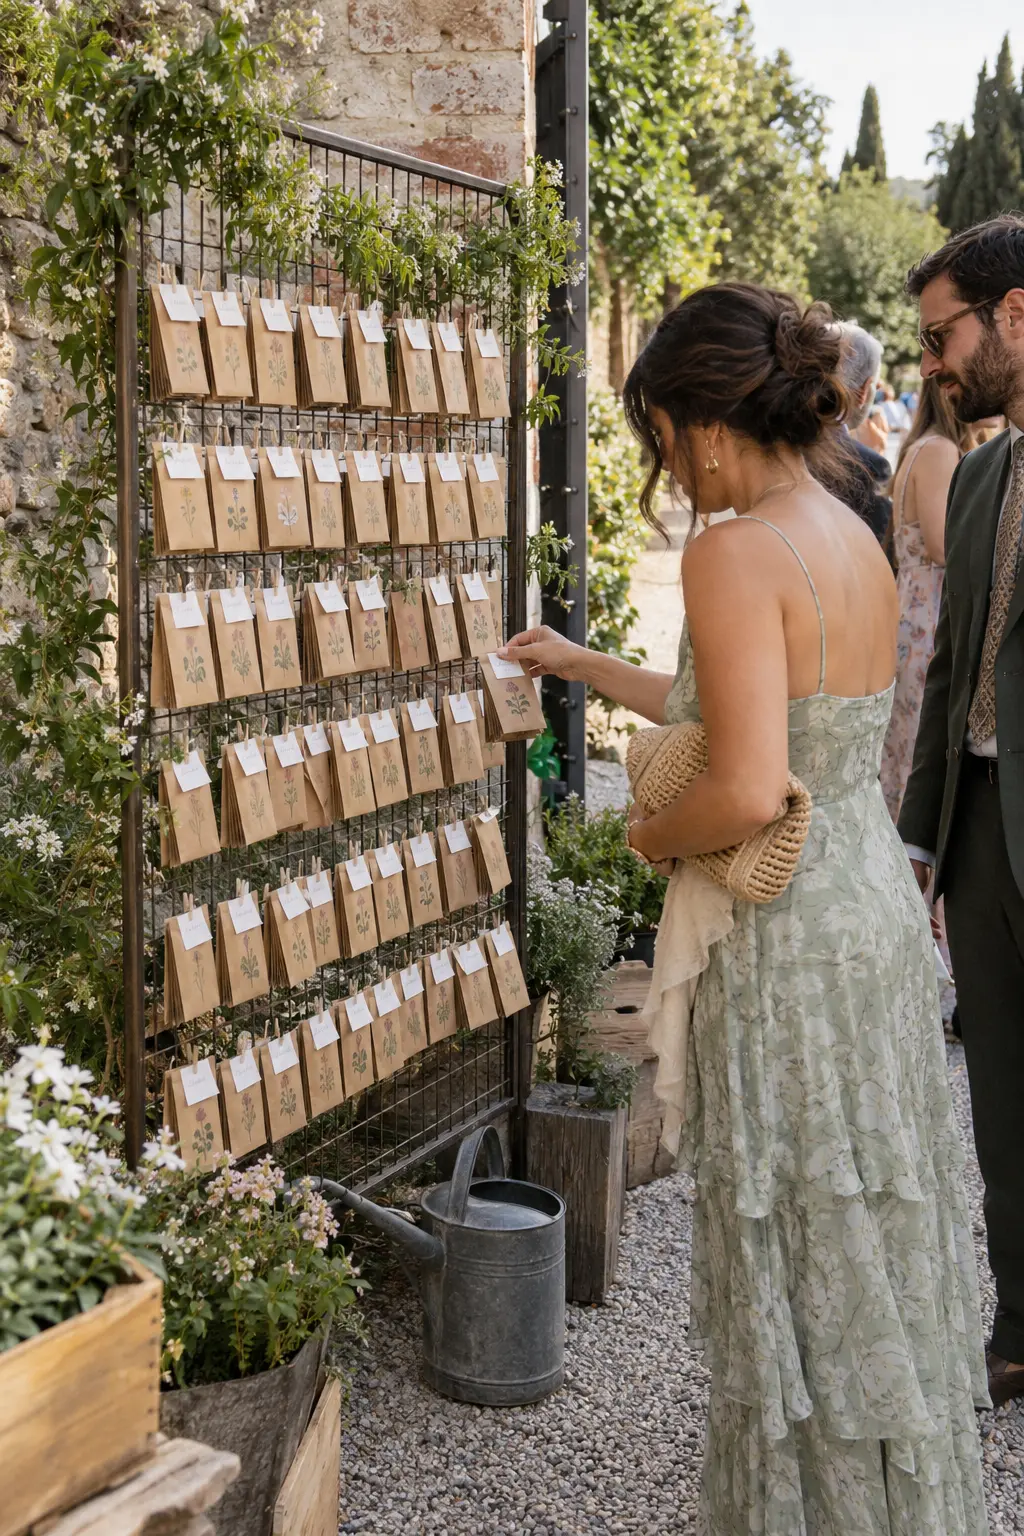
Clip labeled seed packets to a freestanding wire grid, grouping surnames by letter. Each packet carries the table assignment and becomes a lightweight favor that is easy to transport, assemble, and take home.
Choose seeds appropriate for common growing regions and include simple planting guidance on the back. Keep spare packets and blank tags with the coordinator for seating changes; replacing one packet is quicker than rebuilding a printed chart.
16. Ribbon-Line Escort Card Table
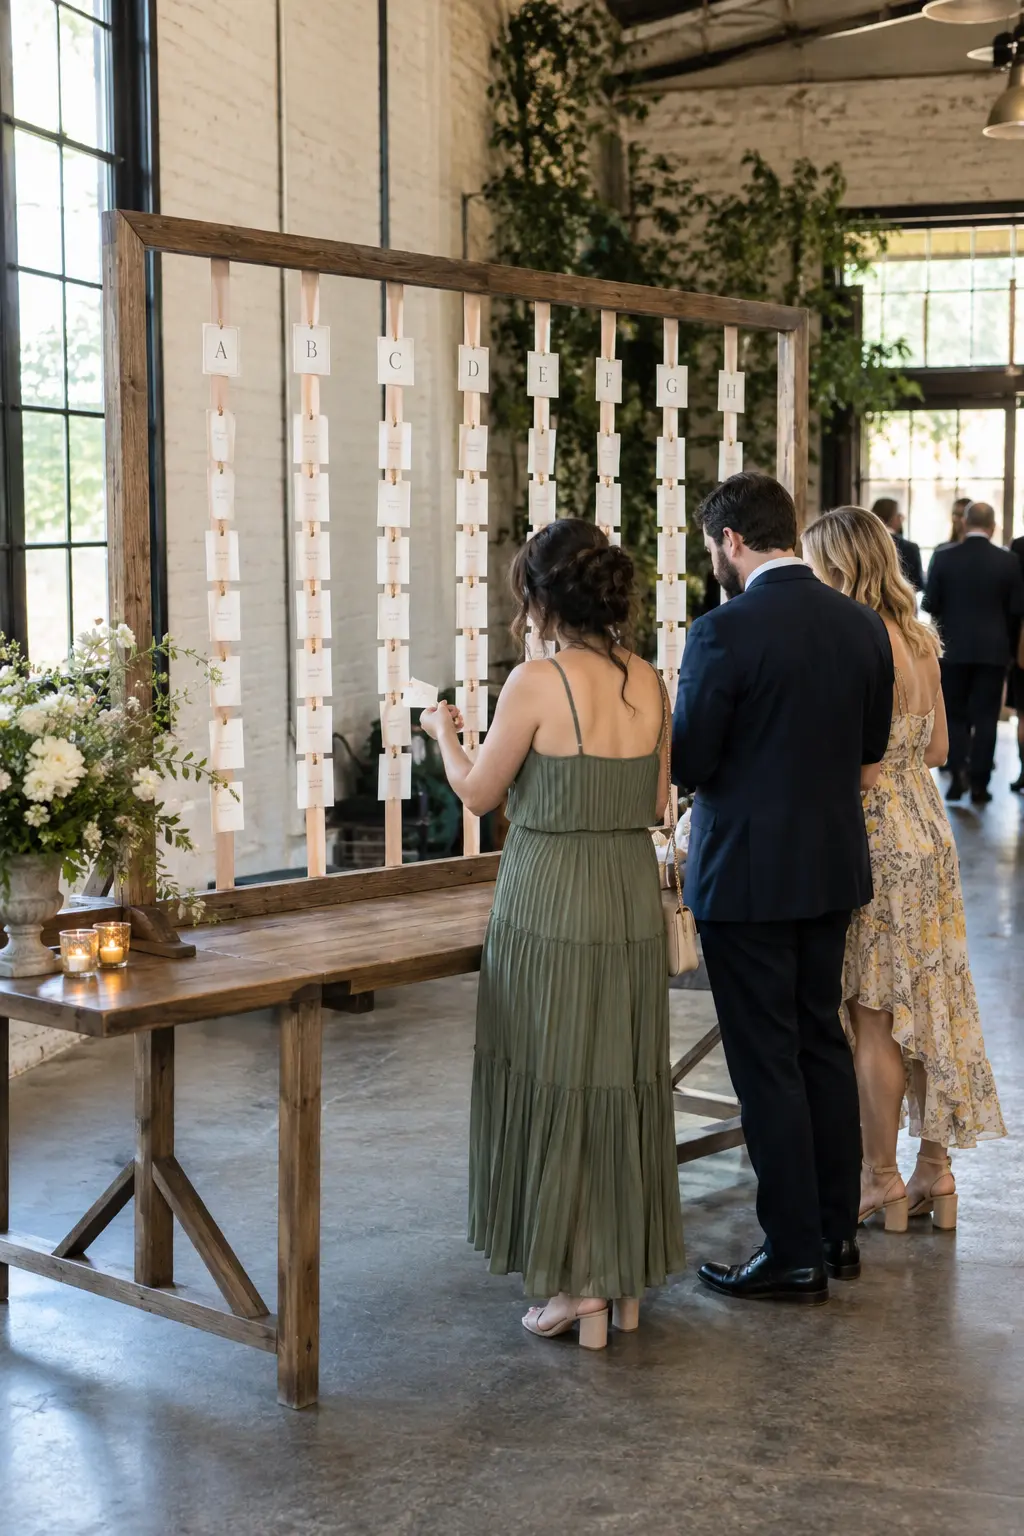
Suspend escort cards from vertical ribbon lines inside a simple wooden frame that spans the table. Letter headings at the top guide guests to the correct column, while the empty surface below gives them room to handle cards without bending the display.
Use clips that release with one hand and ribbons heavy enough to hang straight. Test the frame outdoors if wind is possible, then add discreet base weights before attaching the final card order.
17. Ceramic Tile Escort Grid
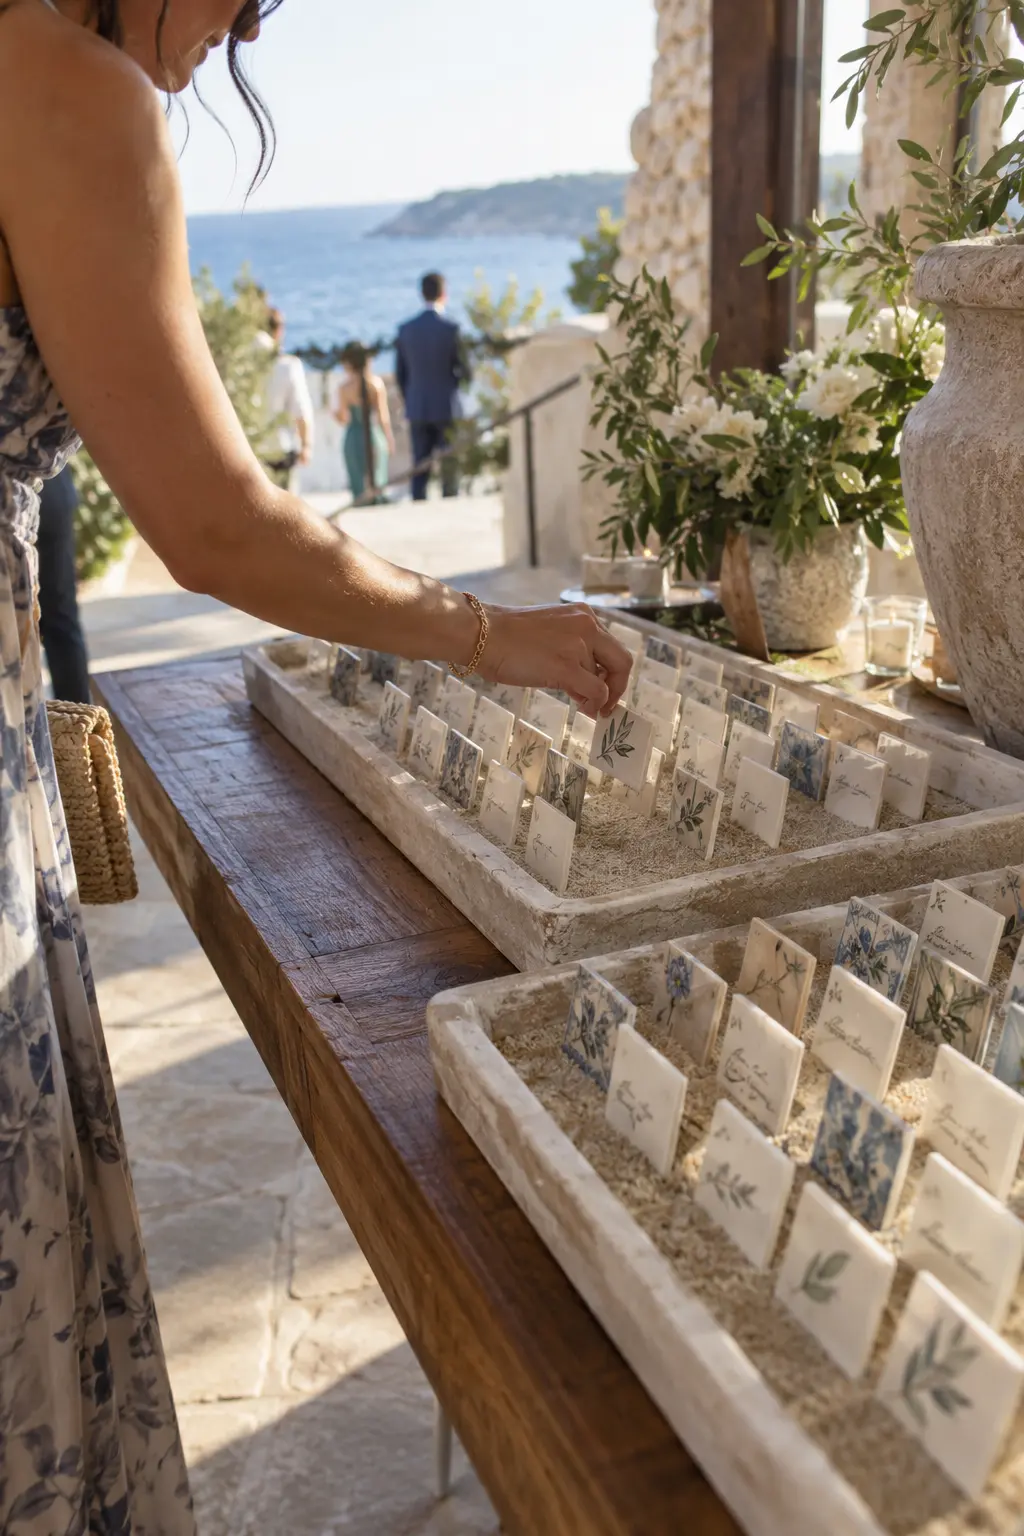
Stand small ceramic name tiles in shallow sand-filled trays, with the table number written beneath each name. The tile gives guests a substantial keepsake, and the sand holds irregular handmade pieces upright without custom hardware.
Sort trays by surname range and leave enough finger space between tiles for easy removal. Pack replacements for chips or spelling corrections, since a single damaged tile should not interrupt the full display.
18. Framed Seating Chart With Search Ledge
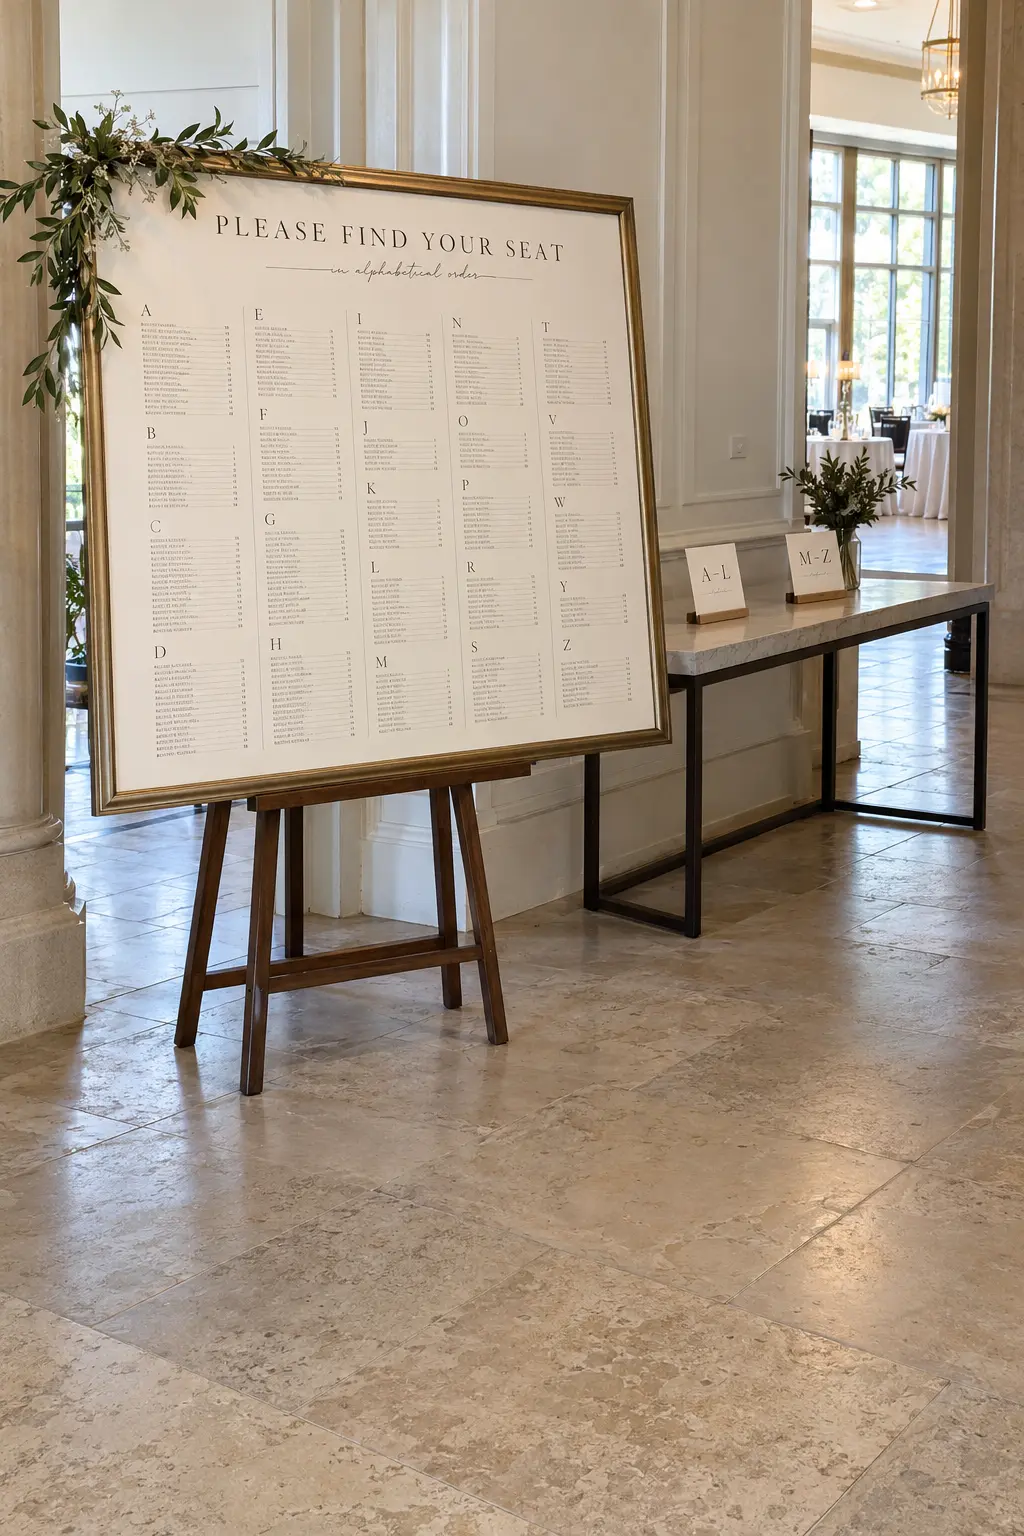
Place a large alphabetical seating chart on a sturdy easel and position a narrow console beside it with two smaller lookup cards. Guests can step close to the chart, then move sideways to confirm a name without forming one dense group.
The chart should remain readable from several feet away, with strong contrast and generous spacing between letter groups. Leave the floor directly in front empty, even when the venue offers extra plants or lanterns for styling.
- Alphabetize by surname for faster searching.
- Keep the floor in front of the chart completely open.
- Give the coordinator a corrected backup list.
19. Weekend Itinerary and Shuttle Card Station
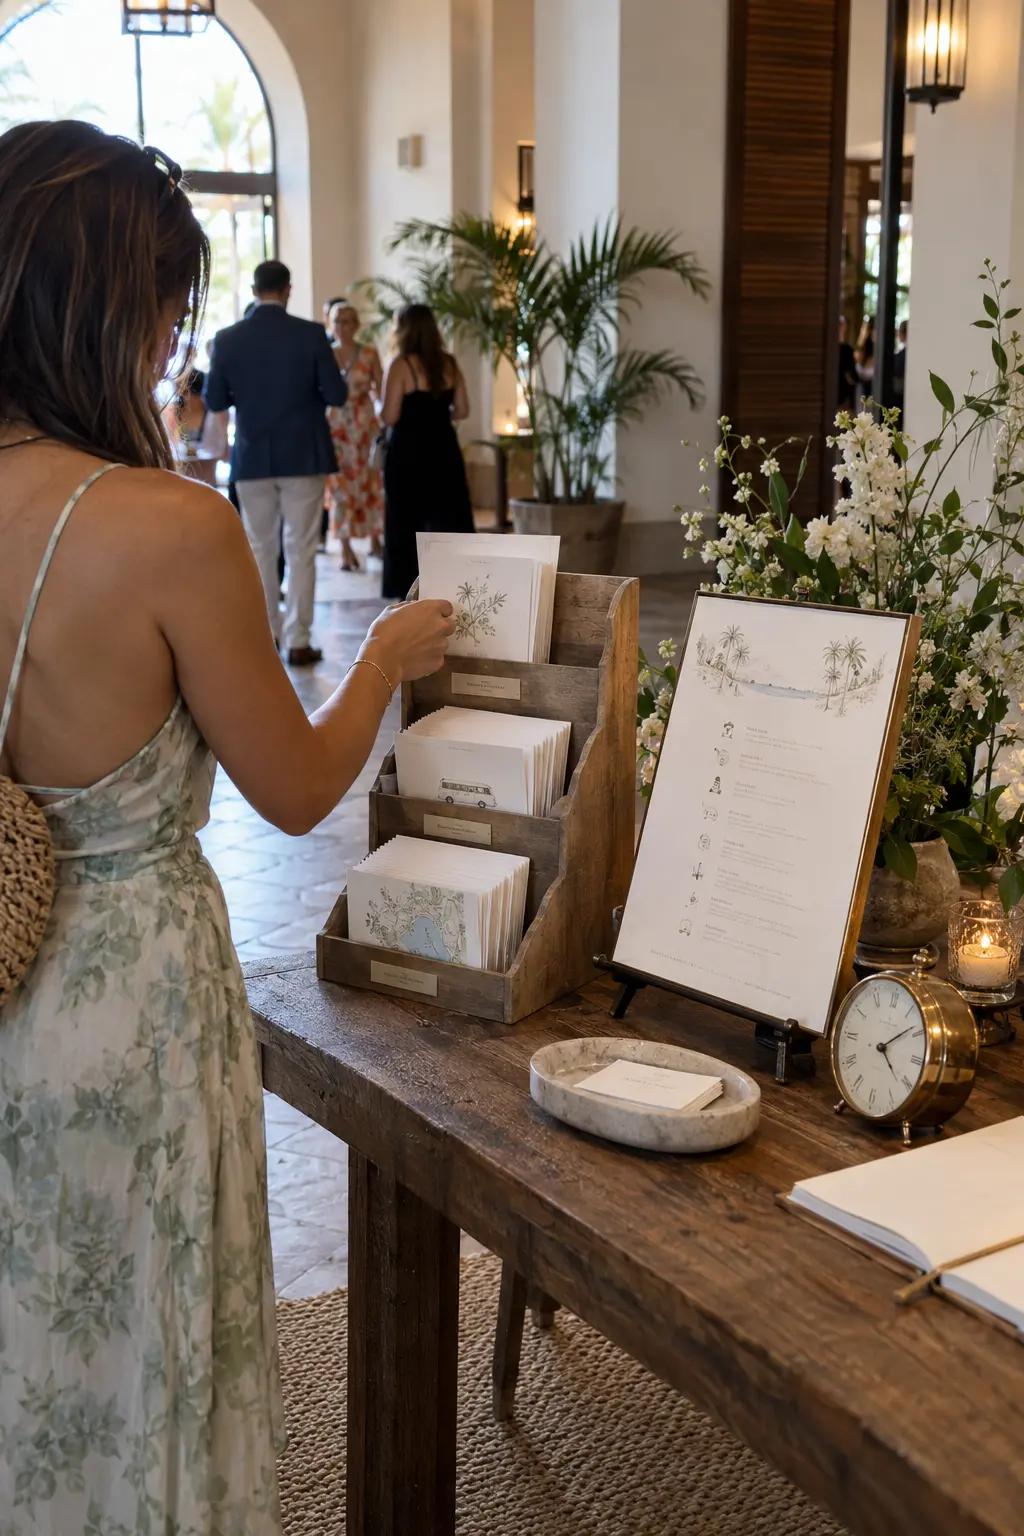
Use a three-tier organizer for weekend itineraries, shuttle cards, and small venue maps. Guests take only the information they need, while one displayed sample shows how the pieces relate without requiring a long sign.
Print shuttle departure points and final return times in the largest type. Refill cards in small batches and keep the master transportation list with the coordinator, since schedule questions often arrive after the welcome table has closed.
20. Program Fan Basket Welcome Table
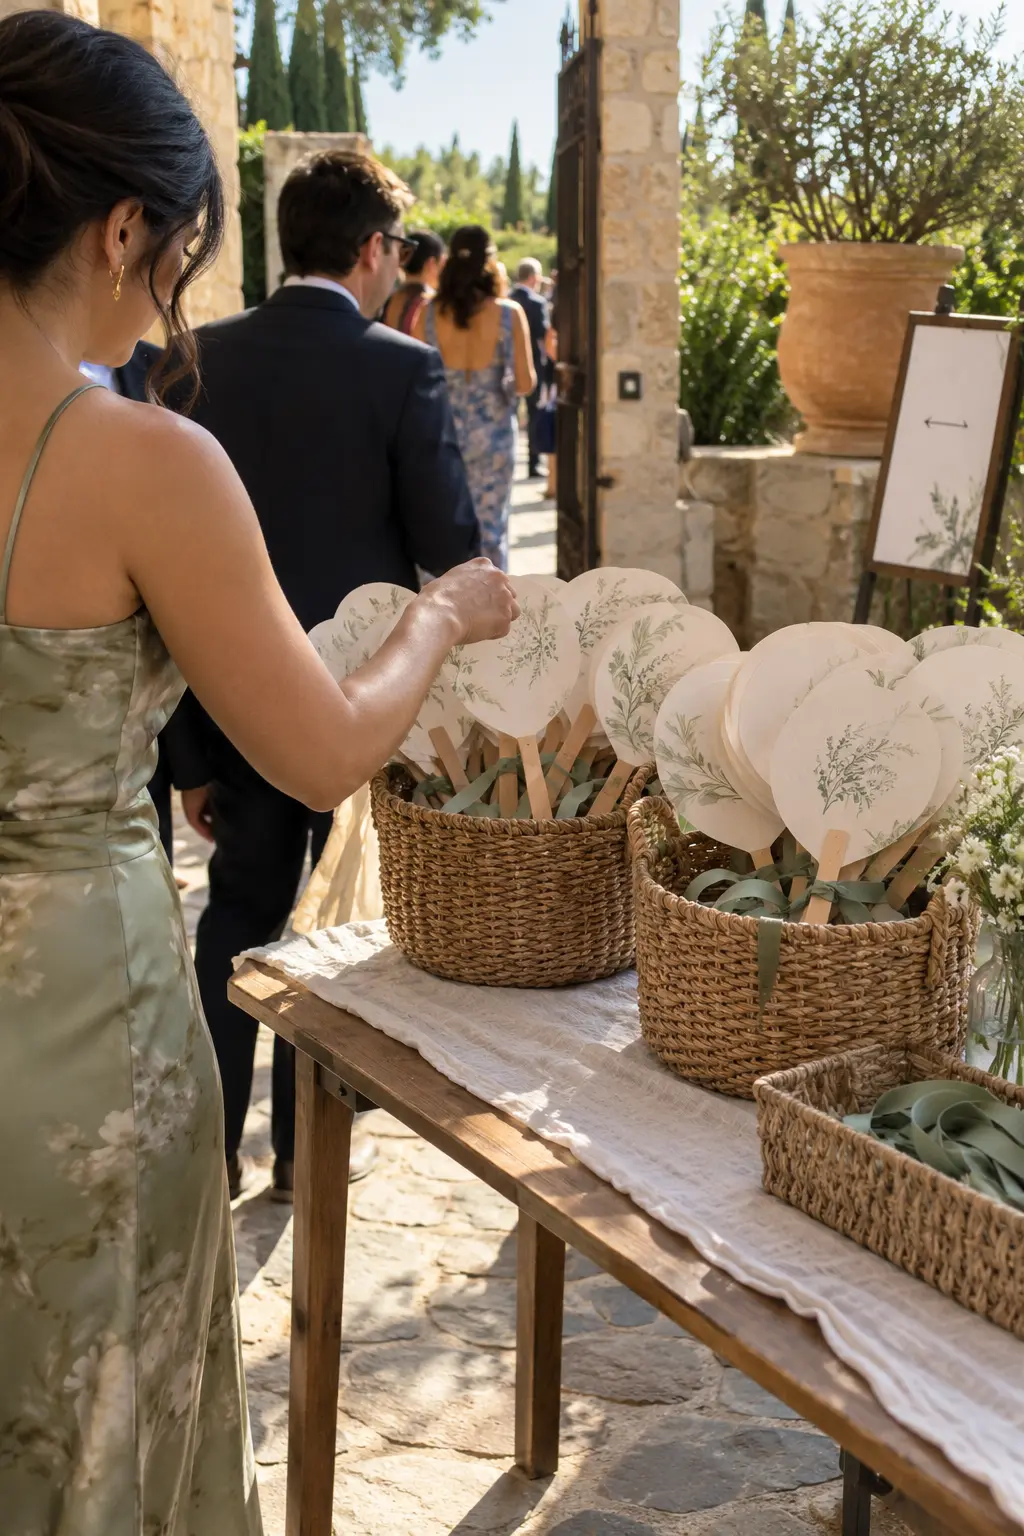
Fill two handled baskets with paddle-fan programs for a warm outdoor ceremony. Guests receive the event order and immediate relief from the heat, while the basket format makes quick pickup easier than separating fans across every chair.
Face the handles outward and divide the total between two access points. Place the baskets in shade, because dark printed stock and glued handles can become uncomfortable or loosen after prolonged direct sun.
Cards, Gifts, Favors, and Arrival Comfort
These tables solve practical arrival questions: where an envelope belongs, which favor to take, and how to stay comfortable. Keep valuable items supervised and separate quick grab-and-go supplies from activities that require writing.
21. Secure Card and Gift Check-In Table
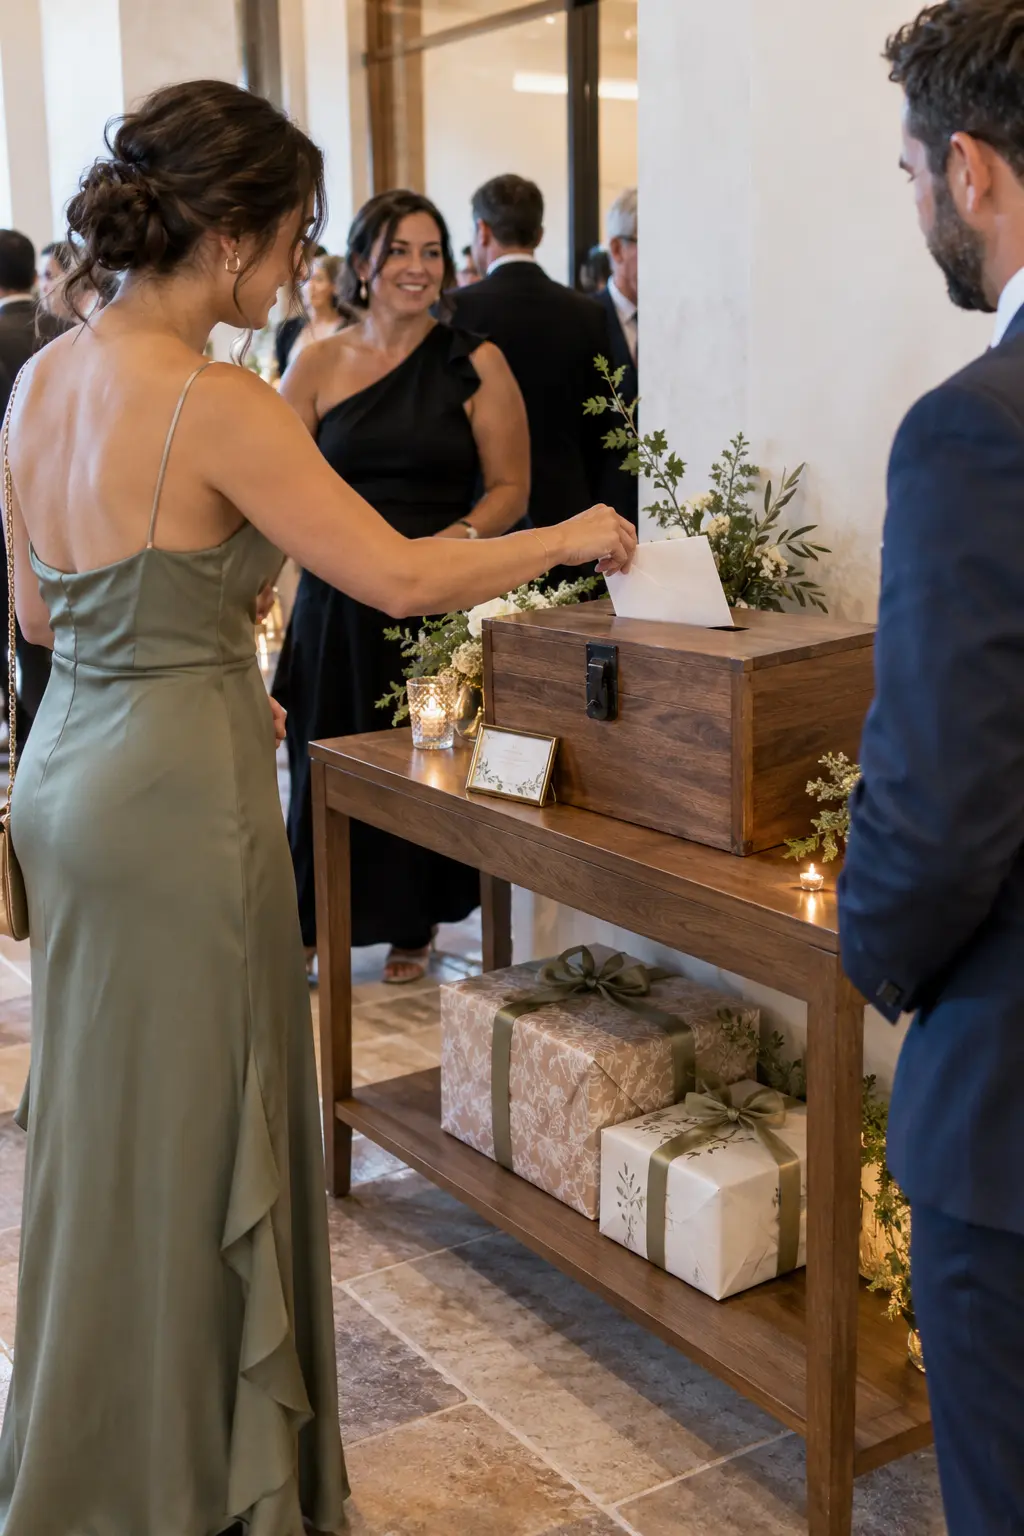
Anchor a locked card chest behind a clear envelope slot, then reserve the lower shelf for the few physical gifts guests may bring. One small label is enough; the empty surface in front gives people a safe place to set down an envelope before depositing it.
Assign a coordinator or trusted attendant to check the area and move cards to secure storage at a planned time. Do not place the box beside an exterior door or in an unattended hallway.
- Use a stable box with a narrow envelope slot.
- Keep the station within staff sight.
- Schedule a secure transfer before dancing begins.
22. Card Drop With Photo Timeline Backdrop
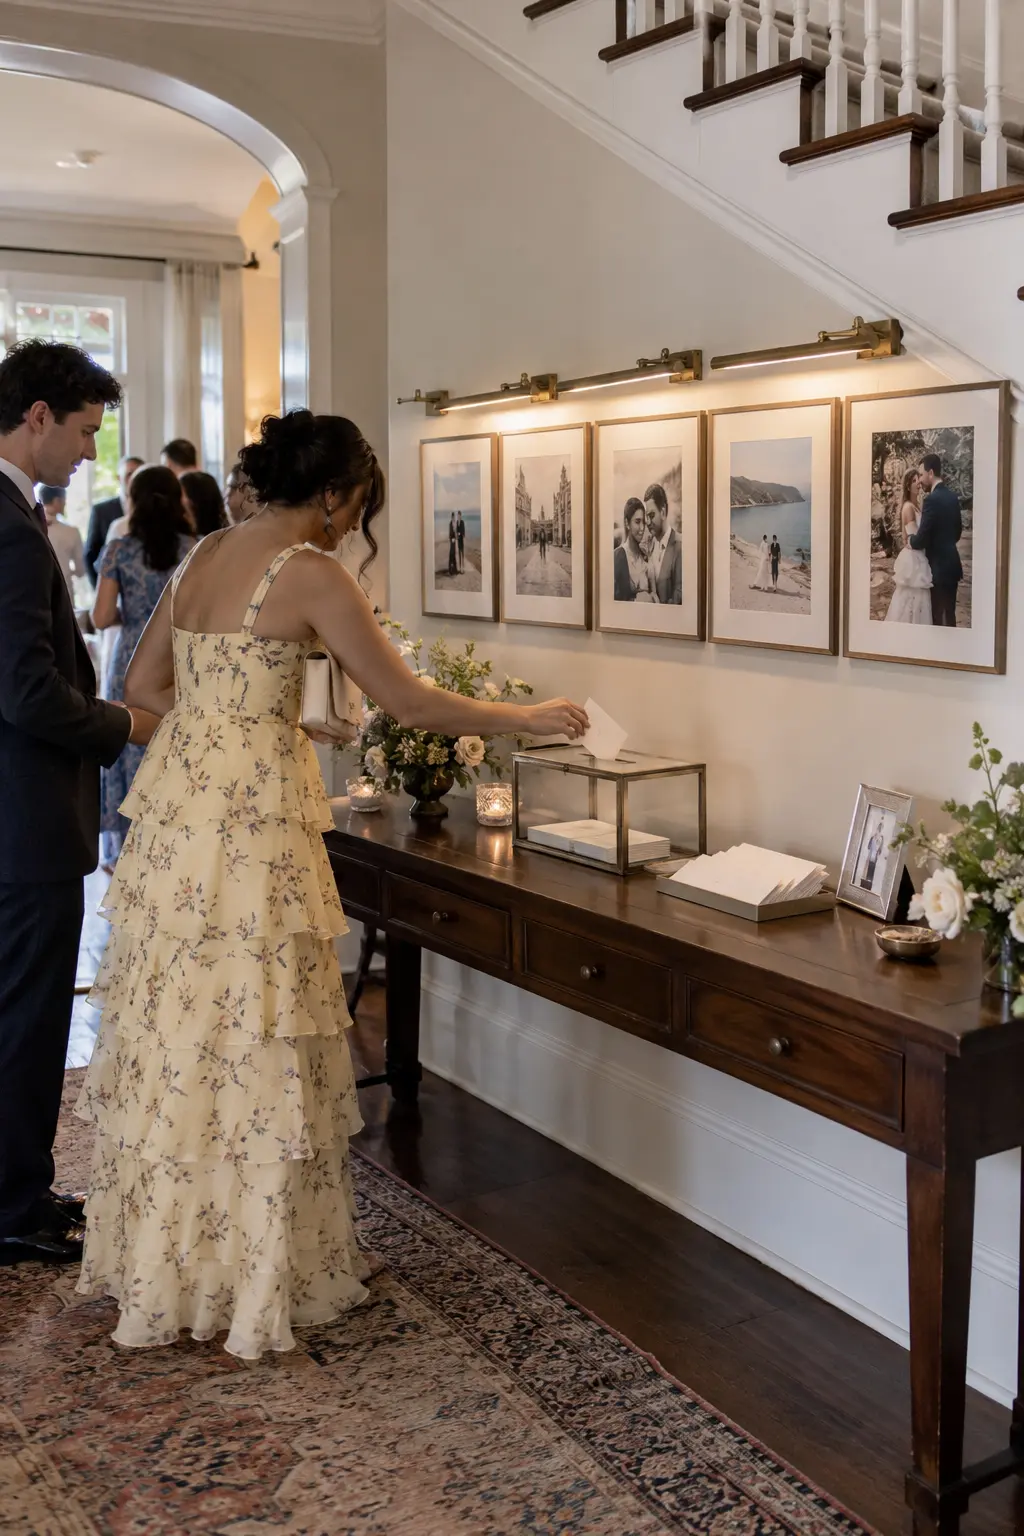
Mount a short photo timeline above a console holding one understated, secure card drop. Childhood pictures, early dates, the proposal, and one engagement portrait give waiting guests something personal to notice without turning the surface into a frame collection.
Keep the envelope landing area clear and place the oldest photographs at the natural starting side. Five to seven images are usually enough to tell the story while preserving space around the collection box.
23. Name-Checked Favor Pickup Table
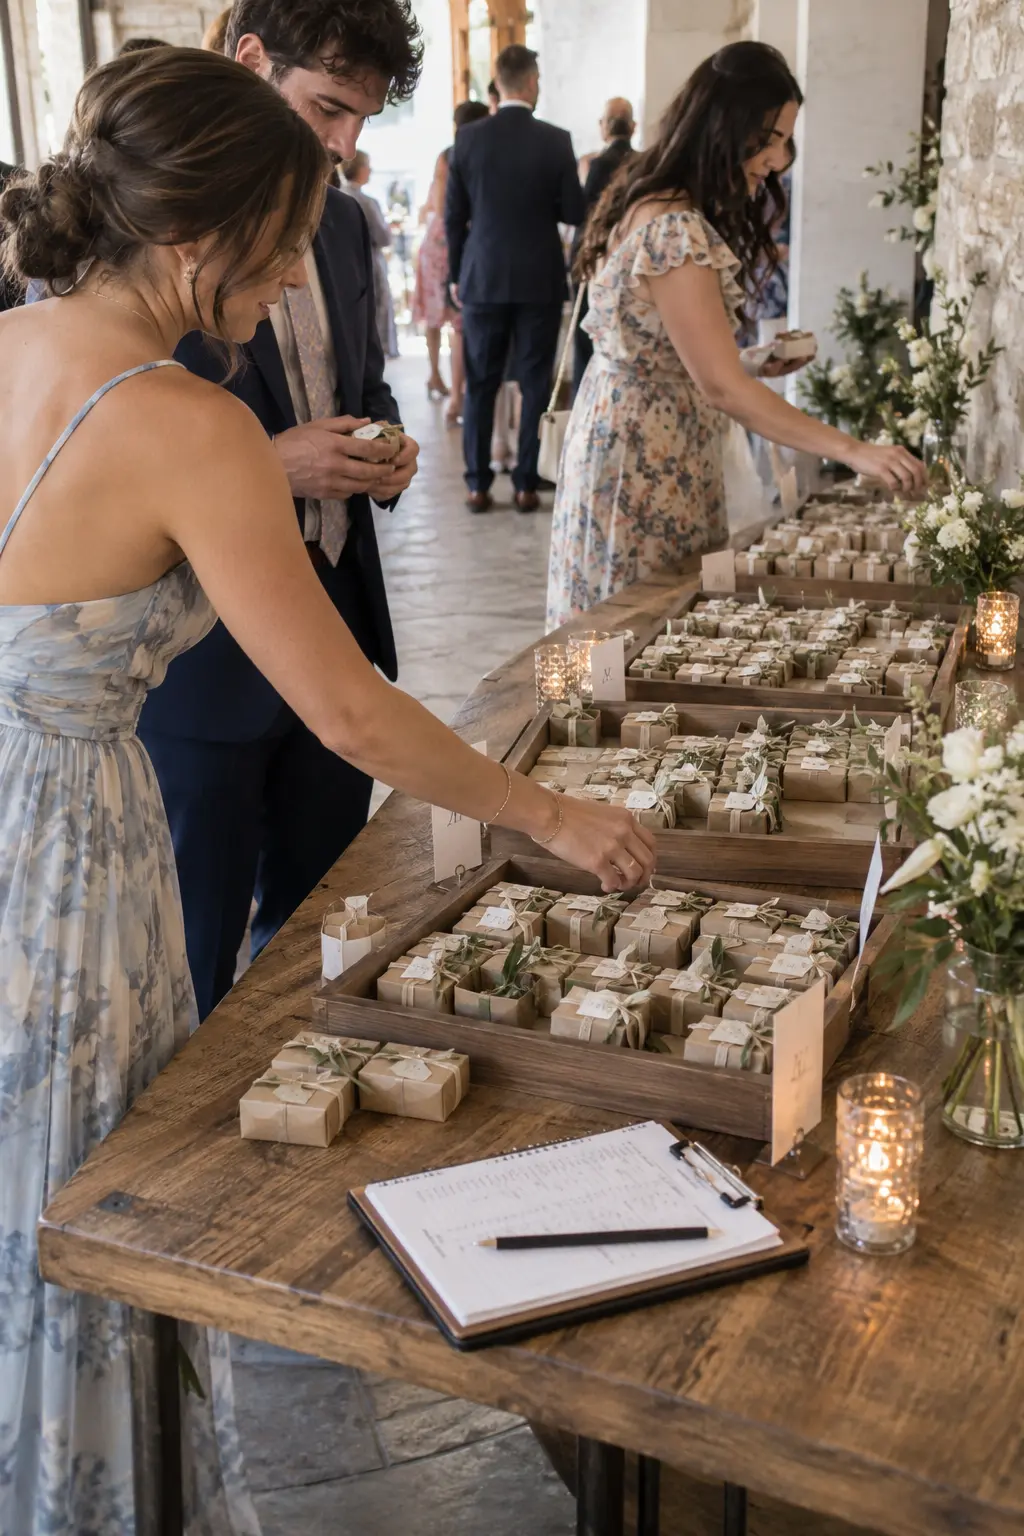
Arrange personalized favor boxes in shallow trays by surname initial and keep a pickup checklist at the attendant's side. This approach prevents couples from purchasing favors that disappear anonymously and helps families collect items for guests who leave early.
Use low trays rather than one tall pyramid, which becomes awkward after the first few favors are removed. Leave a separate clearly marked tray for households sharing one favor.
24. Destination Welcome Bag Check-In
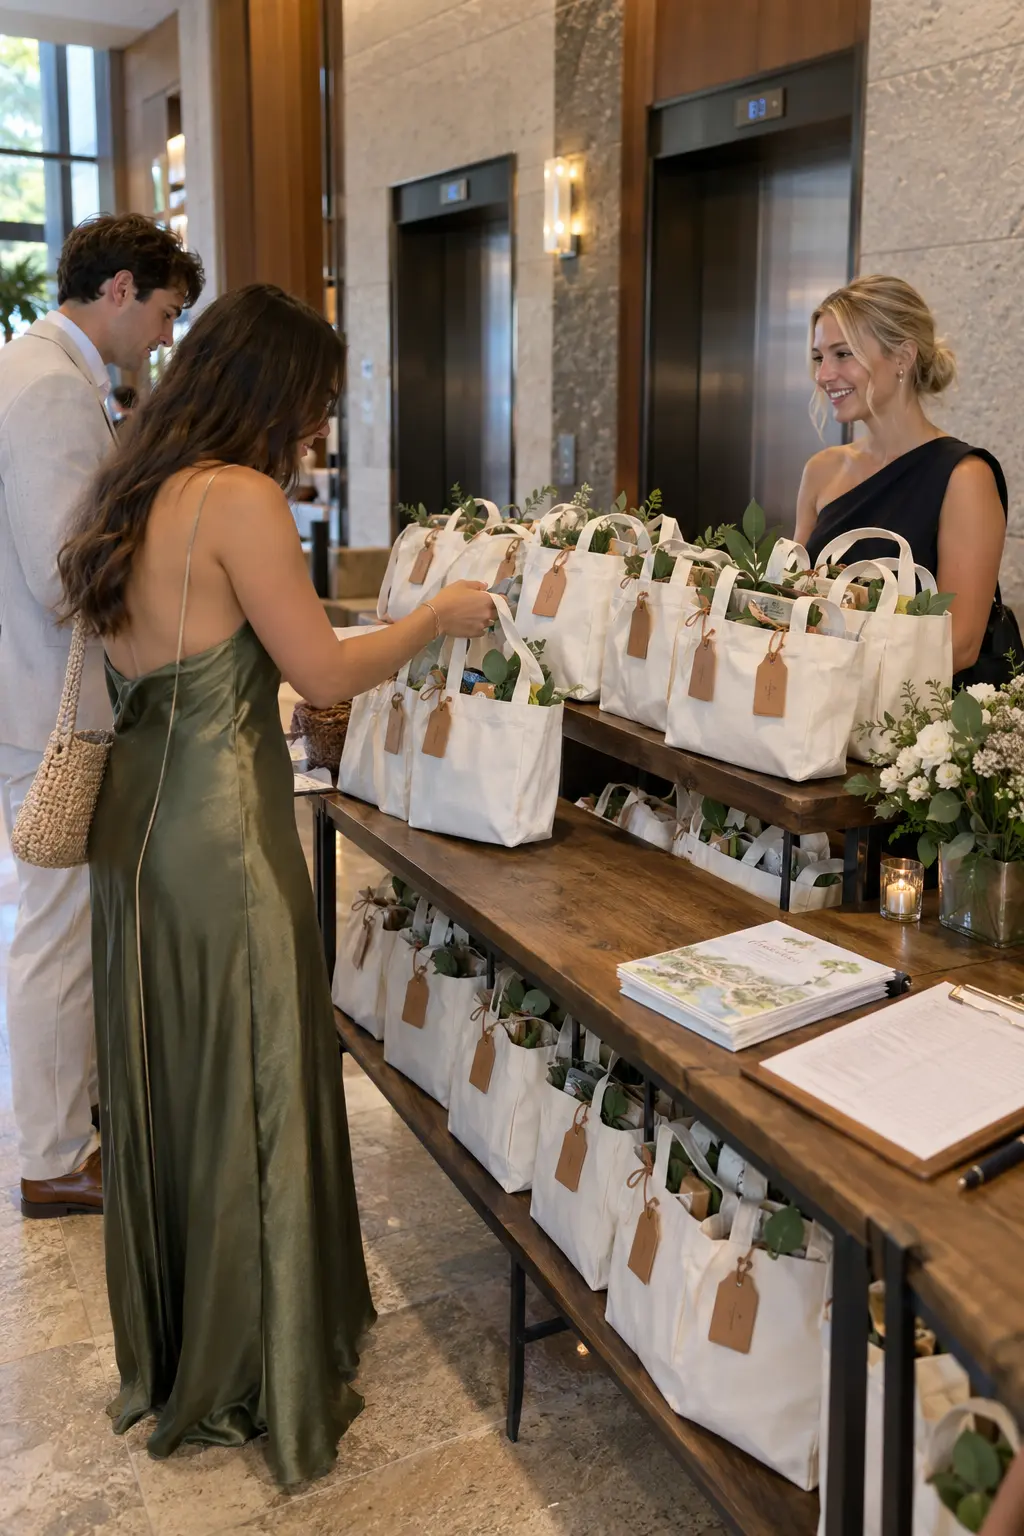
Set welcome bags on risers with luggage tags facing forward, organized by guest or hotel room. An attendant checks off arrivals and hands each bag directly to the right household, preventing names from being overlooked in a decorative pile.
Include only items useful during the wedding weekend, then add a map or itinerary in an exterior pocket. Deliver late-arrival bags to hotel rooms so the entrance table can close before the main event begins.
Organize welcome bags by room or household, then deliver late-arrival bags after check-in.
25. Outdoor Blanket and Shawl Welcome Table
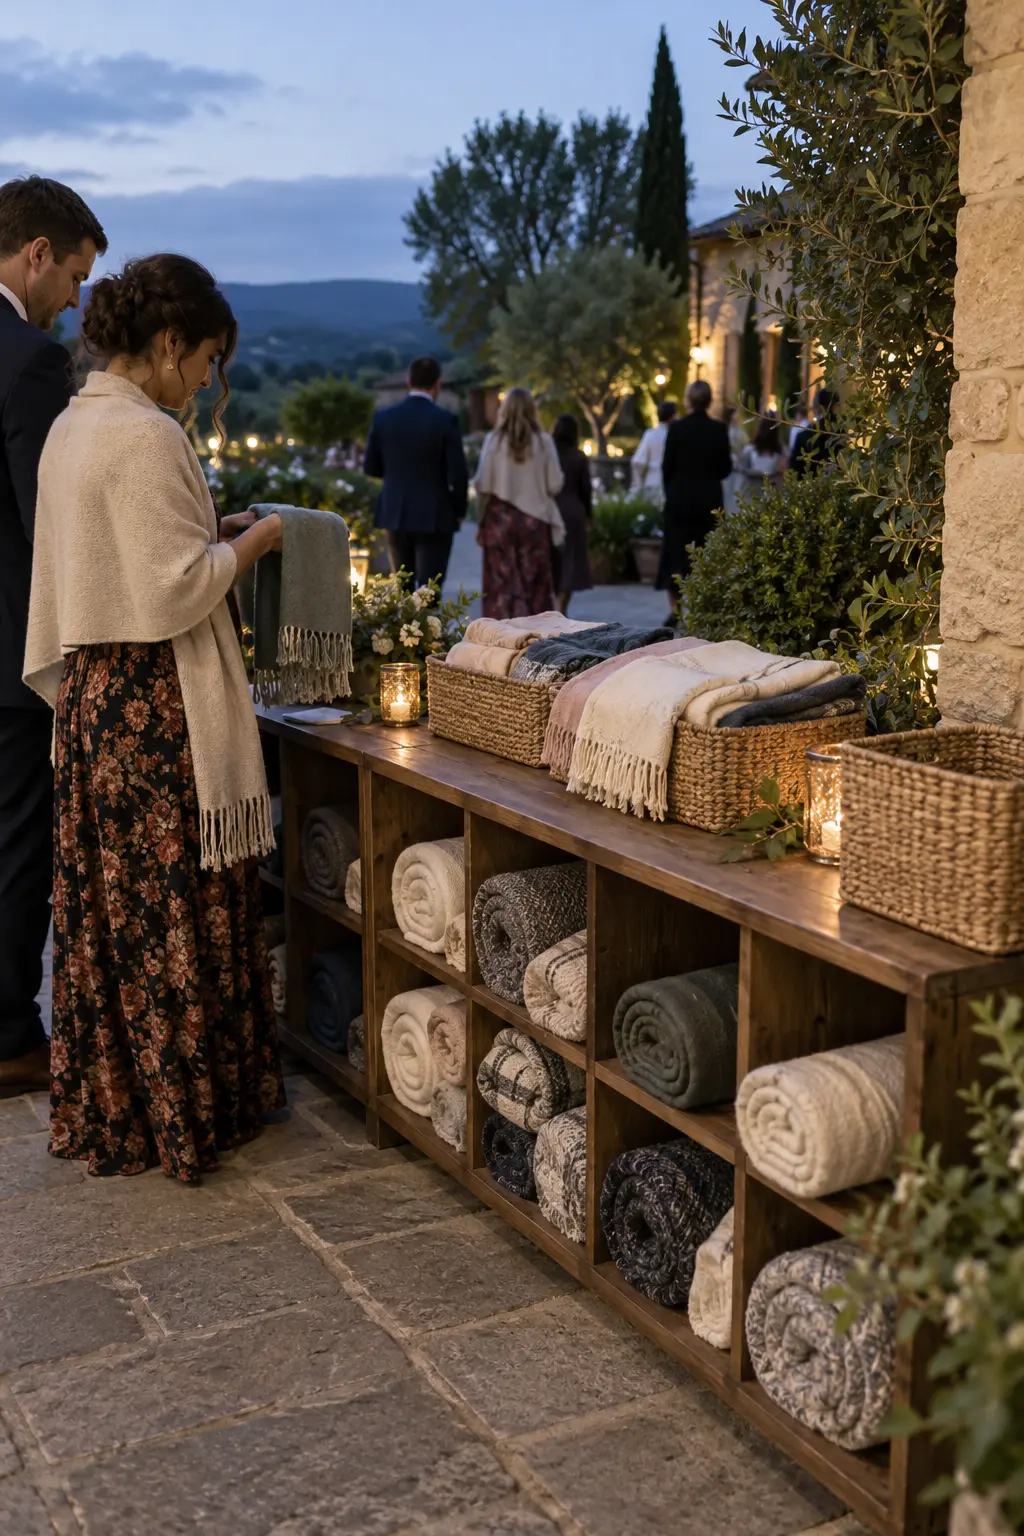
Roll blankets into lower cubbies and fold shawls in baskets across the tabletop. Guests can choose warmth that suits them, and the divided storage keeps the station orderly after several items have been removed.
Place the table before guests reach the outdoor seating, then add a return basket at the far end of the evening route. Choose washable textiles and confirm who will gather, clean, or donate them afterward.
26. Sun-Comfort Parasol and Fan Station
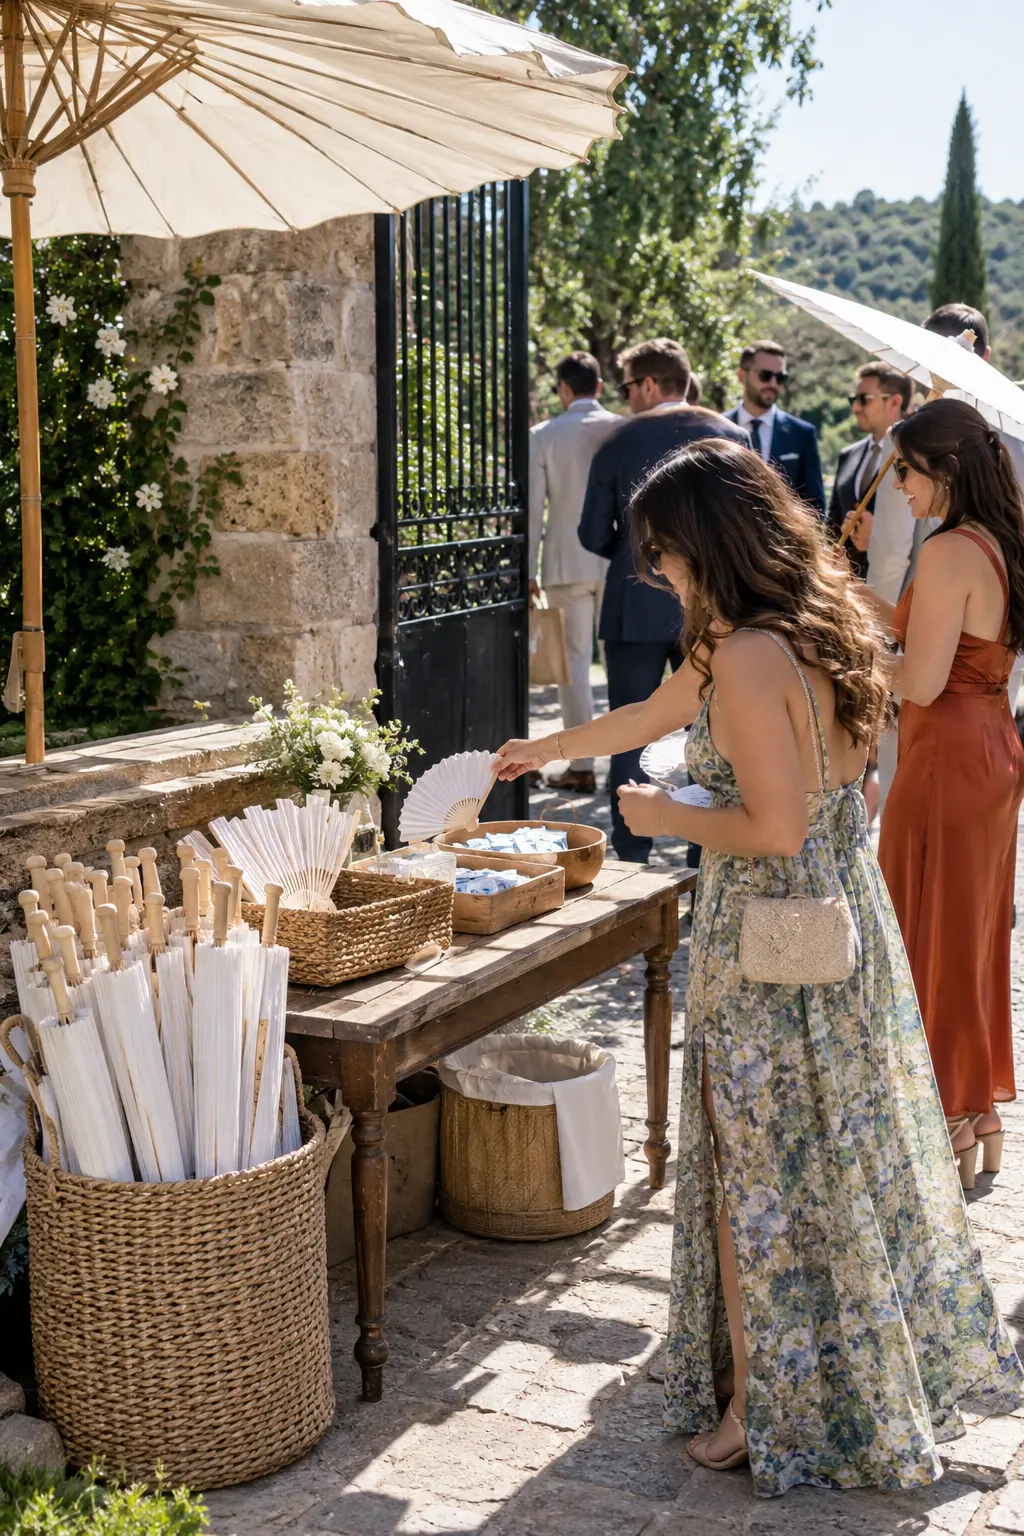
Stand paper parasols upright beside shallow baskets of folding fans and individually wrapped sunscreen wipes. The mix gives guests immediate shade, airflow, and optional skin protection without asking them to carry bulky supplies from home.
Keep parasols closed at pickup so the entrance remains clear, and place a disposal bin below the table for wipe packets. Test the umbrella stand on the actual ground surface; soft grass may require a weighted base.
27. Rainy-Day Towel and Umbrella Check-In
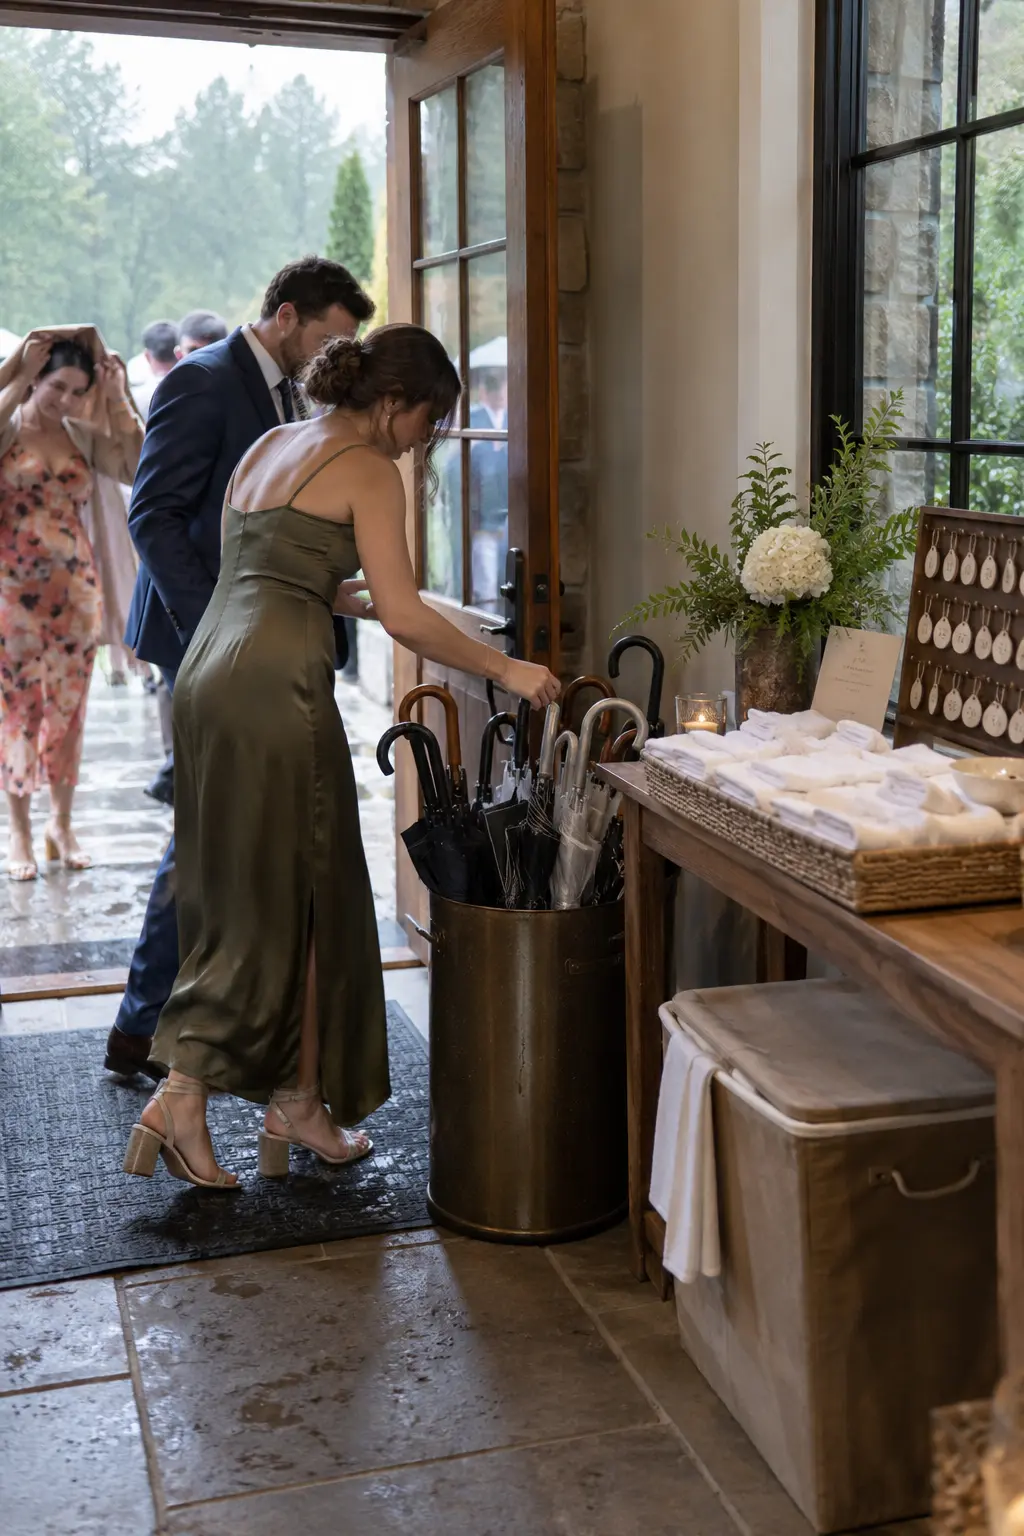
Create a wet-weather welcome point with an umbrella rack, drip tray, folded hand towels, and numbered claim tags. Guests can dry their hands, store umbrellas, and enter the venue without carrying water across polished floors.
Position the rack on a washable mat just inside the entrance, away from the main greeting line. Assign one person to empty the drip tray and replenish towels if steady rain continues.
28. Kids' Welcome Pack Table
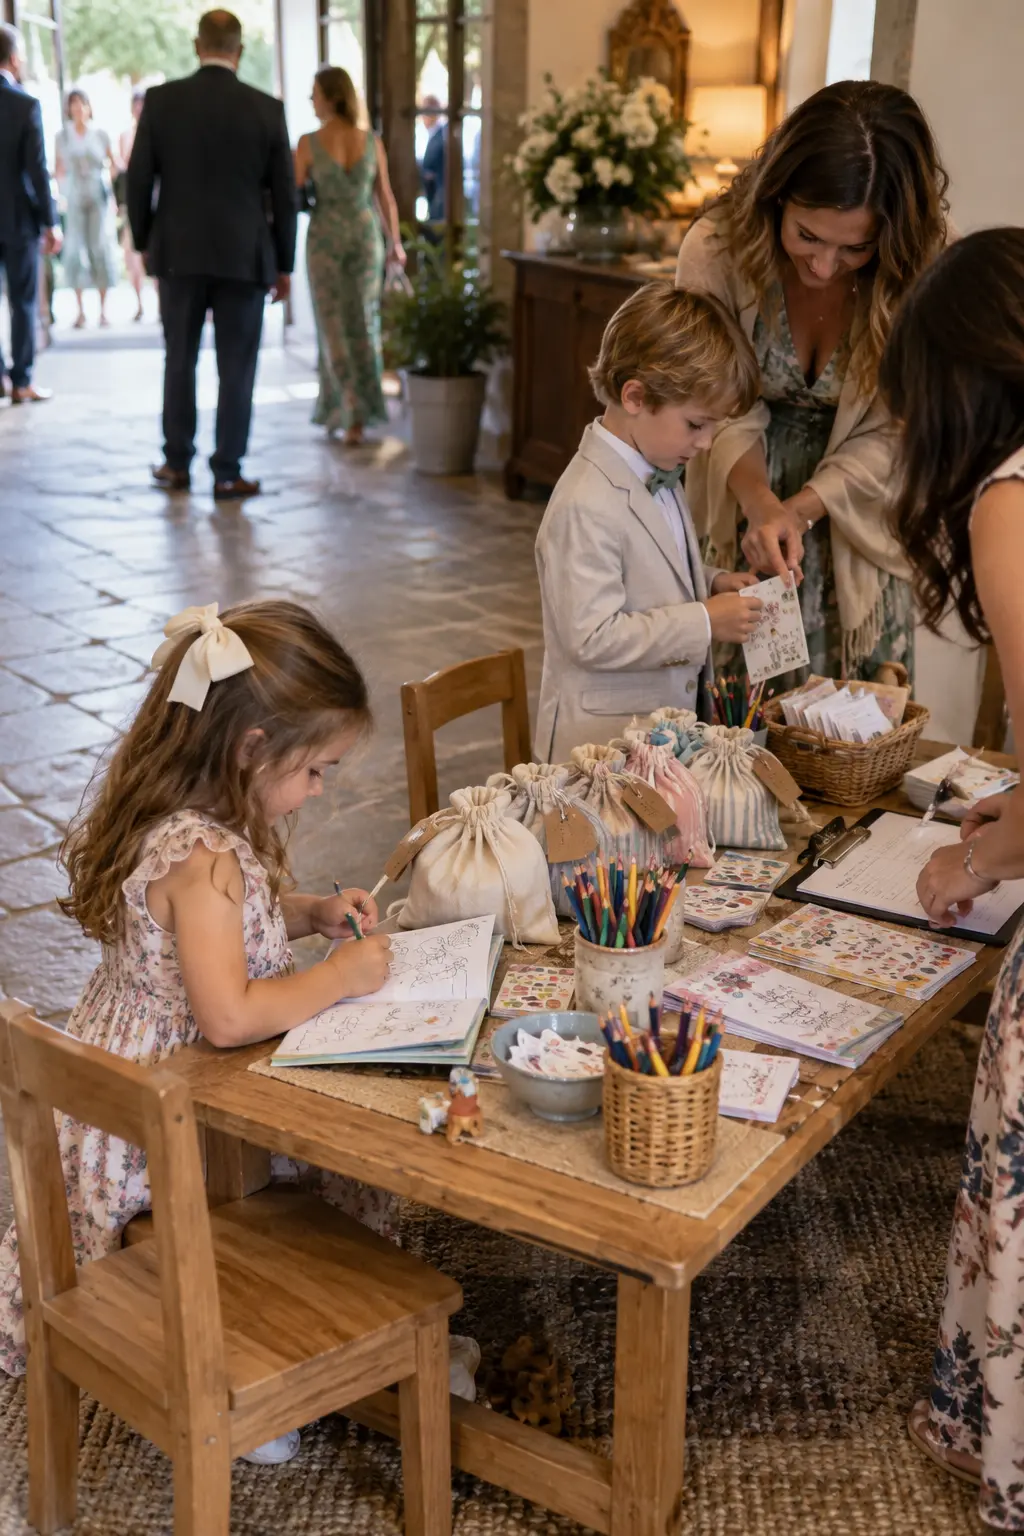
Set name-labeled activity pouches on a low table with clipboards, washable pencils, stickers, and simple booklets. Children can begin using the pack during waiting time, while parents quickly confirm that each child has the correct age-appropriate supplies.
Avoid small loose pieces for toddlers and skip markers that can stain formal clothing or linens. Keep replacement pencils and a small cleanup pouch with the coordinator instead of overfilling the guest-facing table.
29. Accessibility Support Welcome Station
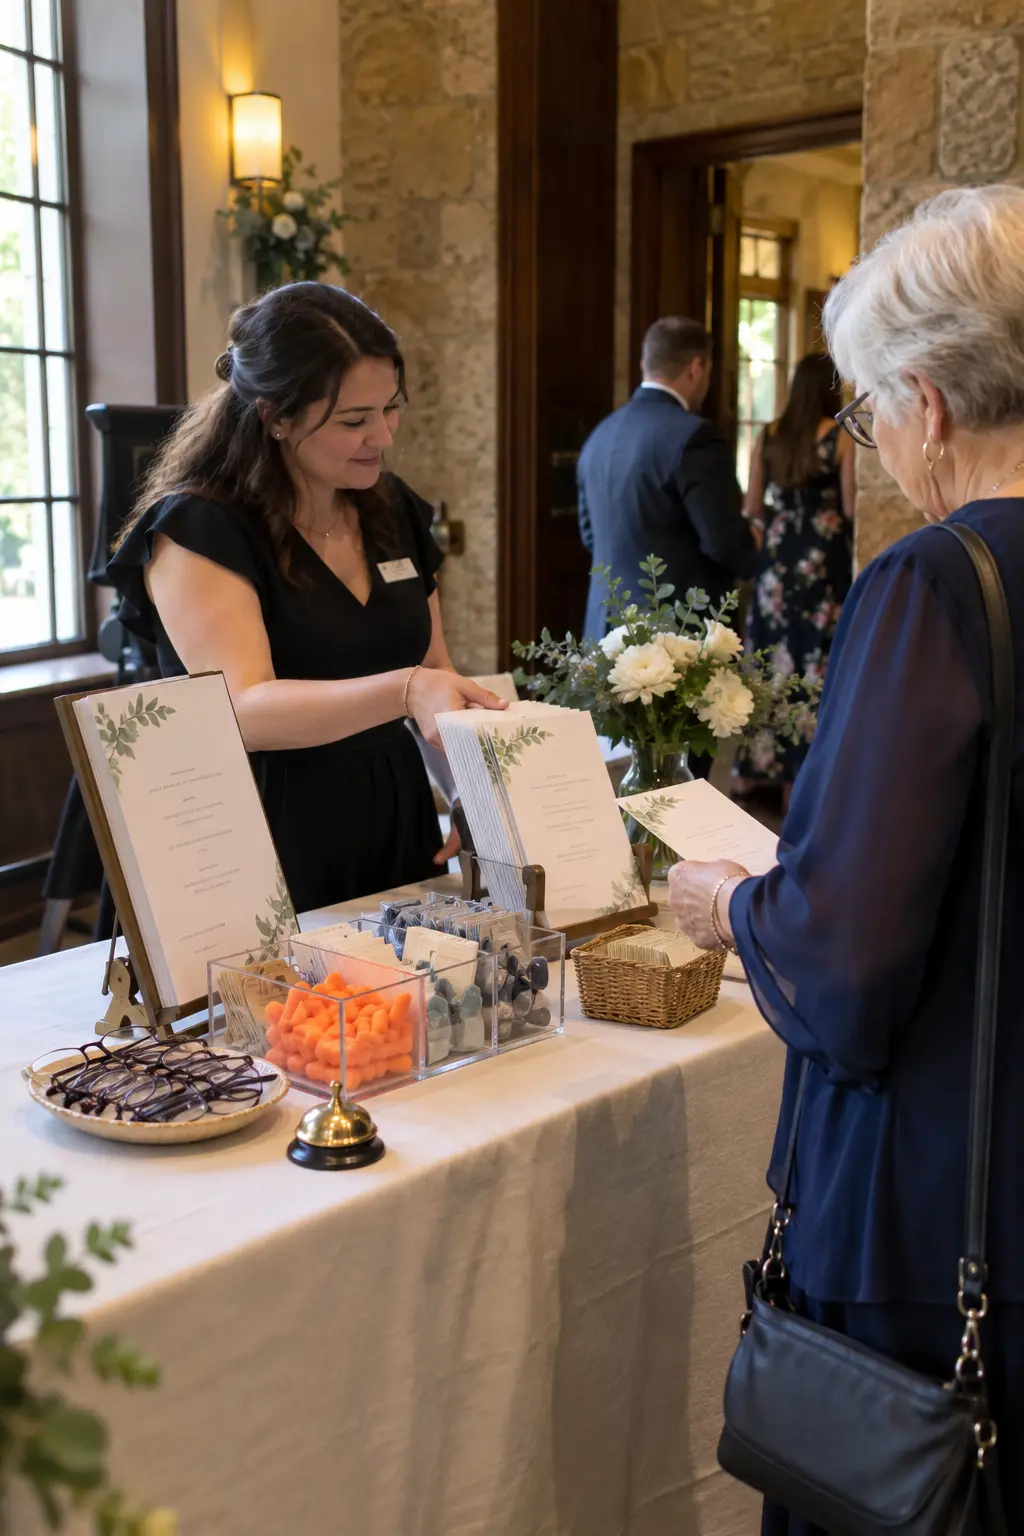
Offer large-print programs, earplugs, reading glasses, and assistance cards in a clear divided organizer. A seated attendant can answer questions about reserved seating, step-free routes, restrooms, or hearing support without making guests search across the venue.
Use high-contrast labels and place the table where wheelchair users can approach from the front. Confirm every listed accommodation with the venue before printing, including elevator access and the location of quieter spaces.
Accessibility information should match the venue's real routes, seating, restrooms, and available equipment.
30. Coat and Bag Tag Table
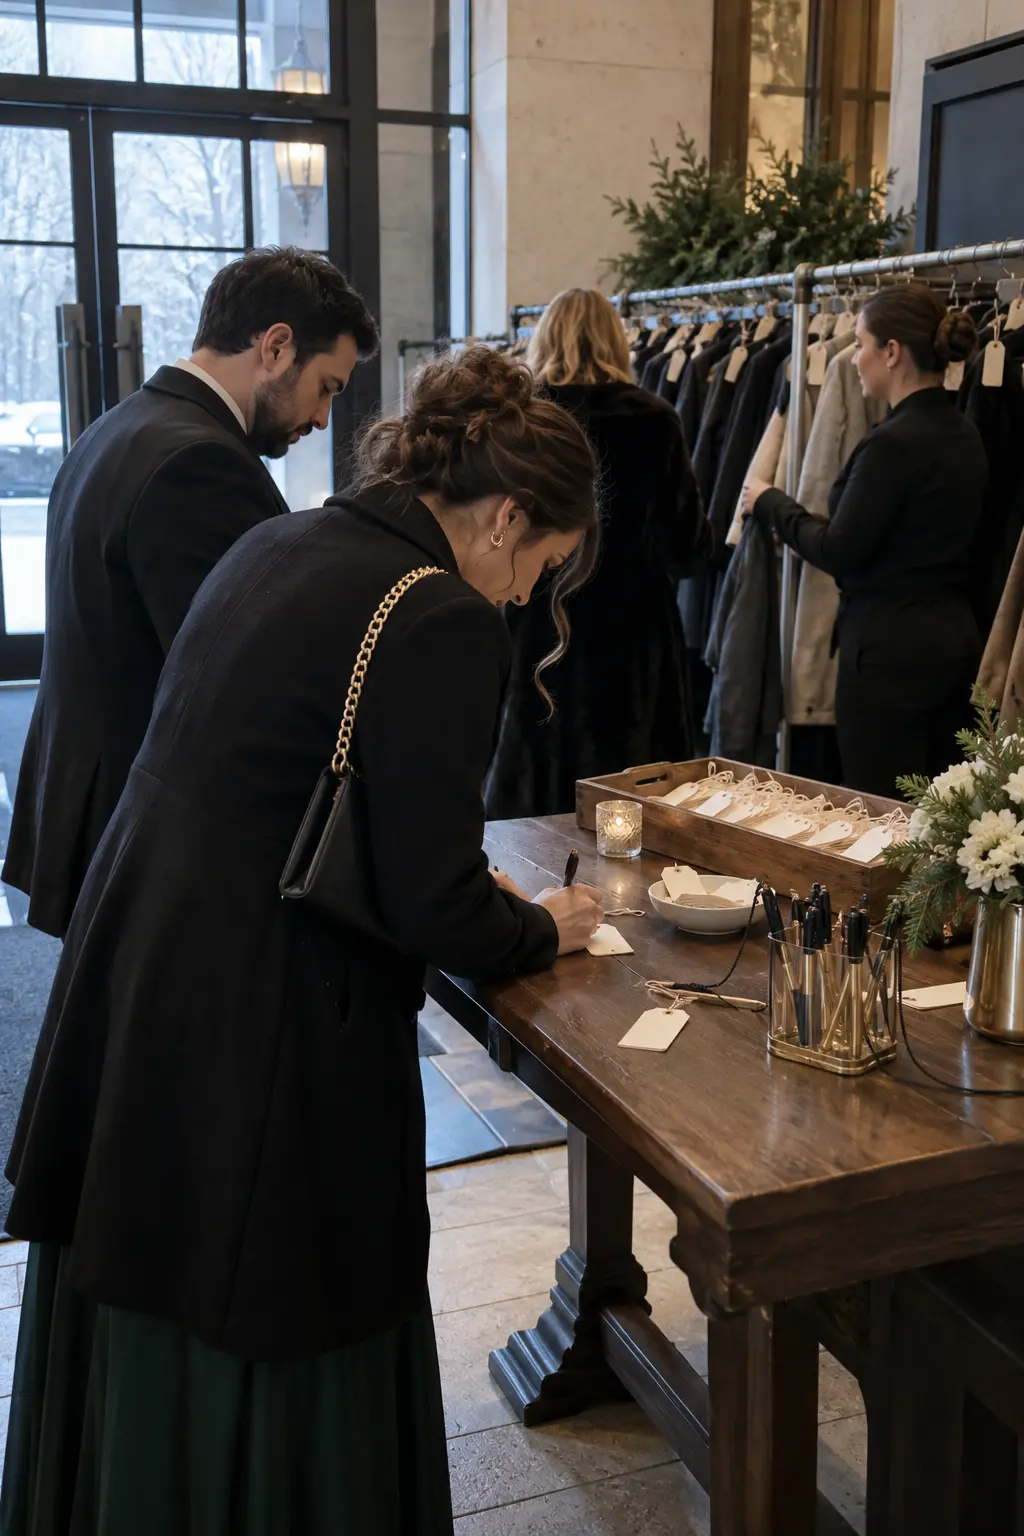
Place numbered claim tickets, pens on cords, and small bag tags on a console beside staffed garment racks. Guests label loose items before storage, reducing confusion when many similar black coats appear at the end of the night.
Keep the writing surface separate from the return line, and reserve a few oversized tags for strollers or large bags. Photograph the final rack arrangement only for staff reference, then delete it after every item is collected.
Welcome Drinks and Small Refreshment Tables
A compact refreshment table can soften a hot, cold, or travel-heavy arrival. Keep the choice focused, label allergens accurately, and plan refills and waste so the station never turns into a second catering line.
31. Infused-Water Arrival Table
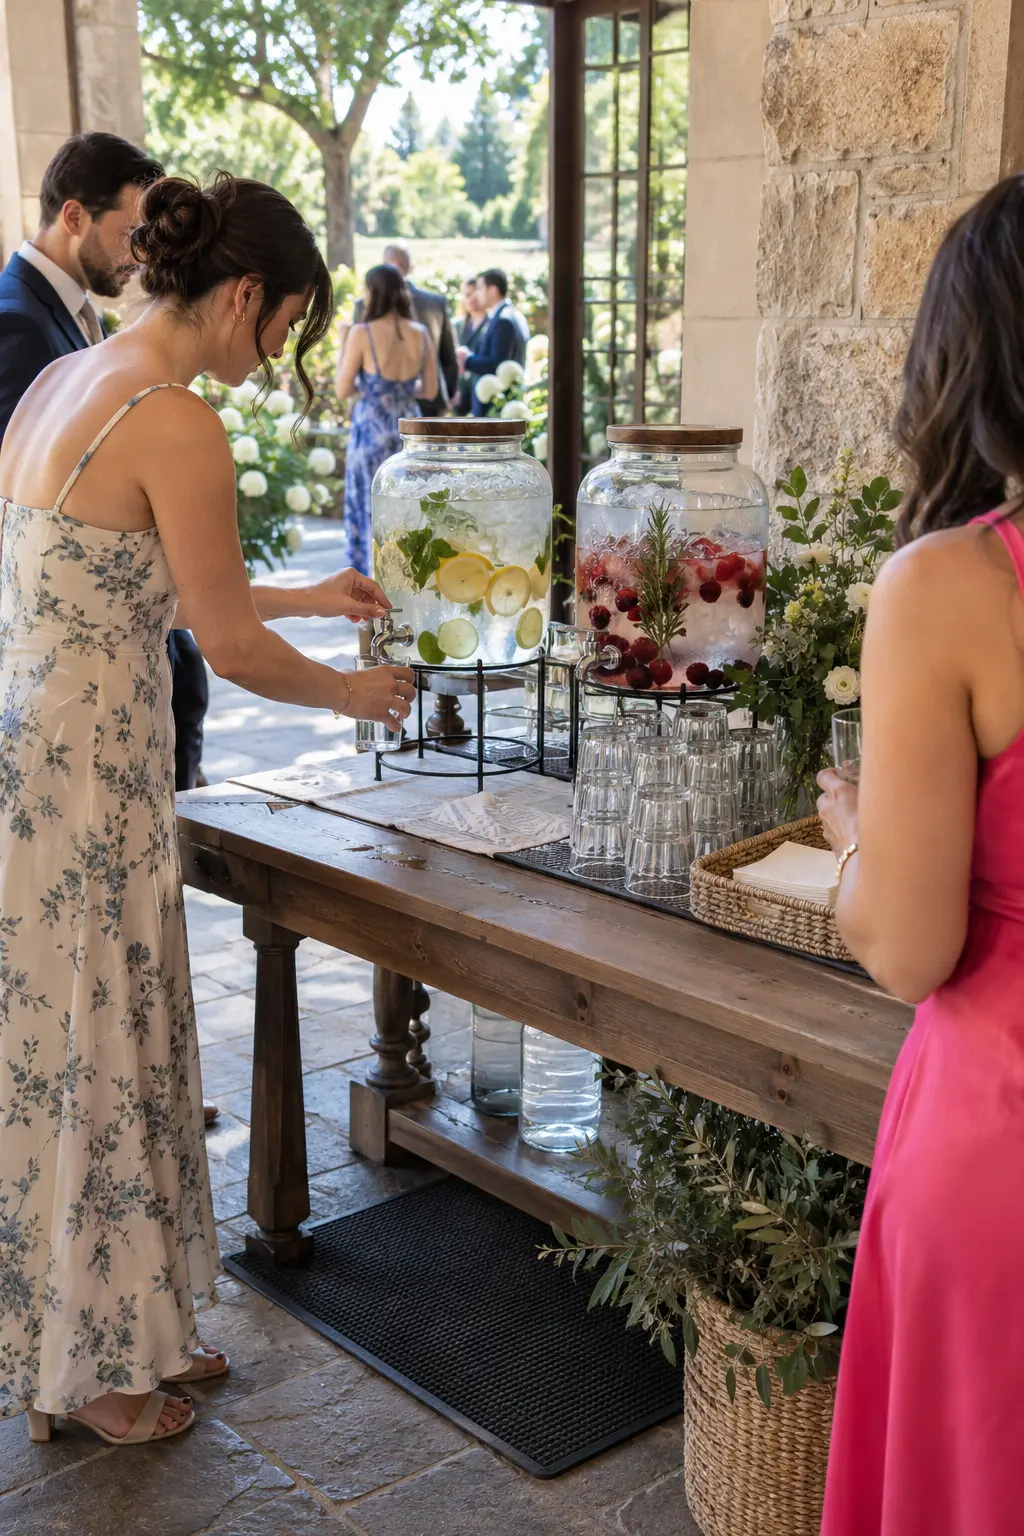
Set two glass dispensers on stable risers, one with citrus water and one with a berry-herb infusion. Stack tumblers in short rows and place a dry return tray at the end, giving guests a simple one-direction pickup flow.
Ask catering staff to refill with cold water and fresh ice rather than adding fruit repeatedly. Use a washable spill mat under the taps, and keep the tabletop away from paper programs or seating cards.
- Raise dispensers enough for a glass to fit under each tap.
- Separate drink returns from clean cup pickup.
- Keep paper goods on another table.
32. Bottled Water and Electrolyte Basket
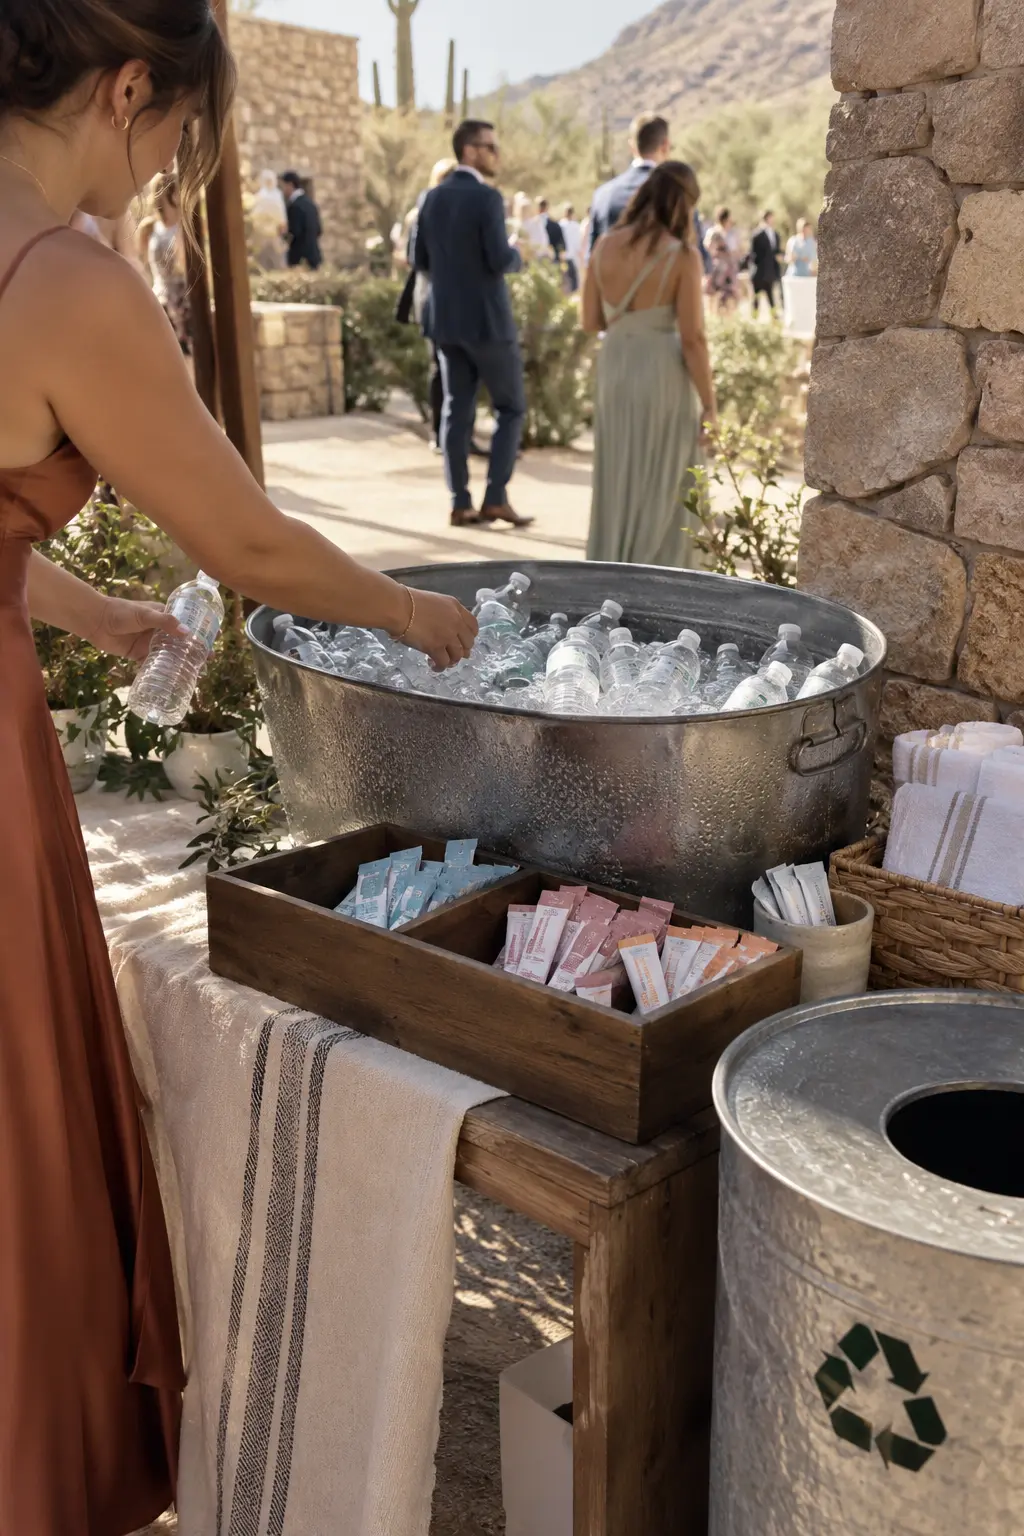
Fill a metal ice tub with water bottles and place individual electrolyte packets in a divided tray beside it. This setup helps guests cool down after a shuttle ride or outdoor walk while keeping service faster than a mixed beverage station.
Provide a visible recycling bin and linen hand towels for condensation. Keep packets dry and clearly separated from any flavor that contains common allergens or sweeteners guests may wish to avoid.
33. Lemonade and Schedule Table
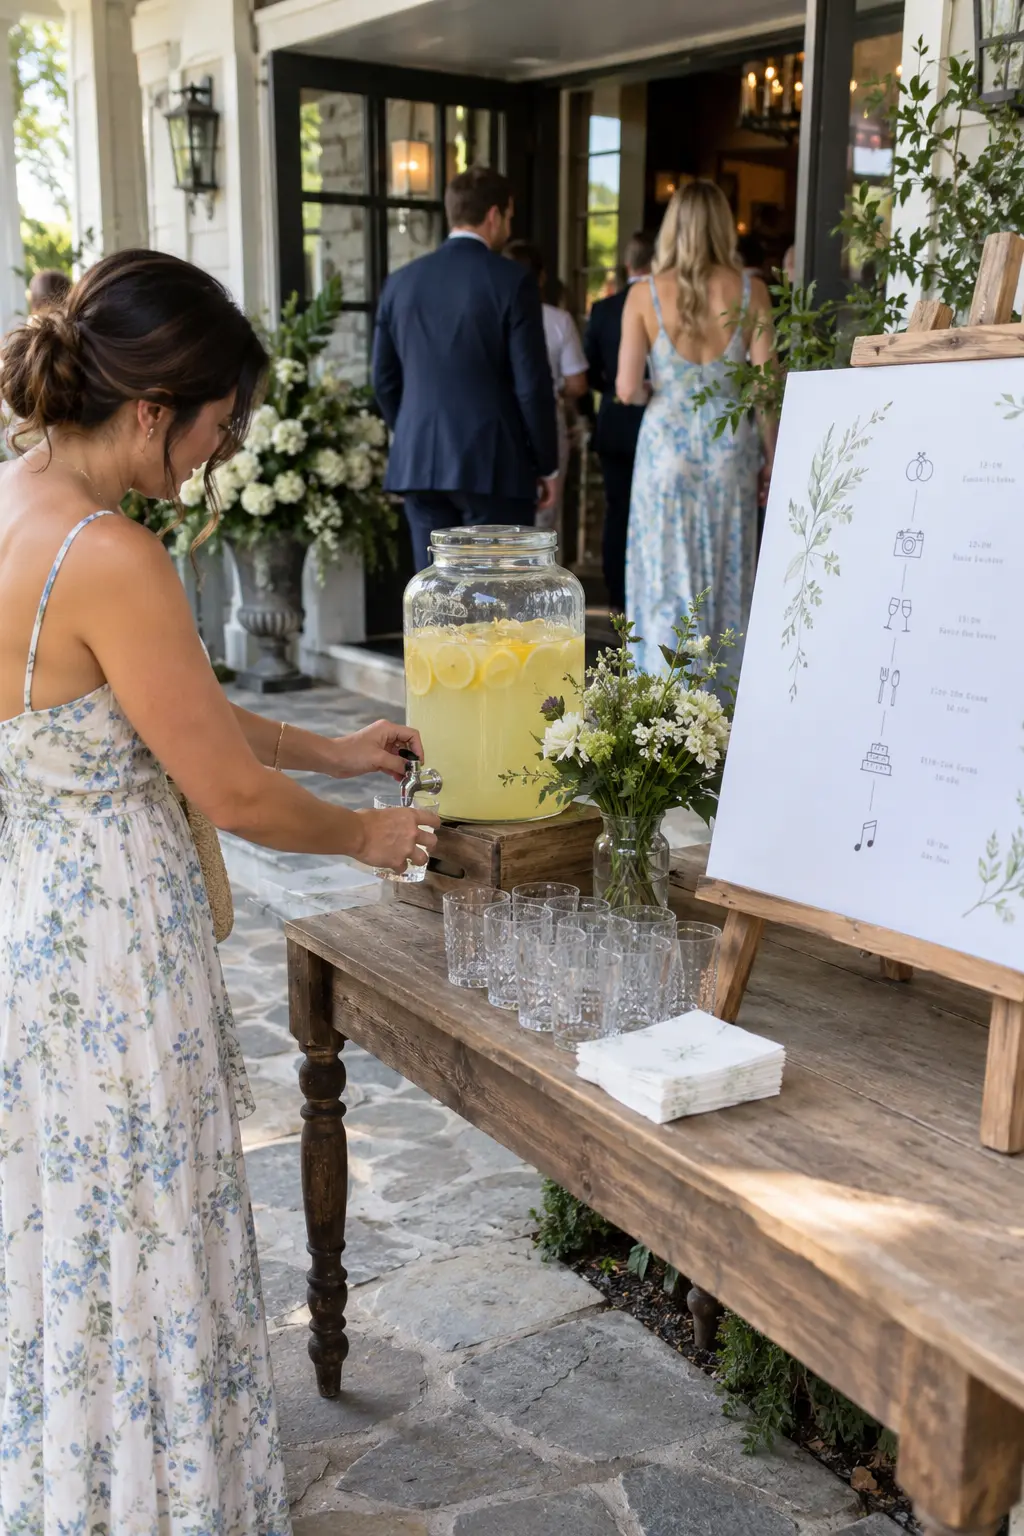
Pair one lemonade dispenser with a large tabletop schedule showing the next two or three event times. Guests can take a drink and understand where they should be next without stopping to read a full weekend itinerary.
Place the schedule beyond the cups so the line keeps moving forward. A single refill jug below the table prevents the display from looking like a bar, while a napkin tray catches small spills.
34. Morning Coffee and Program Station
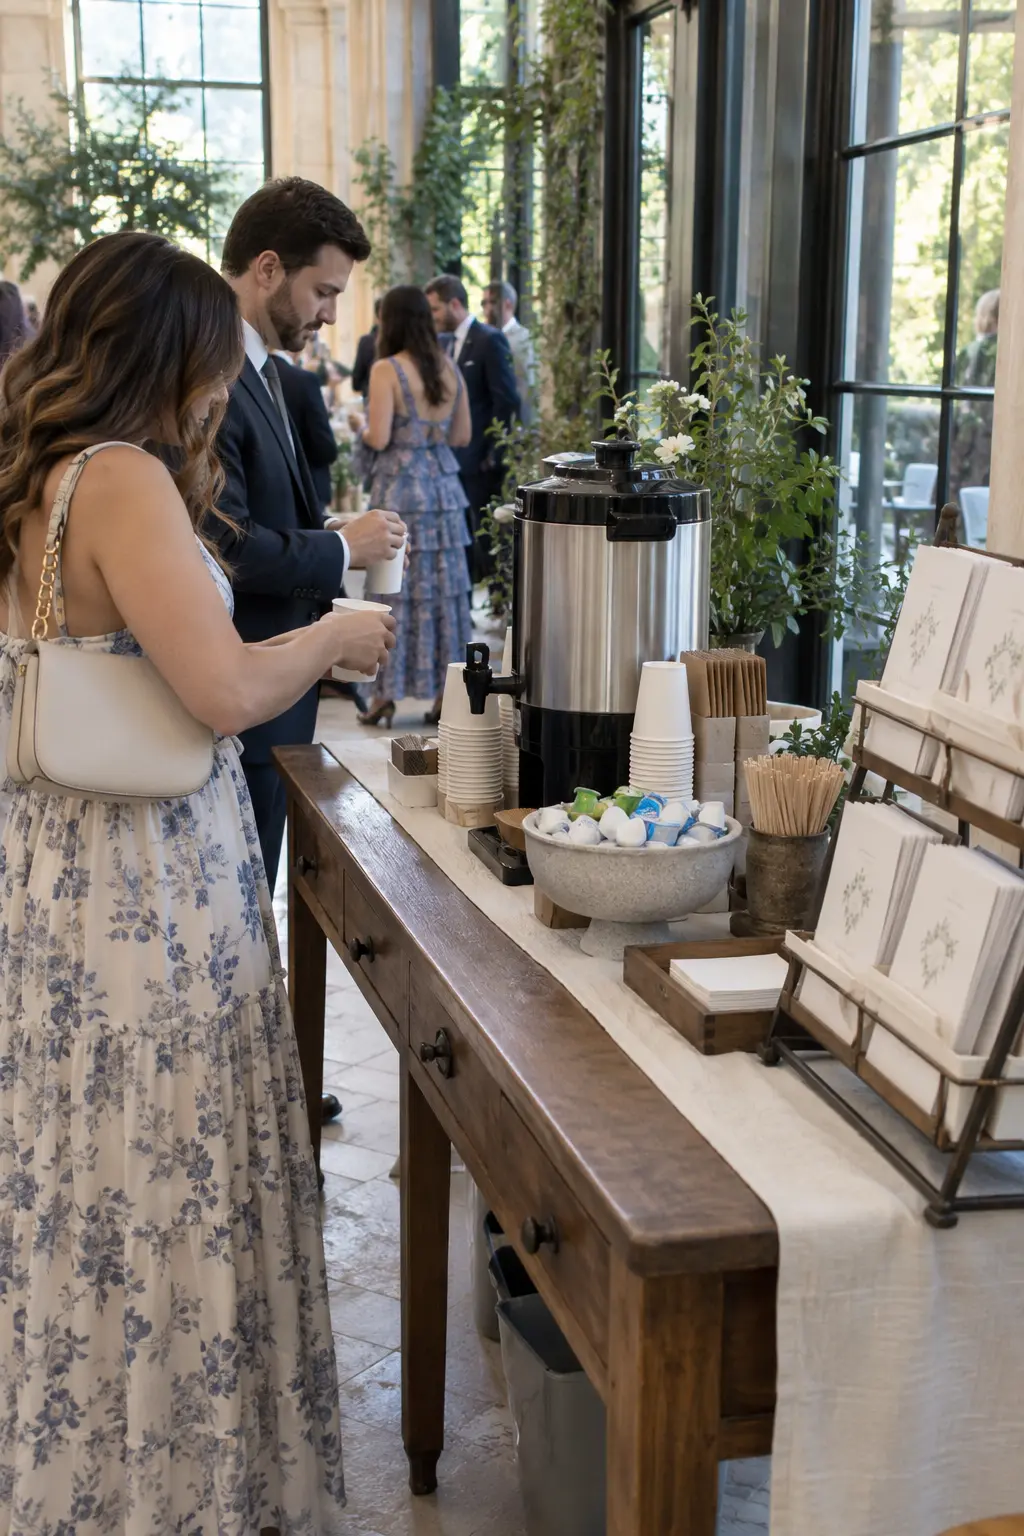
Use an insulated coffee urn with cups and sleeves on one side, then place ceremony programs in a raised rack on the other. Early-arriving guests can warm up and collect the event order without visiting two different parts of the venue.
Keep milk and cream chilled in a covered bowl, and position the stirrer return away from clean programs. Coffee service needs an attendant nearby for refills, drips, and hot-surface safety.
35. Welcome Mocktail Bottle Cart
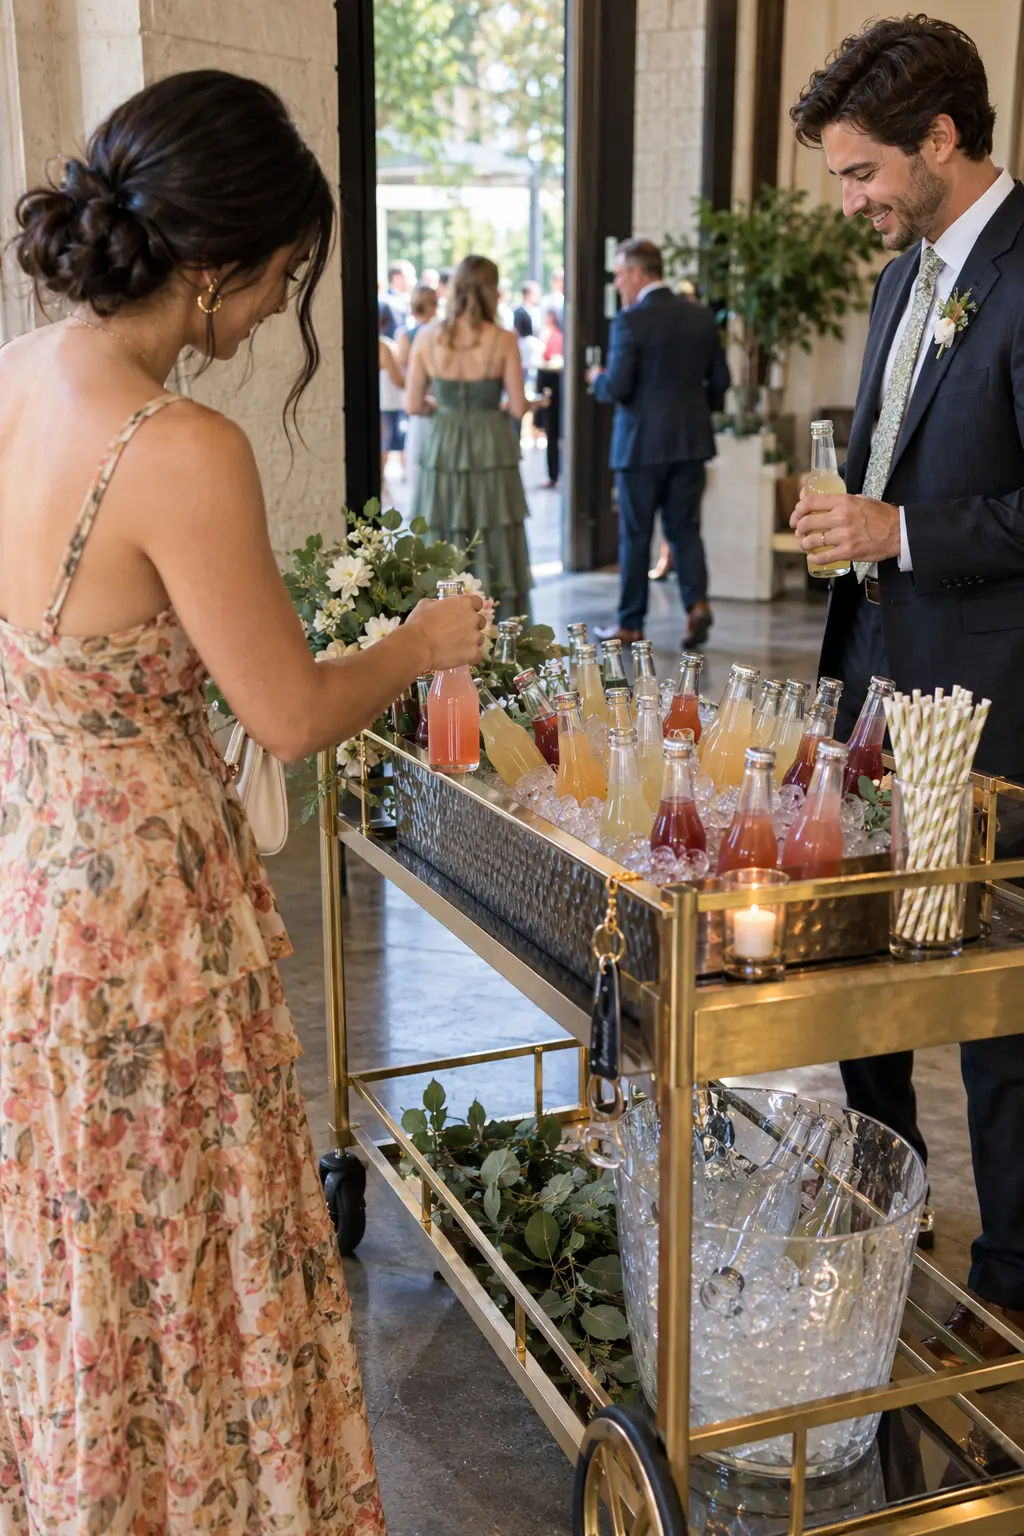
Chill sealed zero-proof drinks in a small rolling cart, with a tethered opener and a return bucket on the lower shelf. Guests get a celebratory arrival drink without waiting for a bartender or balancing an open dispenser near paper details.
Offer two clearly different flavors and keep ingredient cards visible for allergies. Restock from a hidden cooler in small rounds so bottles remain cold and the cart still looks easy to use.
36. Local Snack and Map Table
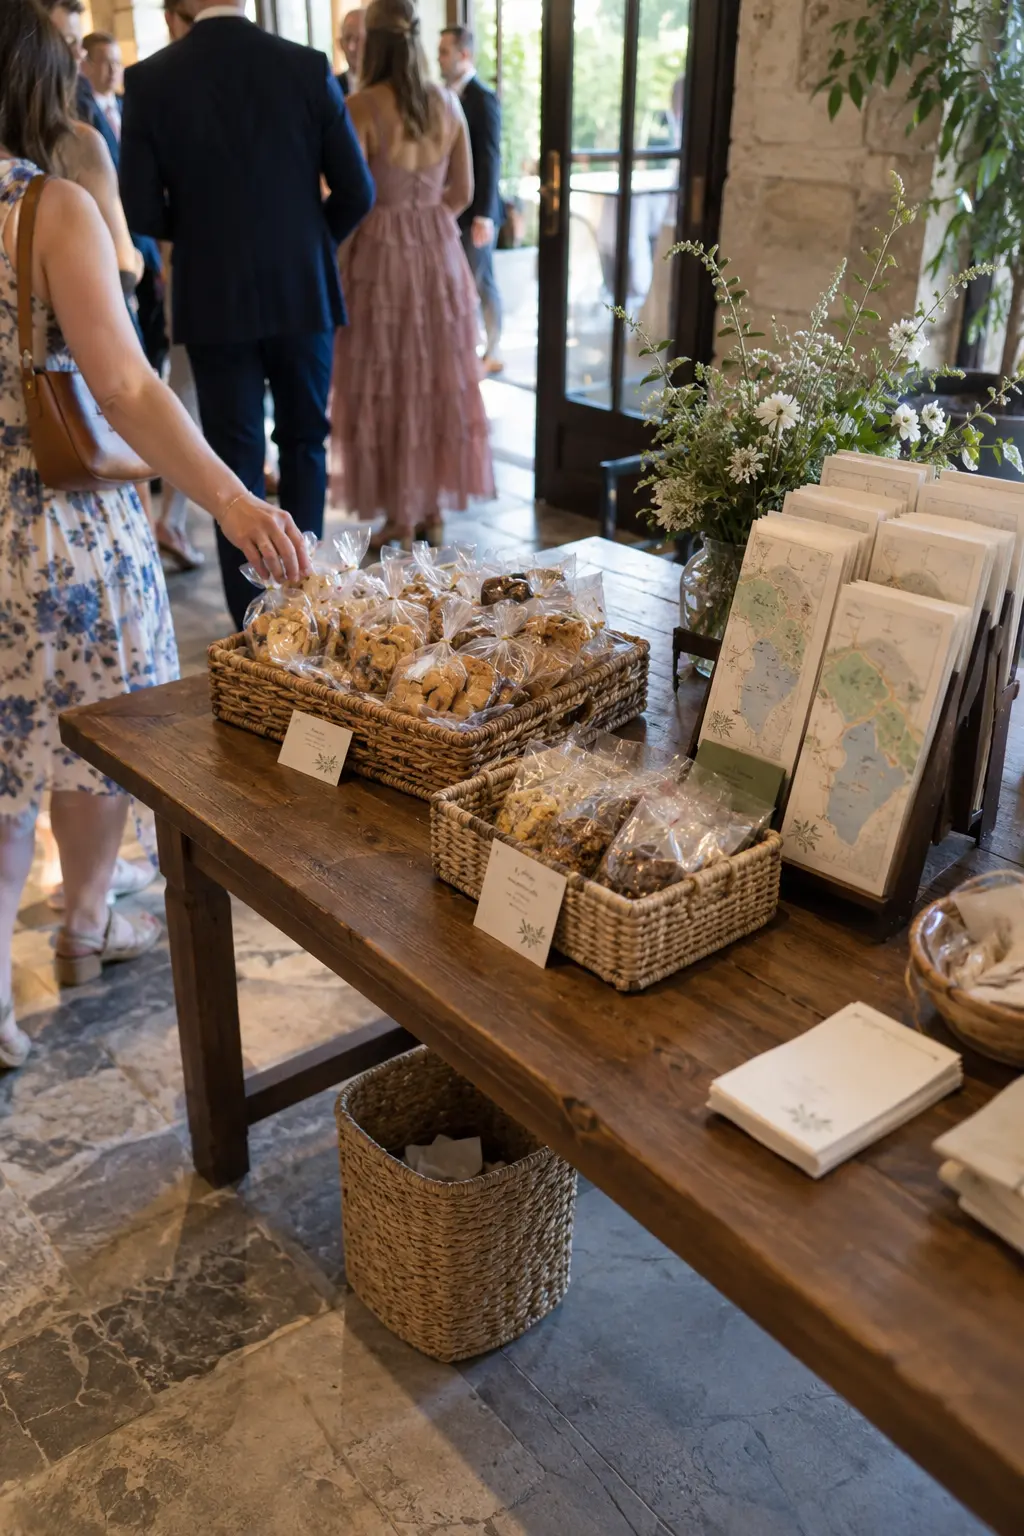
Arrange individually wrapped local snacks in low baskets beside a rack of neighborhood maps. Destination guests receive something quick after travel and can take a guide to nearby coffee, pharmacies, transportation, or free-time activities.
Add accurate ingredient labels and choose items that tolerate room temperature. Keep a waste basket below the table, then move unopened extras to welcome bags or the hotel desk after the arrival window closes.
37. Tea Cup Welcome Shelf
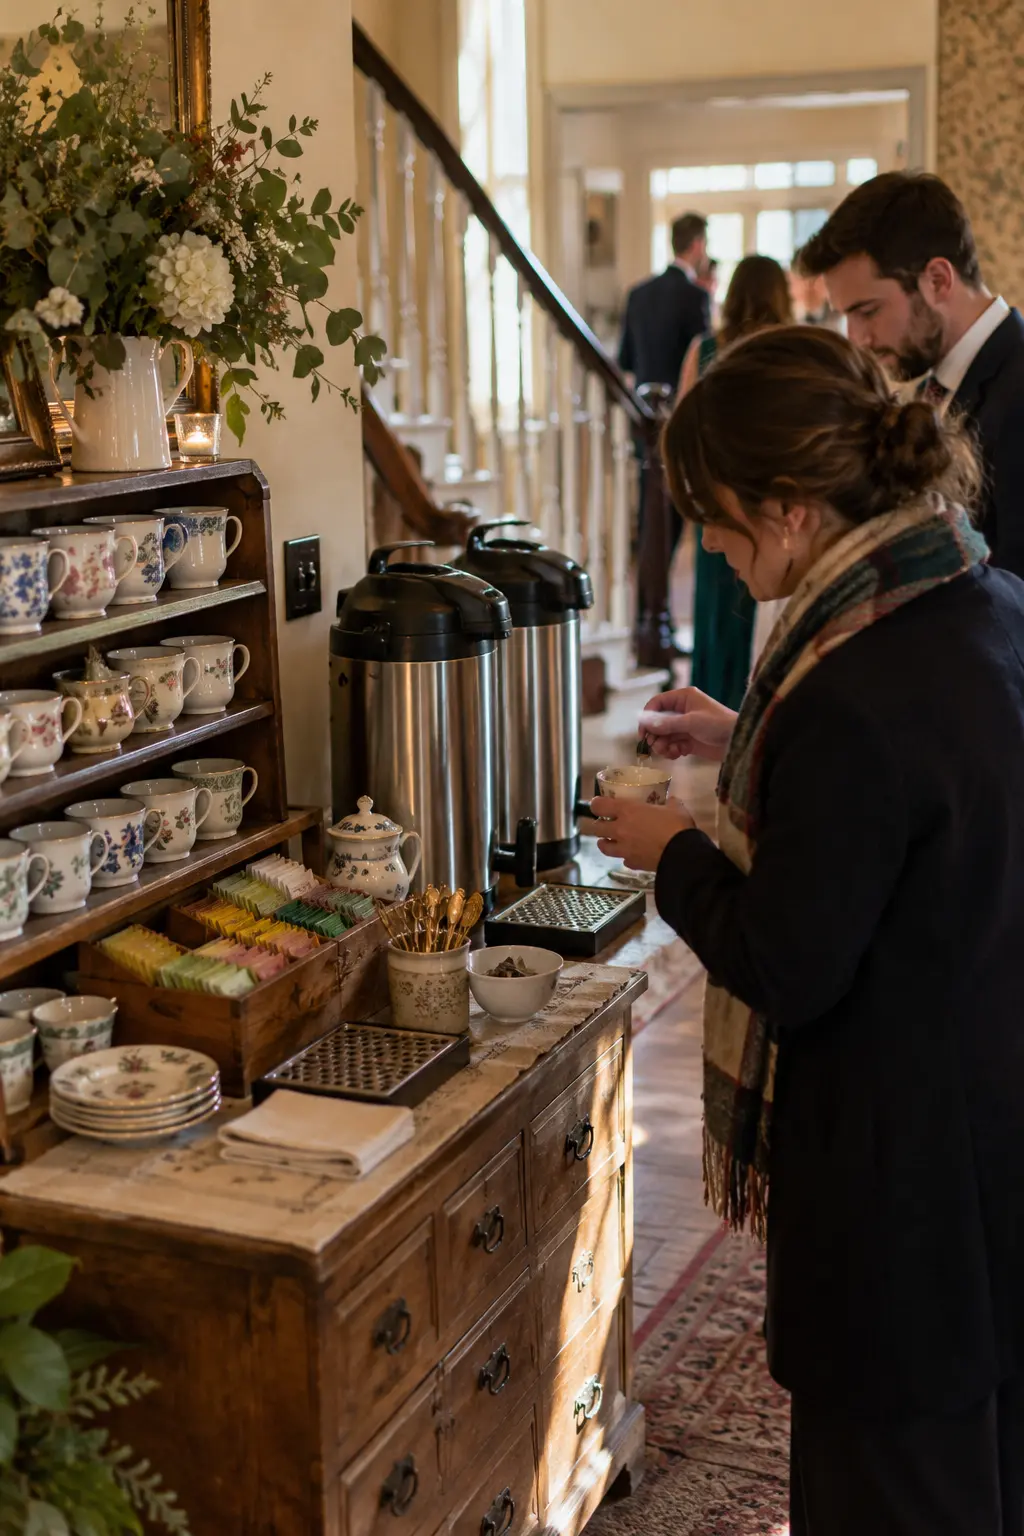
Display ceramic cups on open shelves beside insulated tea dispensers and shallow drawers of labeled sachets. Guests choose a cup and blend, creating a calmer cold-weather welcome than a crowded beverage bar.
Provide separate hot-water and brewed-tea dispensers, plus a clear spoon return and drip tray. Mismatched cups add character, but every piece should have a comfortable handle and no chips.
38. Champagne Escort Glass Display
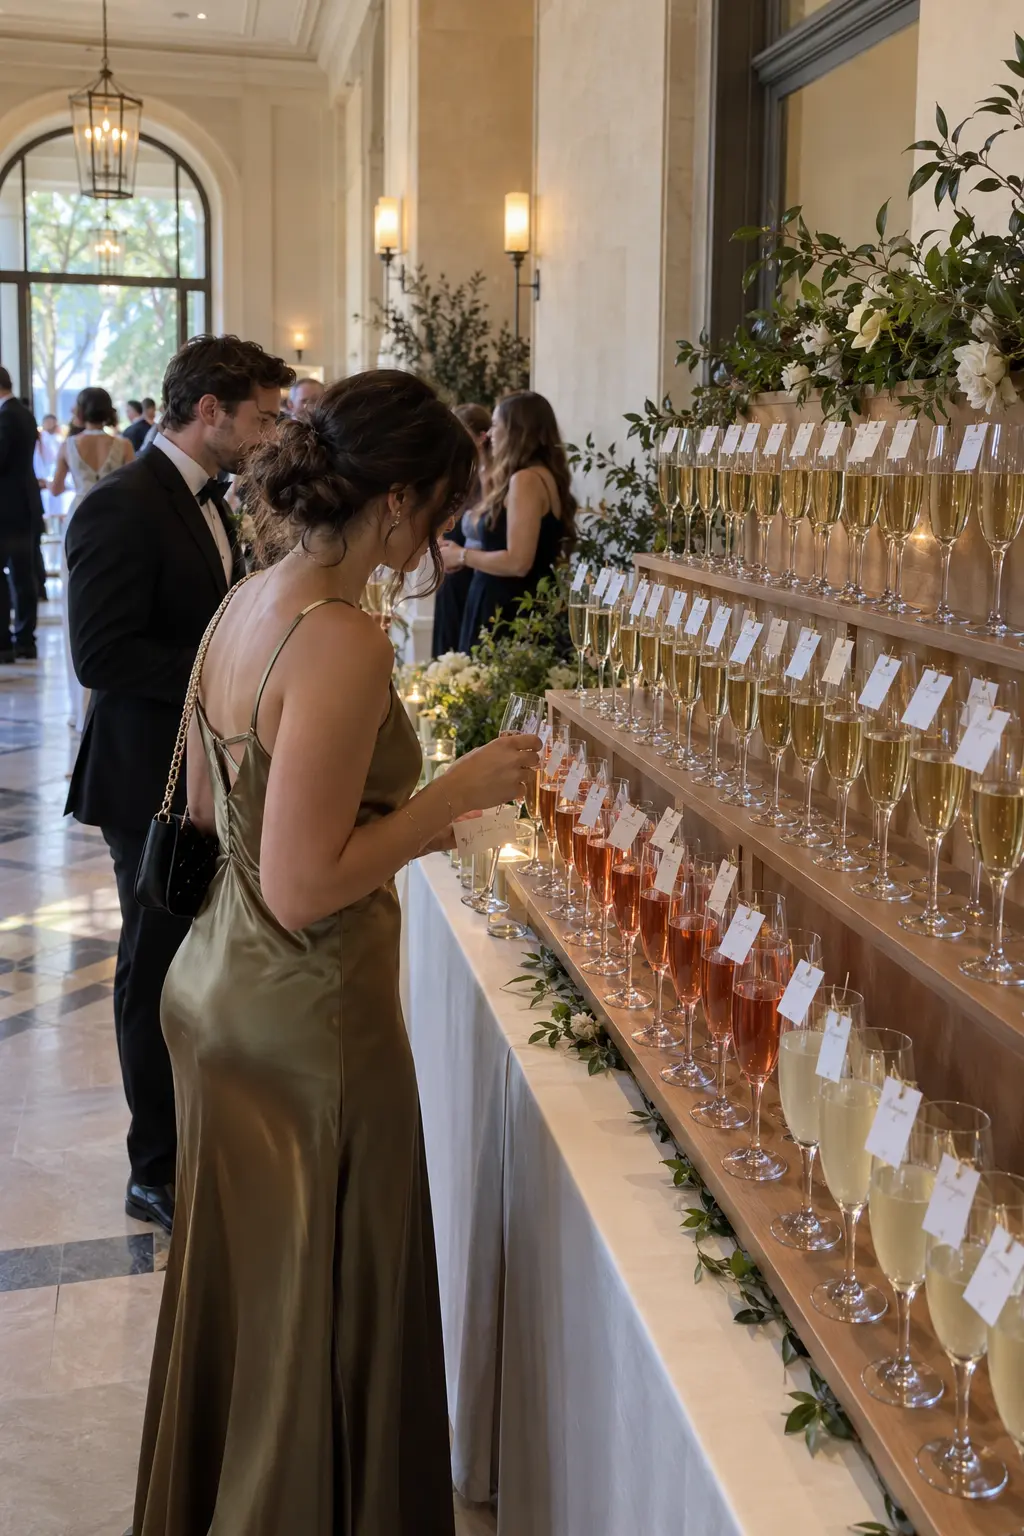
Attach a name-and-table tag to each flute, then arrange glasses alphabetically across sturdy stepped shelves. Guests collect a welcome toast and seating assignment in one movement, turning the escort display into a clear transition toward cocktail hour.
Create a visibly separate row of nonalcoholic glasses and use stable glassware that staff can carry safely. This display needs active replenishment and a wide pickup lane, especially when several guests arrive together.
Keep nonalcoholic escort glasses equally visible and styled, with their own clearly separated row.
Personal Story and Interactive Welcome Tables
Personal displays work best when guests can understand the story or activity within seconds. Give each station one purpose, enough supplies for several people, and a plan for packing the finished keepsake safely.
39. Family Photo Timeline Welcome Table
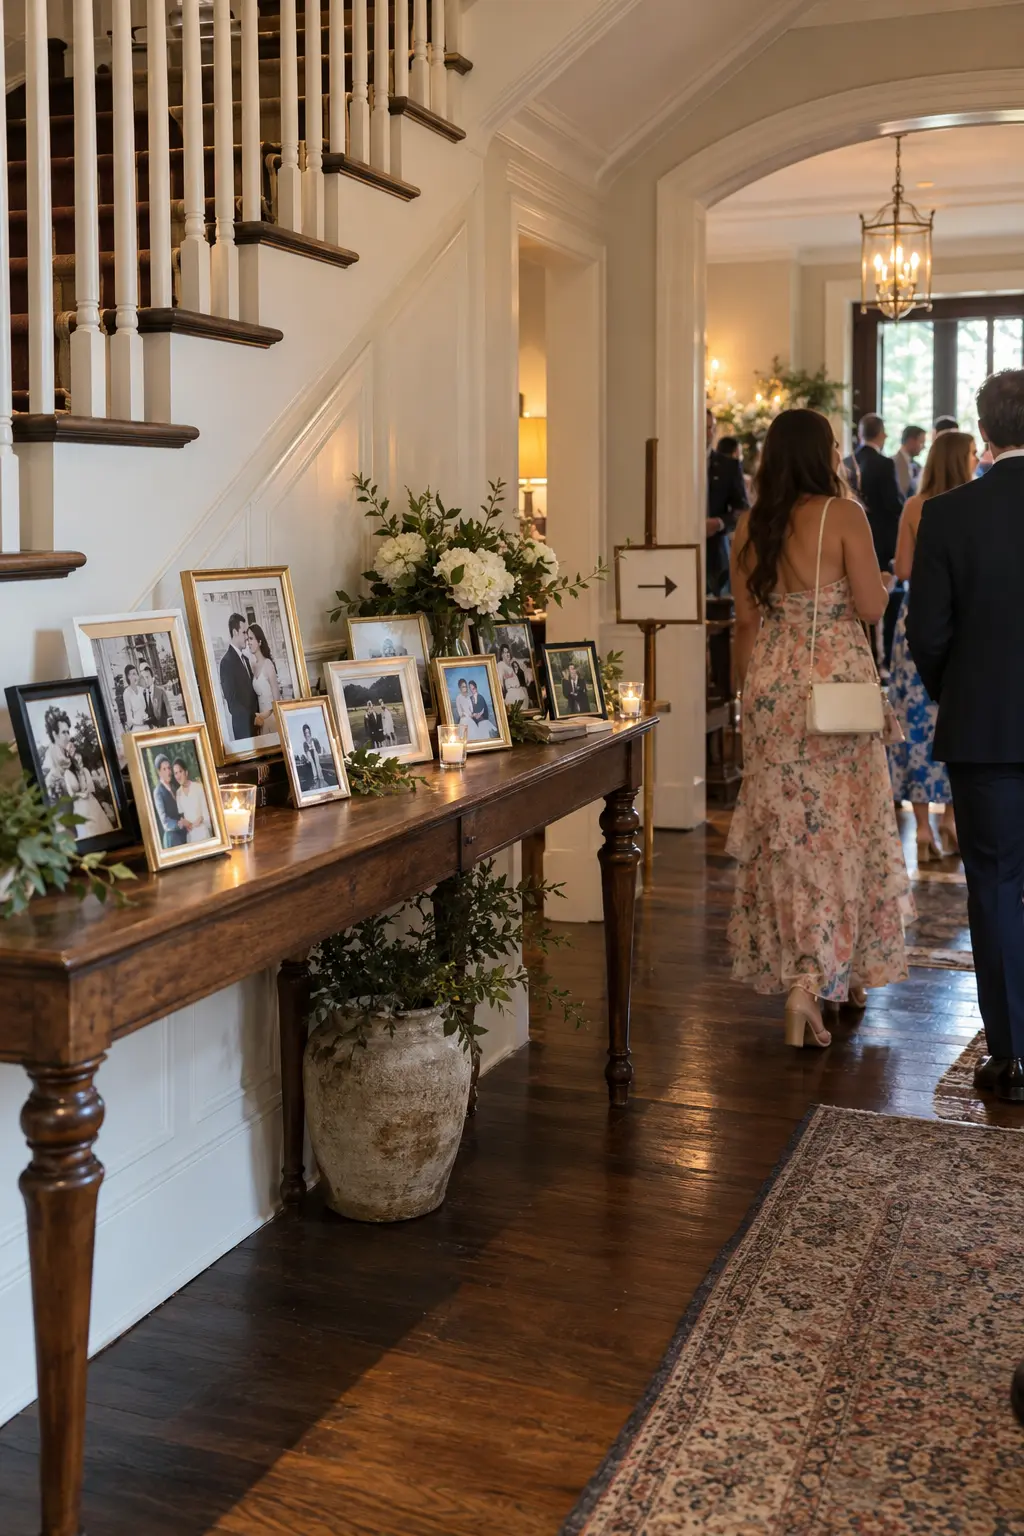
Arrange five to seven framed photographs in chronological order across a long console: childhood, early dating, shared milestones, and engagement. A small directional sign at one end guides guests onward while the images create a natural conversation point.
Vary frame sizes while keeping the timeline easy to follow from left to right. Scan irreplaceable originals and display copies, especially in an entrance exposed to drinks, open doors, or frequent handling.
40. Memory Table With Guest Book
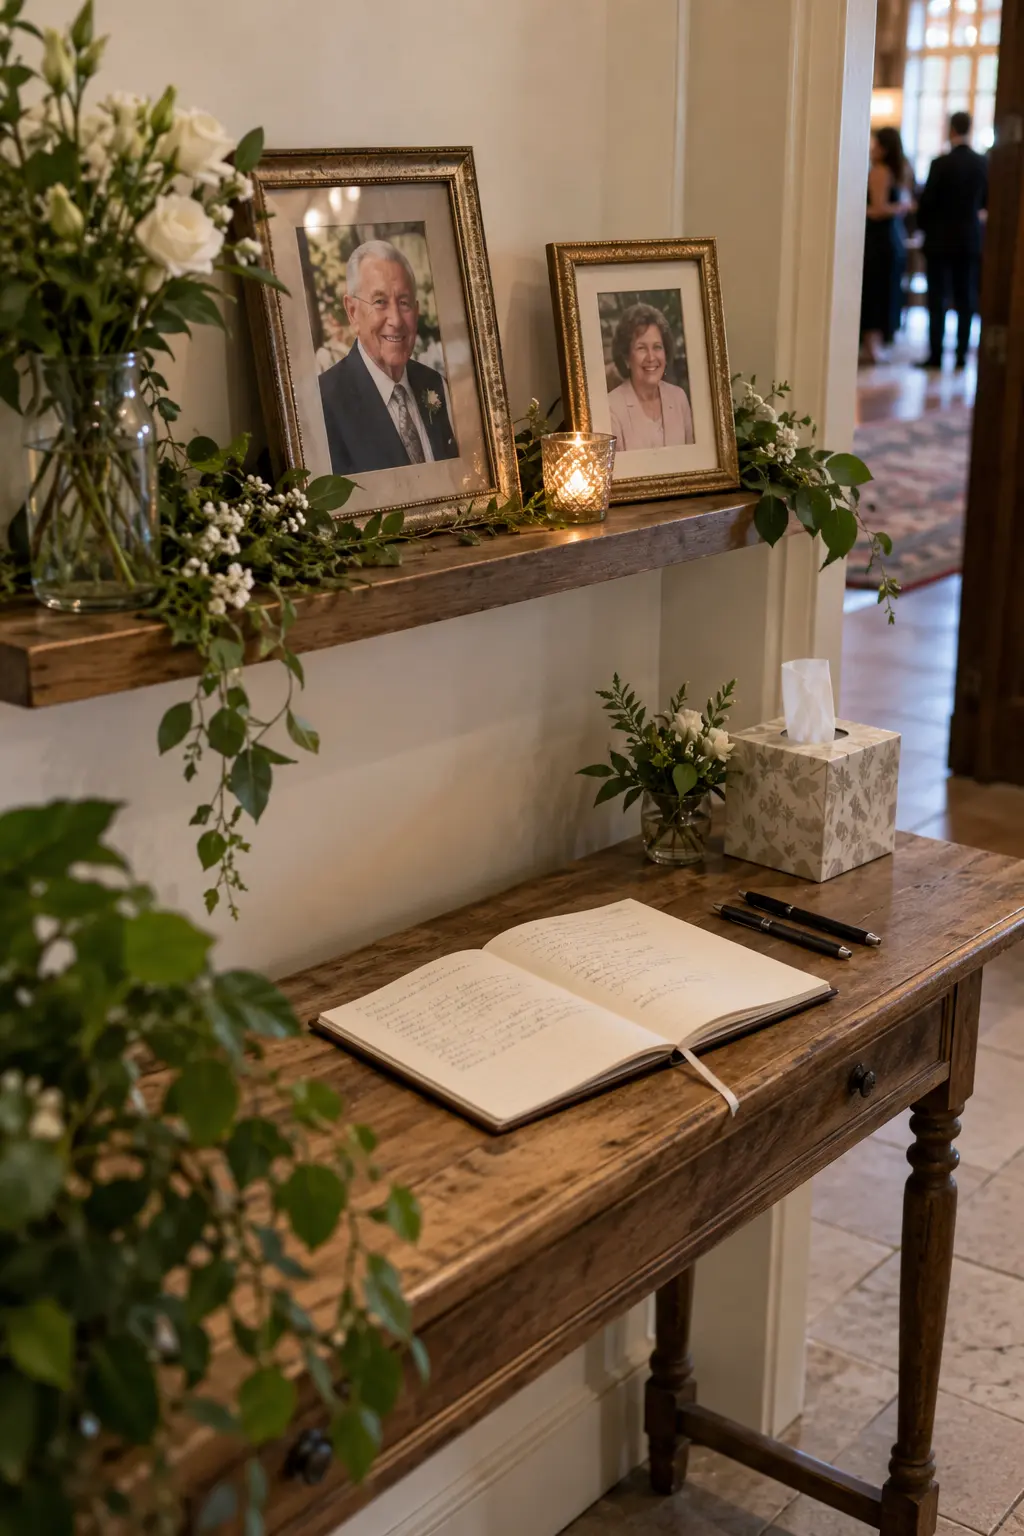
Place two or three memorial portraits on a raised shelf, then keep an open guest book and pens on the table below. The quiet arrangement honors absent loved ones while giving guests a gentle place to add their own message.
Use battery candles where open flames are restricted, and place a small tissue box within reach without making it the focal point. Ask one family member to approve names and photographs before the final setup.
41. QR Photo Upload Welcome Station
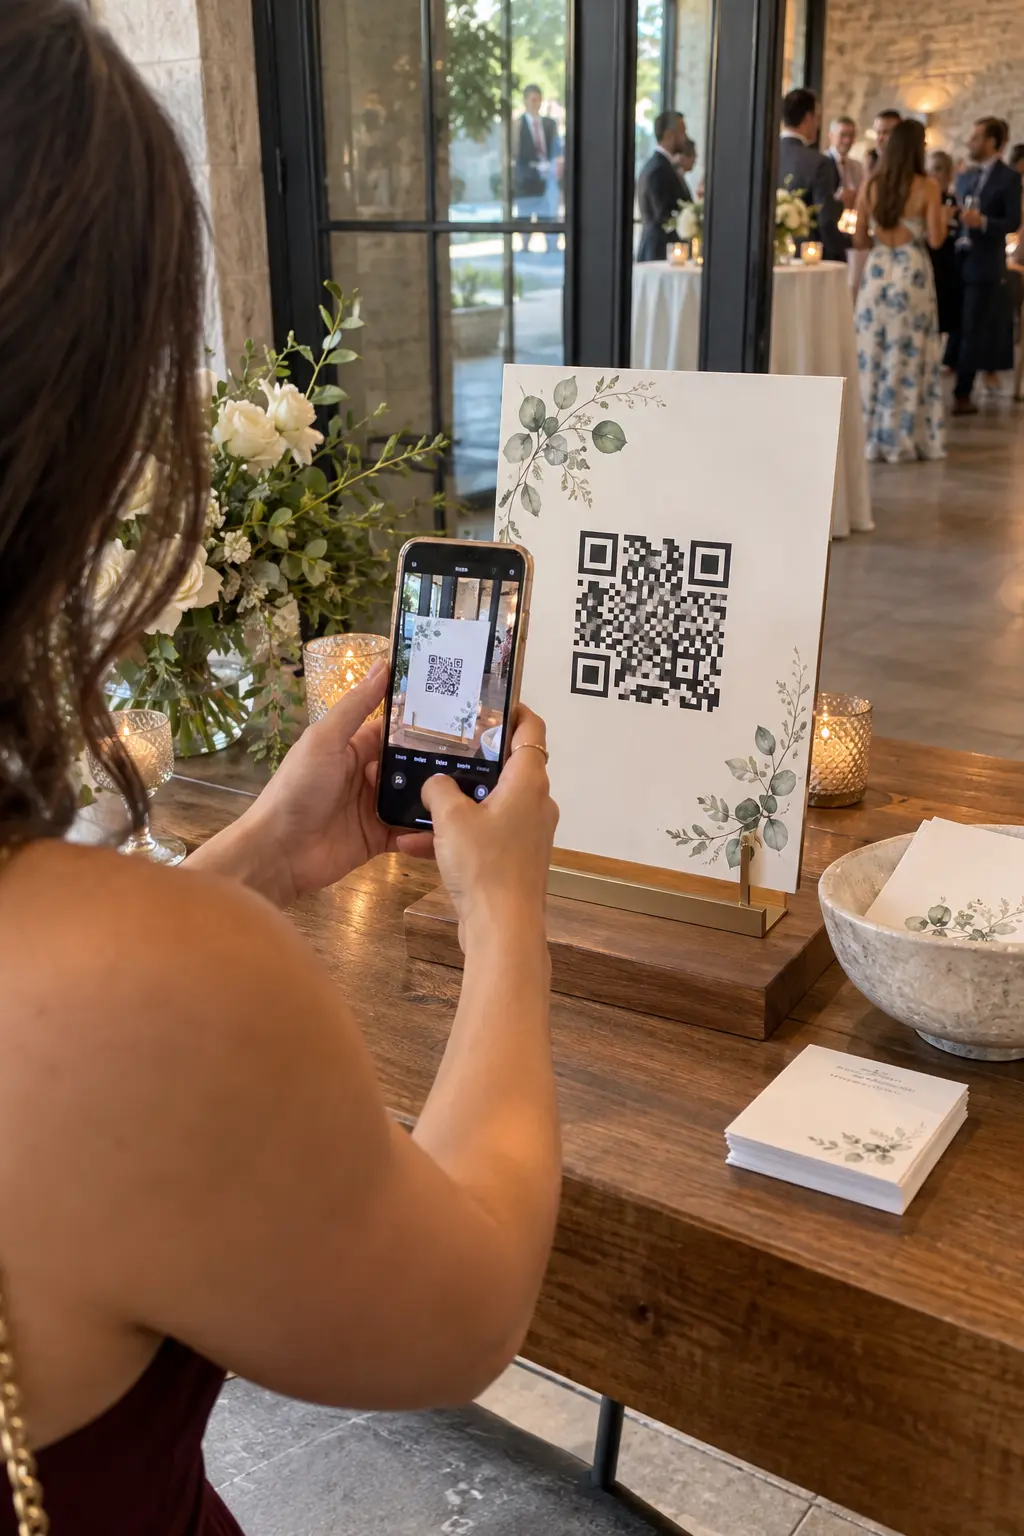
Display a large scan code on a stand with a phone-height ledge and printed backup cards. Guests can upload candid photos throughout the event, while the takeaway card lets them return to the gallery after leaving the entrance.
Test the code on both major phone platforms and confirm venue reception or Wi-Fi before printing. Keep the destination private, set clear upload permissions, and include one short line explaining what guests will see after scanning.
Test every QR code from the printed sign at the venue before guests arrive.
42. Video Message Tablet Booth Table
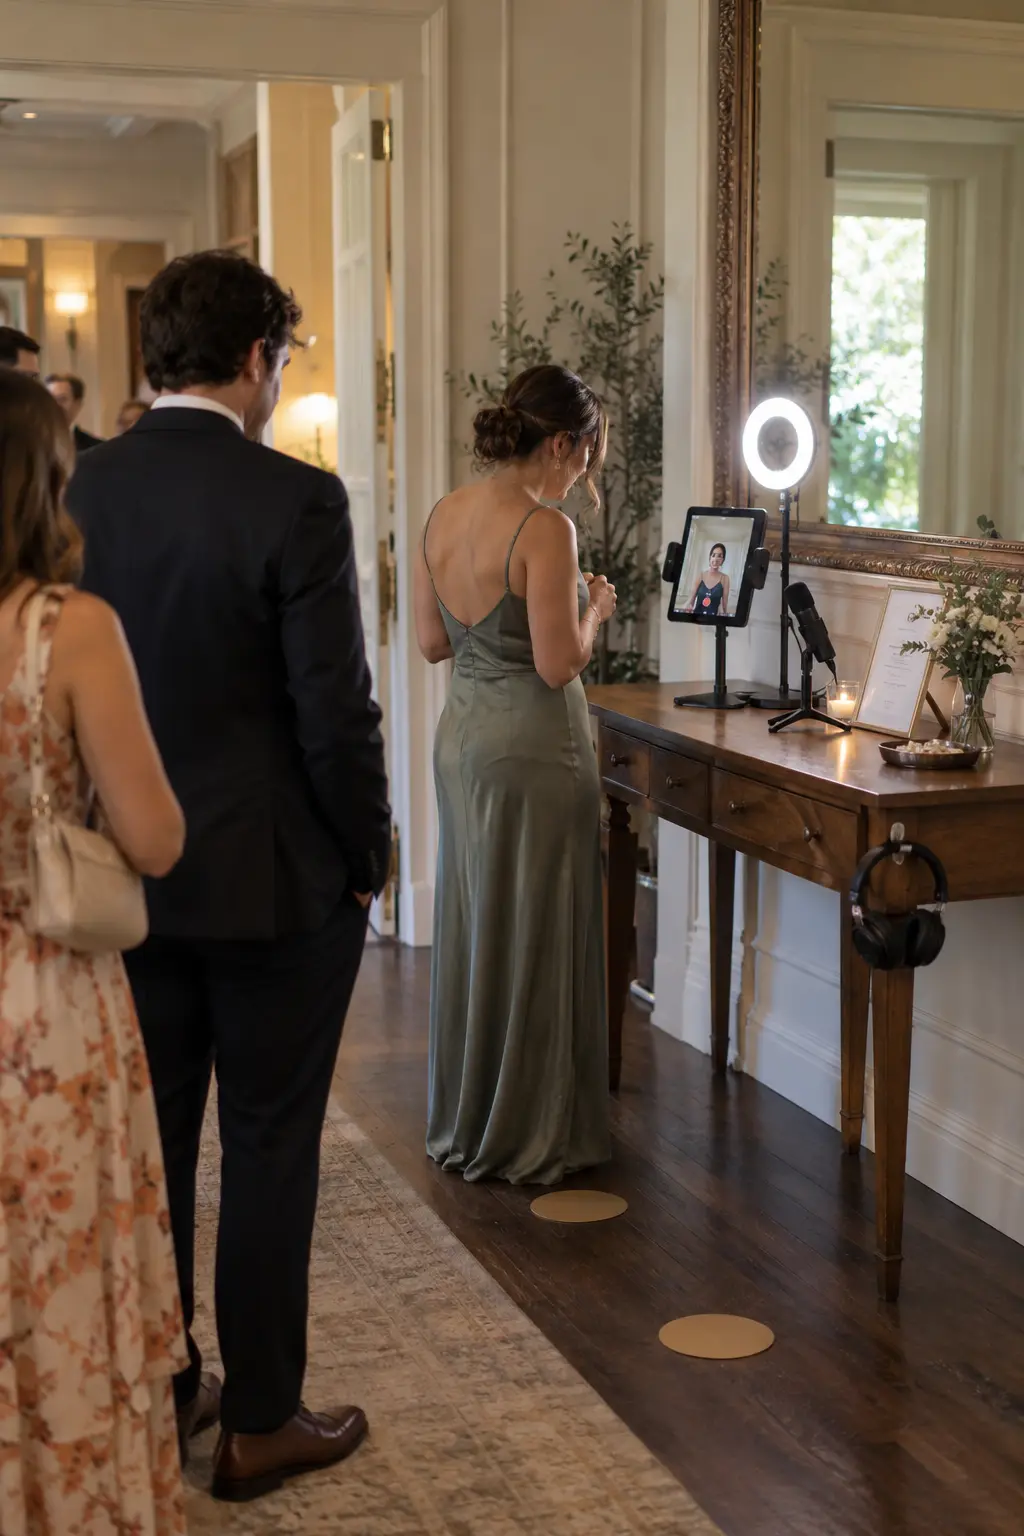
Mount a tablet on a stable stand beside a small ring light and microphone, then mark a short waiting spot on the floor. Guests record quick video wishes against a simple background without occupying the main entrance table.
Use a recording app that returns automatically to the start screen and prevents guests from viewing earlier messages. Connect continuous power, silence notifications, and ask a helper to check framing and storage during the evening.
43. Advice Card Mailbox Table
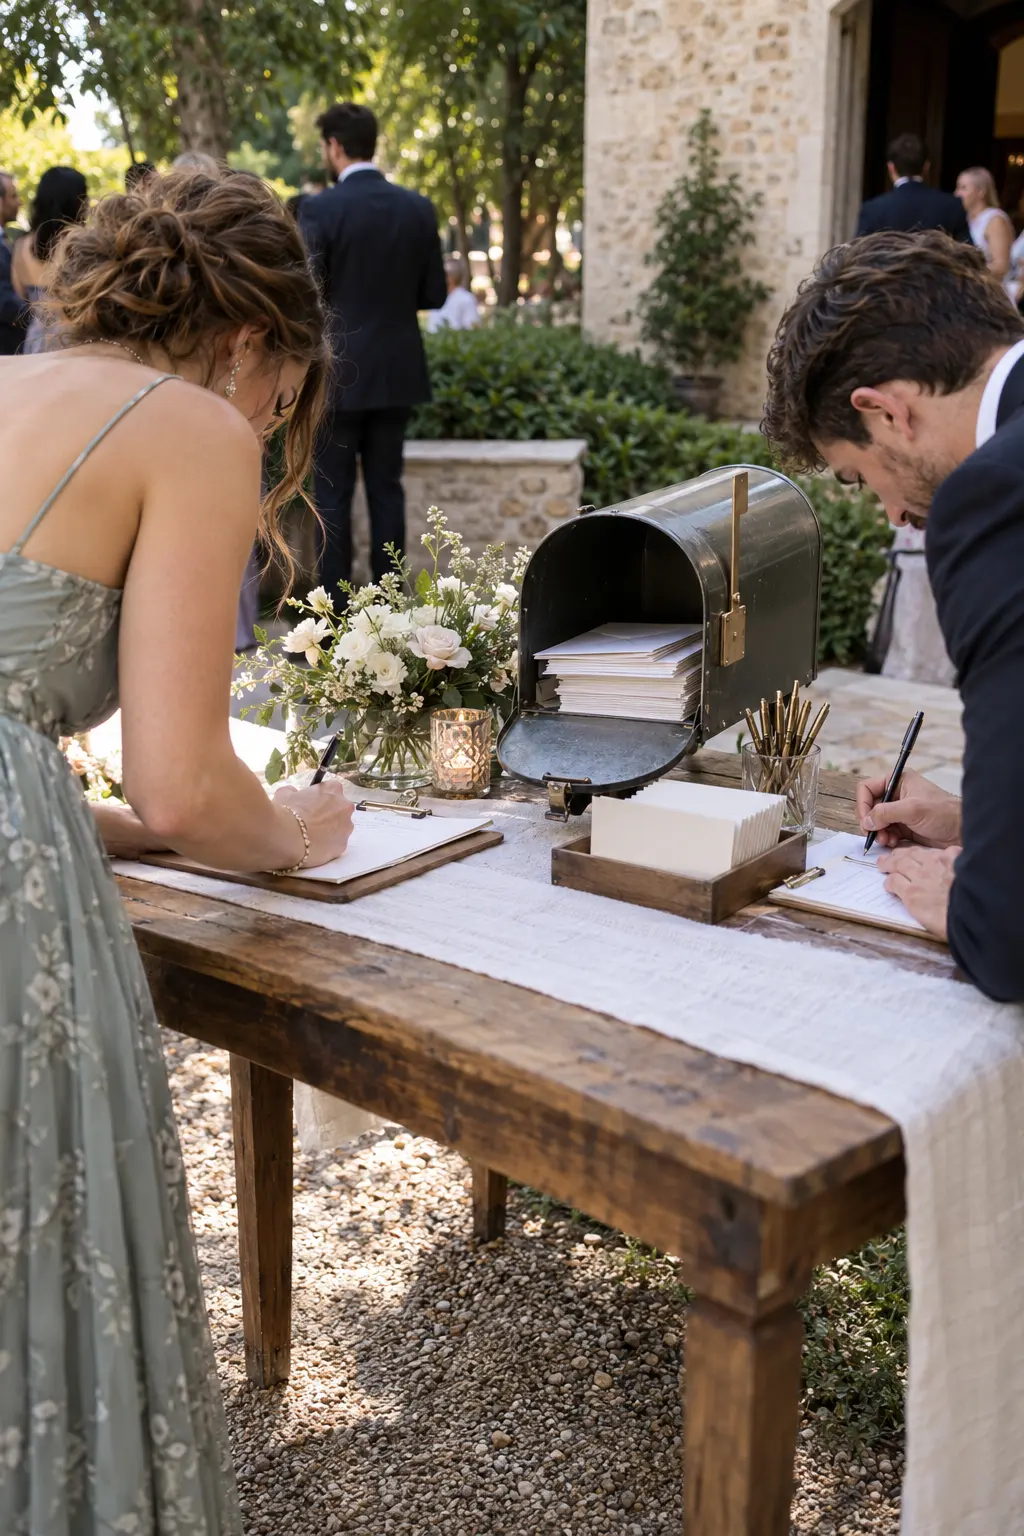
Set a standing mailbox behind two writing spots with advice cards, clipboards, and pens on a rail. Guests write privately, seal the card if desired, and post it through a familiar slot that keeps finished notes out of sight.
Offer a few focused prompts for guests who freeze at a blank card. Secure the mailbox to its base and assign someone to pack it before the reception room is cleared.
44. Map Pin Guest Origin Table
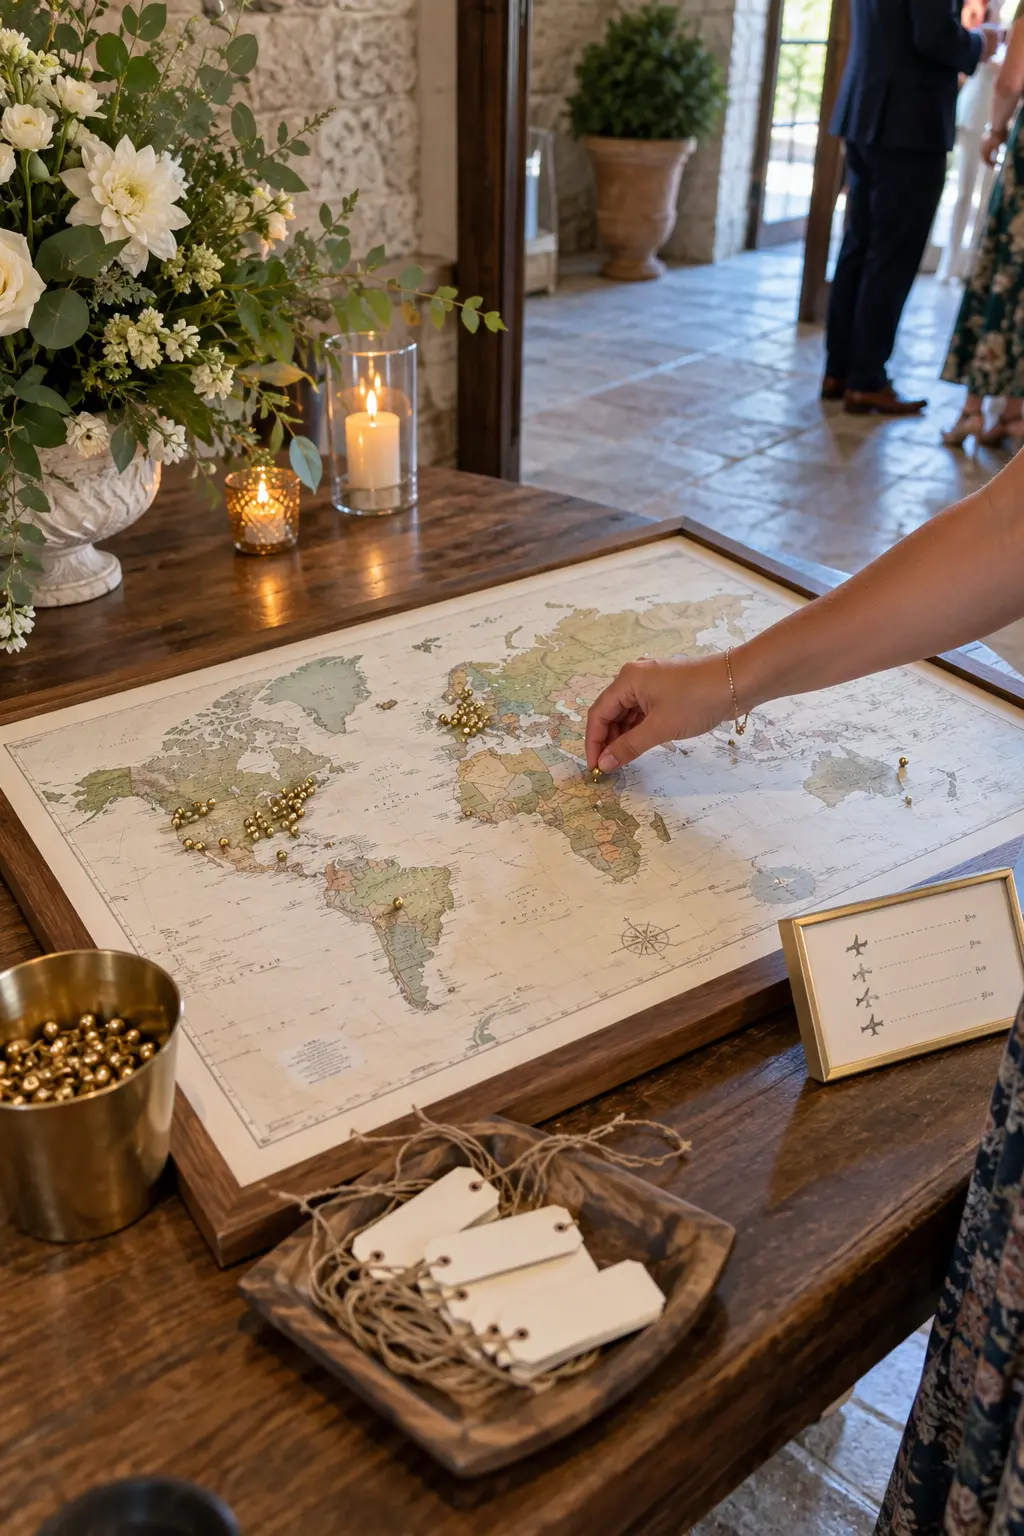
Lay a framed map over cork backing and provide pins with small name flags. Guests mark where they traveled from, creating a visual record of the community gathered for the wedding.
Choose a map scale that gives local and long-distance guests enough room, or pair a regional map with a smaller world inset. Use blunt pushpins with a covered storage cup, and keep children supervised around the station.
45. Signed Globe Keepsake Table
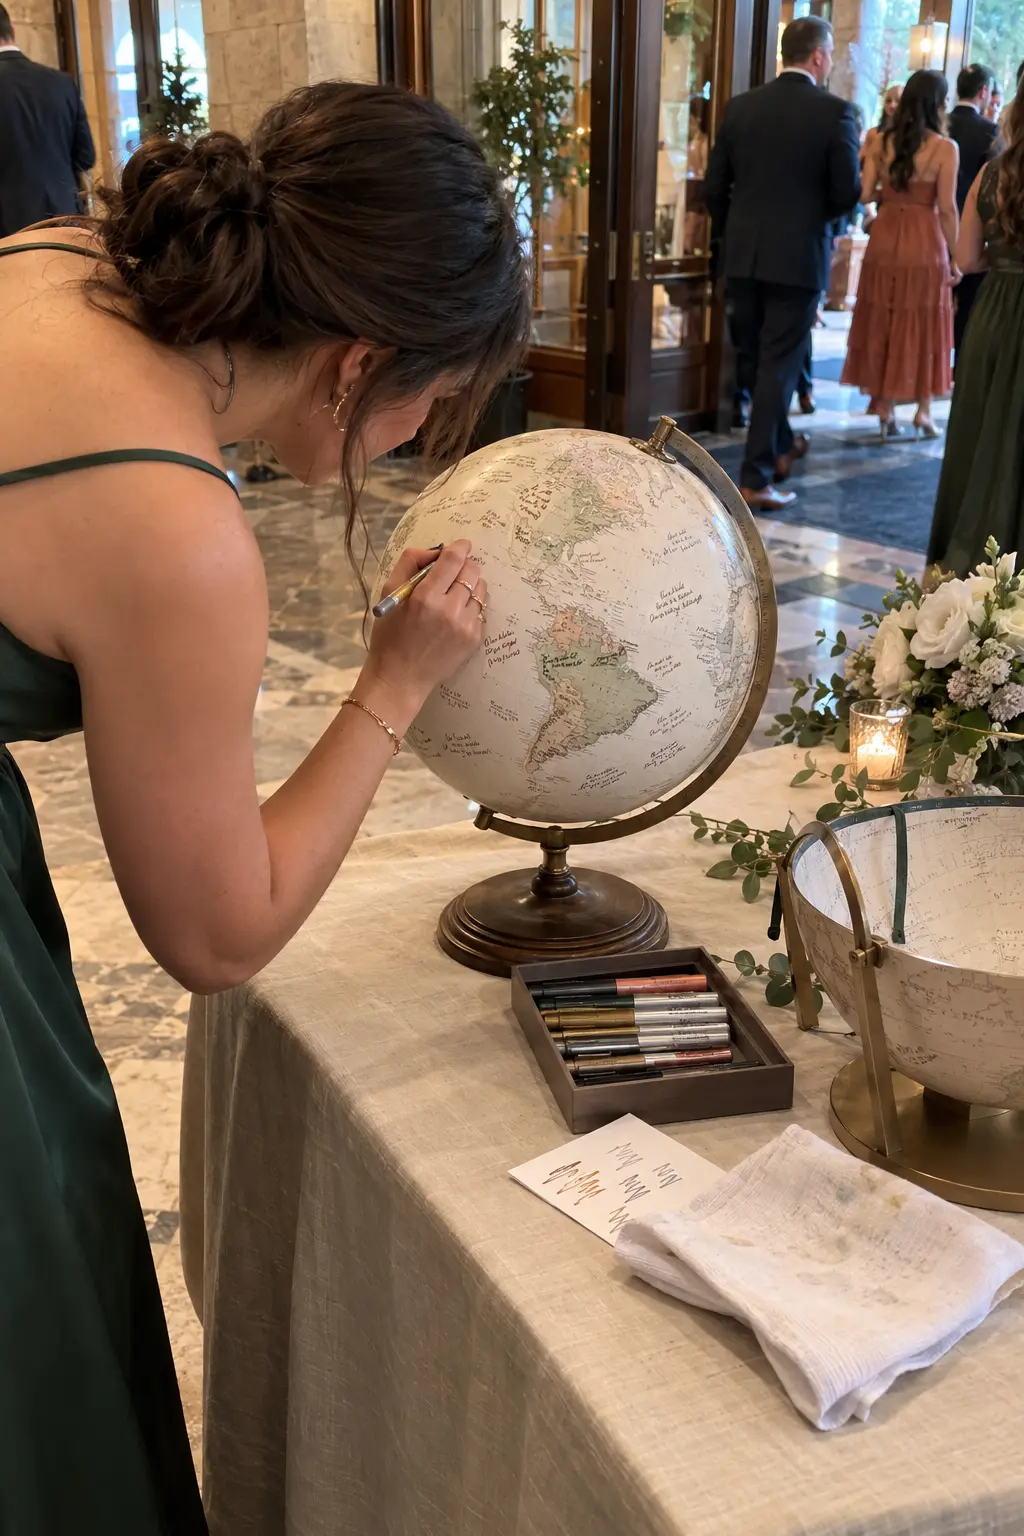
Place a matte globe on a stable stand with paint pens and a small test card. Guests add names or short wishes across land and ocean areas, turning one sculptural object into a keepsake the couple can display later.
Provide a second cradle so wet sections can dry without rolling against the stand. Limit messages to a few words and rotate the globe periodically, keeping unused areas visible to arriving guests.
46. Fingerprint Tree Art Station
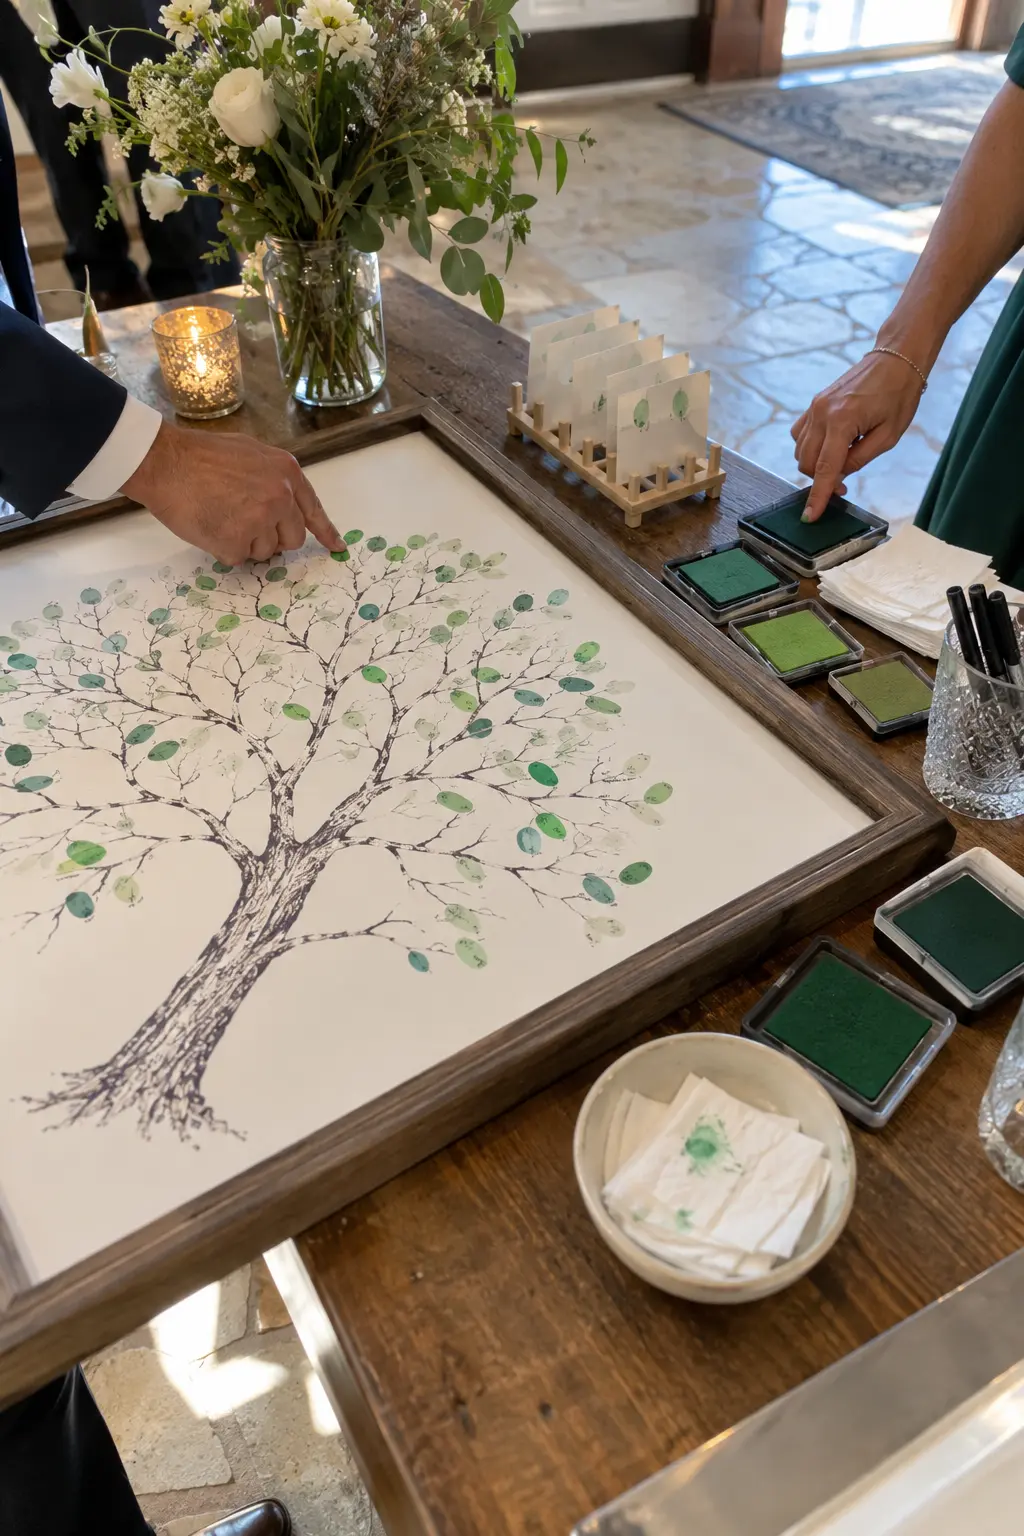
Lay a framed tree print at a comfortable angle with washable ink pads, fine pens, wipes, and a drying rack. Guests add one fingerprint leaf and initial it, gradually filling the canopy with individual marks.
Create a sample leaf before the wedding and choose ink colors that remain distinct when layered. Keep the artwork behind a clear boundary once full, since a sleeve or hand can smear fresh prints near the end.
47. Message-in-a-Bottle Keepsake Table
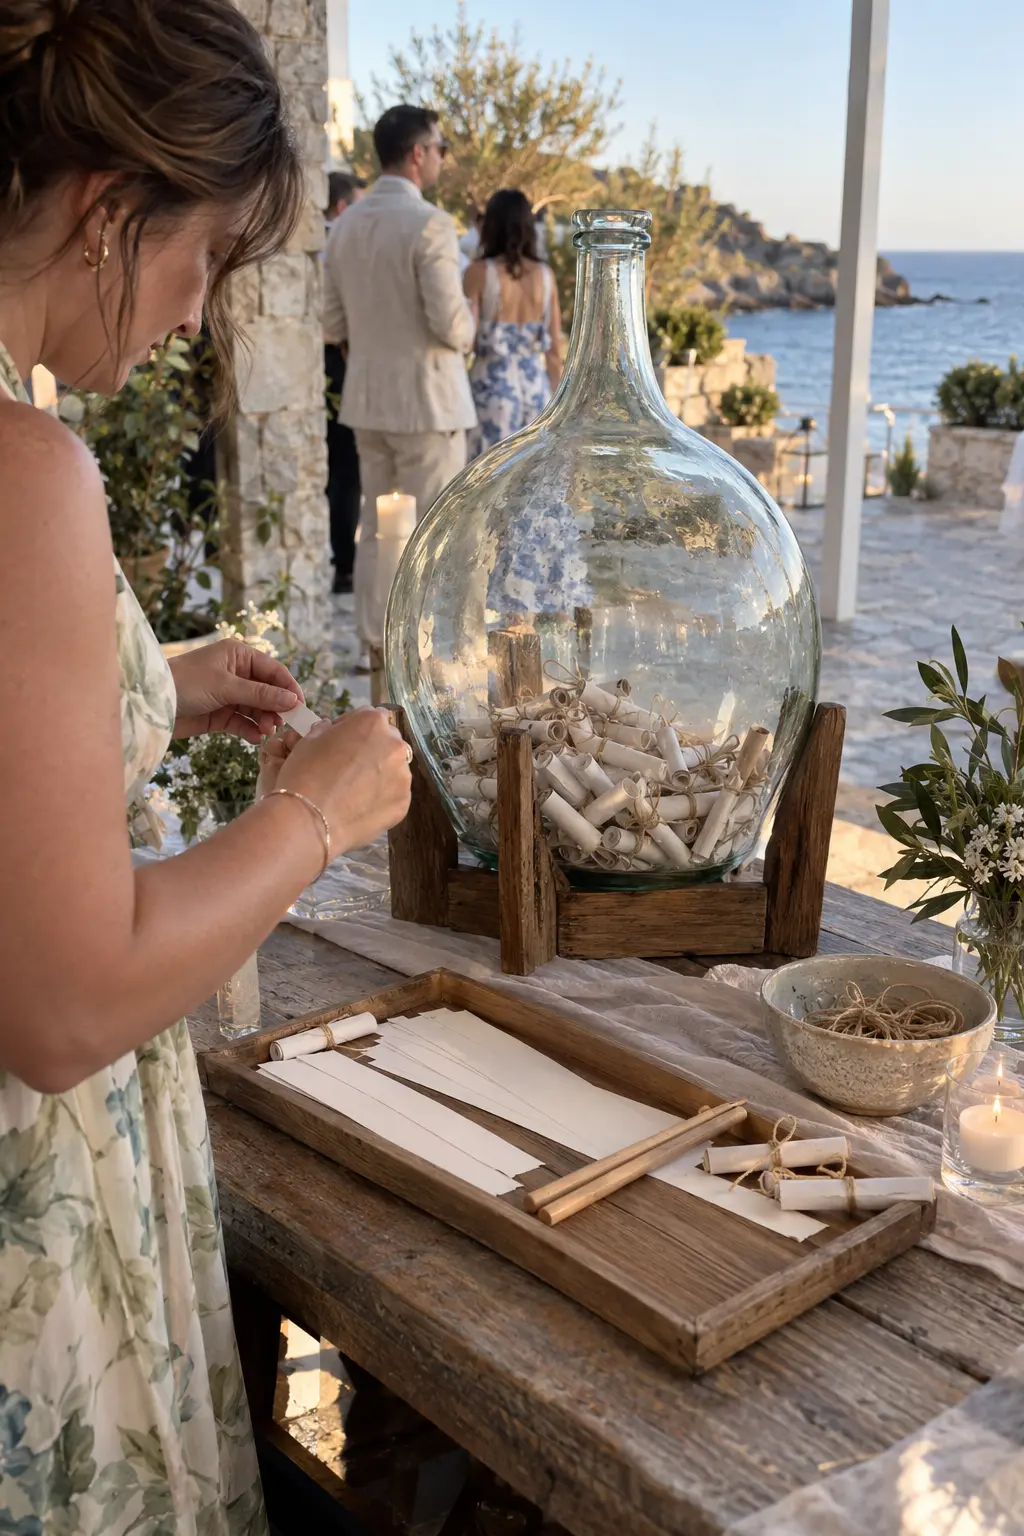
Set a large glass demijohn in a stable cradle, then provide narrow paper strips, rolling dowels, and small ties. Guests write a wish, roll it tightly, and drop it into the vessel for the couple to open later.
Test the bottle opening with the final paper weight before the event; wide notes can jam at the neck. Pack the filled vessel upright in a padded crate, and move it before dance-floor traffic becomes lively.
48. Song Request Card Station
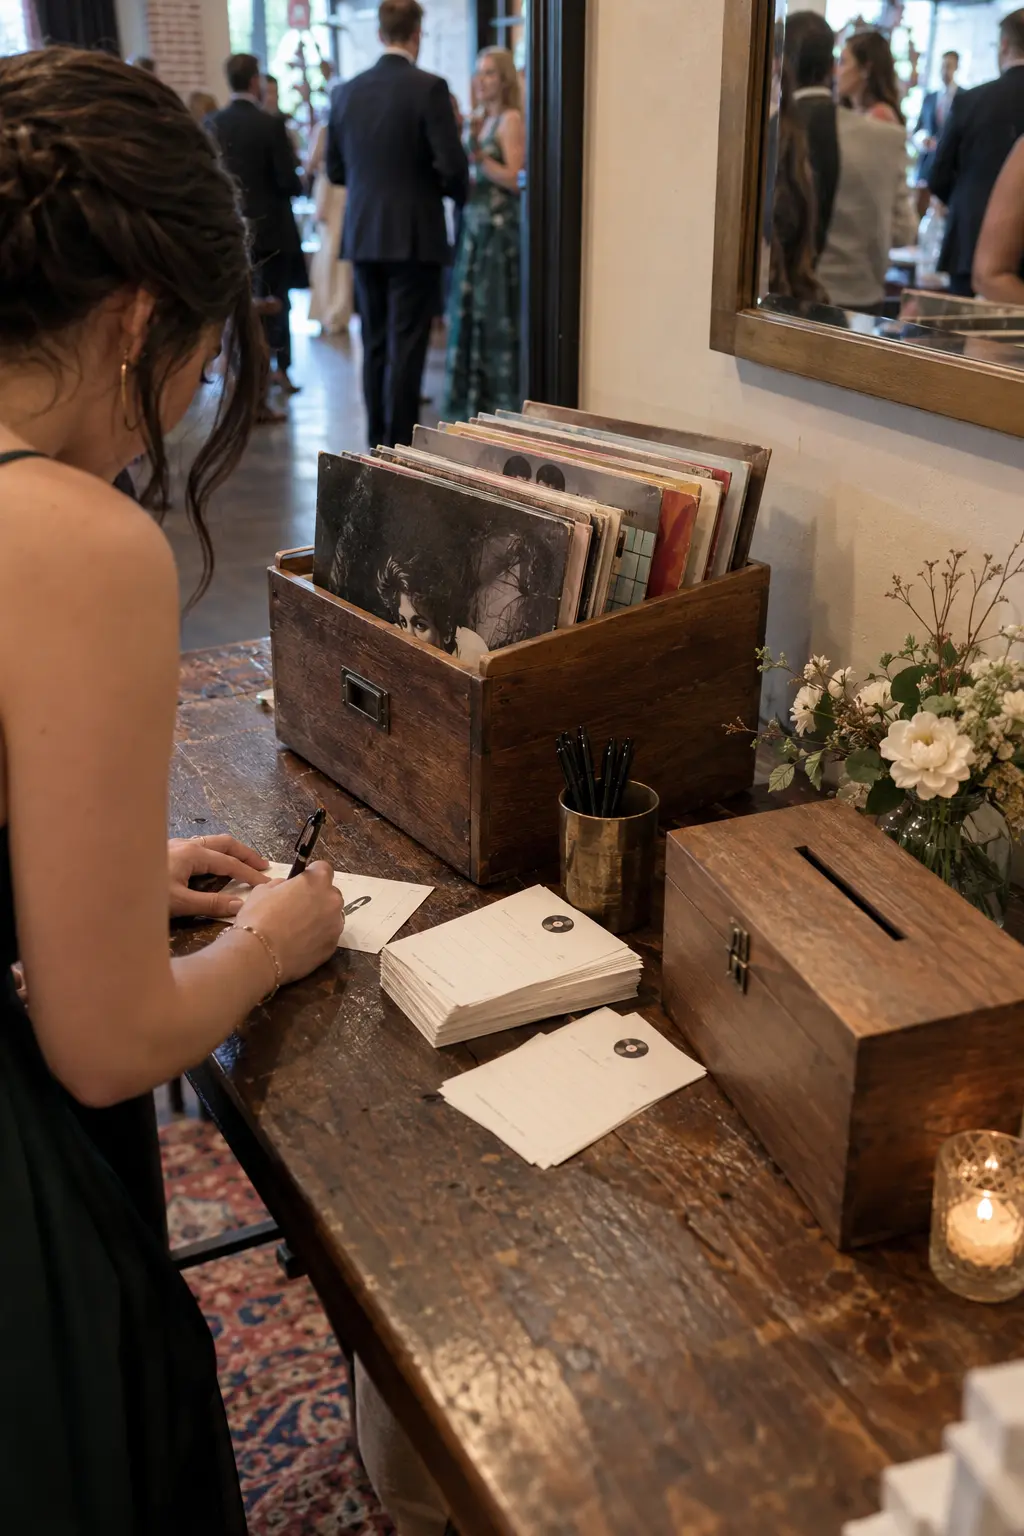
Use a record-box sorter for song request slips, with one slot for dancing and another for slower moments. Guests contribute ideas at arrival, giving the DJ time to review choices before the dance floor opens.
Ask for the song title and artist to reduce guessing, and let the DJ treat requests as suggestions rather than a fixed playlist. Remove duplicates and any unsuitable choices away from the guest-facing table.
49. Cultural Welcome Token Table
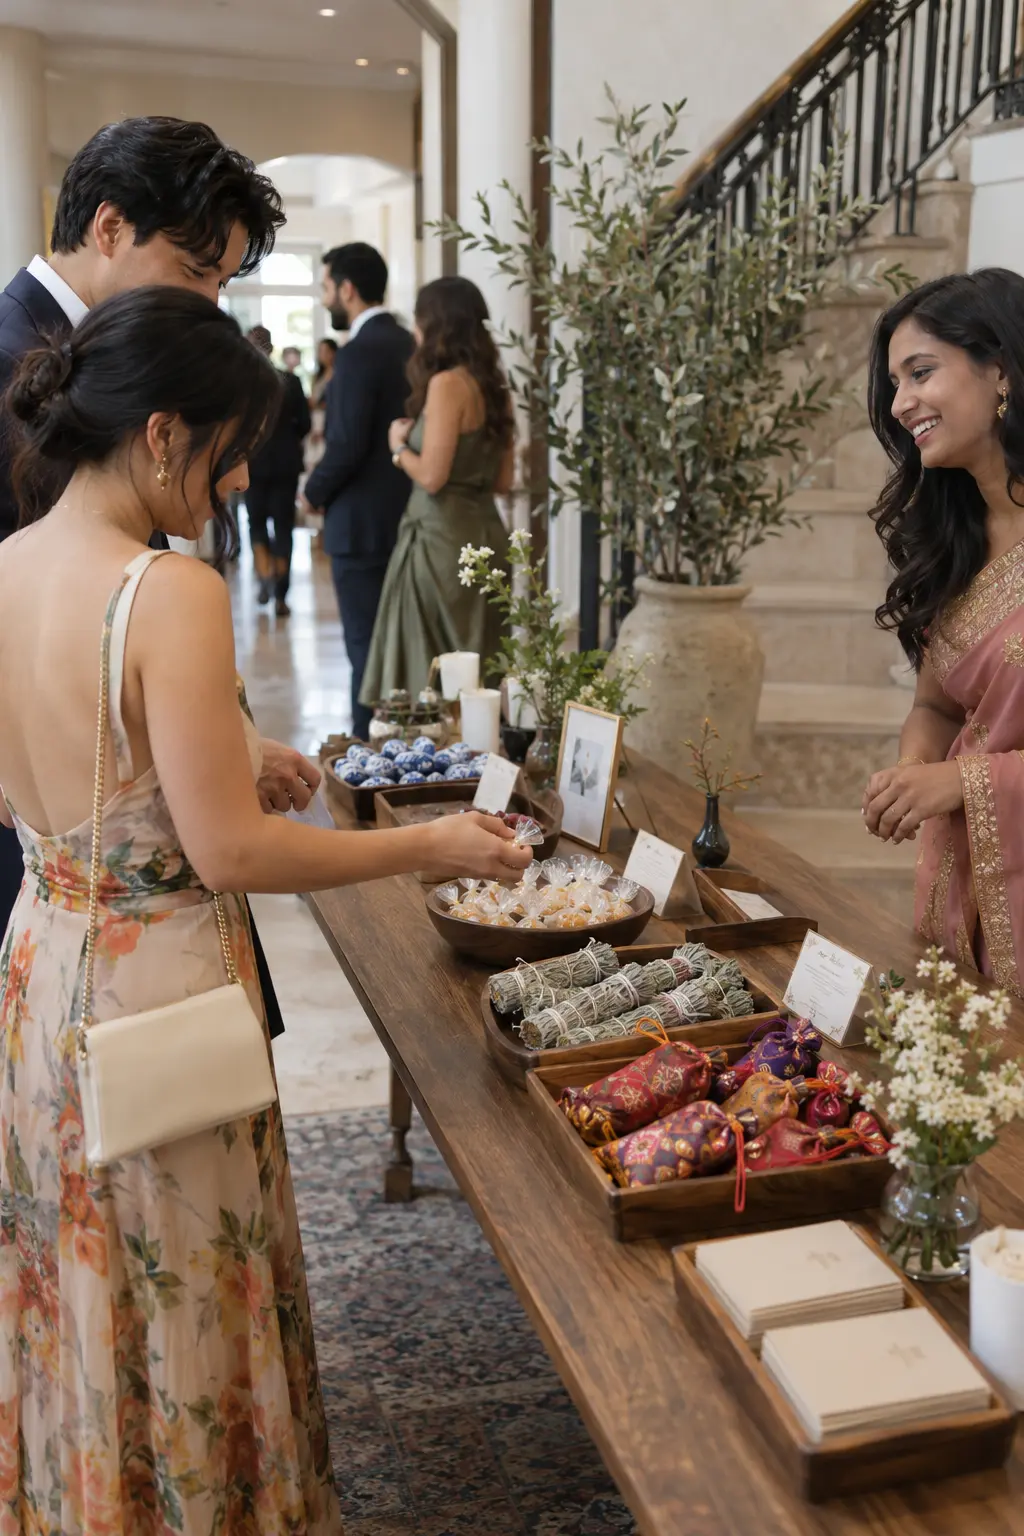
Offer one meaningful wrapped token with a concise explanation card, such as a family sweet, blessing object, textile, or symbolic favor chosen by the couple. An attendant can share the custom and help guests receive it respectfully.
Work with family members or a cultural advisor on wording, handling, and placement. Keep edible tokens labeled for allergens, and avoid combining several traditions into a decorative assortment without context.
50. Split-Flow Welcome Table for Large Weddings
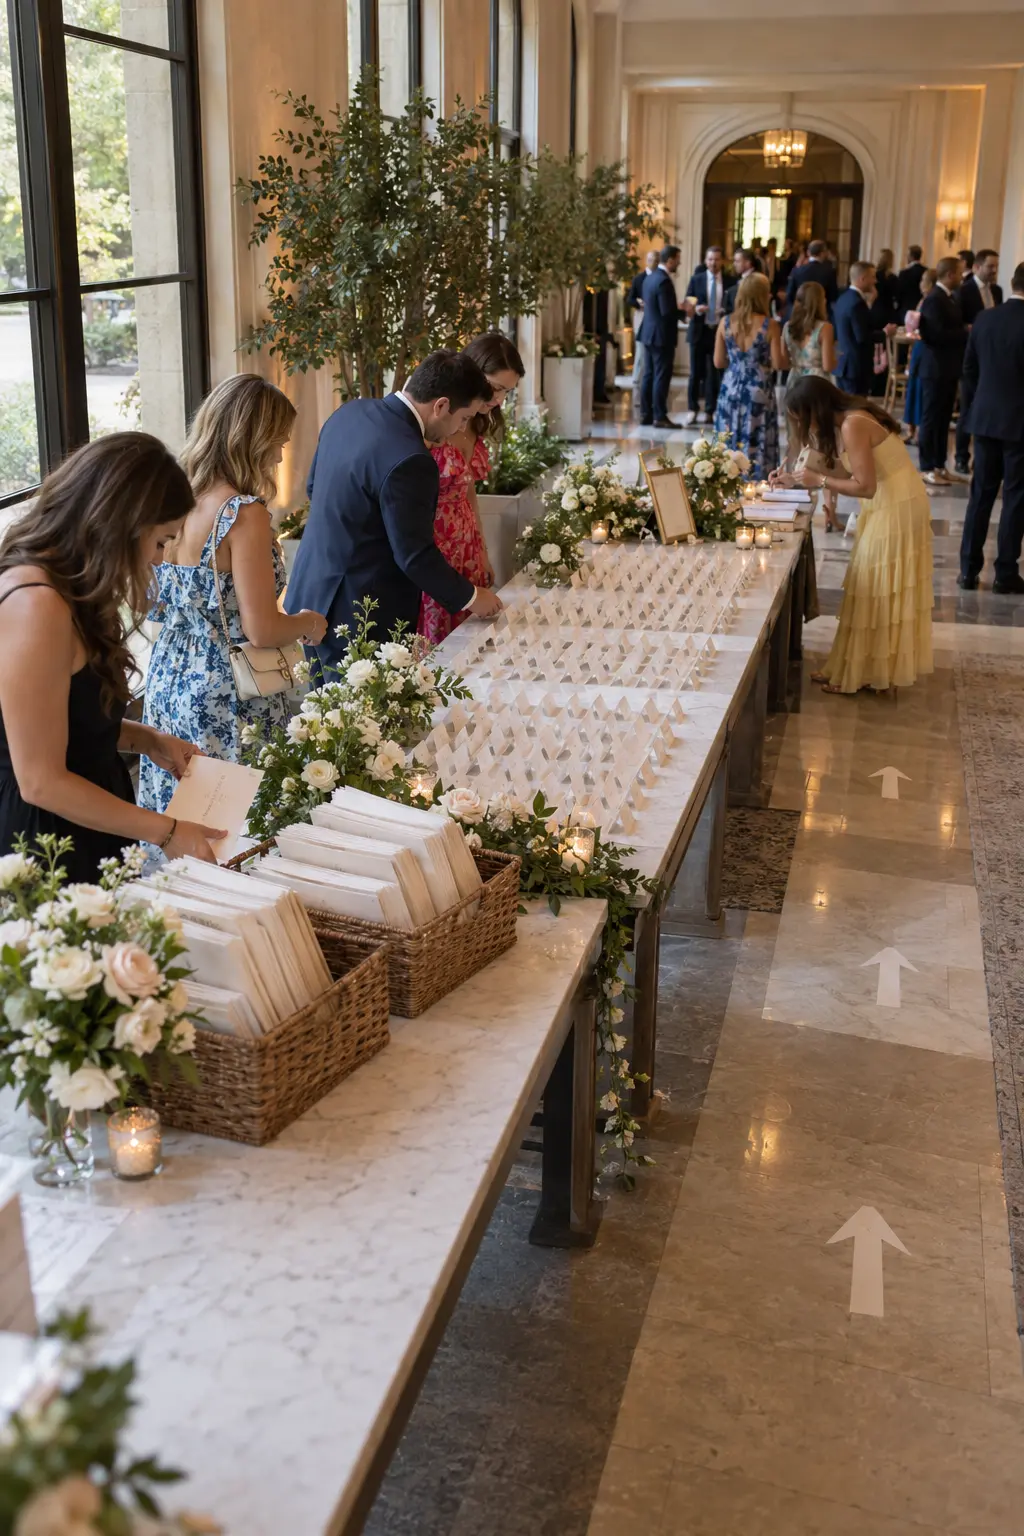
Divide a long table into three zones: programs at the entrance end, alphabetical seating lookup in the center, and the guest book at the far end. Floor arrows and open gaps encourage quick tasks to move ahead while writers step aside.
Duplicate the fastest-moving supplies and place a helper near the seating zone, where questions usually gather. Test the route with several people before opening the doors; a beautiful layout still needs enough turning room for mobility devices and groups.
- Programs first for quick pickup.
- Seating lookup in the widest area.
- Guest-book activity at the far end.
Choose the Welcome Table That Helps Guests Most
Begin with the one arrival question guests need answered fastest, then choose a setup that handles it clearly. Add a keepsake, favor, or refreshment only when the table still has enough room for that second action.
Before the wedding, photograph the finished mockup and give the image to whoever will set it up. Pack supplies by zone, include backups for anything guests handle, and decide who will secure cards, keepsakes, and personal items when the welcome period ends.
Wedding Welcome Table FAQs
What should go on a wedding welcome table?
Choose the items that support arrival: a welcome sign, programs, seating information, guest book, secure card drop, favors, or one simple refreshment. Most tables work better with two or three clear functions than with every possible detail crowded together.
Where should a wedding welcome table be placed?
Place it along the route guests naturally use, with enough space to pause without blocking doors, check-in, restrooms, or bar service. Quick pickup tasks can sit near the entrance; writing, recording, and photo activities usually need a quieter side position.
How big should a wedding welcome table be?
A four- to six-foot table suits many combined setups, while a narrow console works for programs or a small guest book. Base the size on the actual objects and guest action, then preserve empty surface and approach space instead of filling every inch.
How do you prevent a welcome-table bottleneck?
Alphabetize seating information, duplicate fast pickup supplies, separate writing activities from quick tasks, and leave open floor space. For a large wedding, divide the table into zones or use two nearby stations with a helper directing questions.
Who sets up and clears the wedding welcome table?
Assign the task to a coordinator, venue team, or trusted helper using a photo and labeled supply boxes. The same plan should name who will refill materials, secure cards, pack keepsakes, and remove personal items before the venue cleanup begins.
This post may contain affiliate links: full affiliate disclosure.