
Wedding reception decorations work best when the room feels connected from the entrance to the last table, rather than filled with unrelated beautiful objects.
Start with the venue’s existing architecture, choose two or three colors, then decide which zones deserve a focal moment and which only need repetition.
These 80 ideas cover tables, ceilings, lighting, entrances, lounges, food displays, outdoor spaces, and personal details, with practical guidance for adapting each look.
Reception Table Centerpieces With Distinct Shapes
Centerpieces establish the room’s rhythm at eye level. Compare scale, sightlines, and serving space before choosing flowers, candles, fruit, or sculptural materials.
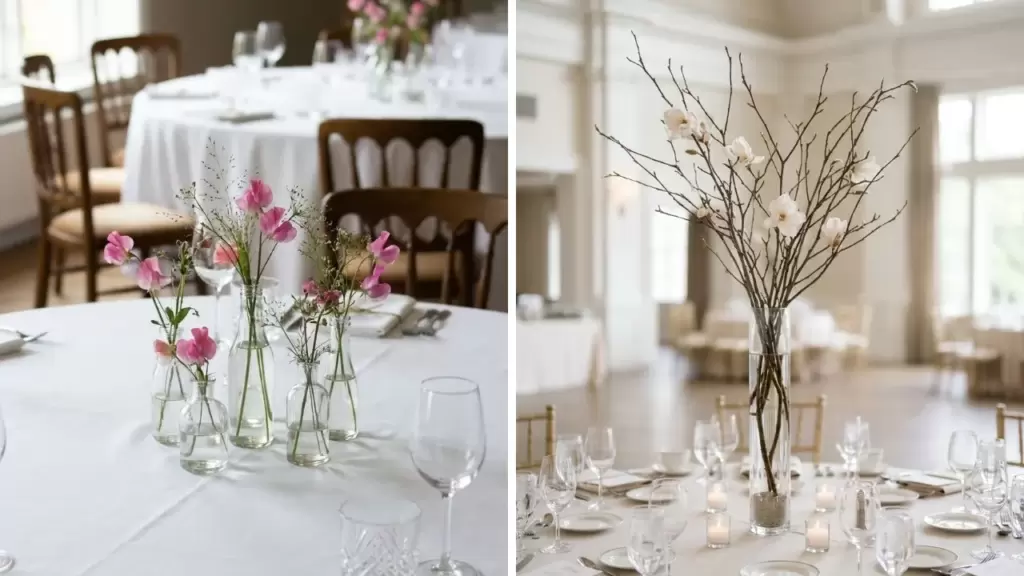
1. Bud Vase Clusters With Uneven Heights
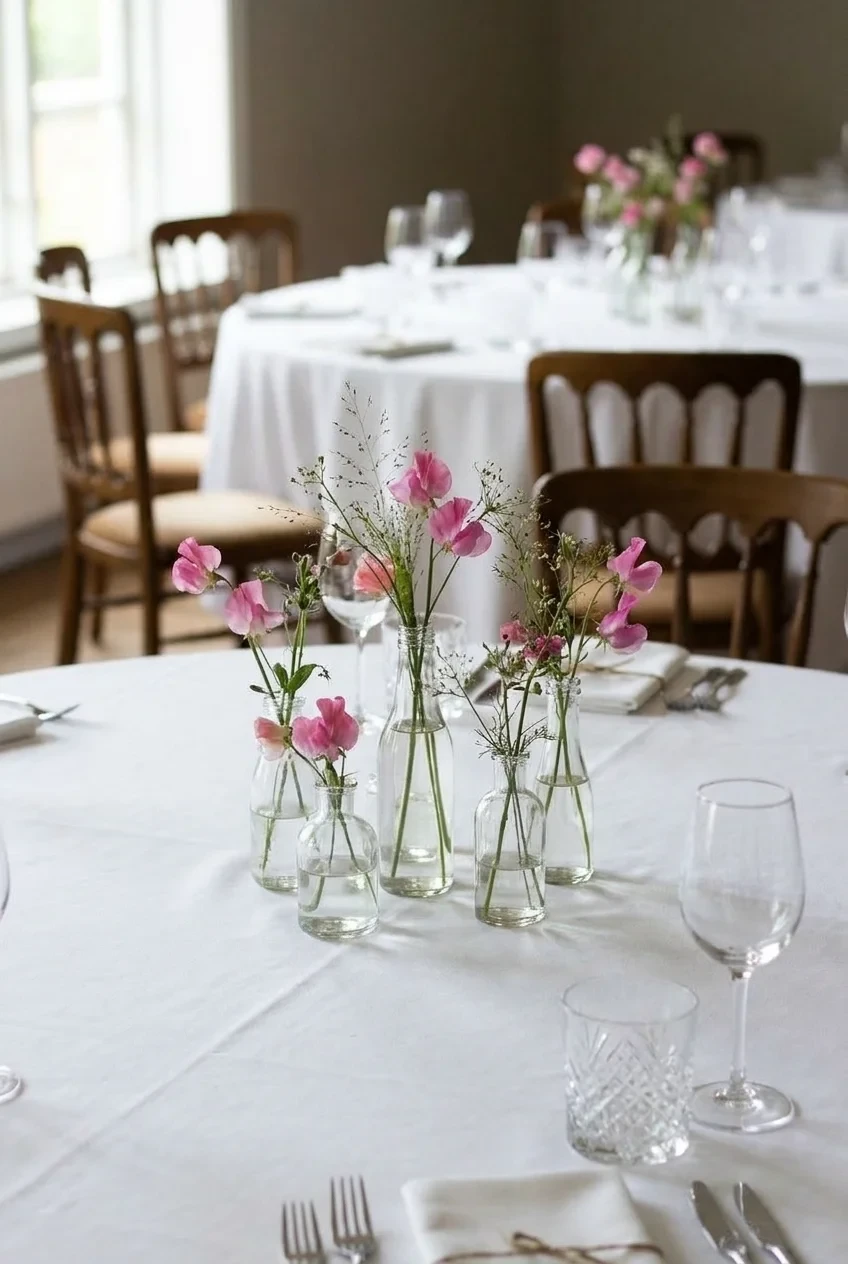
Group three to five small vases instead of spacing single stems around the table. Vary their heights slightly while keeping every arrangement below conversation level.
Repeat one flower variety or color through each cluster, then leave enough bare linen for glassware, bread plates, and shared serving dishes.
2. Low Garden Bowl Centerpieces
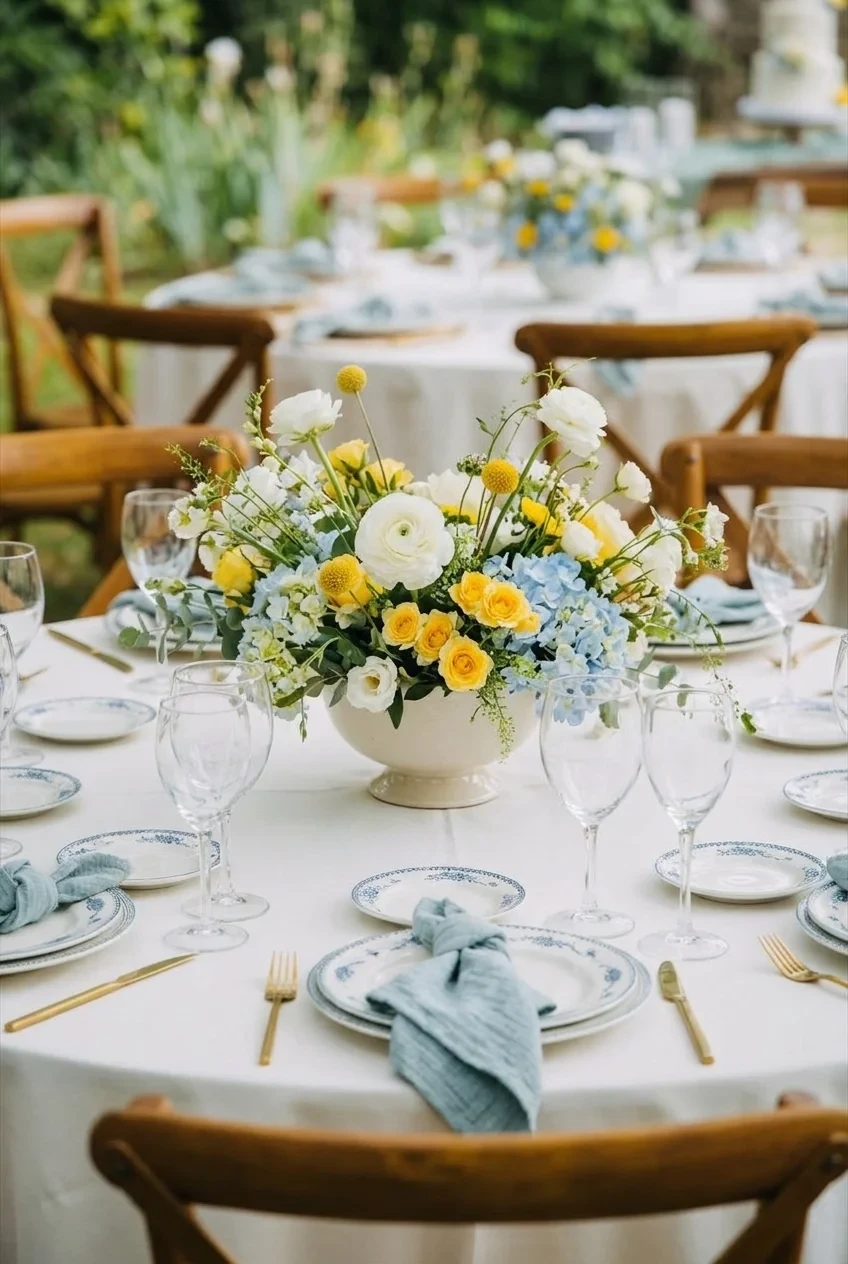
A shallow footed bowl gives loose garden flowers one generous shape without blocking faces. Keep stems airy enough to reveal the vessel and table surface.
Set one complete place setting beside a sample arrangement before approving width, especially on smaller rounds where plates and glasses already consume substantial space.
3. Tall Branch Centerpieces With Clear Bases
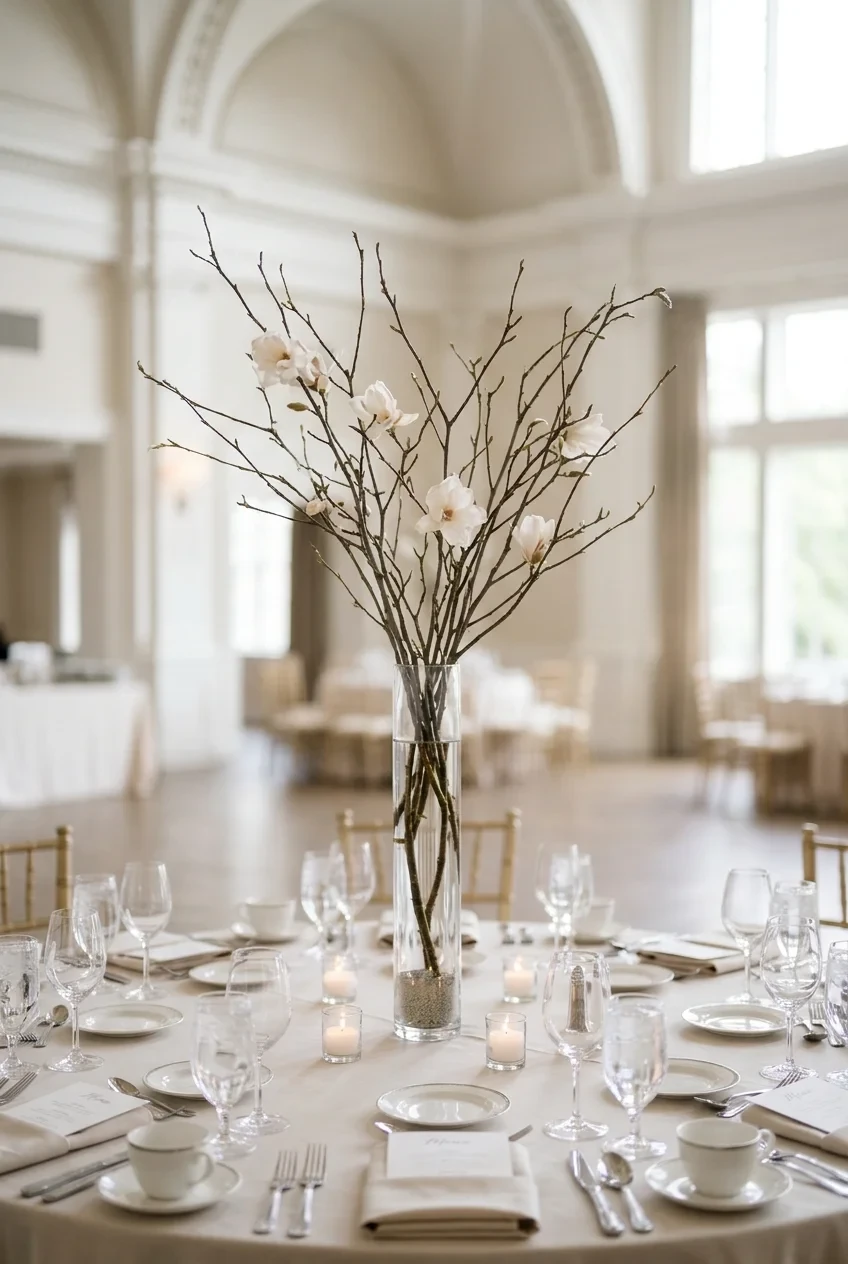
Bare or lightly flowered branches create height without forming a dense wall. Use narrow clear bases so guests can see through the arrangement across the table.
Ask the florist and venue to confirm stability, ceiling clearance, and safe candle distance before treating dramatic height as the room’s main decoration.
Photograph one sample at seated eye level before approving the design, because an airy arrangement can still block conversation from certain angles.
4. Candle River Down a Long Table
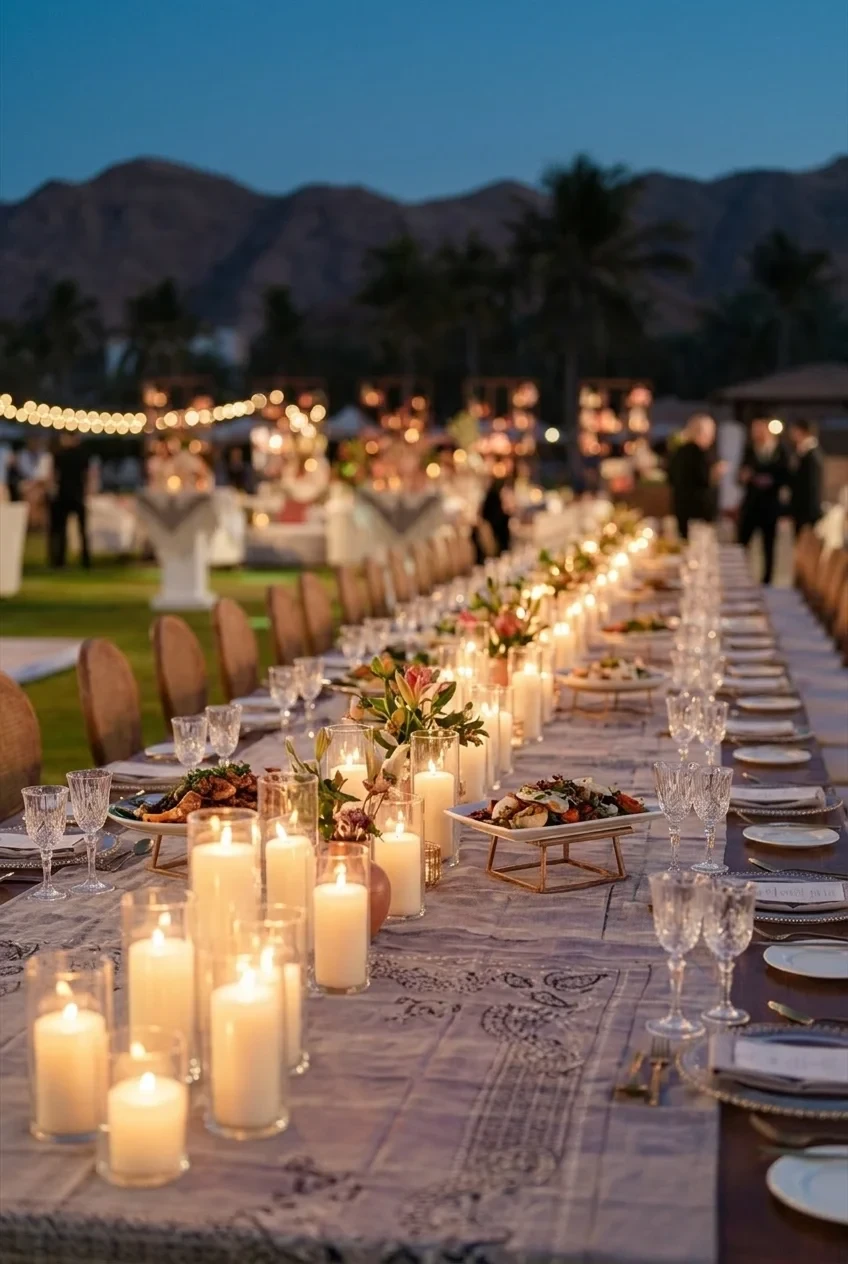
Run mixed-height candles through the center of a long table, leaving deliberate gaps for flowers, water bottles, and platters rather than creating one solid line.
Use approved holders and follow the venue’s flame rules. Quality flameless candles can preserve the layered glow when open flames are unavailable.
Build one complete table section before committing, checking how the candle rhythm looks beside filled glasses, plated food, and the venue’s existing light.
5. Fruit and Herb Centerpieces
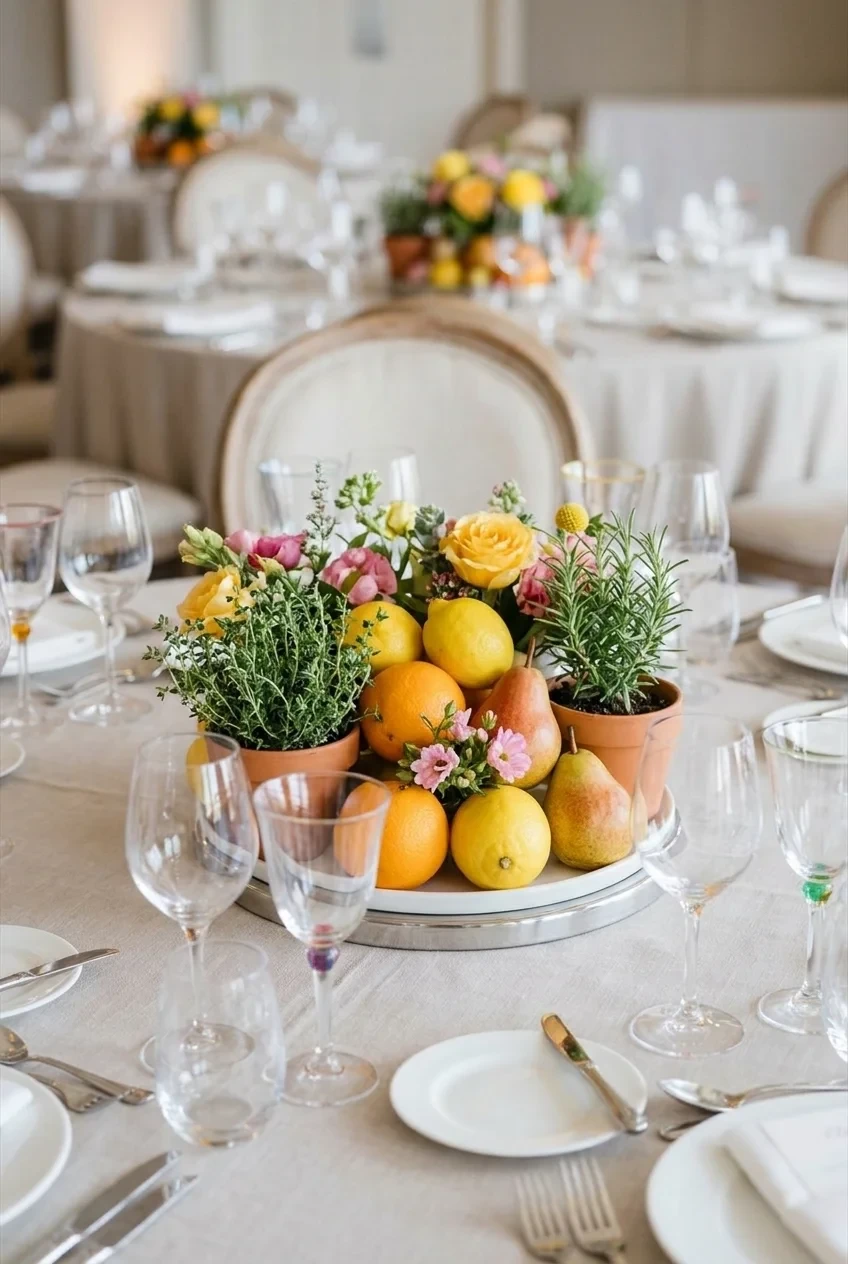
Pile citrus, pears, figs, or another fitting fruit beside potted herbs and low flowers, using the produce as color rather than random filler.
Choose sturdy fruit that can remain attractive through dinner, and place soft or cut pieces on washable trays instead of directly against rented linen.
6. Single-Color Flower Clouds
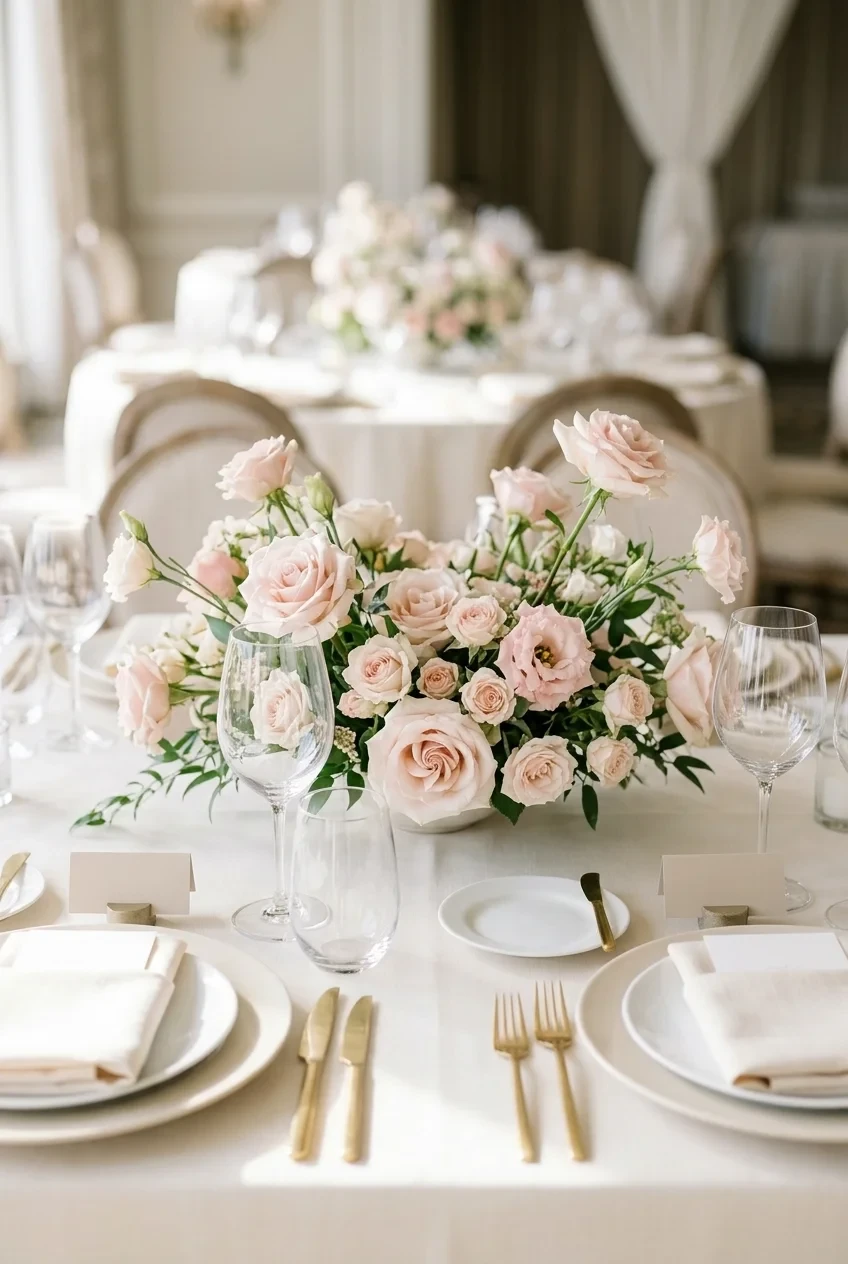
Choose one flower color and combine several varieties within it, creating texture through petal shape instead of adding more colors to the table.
Balance the concentrated arrangement with quiet linen and clear glassware. A limited palette works best when the flowers still show natural variation.
7. Mossy Woodland Bowls
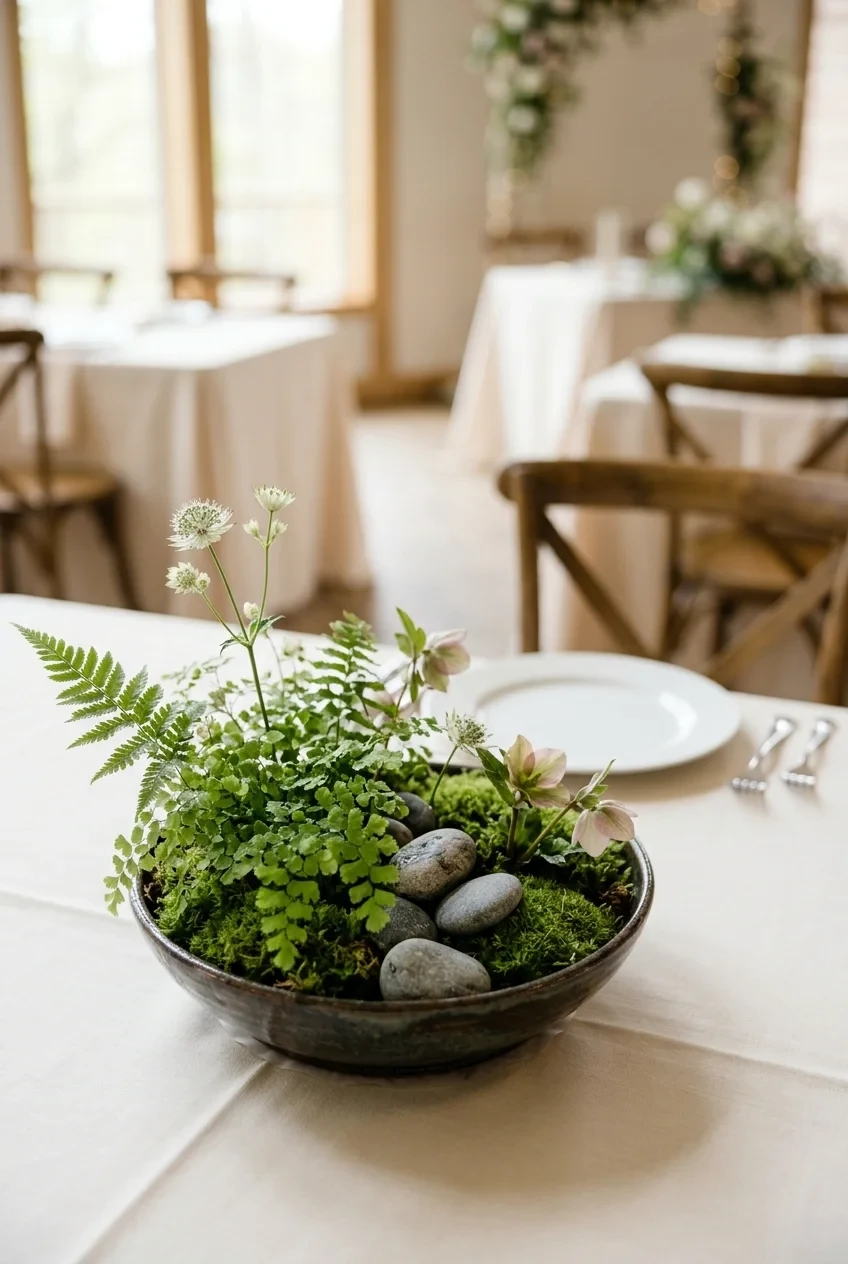
Combine moss, ferns, stones, and a few woodland flowers inside low bowls, keeping soil and damp materials fully contained above the tablecloth.
Use this look when the venue or wedding direction genuinely supports woodland textures; it should not become a generic shortcut for every outdoor reception.
8. Sculptural Table Numbers as Centerpieces
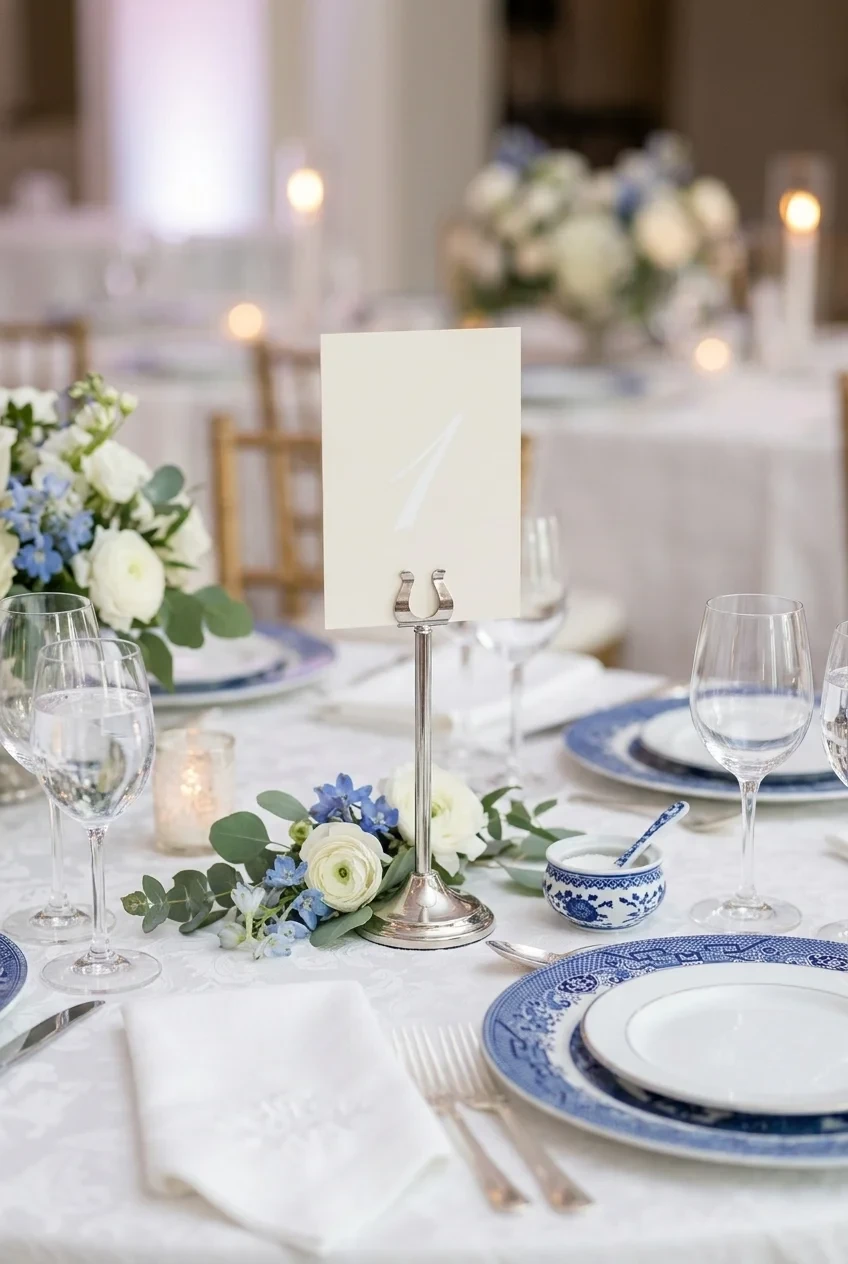
Let freestanding table numbers provide the vertical element, then surround each base with a restrained ring of flowers or candles instead of another large arrangement.
Test the number’s readability from the aisle and its stability beside glassware. Replace ornate shapes if they confuse guests searching across the room.
Linens, Place Settings, and Paper Details
Place settings reward close inspection because guests sit beside them for hours. Add layers selectively, preserving plate space, readable information, and comfortable service.
9. Menus Tucked Beneath Folded Napkins
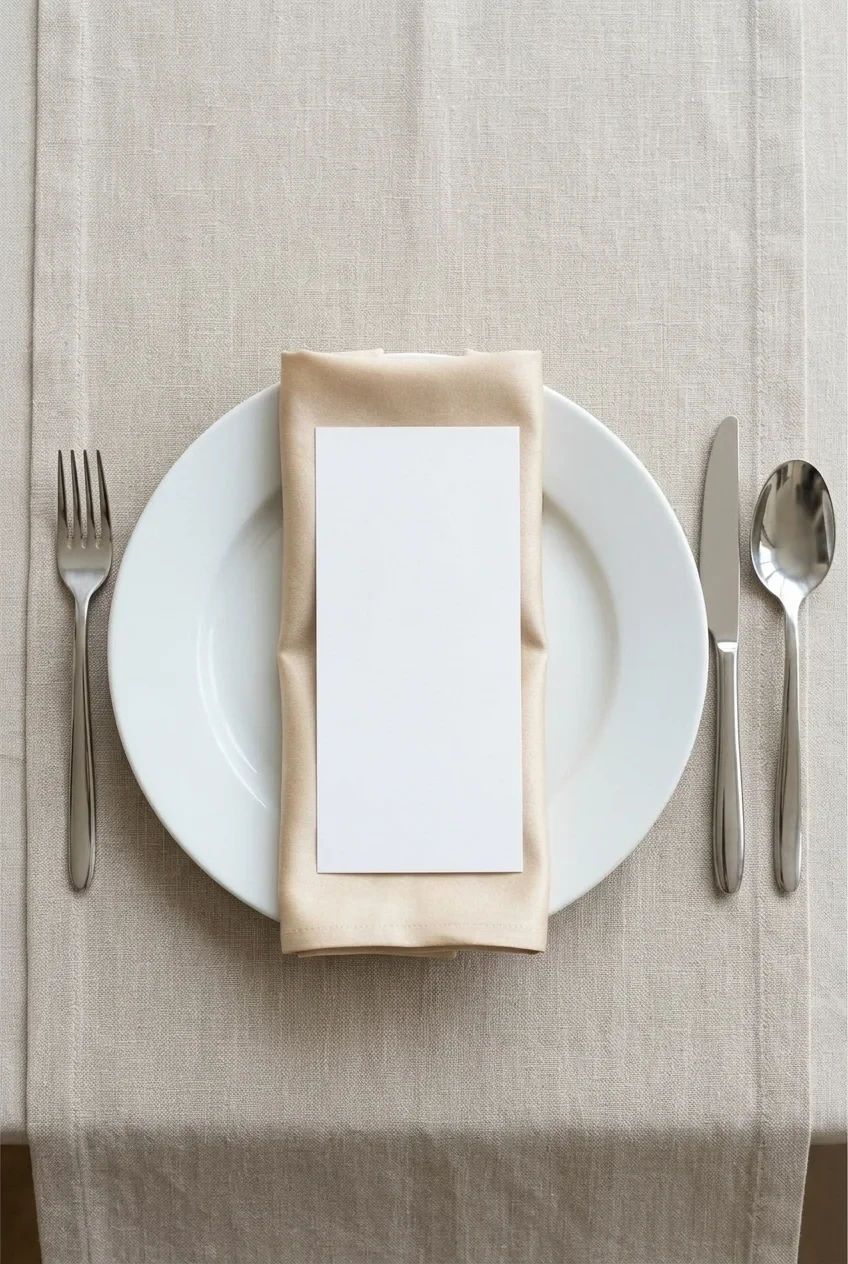
Place a slim menu beneath a loose napkin fold so guests can read it without dismantling ribbon, flowers, or an elaborate layered package.
Keep the paper narrower than the plate and test ink contrast under evening light. Decorative type is useless when dish names become difficult to scan.
10. Pressed Flower Place Cards
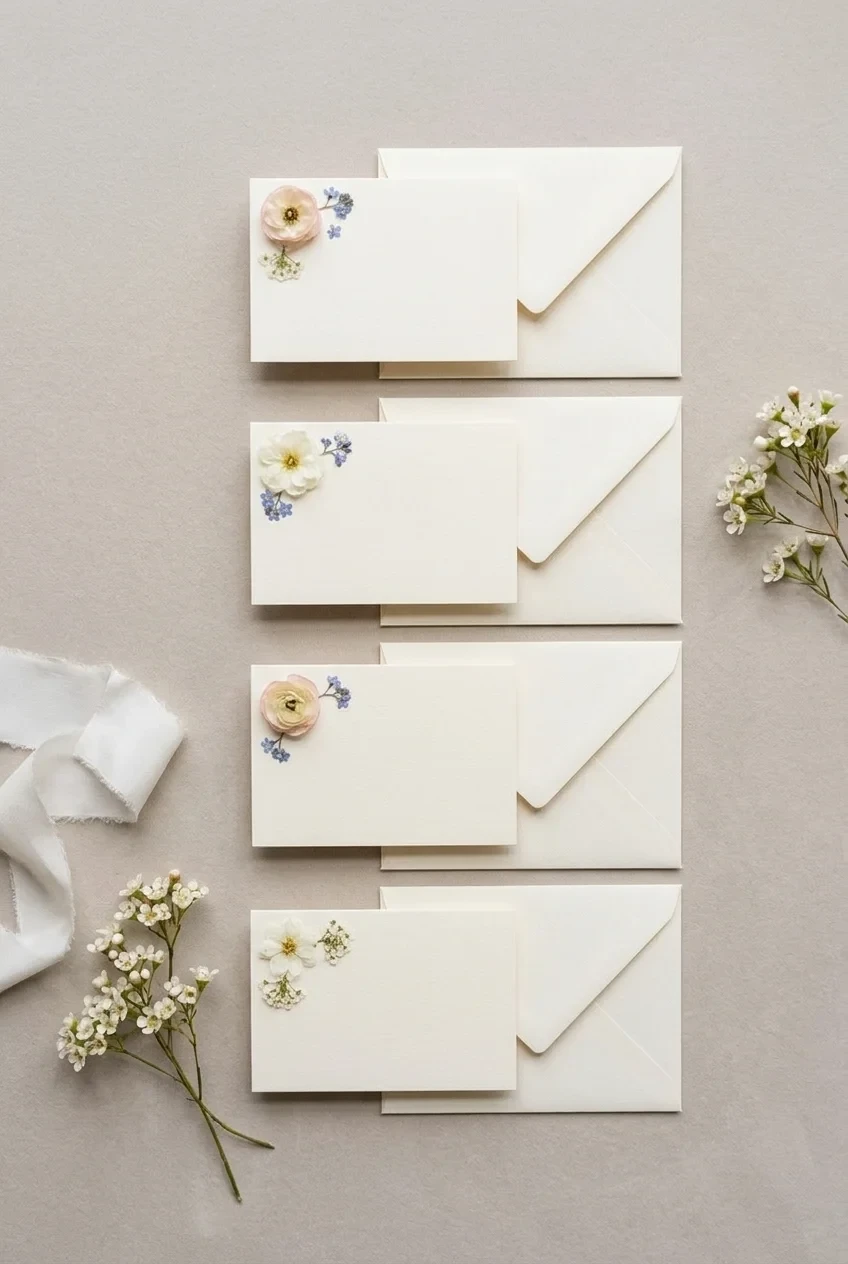
Mount one small pressed flower beside each printed name, leaving enough clear paper for quick reading and avoiding petals that shed onto plates.
Match the flower loosely to the reception palette rather than forcing identical specimens. Natural variation gives the cards character without changing their functional layout.
11. Vellum Name Cards Over Color
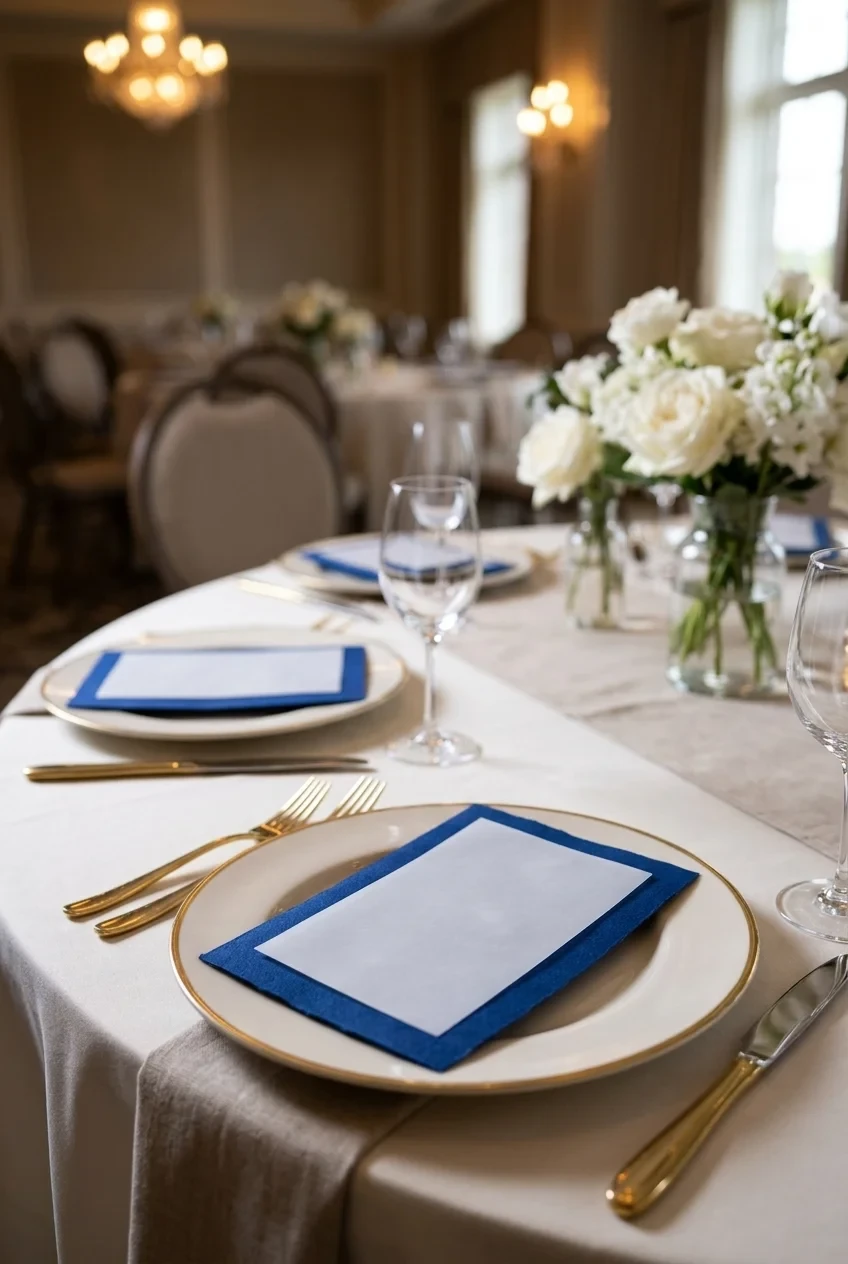
Lay translucent vellum cards over saturated paper so the names appear framed by color without adding another object to the place setting.
Select thick vellum that stays flat, and avoid pale ink or reflective lettering that disappears beneath warm lamps and candlelight.
12. Ribbon-Tied Flatware Bundles
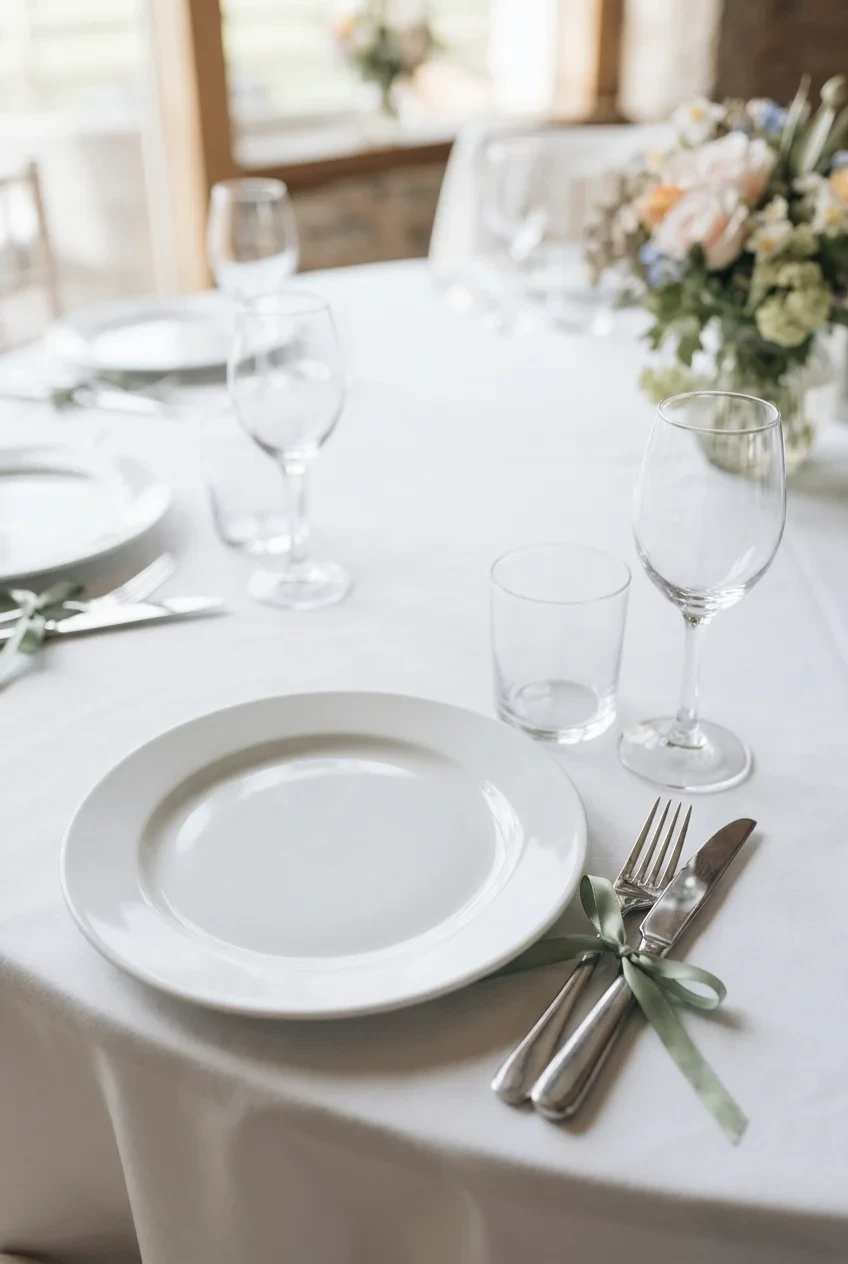
Tie flatware loosely with narrow ribbon for a soft vertical accent, placing the bundle beside the plate so guests can untie it easily.
Use one neat knot rather than a decorative bow when dinner service starts quickly. Long ribbon tails can drag through sauces or candle holders.
13. Colored Glassware as the Main Accent
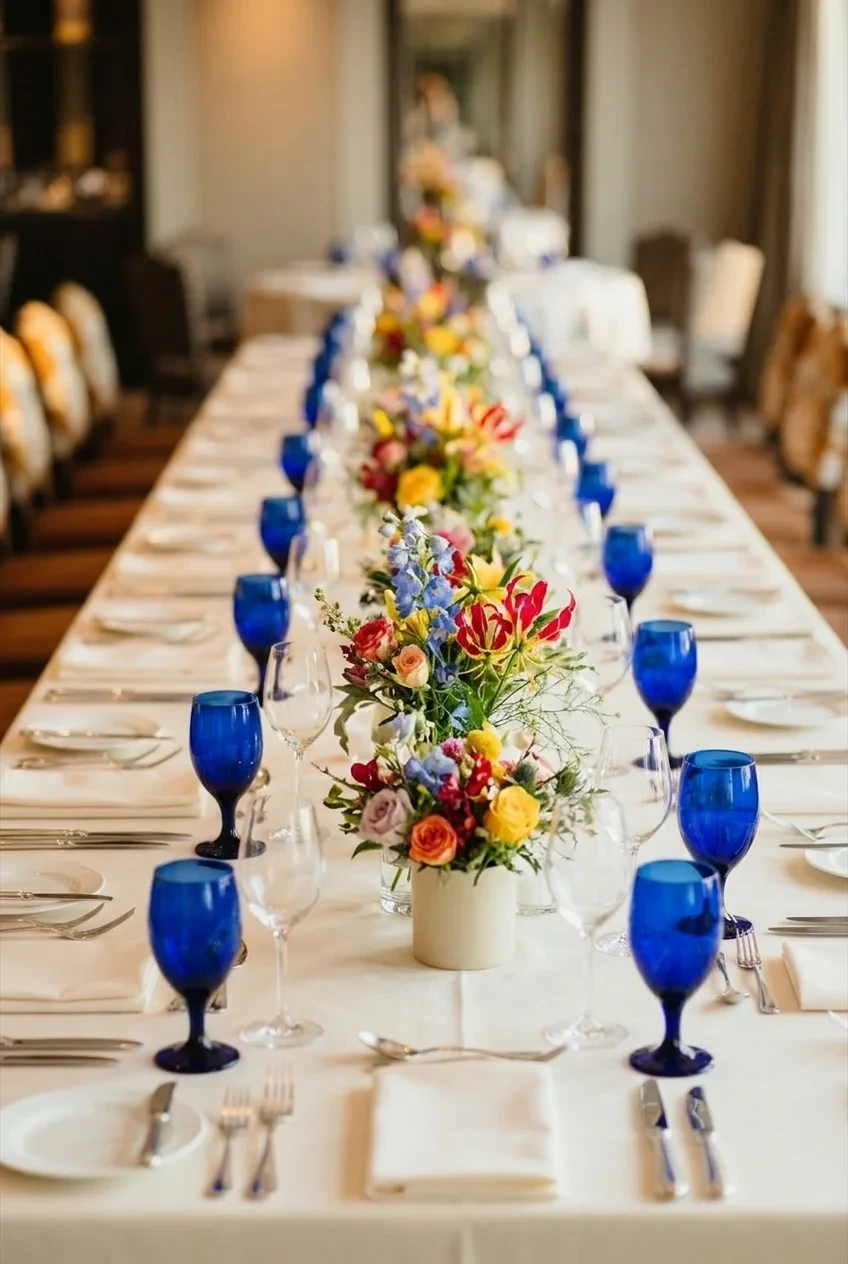
Repeat one colored water glass at every seat, allowing the room to gain color without changing neutral plates, linen, or centerpieces.
Rent a sample and view it filled with water under venue lighting. Some tinted glass becomes muddy or nearly black after sunset.
14. Coordinated Mismatched Ceramic Plates
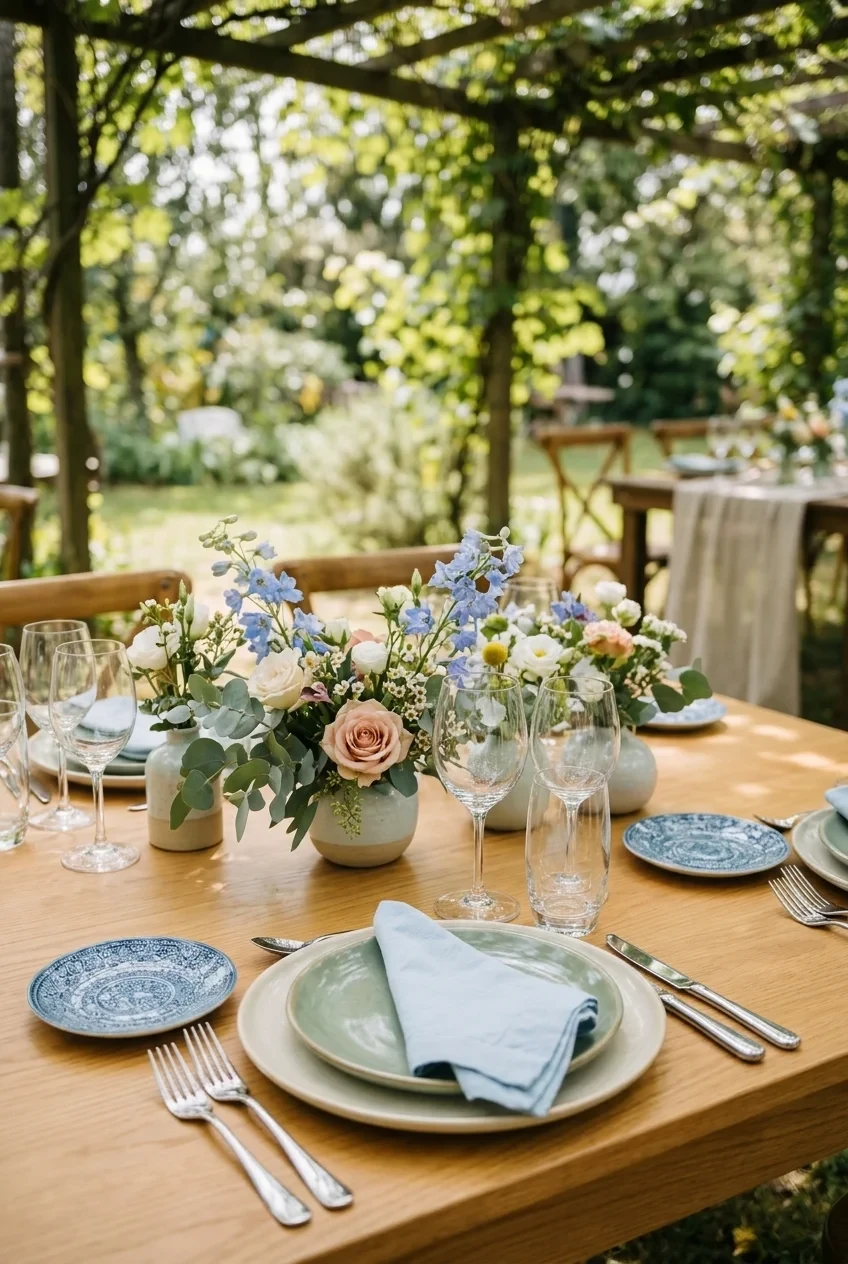
Mix plates that share one color family or rim shape, creating variation that still reads as a planned set across the room.
Confirm rental quantities and food-safe condition before building the concept around vintage pieces. Reserve the most decorative plates for visible first courses.
15. Textured Chargers Beneath Simple Plates
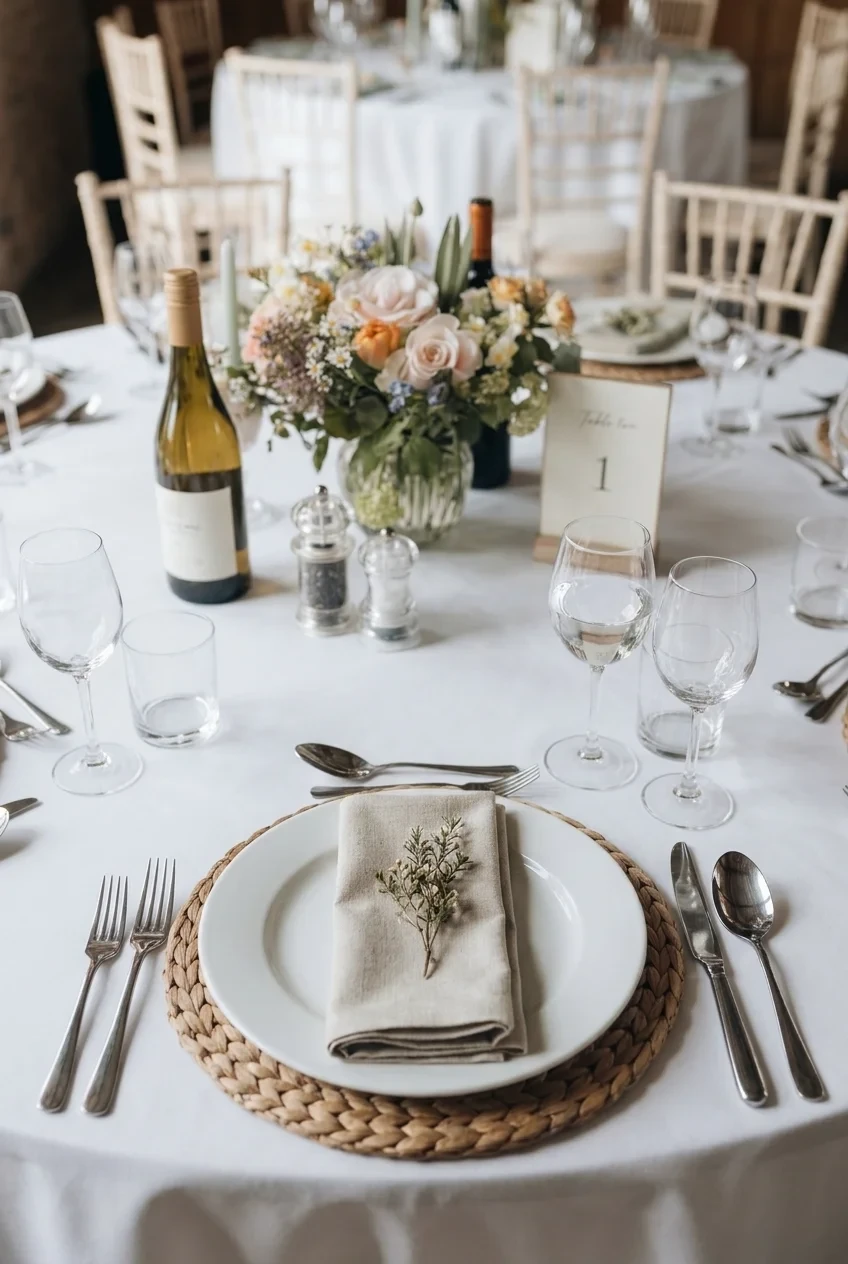
Use woven, ribbed, or softly metallic chargers to outline each setting while keeping the dinnerware itself plain and easy for catering staff to handle.
Measure the full setting before renting them. Wide chargers can crowd neighboring plates or push glassware toward the centerpiece on compact tables.
Compare charger dimensions against the catering team’s plate sizes, including any first-course dish that arrives before the main dinner plate.
16. Small Favors Integrated Into Each Setting
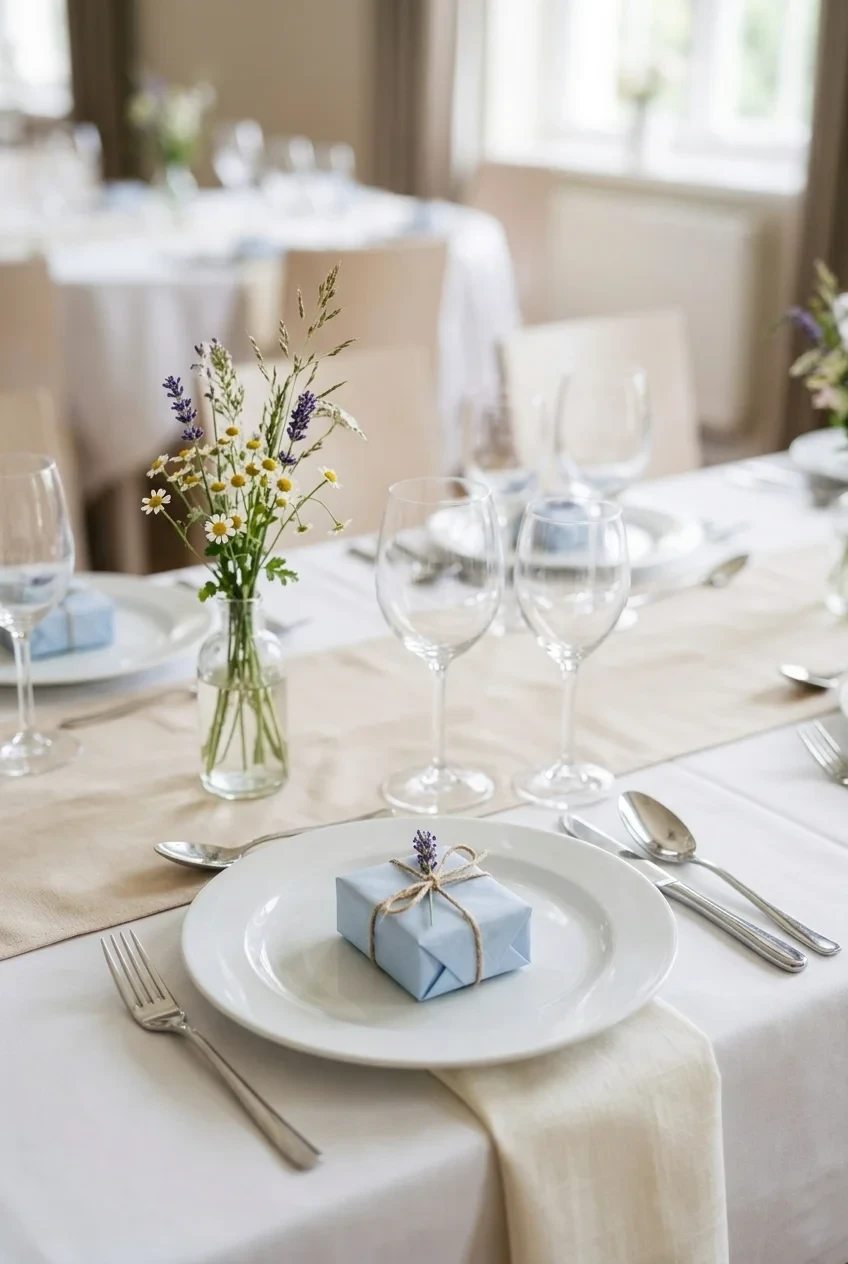
Place one compact favor above the plate or beside the name card, choosing something that remains clean, stable, and unobtrusive during dinner.
Avoid bulky packaging that guests must move immediately. A consistent ribbon or label can connect useful favors to the table palette.
Sweetheart and Head Table Focal Points
The couple’s table naturally attracts photographs and speeches. Give it one stronger shape than guest tables while keeping serving access and sightlines comfortable.
17. Low Floral Garland Along the Table Edge
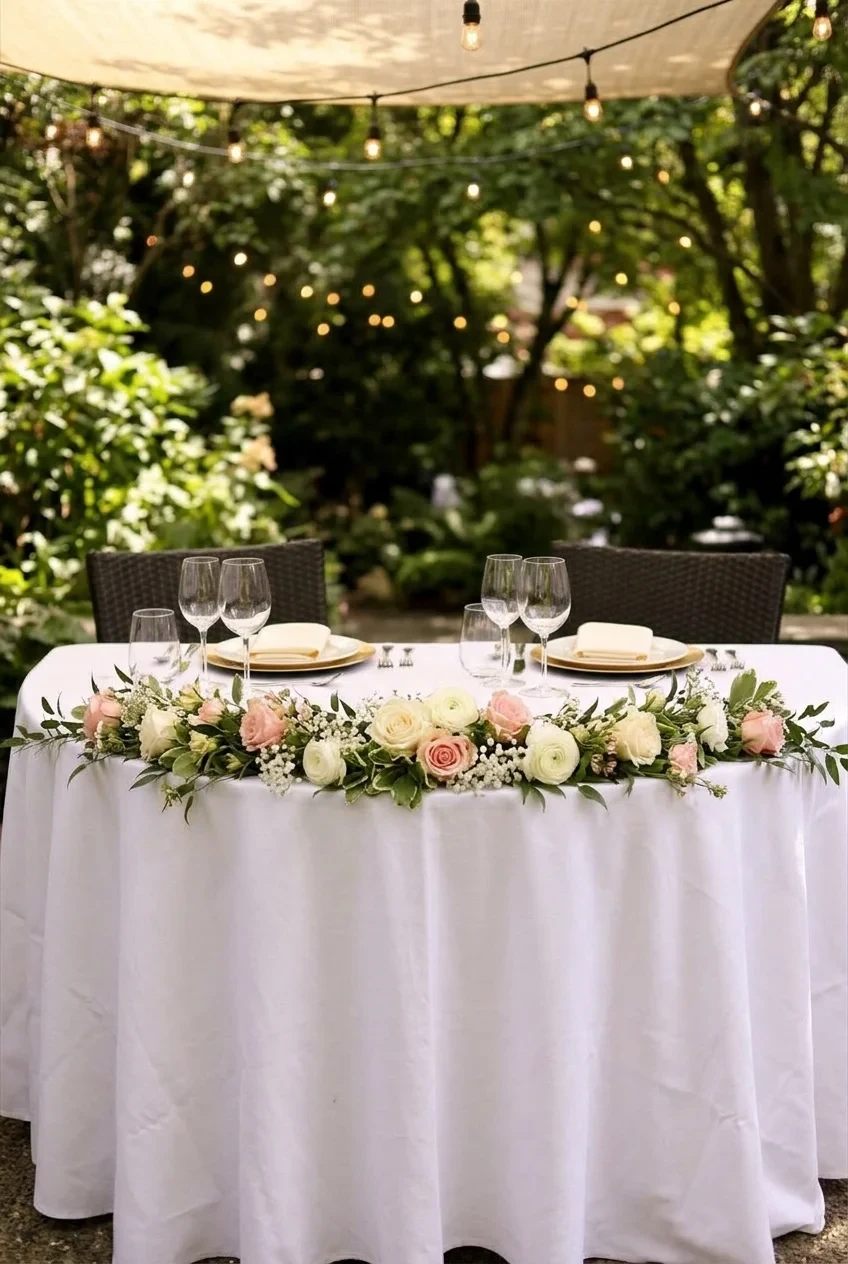
Run flowers and greenery along the front edge instead of piling them between place settings, keeping the tabletop open for dinner and glasses.
Secure every section so stems cannot slide when guests sit or staff clear plates. The garland should frame the table rather than conceal it.
18. Curved Sweetheart Table With Floor Flowers
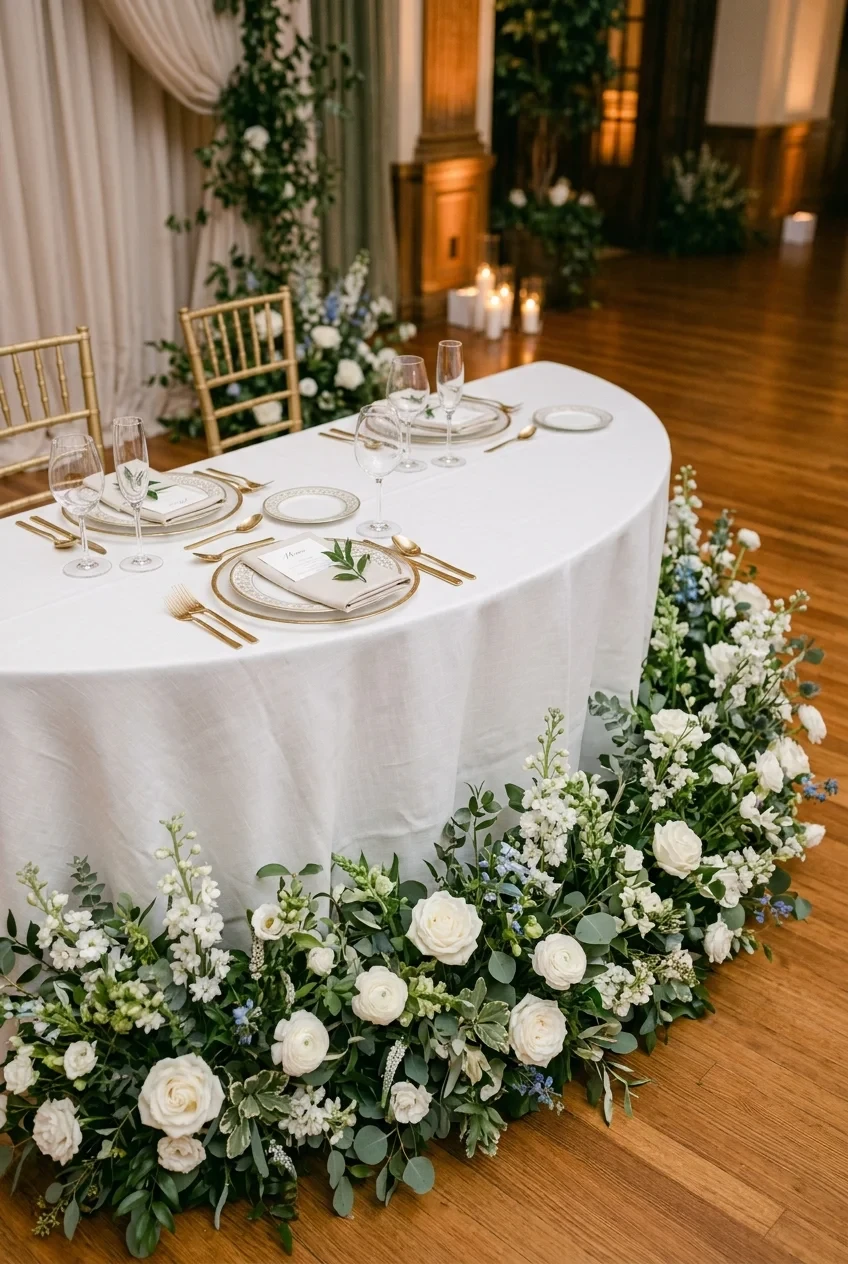
A curved table creates a gentle focal shape and leaves room for a low meadow of flowers across the floor in front.
Keep the floral edge far enough forward for comfortable chairs and staff access. Mark the arrangement footprint before ordering stems or rented furniture.
19. Soft Fabric Backdrop With Side Lighting
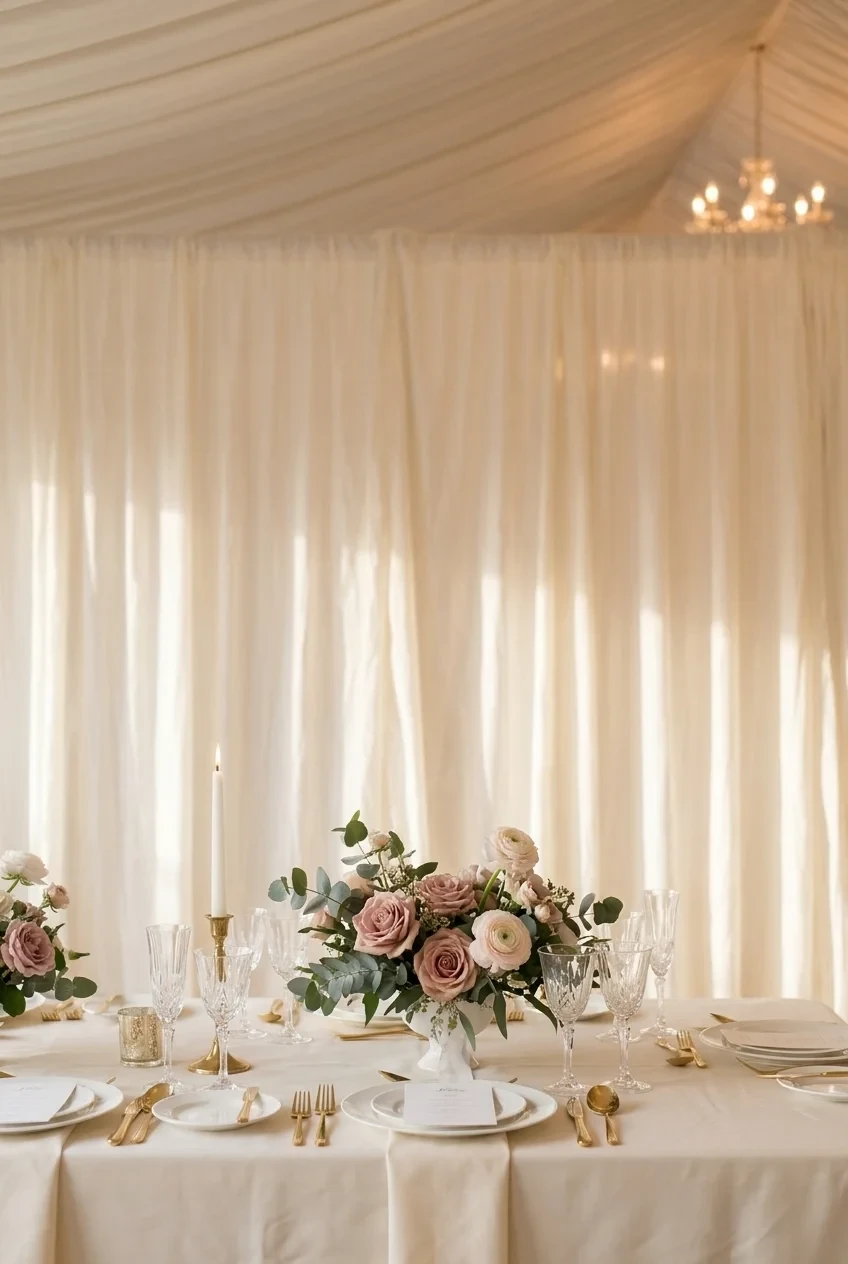
Hang wide fabric panels with relaxed vertical folds, then light them from the sides so texture appears without a bright spotlight behind the couple.
Choose rigging through the venue or approved installer. Freestanding frames need hidden weights and enough distance from chairs, candles, and service paths.
View fabric samples beside the actual linen and wall color, since warm ivory can appear yellow or gray under different indoor lighting.
20. Repurposed Ceremony Arch Behind the Couple
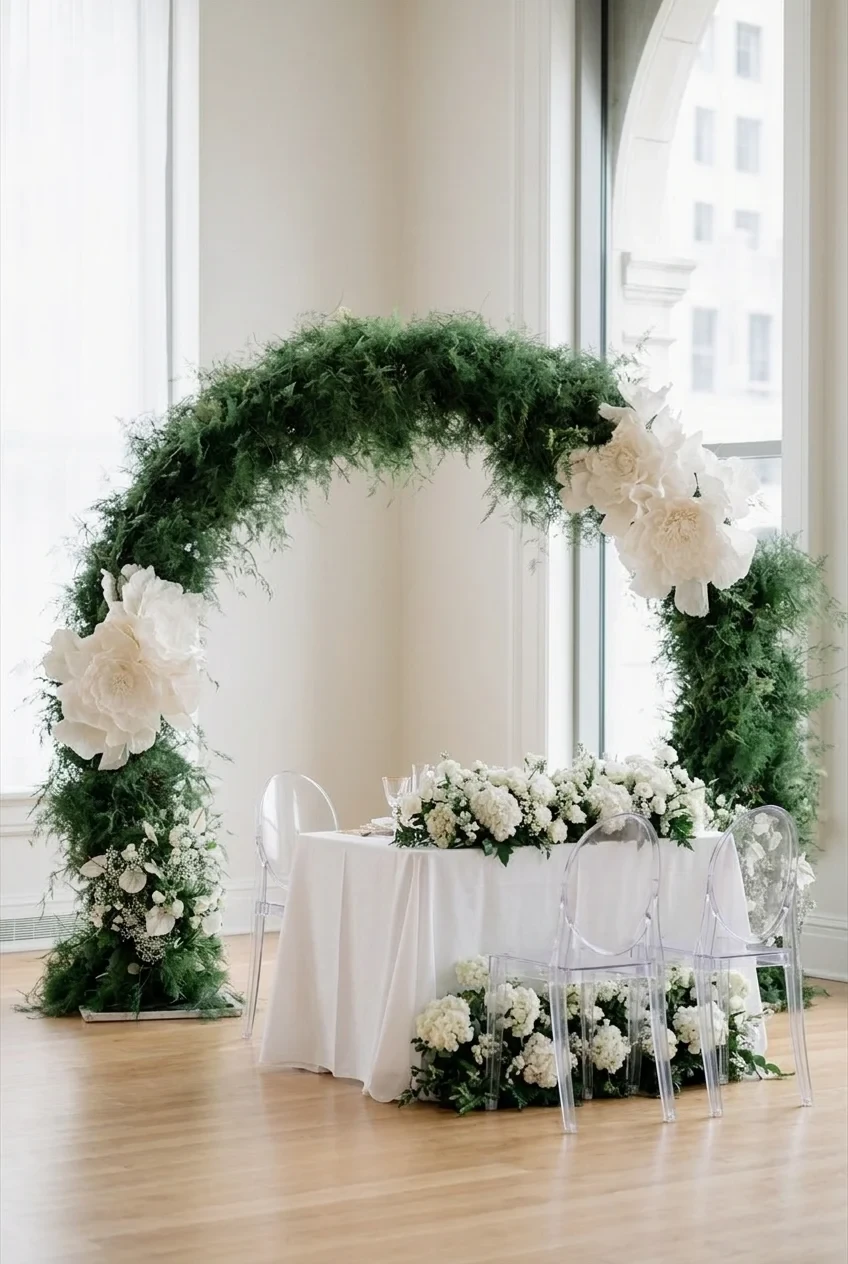
Move the ceremony arch behind the sweetheart table, adjusting its flowers for the closer reception viewpoint instead of building another large structure.
Confirm who moves it, when access opens, and whether the base fits the reception floor. Never improvise relocation during cocktail hour.
21. Grounded Flower Meadow Without a Backdrop
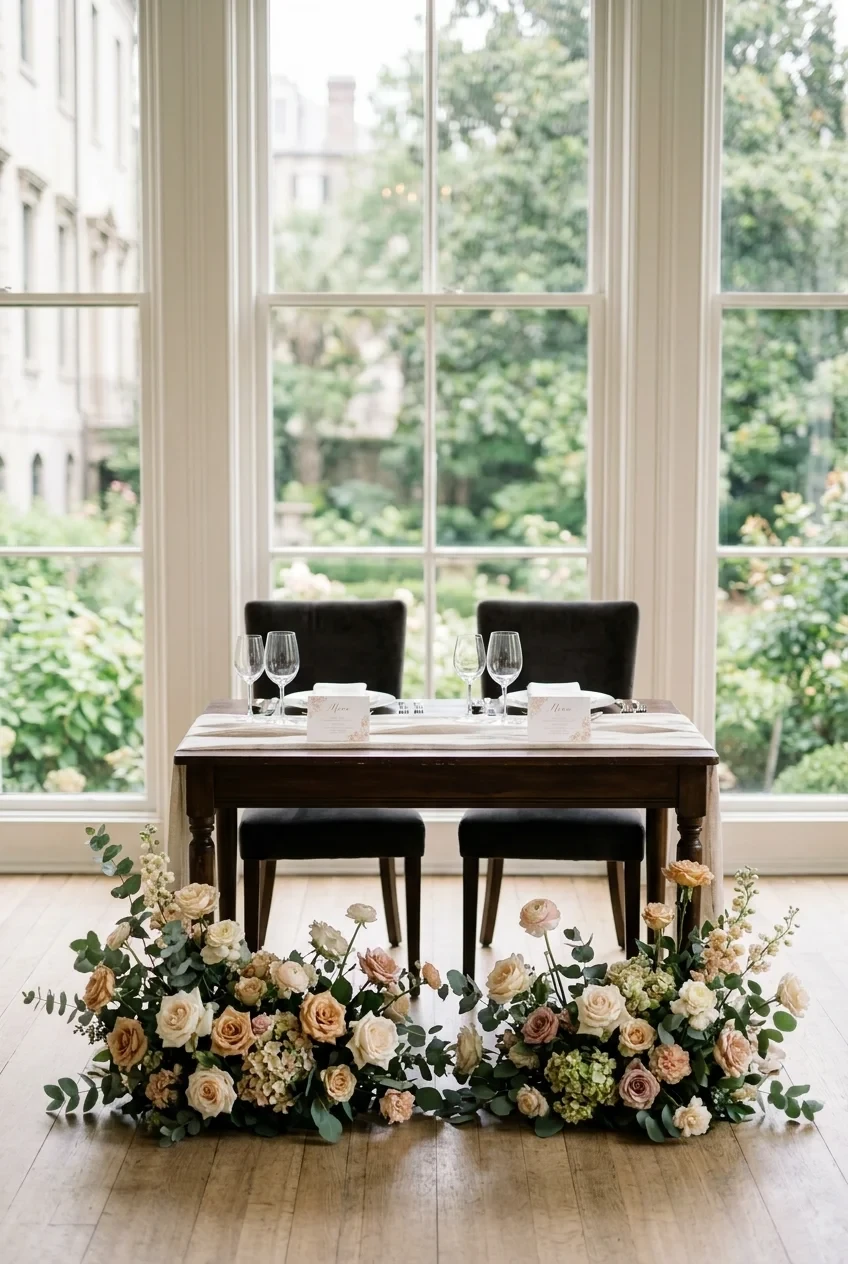
Arrange flowers in low connected clusters around the table base, letting a beautiful wall, window, or landscape remain the backdrop.
Vary cluster lengths instead of forming a rigid border. Leave openings near chair legs and serving access so the design never becomes a trip hazard.
22. Candle Wall With Shelved Glass Holders
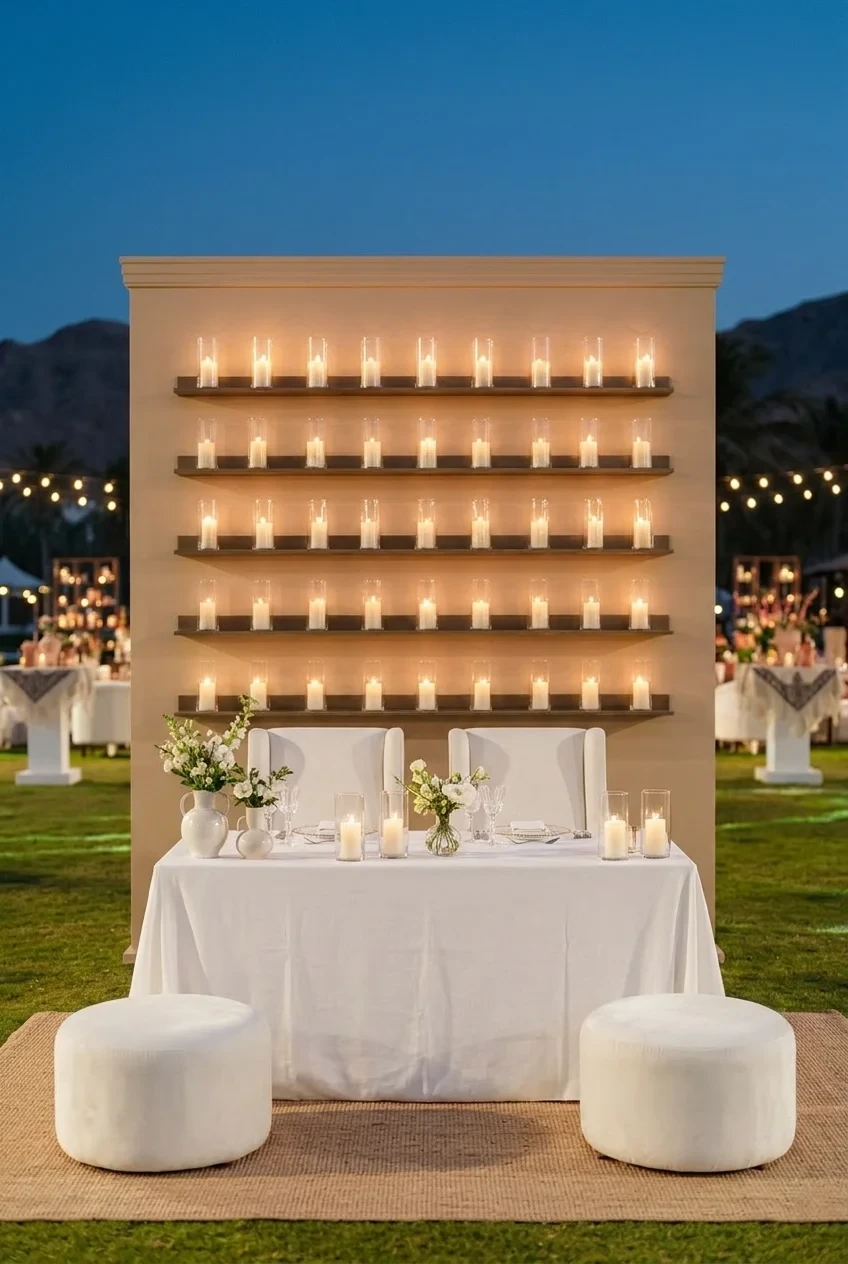
Fill shallow wall shelves with protected candle holders, spacing them evenly enough to read as architecture rather than a collection of small objects.
Use venue-approved flame protection or flameless lights, and keep fabric, flowers, and guest seating outside the installer’s required clearance zone.
23. Hanging Greenery Above the Head Table
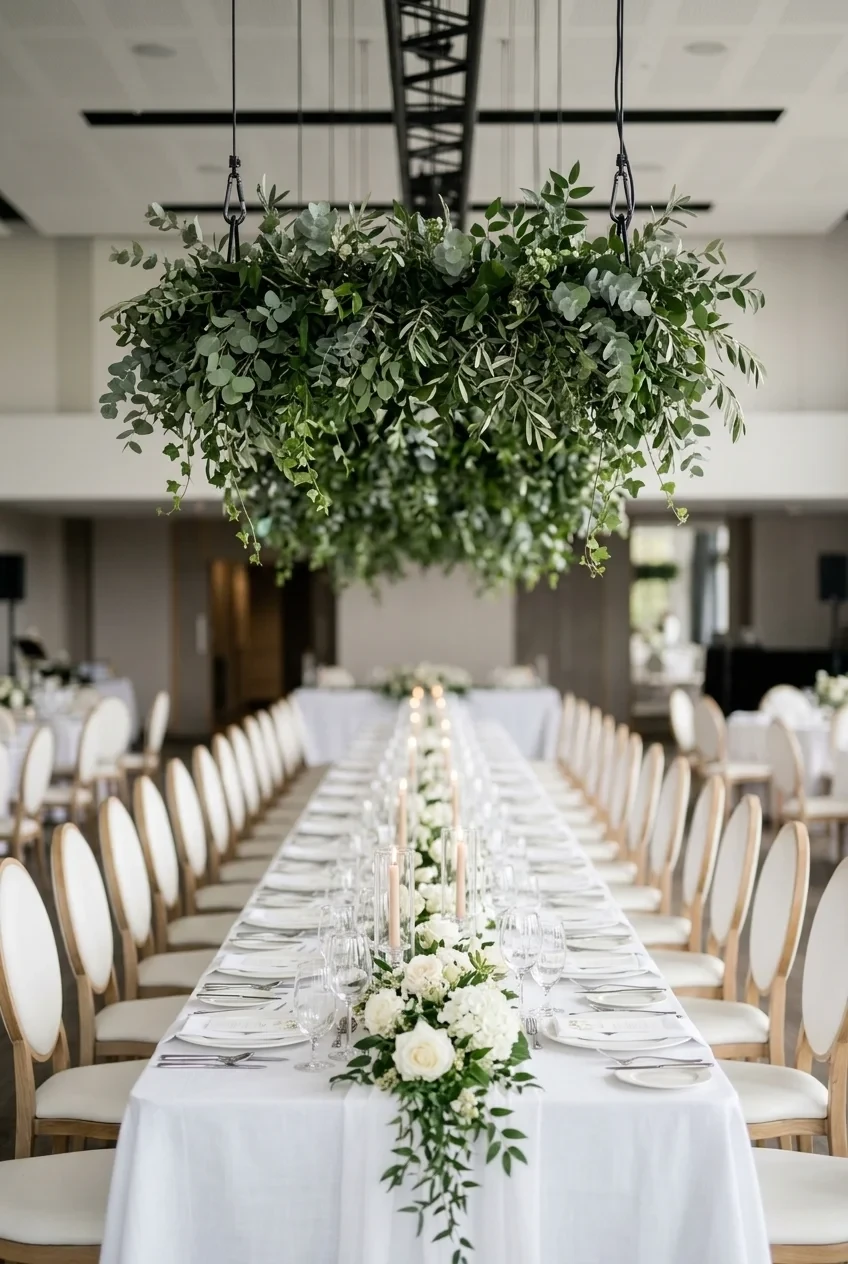
Suspend one long greenery shape above the head table, aligning its length with the table rather than filling the entire ceiling indiscriminately.
A qualified installer must confirm rigging points, weight, height, and sprinkler clearance. Keep the tabletop simpler so both layers remain readable.
24. Contrasting Chairs for the Couple
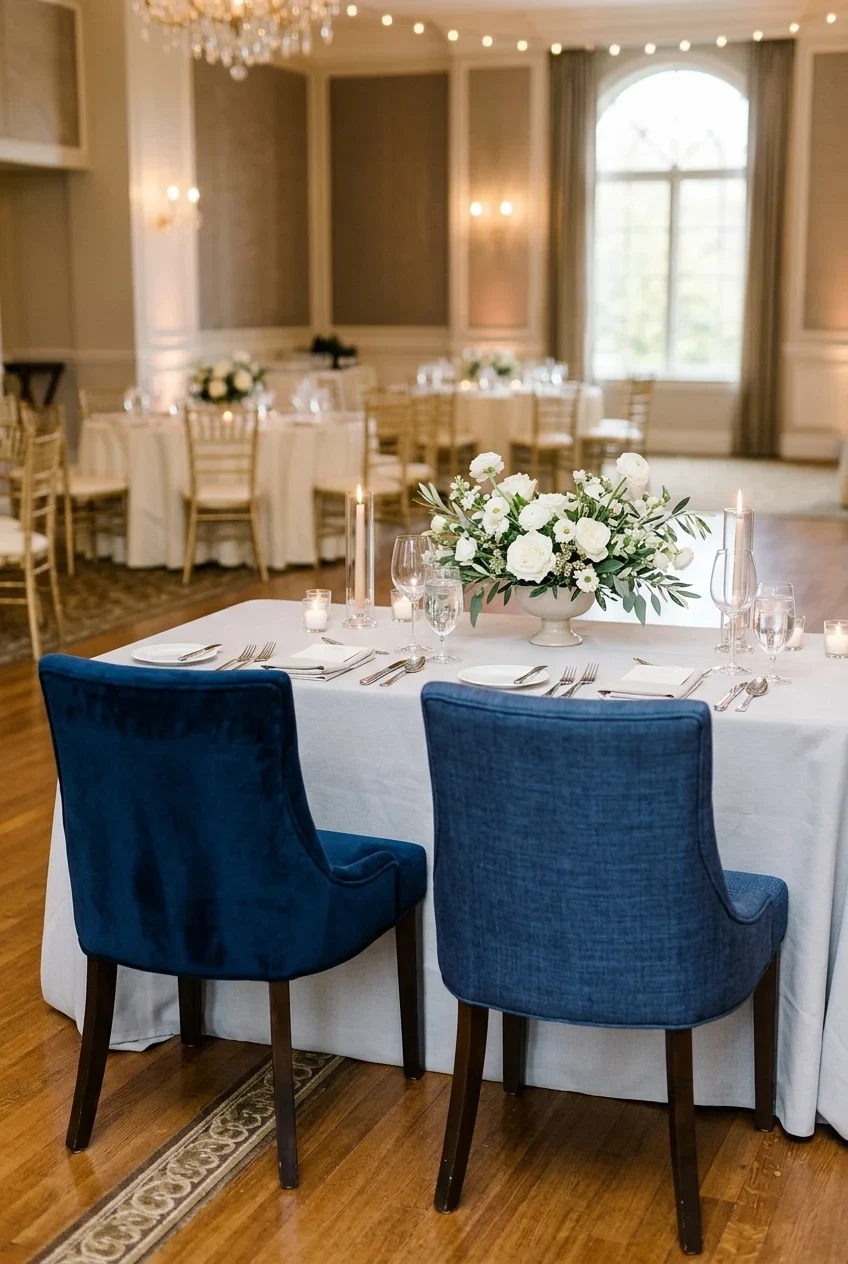
Give the couple chairs with a different silhouette or upholstery color, allowing furniture to mark the table without signs, banners, or oversized initials.
Match seat height and comfort before choosing appearance. A striking chair that sits too low will look awkward beside the table all evening.
Entrance, Seating, and Guest-Flow Decorations
Functional displays can also set the visual direction. Place them where guests naturally pause, then keep aisles wide enough for lines, mobility devices, and service.
25. Clear Welcome Sign With Grounded Flowers
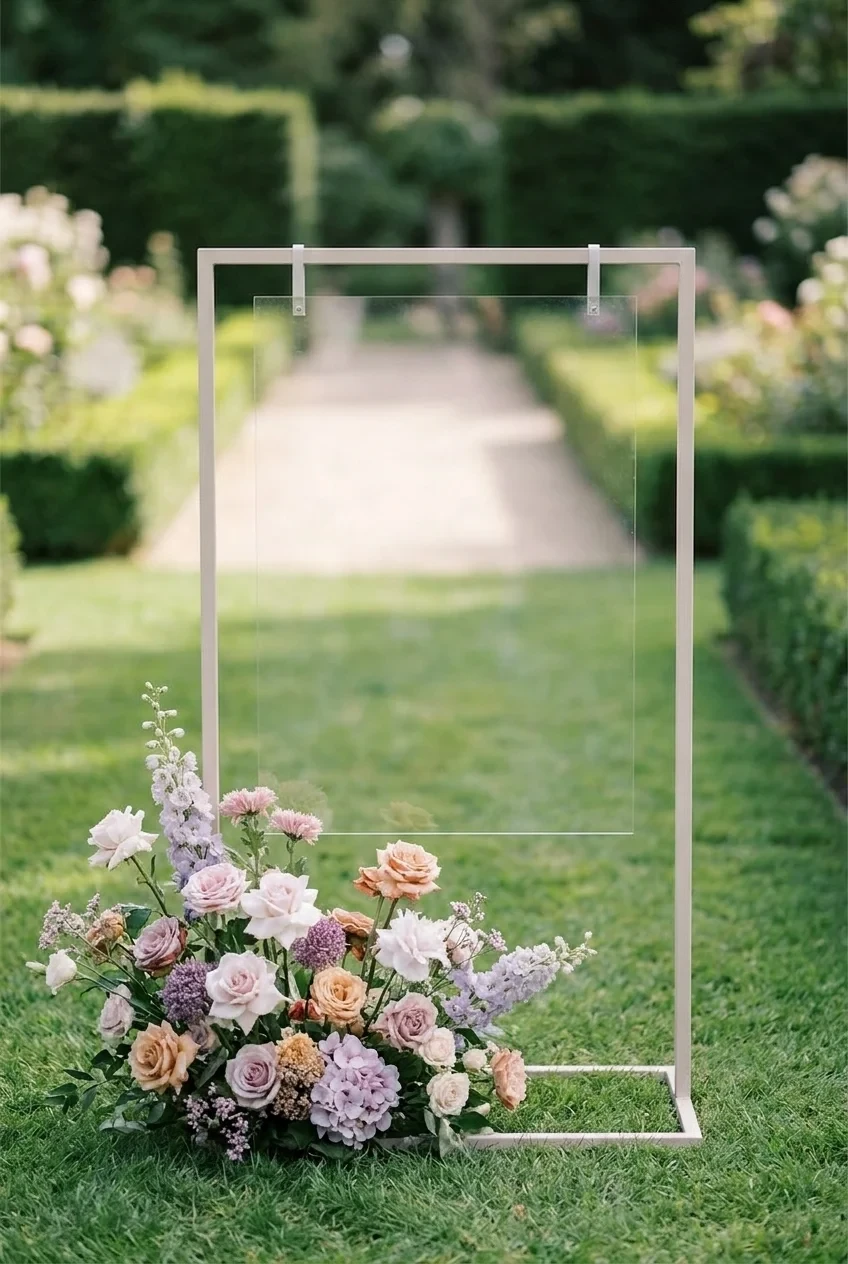
Mount a clear sign on a stable frame, then anchor one lower corner with flowers so the lettering remains readable against the entrance background.
Test the sign from several steps away and finalize every detail before printing. Transparent materials often need a solid panel or shadow behind text.
26. Mirror Seating Chart With Removable Cards
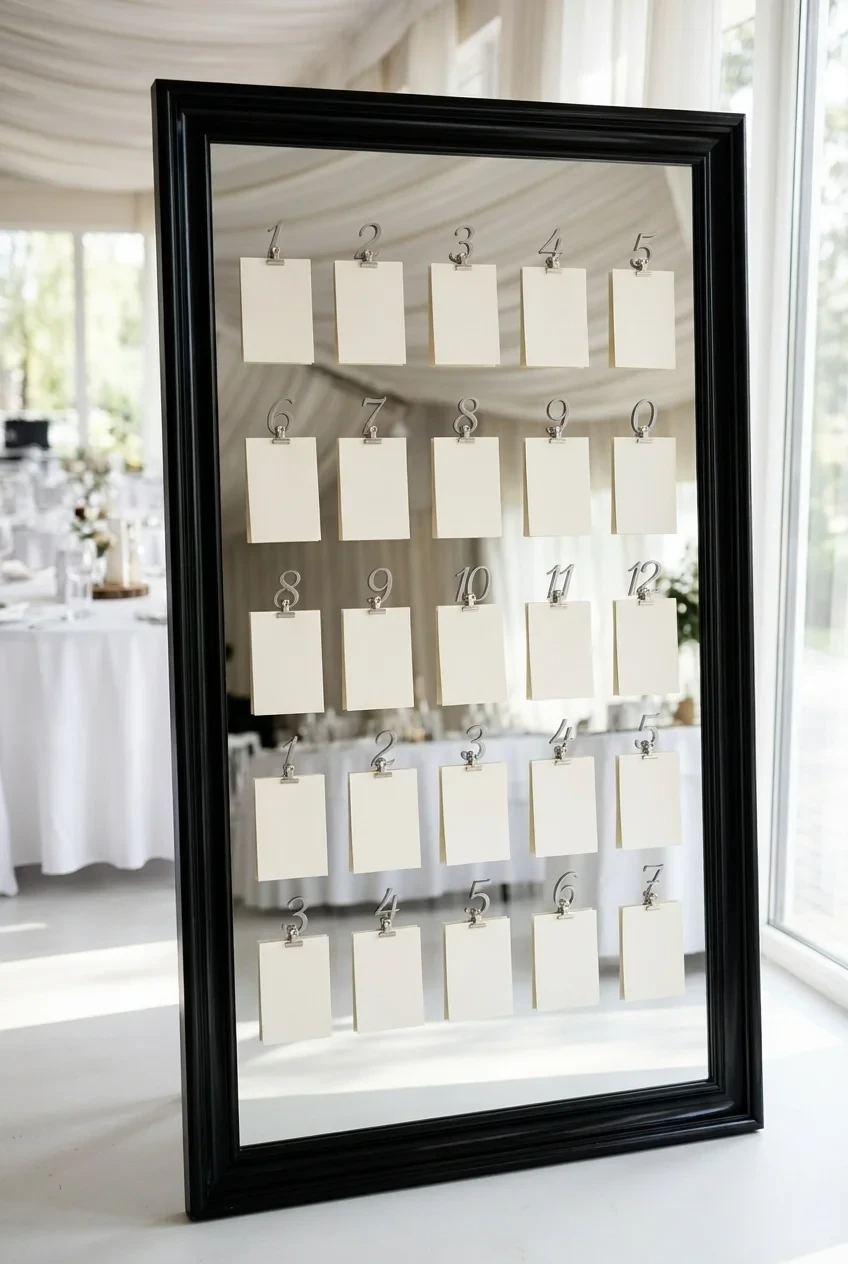
Attach individual assignment cards to a large mirror, making late changes possible without rewriting the entire reflective surface or leaving visible corrections.
Arrange cards alphabetically and control nearby reflections with side lighting. Guests should find names quickly without blocking the reception doorway.
Prepare a printed alphabetical backup for hosts, preserving the same assignments if cards shift, reflections confuse guests, or the display becomes crowded.
27. Escort Card Garden in Low Planters
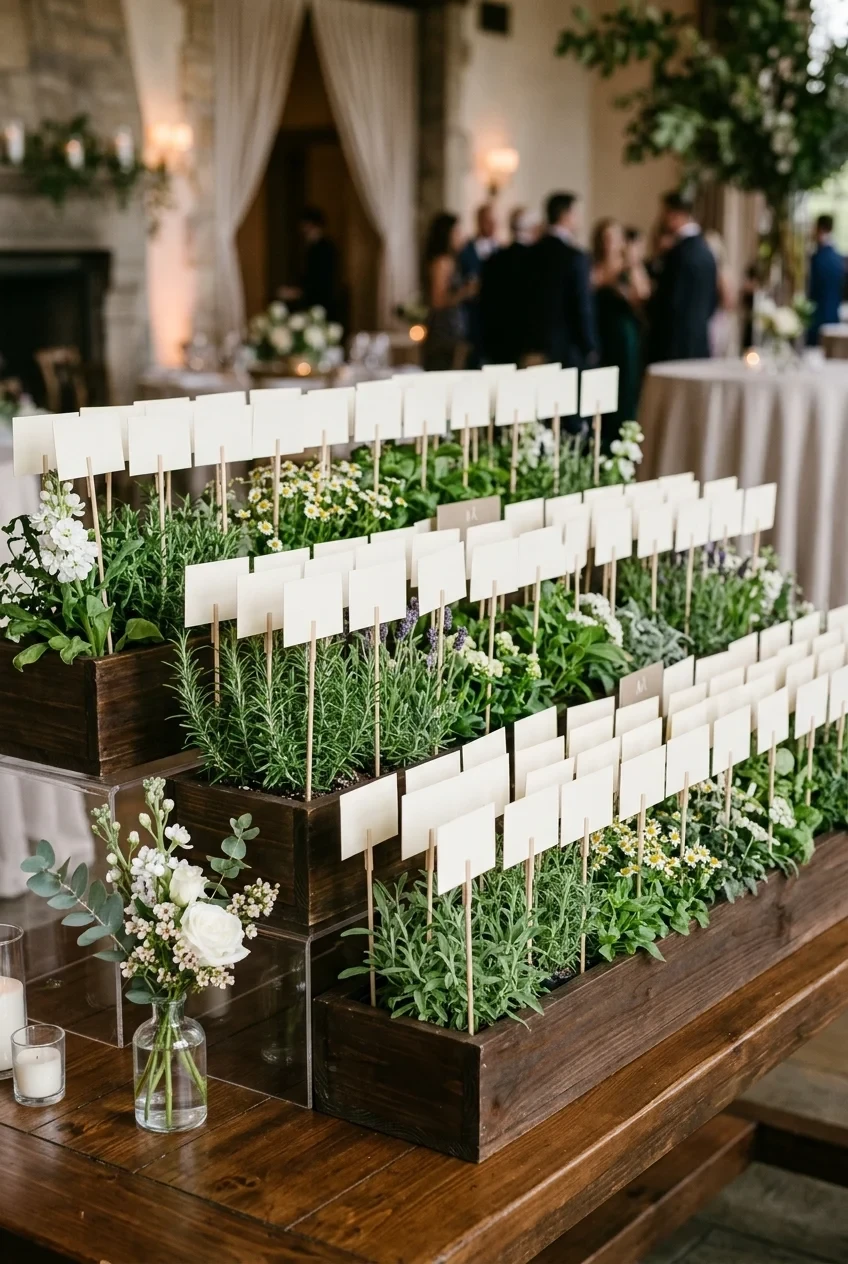
Tuck escort cards into low planted boxes, using flowers or herbs that remain below the card faces and preserve alphabetical browsing.
Divide a large guest list into clearly marked ranges. Leave an empty surface nearby so guests can set down drinks while finding assignments.
28. Color-Blocked Envelope Wall
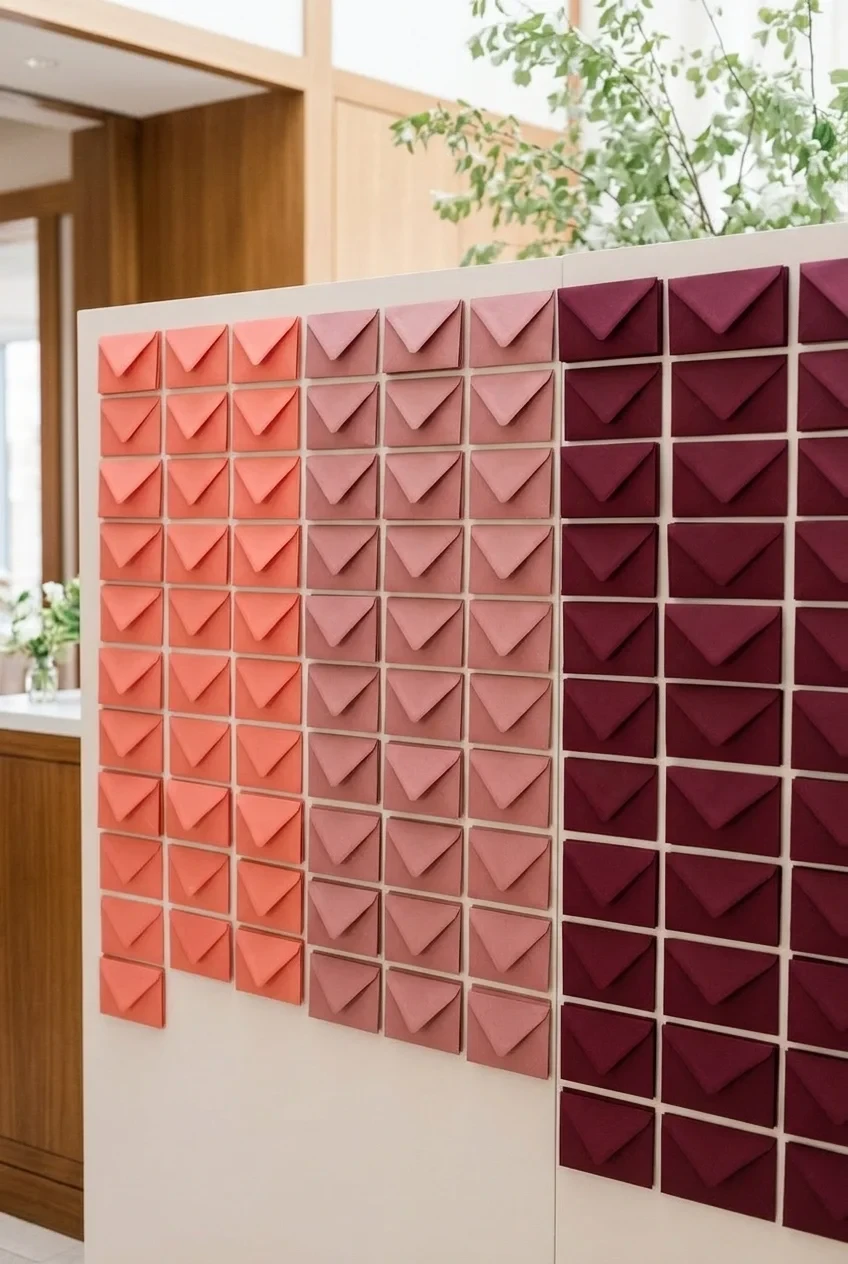
Arrange small envelopes in clean color blocks, assigning each table a shade while keeping guest names in one consistent high-contrast position.
Use removable mounting that will not damage the venue wall, and provide staff with a backup list when an envelope gets moved.
29. Welcome Drink Tags as Escort Cards
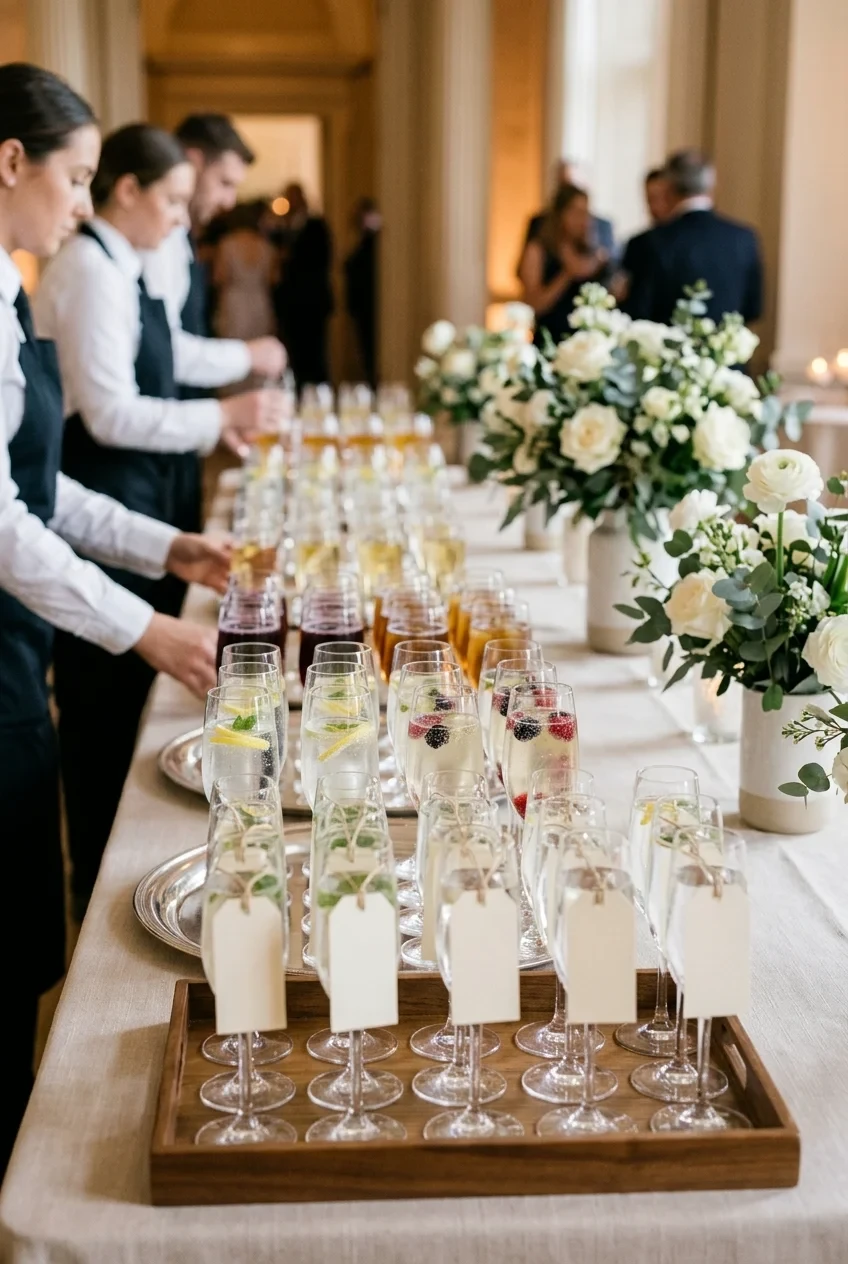
Hang waterproof name tags from pre-poured welcome drinks, combining the first refreshment with table assignments while keeping nonalcoholic choices equally visible.
Station staff beside the display to replenish safely and prevent guests from handling several glasses while searching for their names.
30. Travel Tag Seating Display
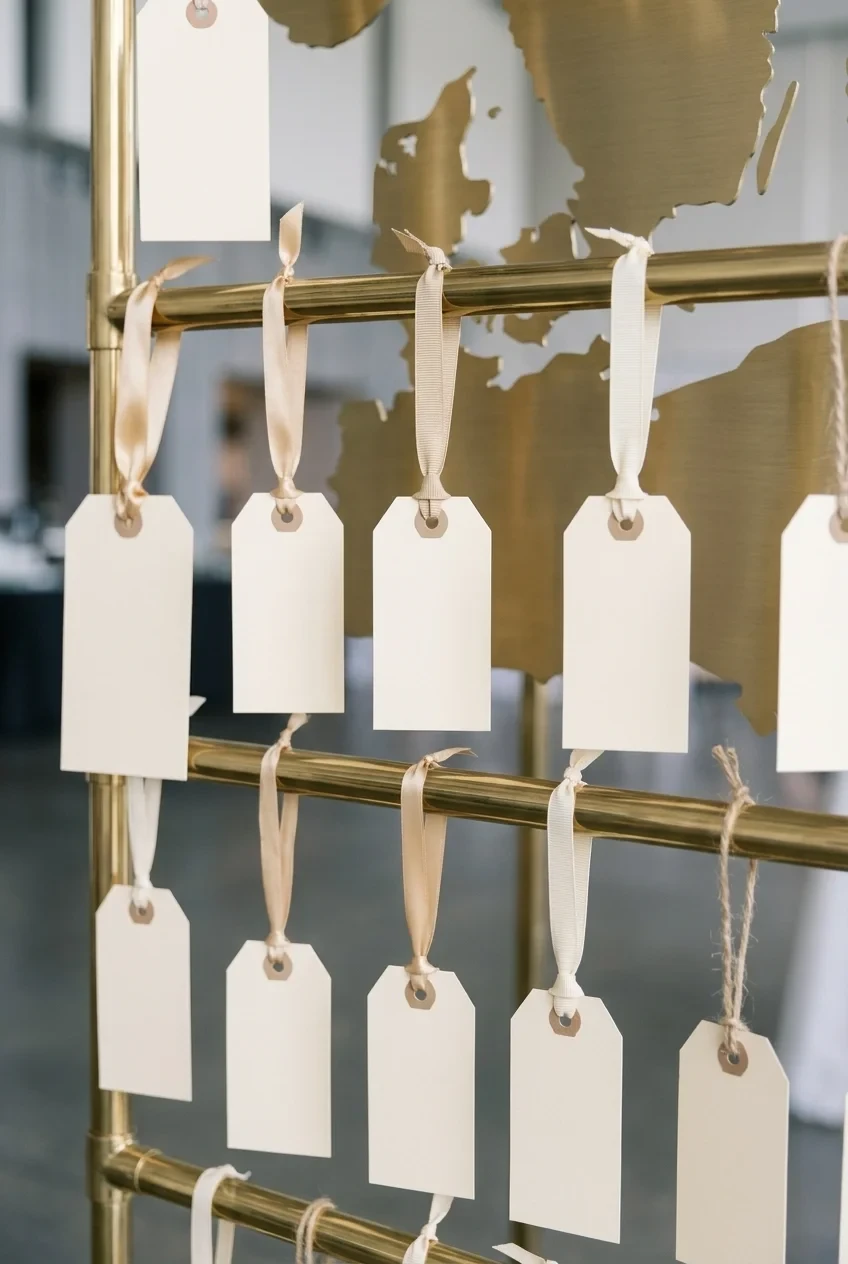
Hang luggage-tag-style cards from brass rails for a travel theme, using blank map shapes and varied ribbon colors instead of airport logos.
Keep tags at accessible heights and leave enough spacing for fingers. Tiny cards become frustrating when guests must separate several layers.
31. Family Wedding Photo Gallery
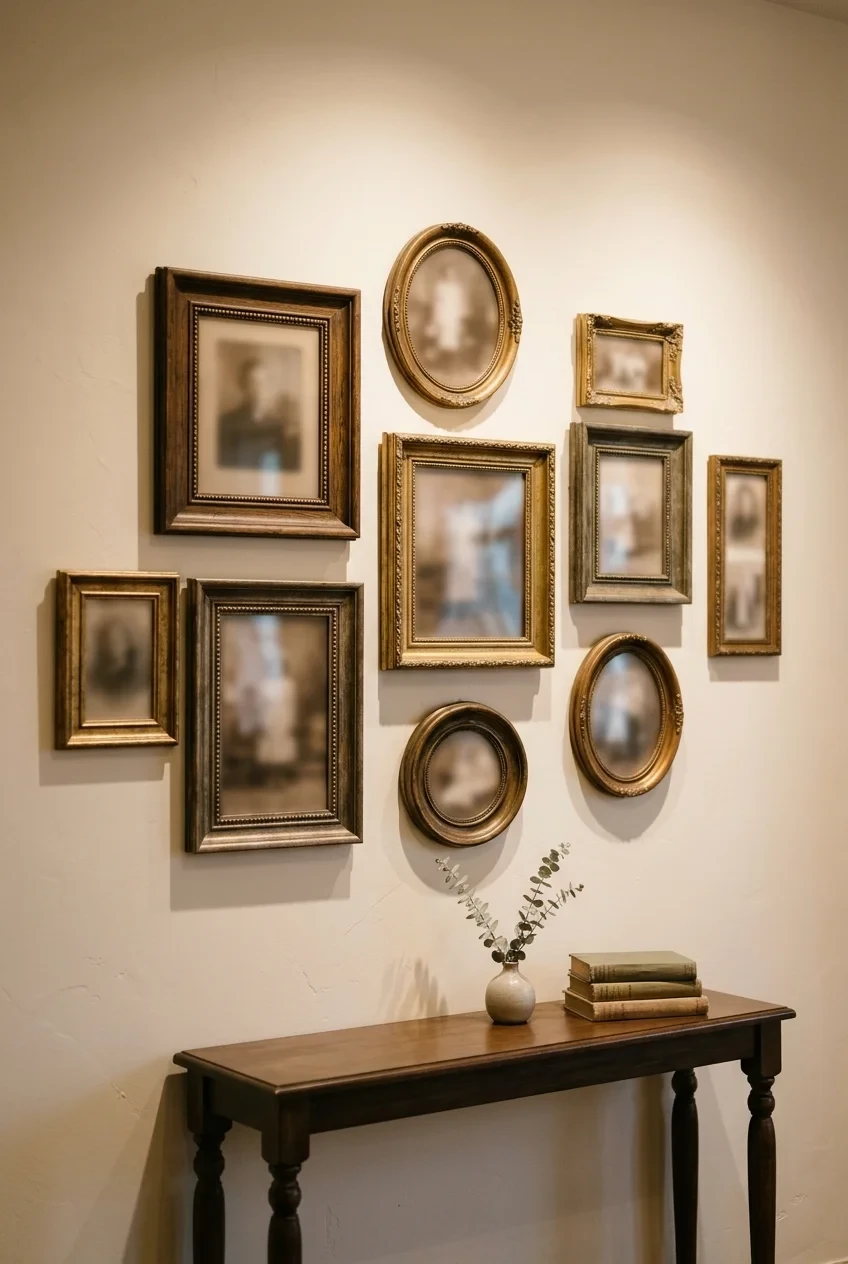
Frame family wedding photographs in mixed sizes, grouping them on one wall or console instead of scattering sentimental images across unrelated reception zones.
Ask permission before displaying personal photographs, label relationships briefly, and use scanned copies when originals could be damaged by transport or sunlight.
32. Lantern-Lined Reception Entry
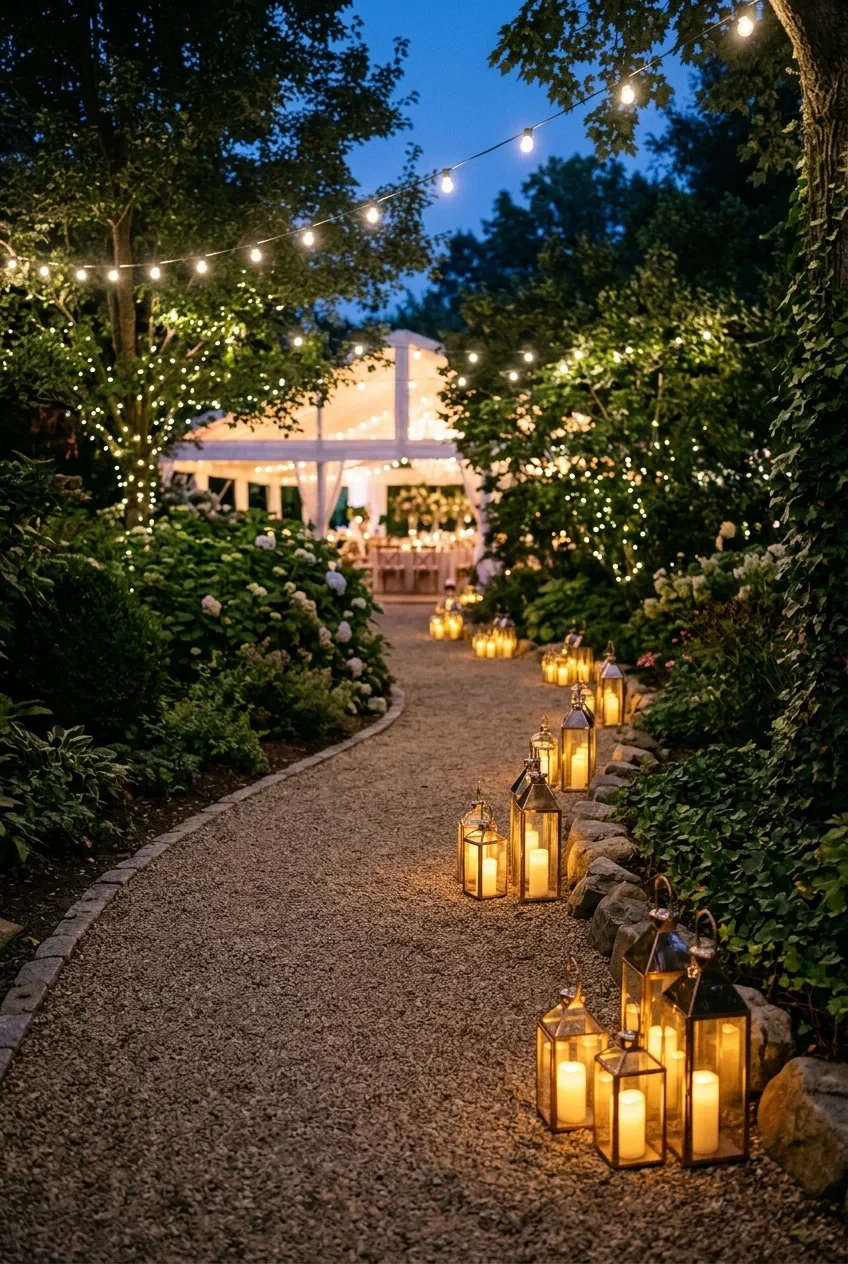
Place lanterns in staggered clusters along one side of the entrance path, preserving the full accessible route rather than narrowing both edges.
Use weighted, enclosed, venue-approved lights and check brightness after sunset. Lanterns should guide movement without dazzling guests or disappearing into daylight.
Ceilings, Walls, and Whole-Room Lighting
Large-room decorations change the atmosphere before guests notice individual tables. Treat rigging, power, fire rules, and installation time as part of the design.
33. Fairy-Light Canopy Over Dinner
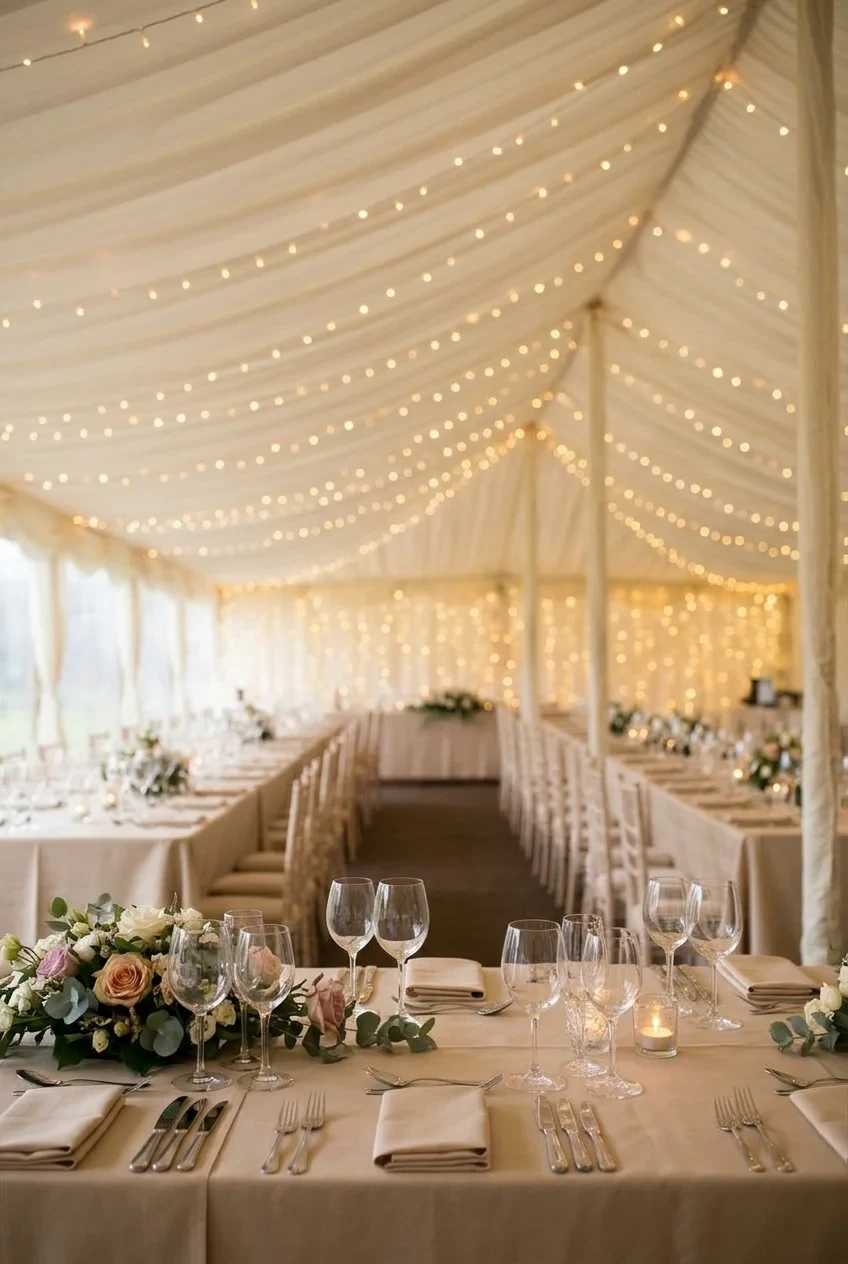
Stretch warm light strands in parallel lines above the dining area, creating an even ceiling rather than bunching every strand around one central pole.
Coordinate power routes and dimming with professionals, and keep all connection points away from fabric, water service, and guest reach.
Ask the photographer to test exposure beneath the completed canopy, ensuring faces and table details remain clear without losing the lights’ warm atmosphere.
34. Wide Fabric Swags Across the Ceiling
Image pending: No image is attached to this draft for idea 34 (image-34). Required HC reference "hc-ceremony-006" is restricted to explicit indoor ceremony, indoor wedding, elegant, formal, luxury, winter intent; negative or missing intent cannot unlock it. No text-only generation request was sent.
Use broad fabric panels with deep, relaxed curves to soften a plain ceiling, repeating fewer swags instead of creating many narrow strips.
Have the venue approve fabric ratings, attachment points, and sprinkler clearance. Light the panels gently so folds remain visible after dark.
35. Hanging Flower Installation Above Round Tables
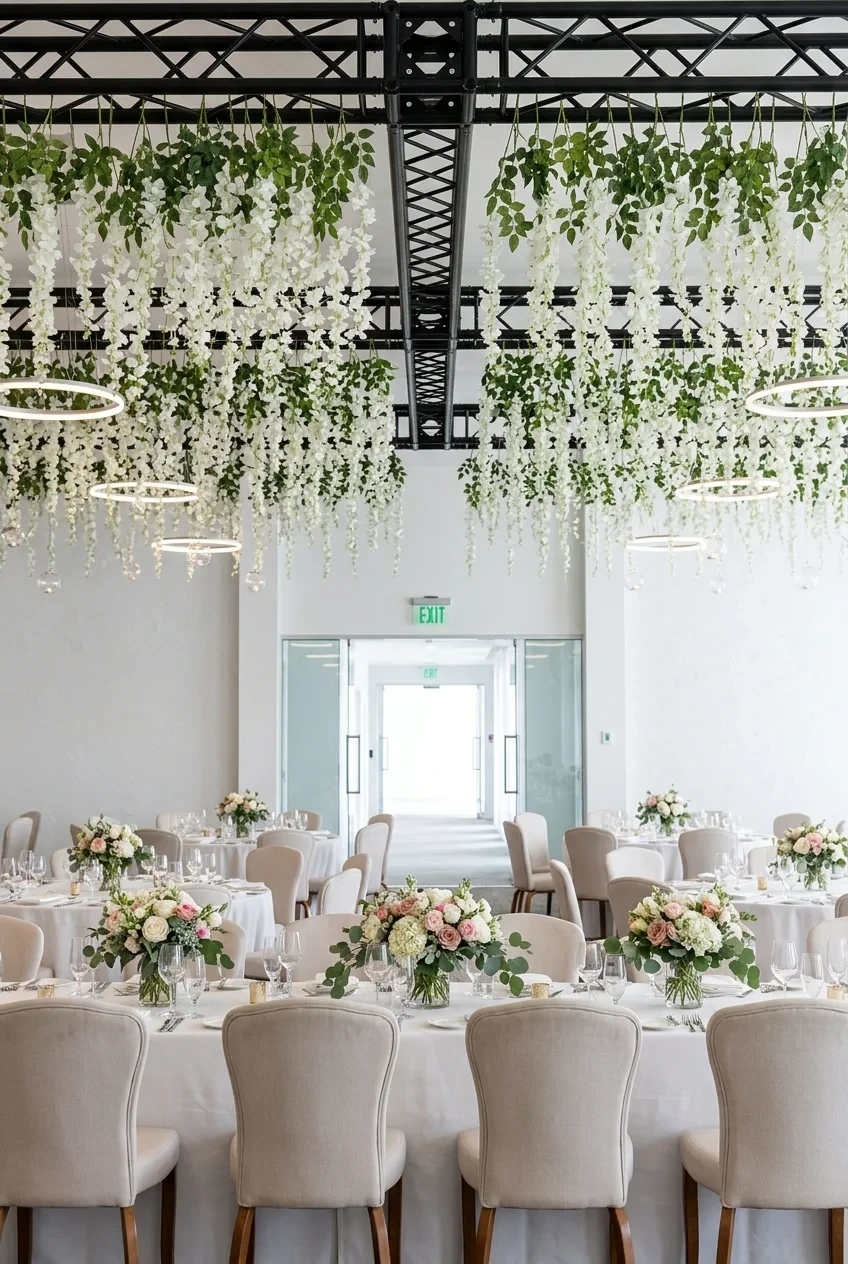
Suspend several airy flower forms above selected round tables, leaving other tables low so the room gains rhythm without an overhead forest.
Align each piece to the floor plan and confirm exact finished height. Floral installations should never obscure exits, fixtures, or service routes.
Keep replacement flowers and basic repair supplies nearby during installation, because overhead pieces are harder to adjust after tables and place settings arrive.
36. Greenery Clouds With Pin Lighting
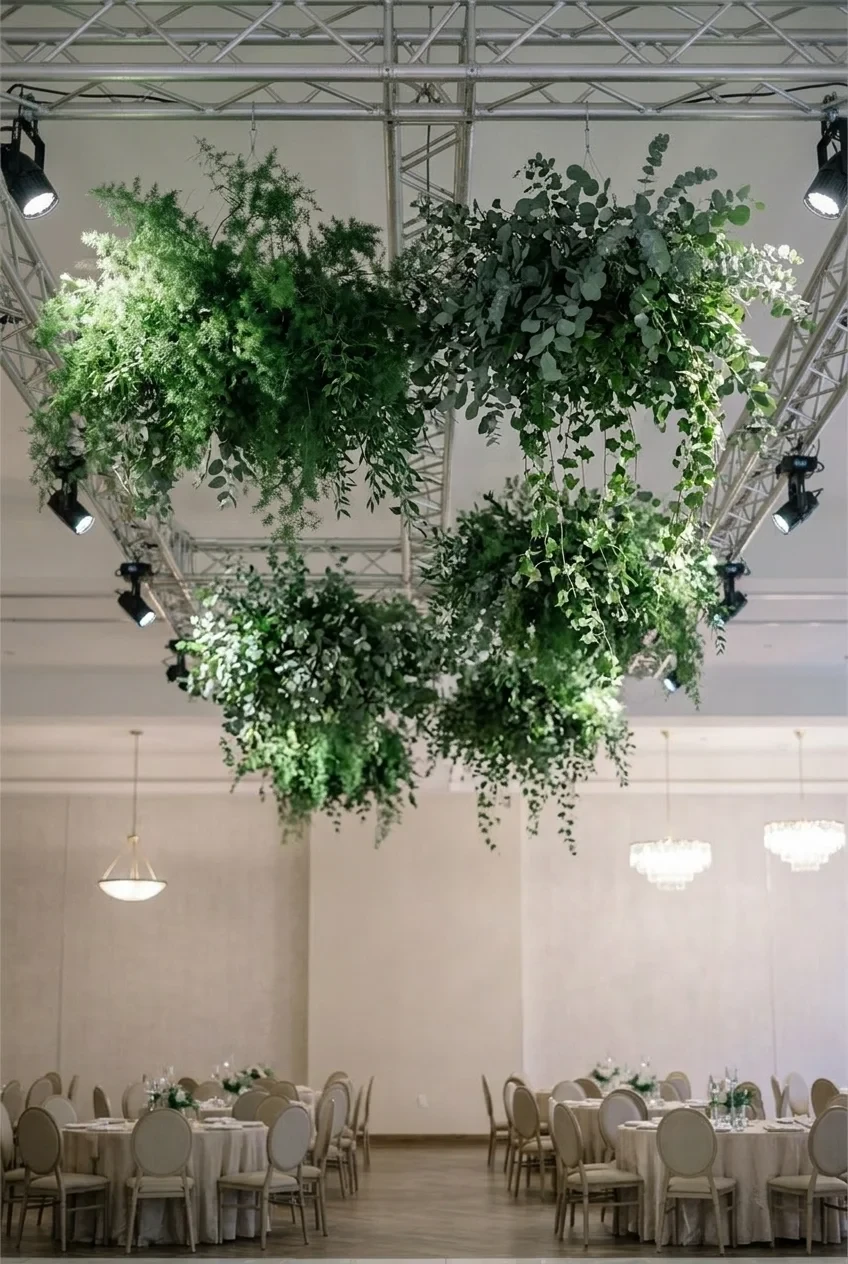
Build loose greenery clouds around approved rigging points, then use narrow pin lights to reveal leaf texture without turning the entire ceiling green.
Keep the shapes separated and irregular. Continuous dense coverage adds weight, cost, and visual heaviness while making maintenance harder during installation.
37. Colorful Paper Lantern Cluster
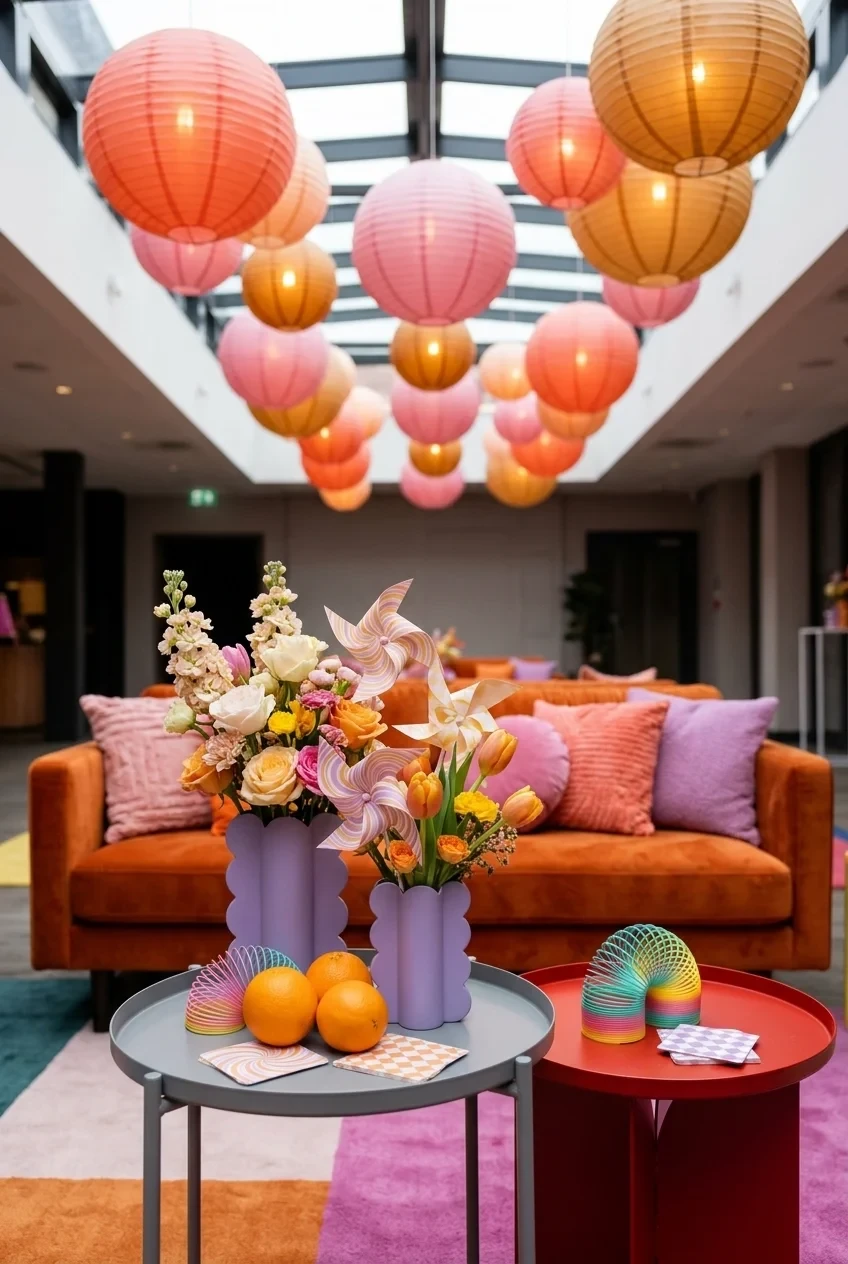
Cluster paper lanterns in three coordinated colors above a lounge or dance area, varying sizes while keeping their shapes simple and unprinted.
Use listed lighting components and professional suspension. Unlit lanterns can still add color when venue electrical capacity or installation time is limited.
38. Vertical Ribbon Wall Behind the Dance Floor
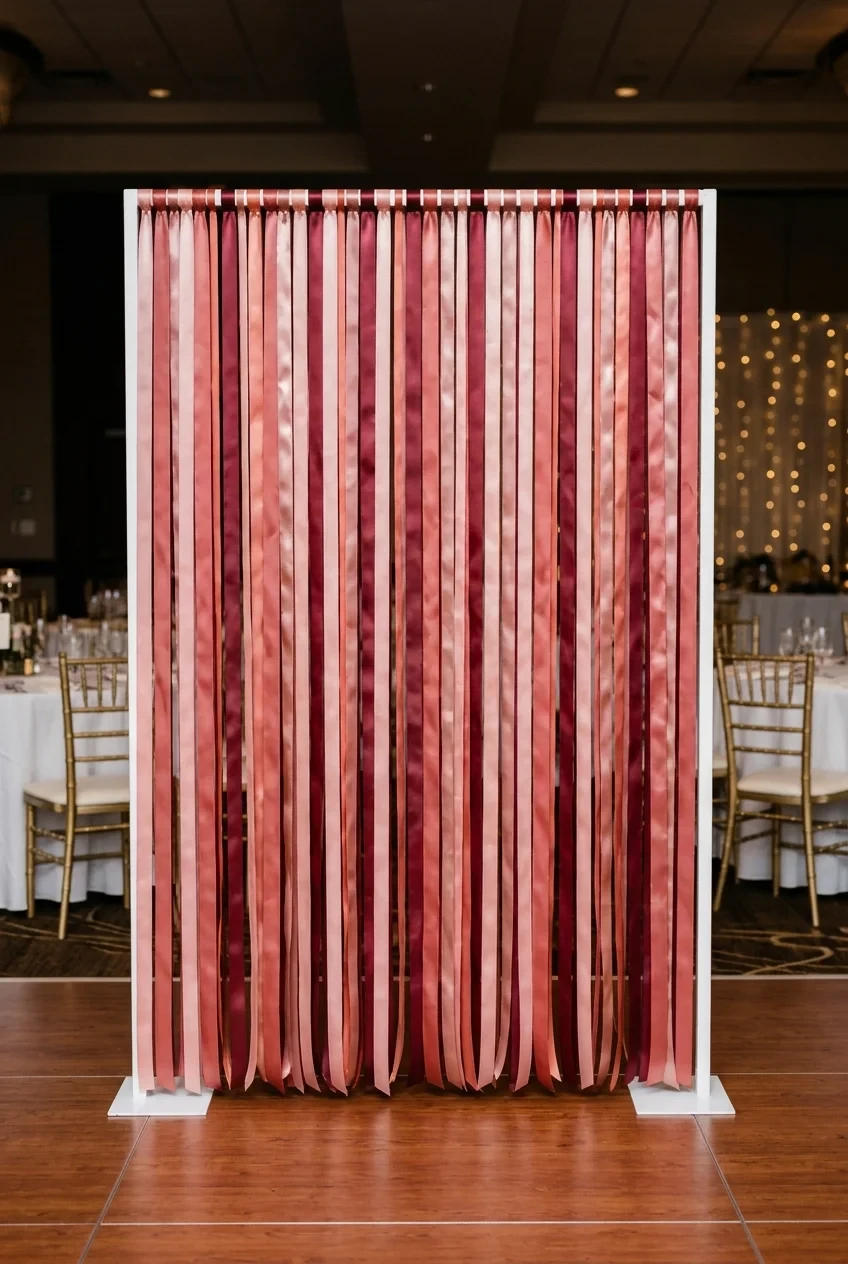
Hang wide ribbons in closely related colors from a freestanding frame, trimming them above floor level so shoes and cleaning equipment stay clear.
Mix matte and satin finishes for movement without glitter. Keep fans and air vents from twisting the ribbons into nearby lighting or speakers.
39. Warm Uplighting on Columns
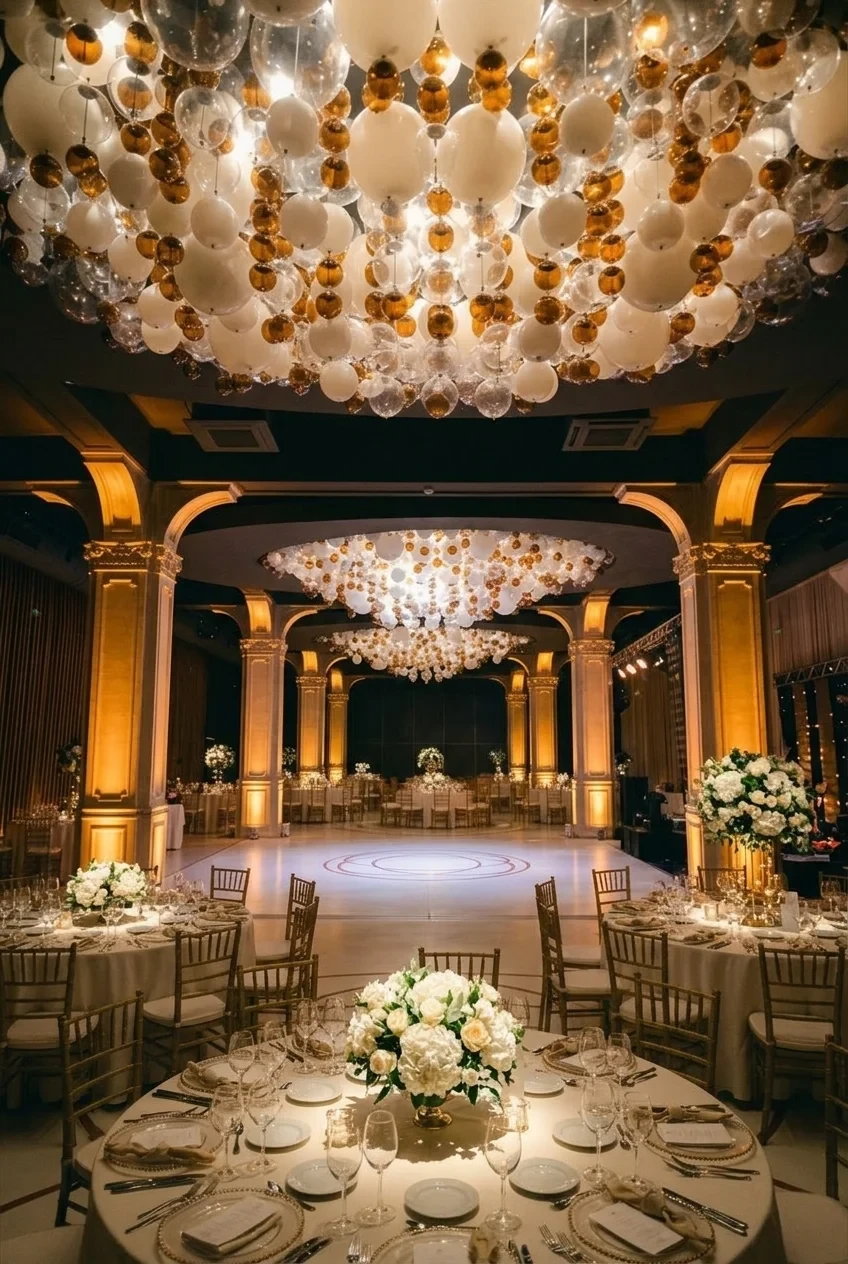
Place warm uplights at repeated architectural columns, allowing the building’s structure to become decoration without covering it with fabric or greenery.
Test fixtures after sunset and shield visible bulbs. Uneven brightness or exposed cables can make a simple lighting plan feel unfinished.
40. Soft Pattern Projection on a Blank Wall
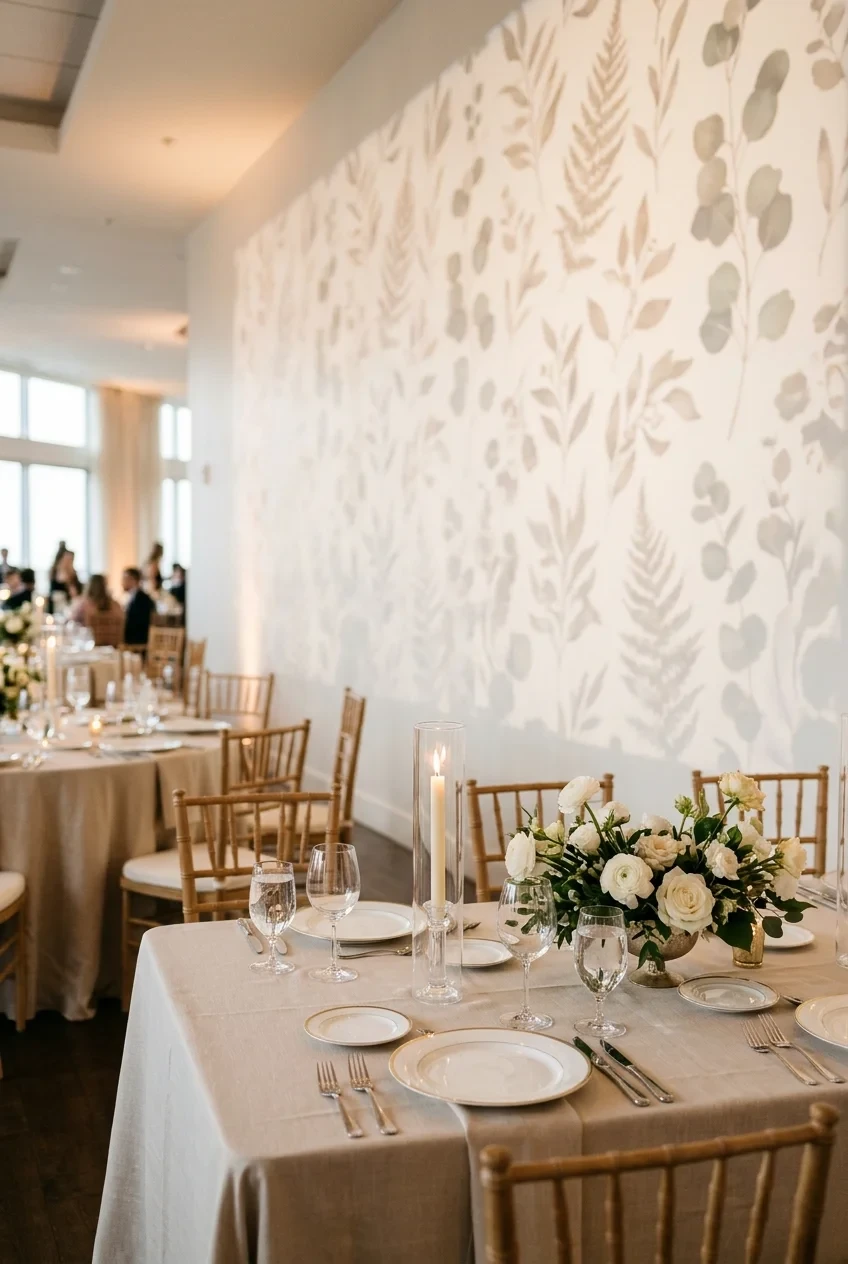
Project a restrained leaf, wave, or geometric pattern across one blank wall, using movement only if it remains slow and subtle.
Preview the pattern with house lights and photography flashes. High contrast can distract during speeches, while pale projection may disappear completely.
Dance Floor, Bar, and Cocktail-Area Decorations
Active reception zones need decoration that survives movement and service. Keep pathways open, lighting flattering, and fragile pieces away from crowded edges.
41. Circular Floral Ring Around the Dance Floor
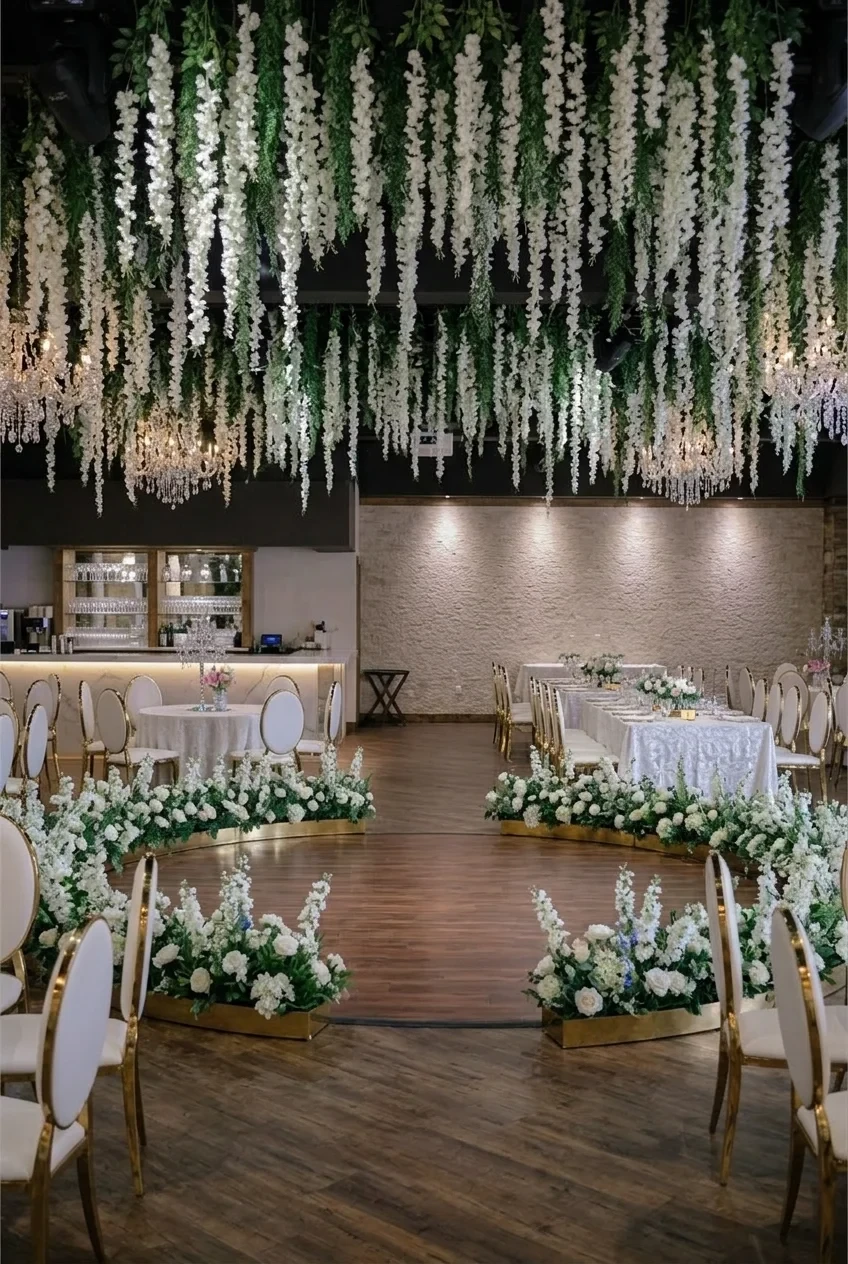
Outline a round dance floor with low broken arcs of flowers, leaving broad openings toward the bar, tables, and primary guest routes.
Keep every arrangement outside the dancing surface and protect bases from kicks. Continuous borders can trap guests or complicate emergency access.
42. Black-and-White Checkered Dance Floor
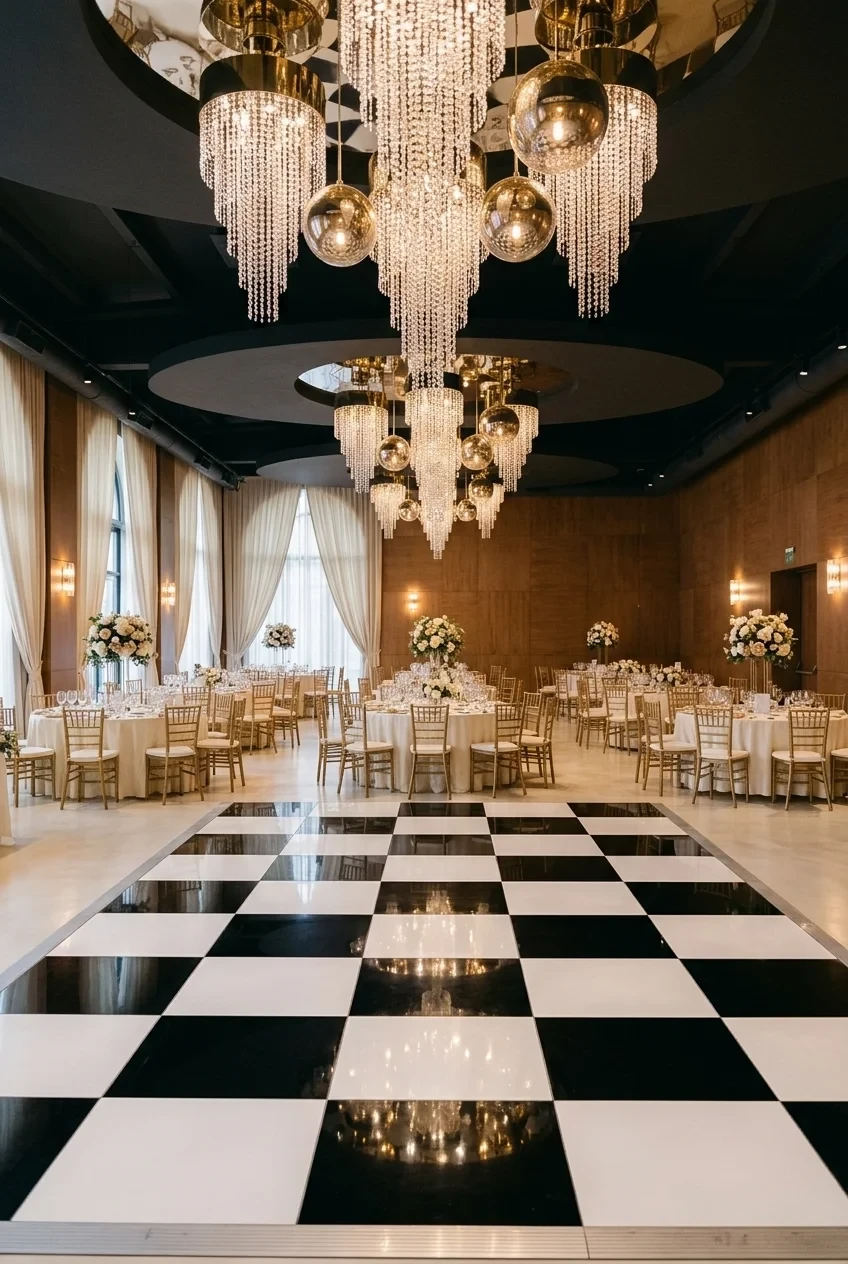
A checkered floor creates a strong graphic center, especially when surrounding reception tables use quiet linen and limited floral color.
Check panel seams, edge ramps, and slip resistance with the rental company. The pattern should end cleanly before speakers and service stations.
43. Disco Ball Cluster Above the Dance Floor
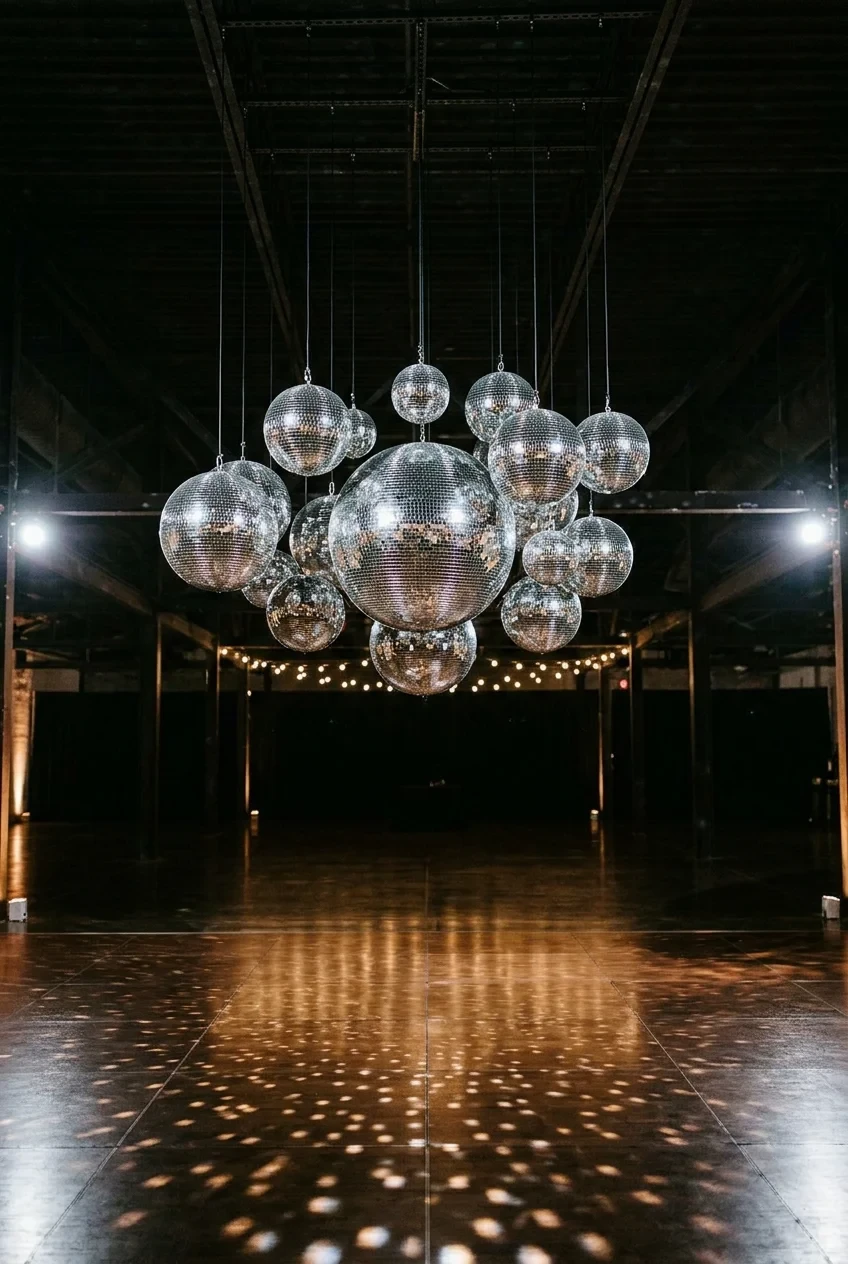
Hang disco balls in several sizes as one focused cluster, using controlled spotlights to create movement without covering every wall in reflections.
Rig them professionally and test spinning speed. Fast reflections can be uncomfortable, while stationary balls still provide texture under changing dance lights.
Position the cluster where reflected light reaches the dance floor rather than dining tables, then confirm the effect during speeches and dinner.
44. Bar Corners Anchored With Flowers
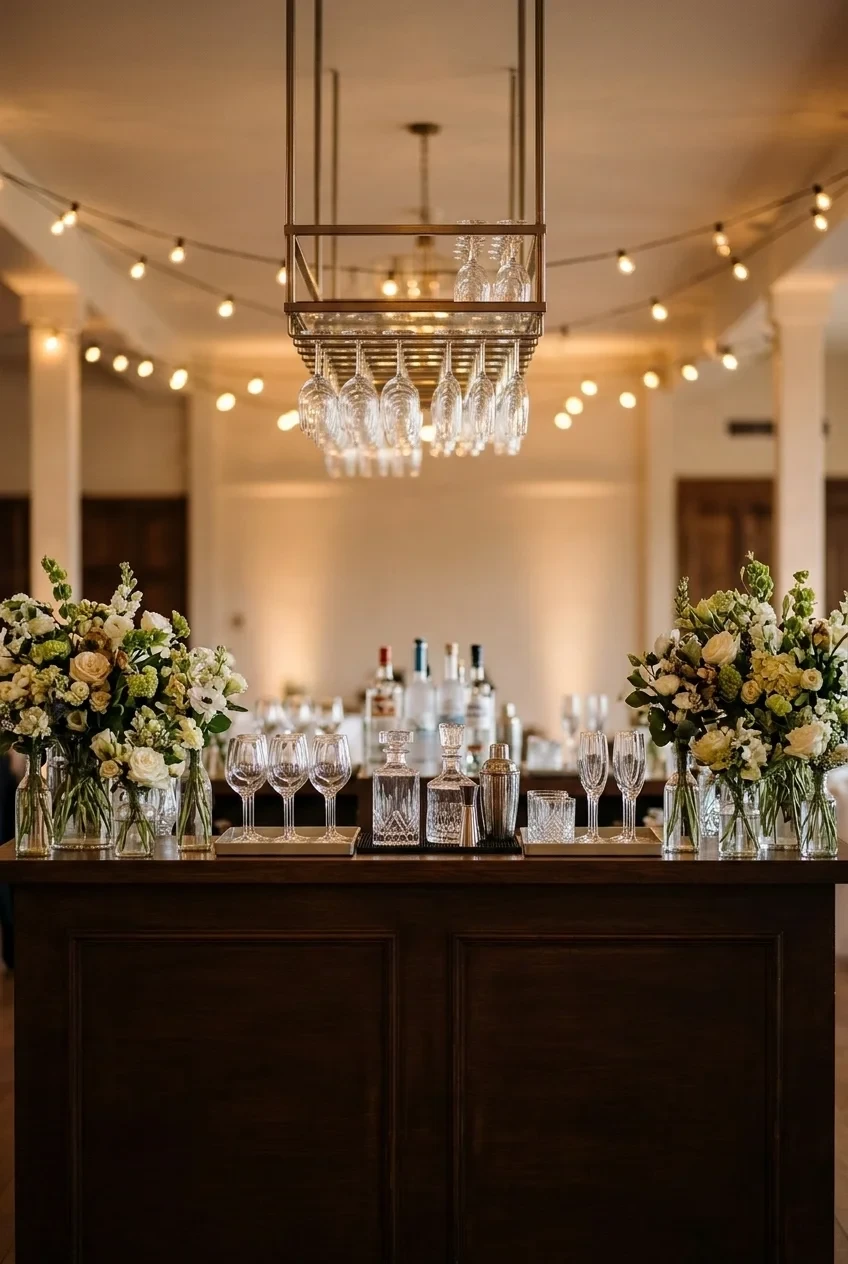
Place substantial floral arrangements at the bar’s outer corners, preserving the center for menus, garnishes, payment equipment, and quick drink pickup.
Use stable vessels that resist spills and crowd contact. Flowers should frame bartenders rather than hiding their work surface or guest sightlines.
45. Illuminated Bottle Shelves With Quiet Florals
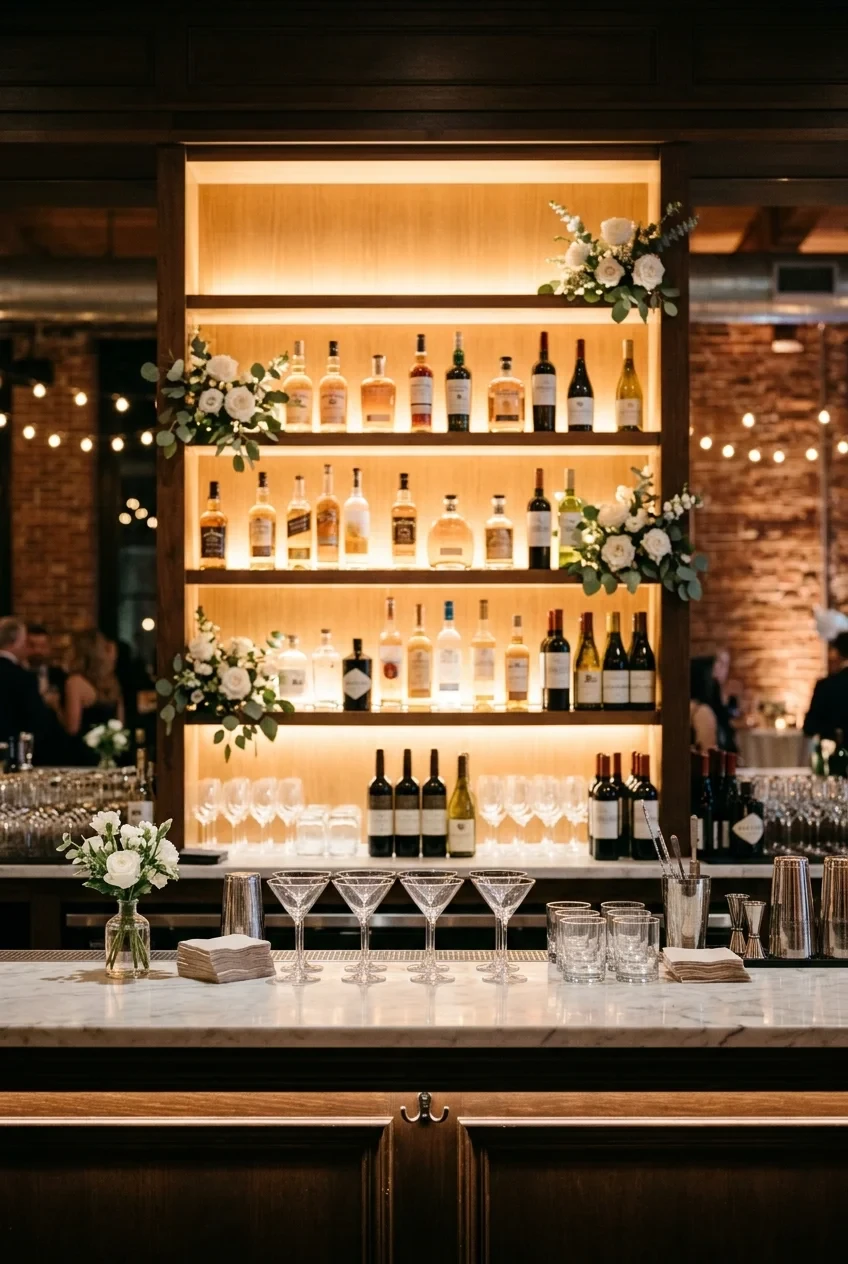
Backlight bottle shelves with warm, even illumination, then add small flowers only at shelf ends so labels and service remain visible.
Ask the bar team where refrigeration, restocking, and glass storage occur. Decorative pieces must never block safe access during the busiest hour.
46. Coupe Display With a Floral Base
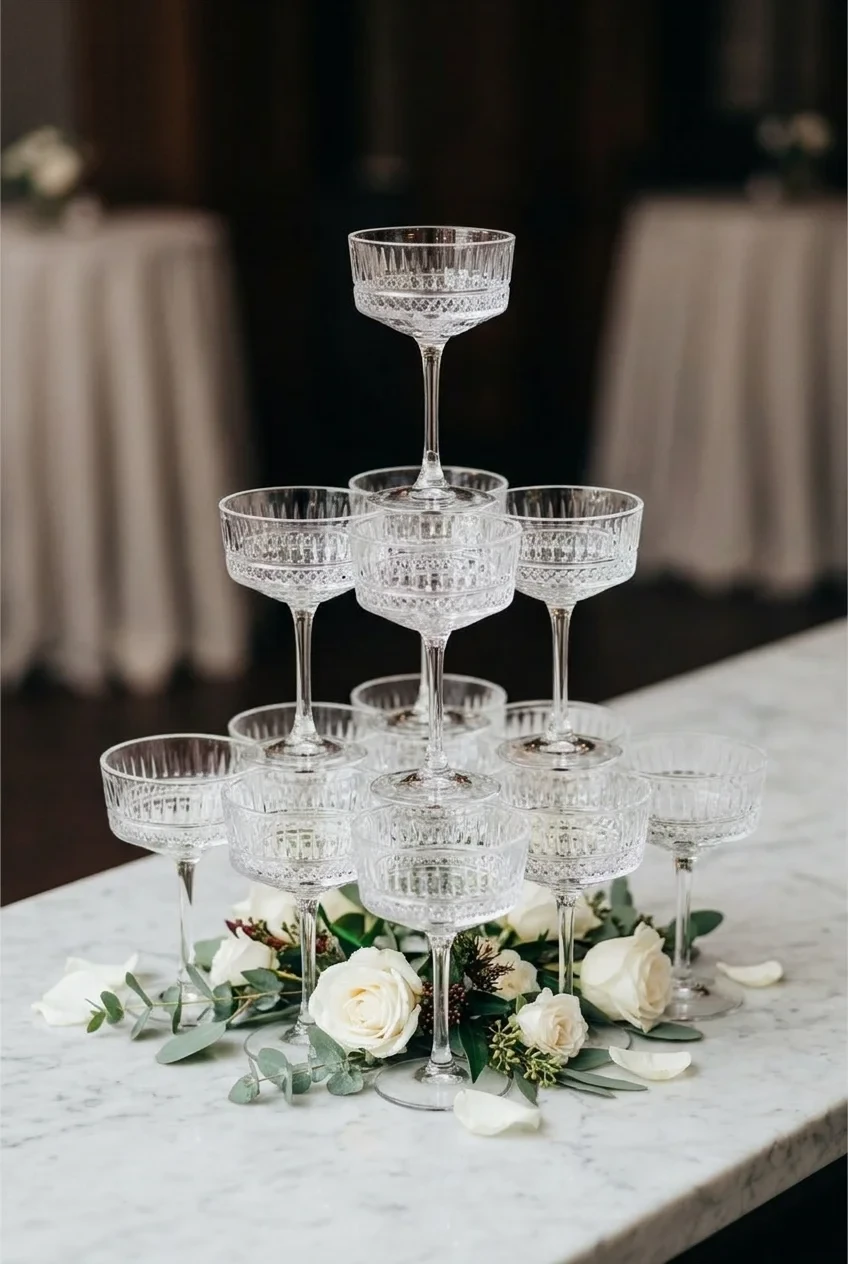
Arrange coupe glasses in a professionally built display, surrounding only the base with flowers so stems never interfere with glass stability.
Let catering staff assemble and pour the display. Treat it as a service feature, not a do-it-yourself stacking project for the wedding party.
47. Grouped Lounge Seating With Side Tables
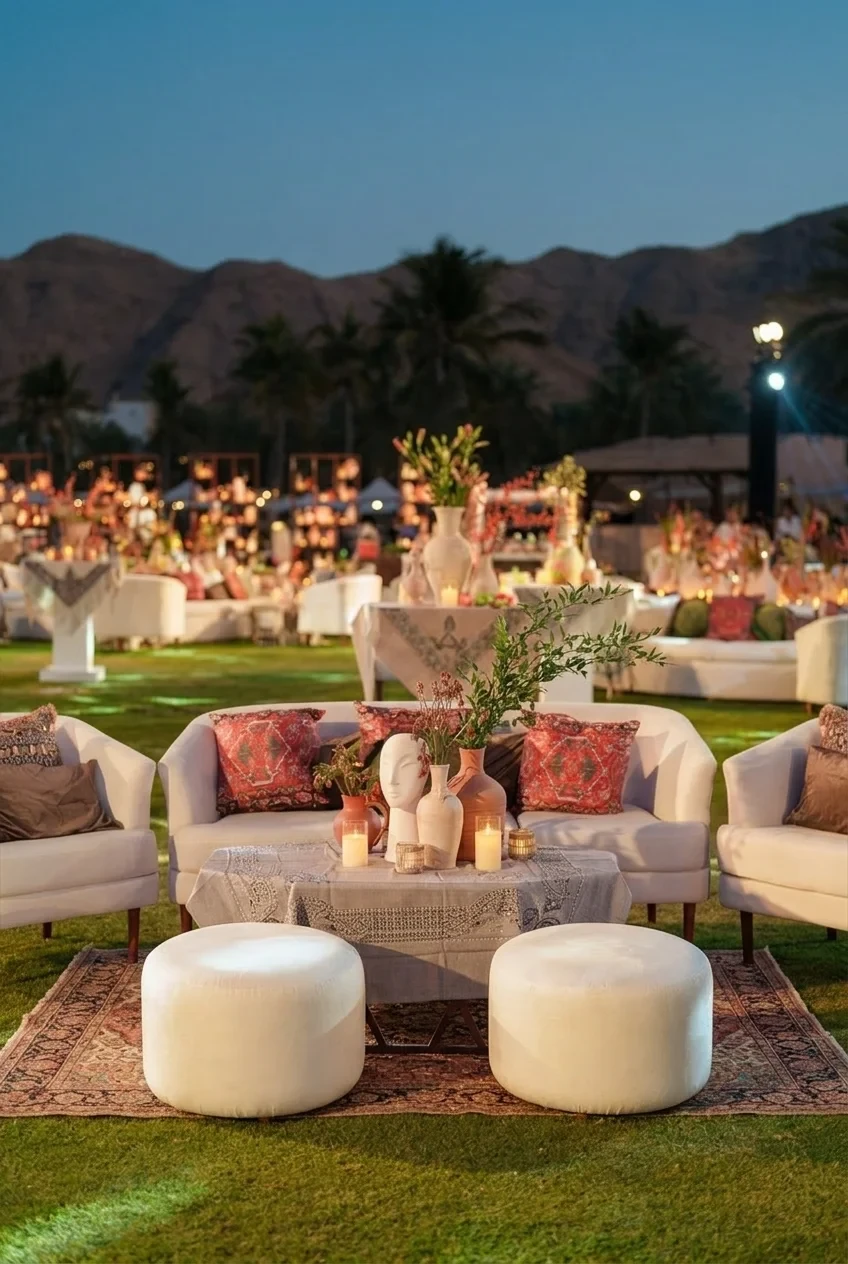
Arrange sofas and chairs in small facing groups, giving every seat a nearby table while keeping the lounge connected to music and conversation.
Preserve a clear route around each grouping and avoid deep furniture that overwhelms smaller rooms. Rugs can visually anchor pieces without building walls.
48. Mini Lamps on Cocktail Tables
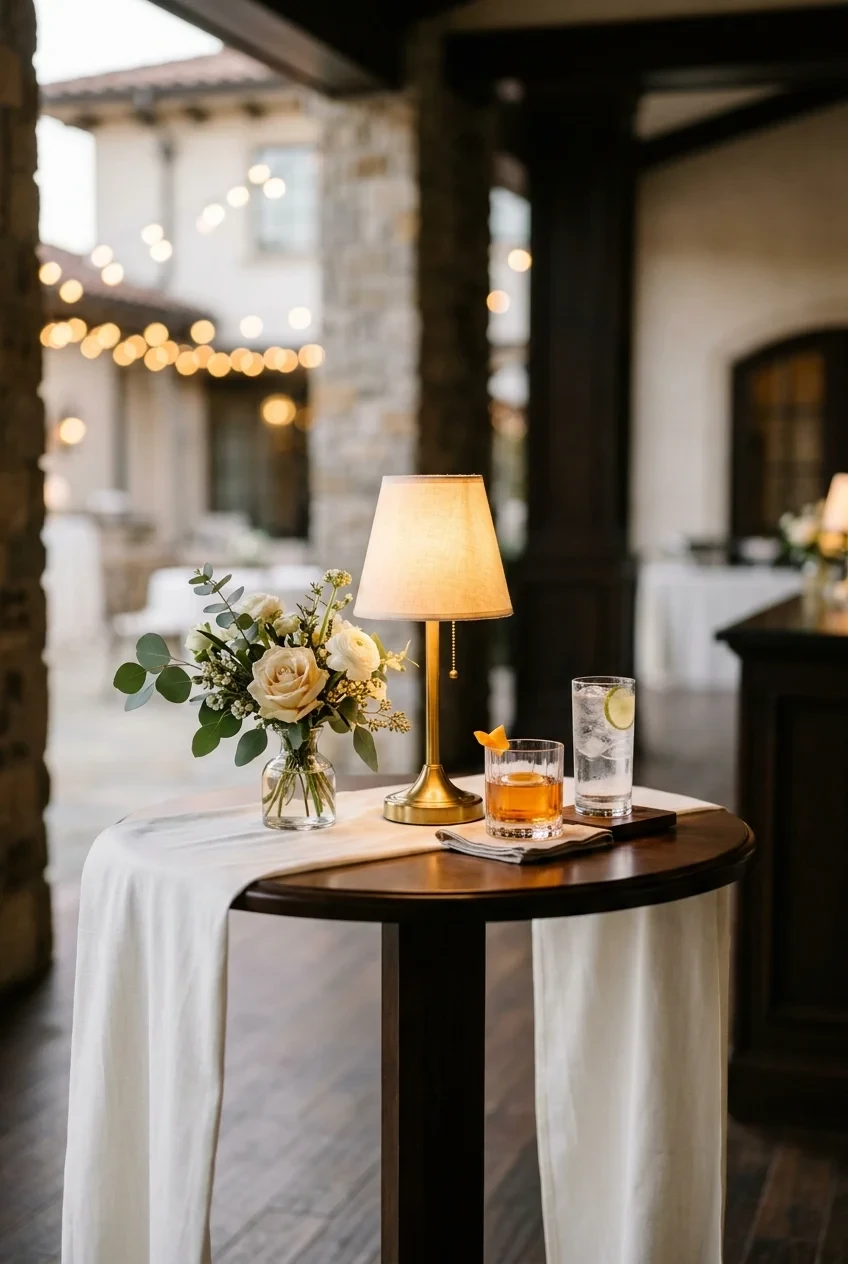
Place compact shaded lamps on selected cocktail tables, alternating them with flowers so the room gains pools of light rather than uniform brightness.
Choose weighted cordless lamps with concealed switches and enough charge for the event. Keep shades narrow enough to leave space for drinks.
Cake, Dessert, and Food-Station Decorations
Food displays look strongest when decoration frames the service instead of competing with it. Preserve temperature control, replenishment space, labels, and easy guest access.
49. Cake Table Surrounded by a Flower Meadow
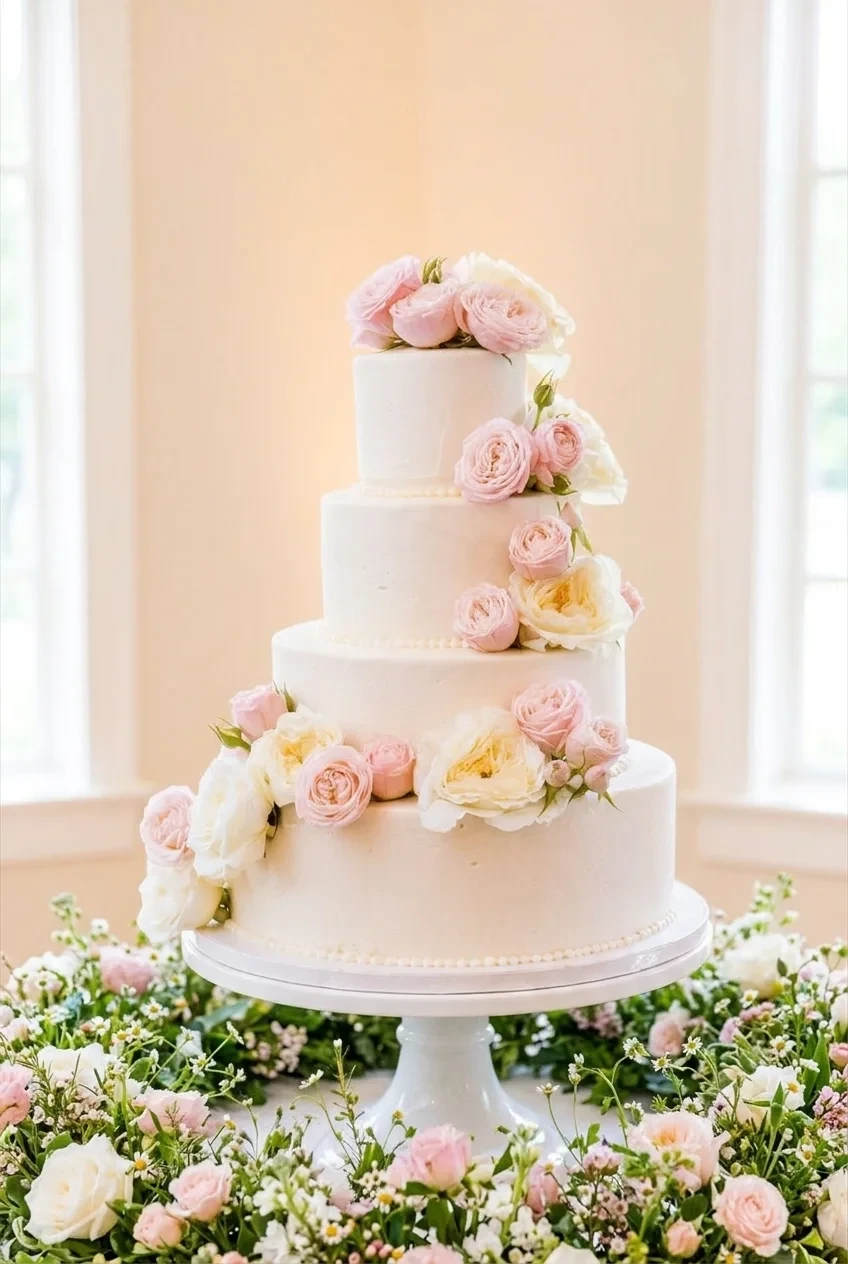
Place the cake on a simple pedestal, then build low flower clusters around the table base so the dessert remains visible from across the room.
Keep stems, candles, and fabric away from service edges. The baker and florist should agree on placement before the cake arrives.
50. Small Cake on an Oversized Stone Pedestal
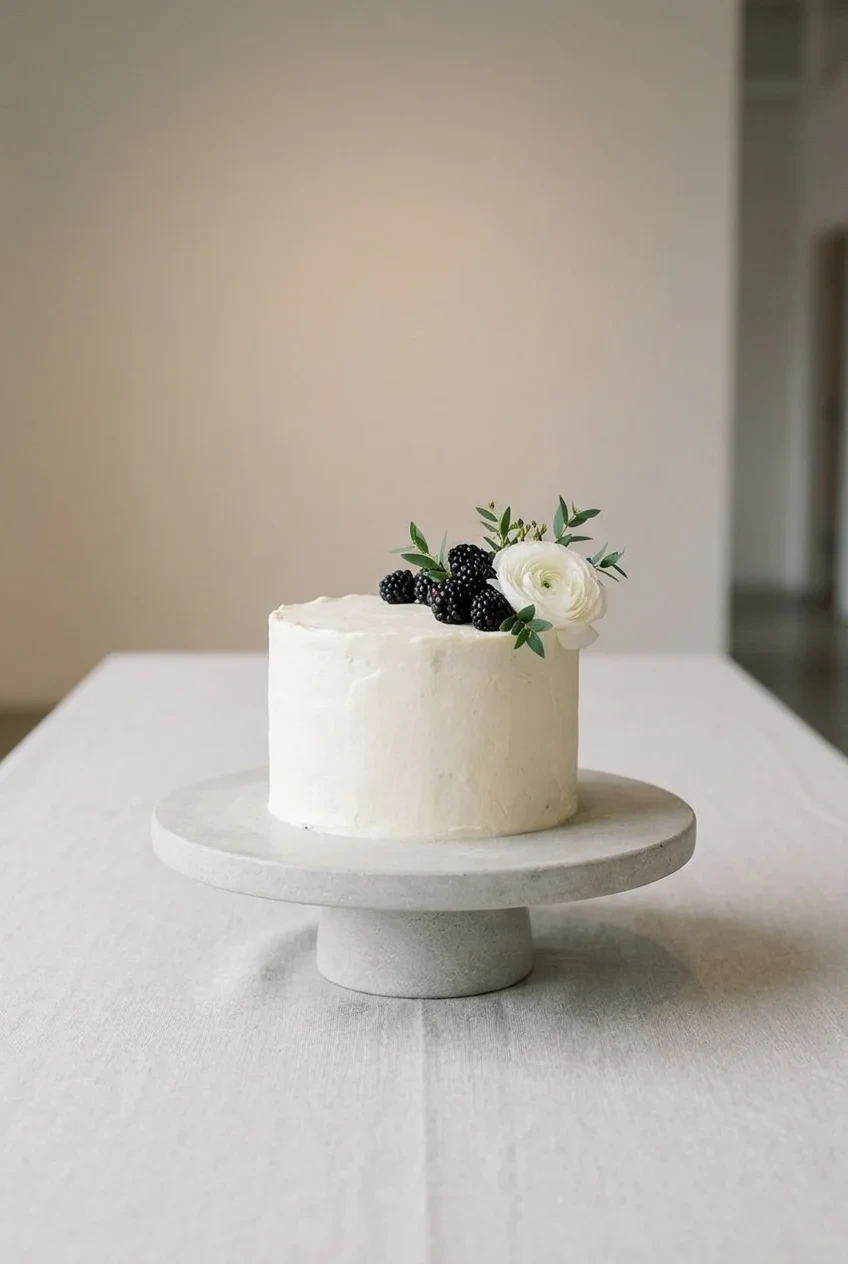
Give a modest cake presence with a broad stone pedestal and generous empty space, adding only one restrained flower cluster beside the base.
Confirm the pedestal’s weight capacity and food-safe top. Wide platforms need a stable table that staff can approach from the cutting side.
51. Desserts on Graduated Risers
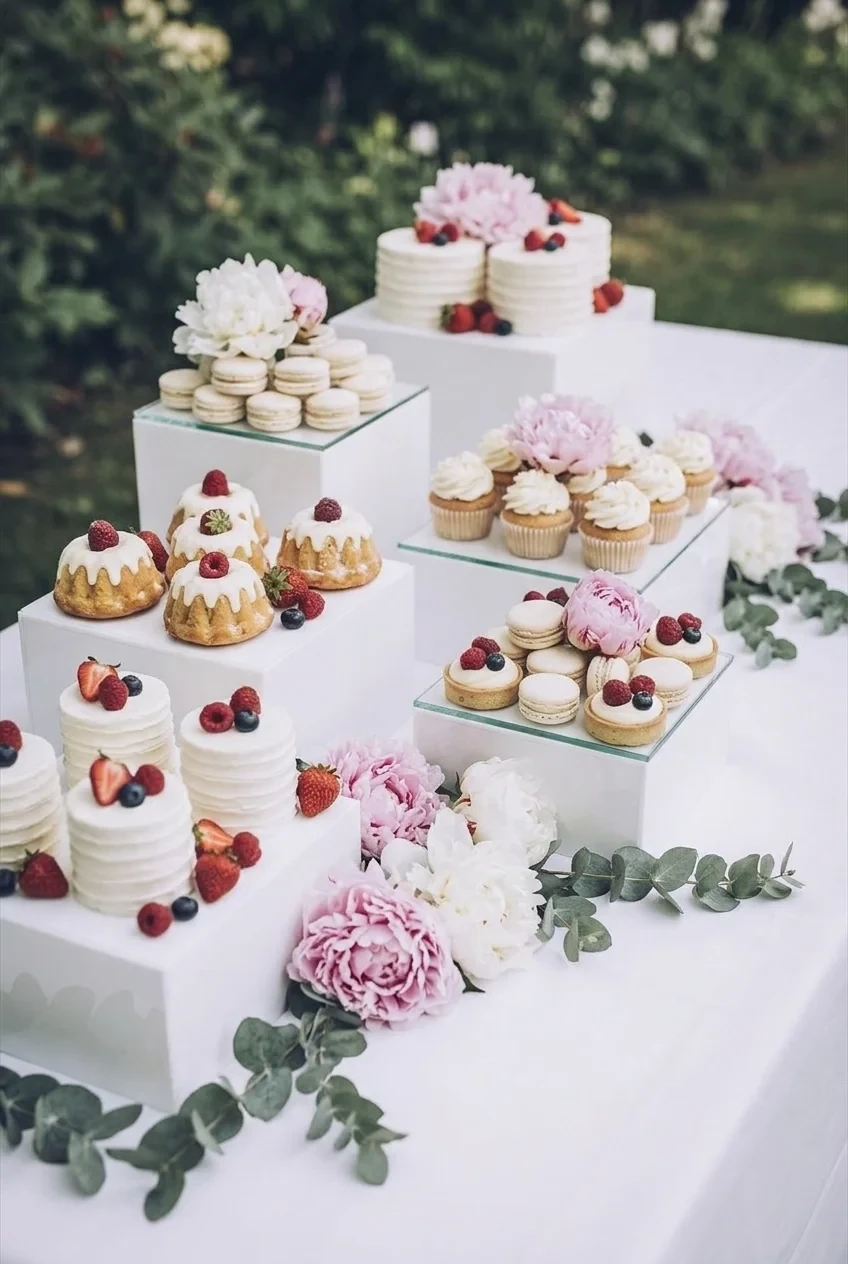
Arrange small desserts on graduated risers, grouping matching items together so guests can recognize choices without searching through a crowded mixed display.
Use stable food-safe surfaces and refill from the back. Flowers belong between riser groups, never above uncovered desserts where petals might fall.
Label desserts on a separate flat surface instead of balancing cards on risers, where guests can knock them into nearby food.
52. Pie Table With Linen Labels
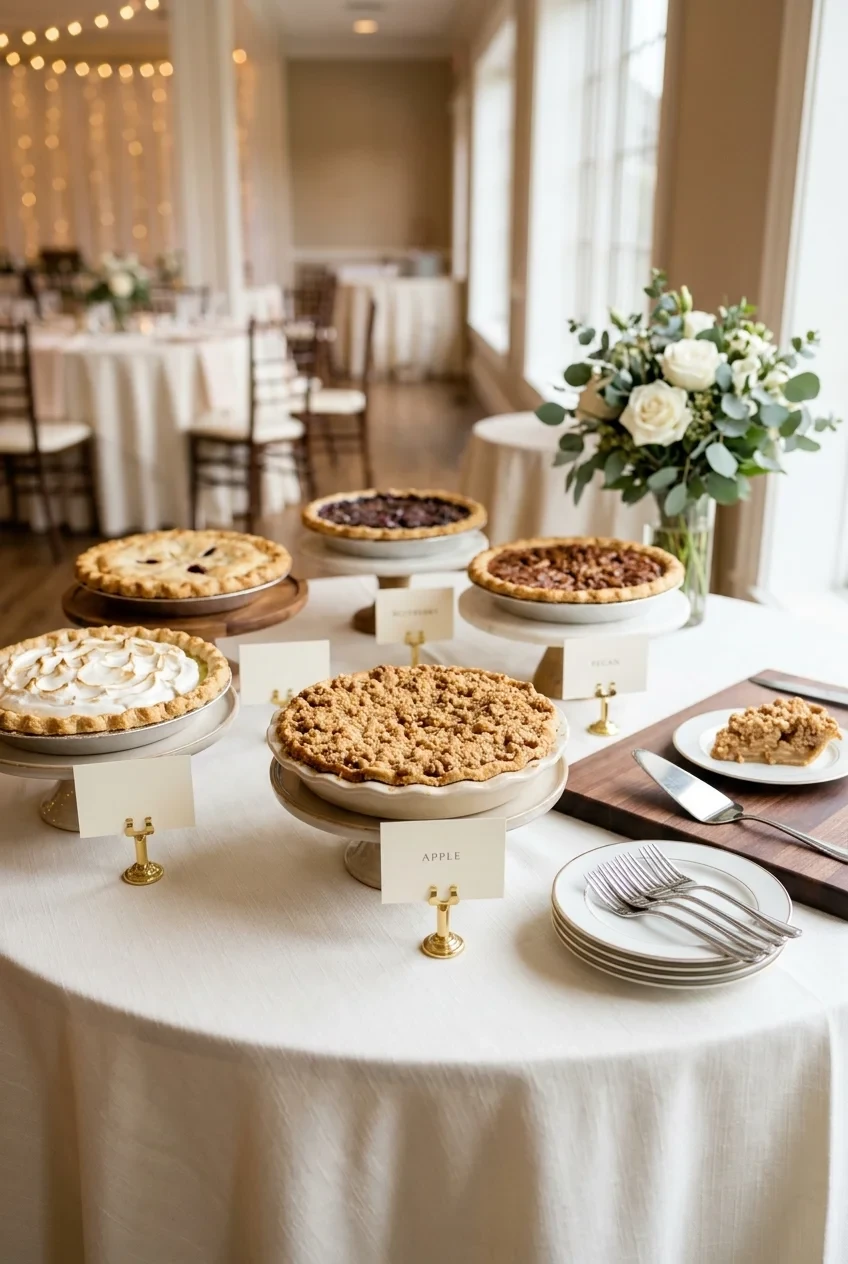
Display whole pies on low stands over a washable cloth, using small upright labels to identify flavors and common allergens clearly.
Leave a dedicated cutting area with plates and servers at one end. Decorative baskets or crates should not crowd hot dishes or guest elbows.
53. Donut Wall With Removable Trays
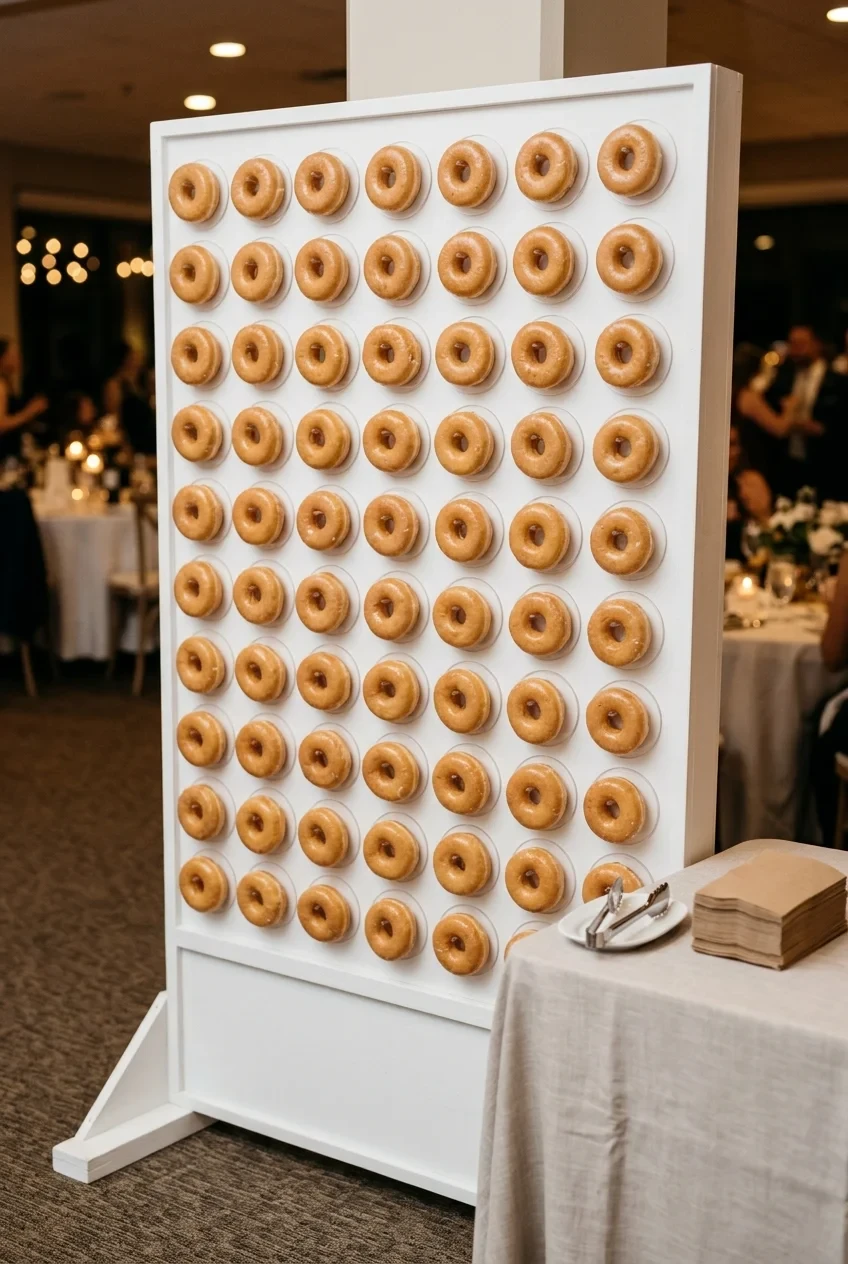
Frame removable food-safe trays within a vertical wall, creating the look of a peg display while allowing staff to replace complete sections hygienically.
Keep the lowest sweets above child reach unless supervised, and provide tongs or wrappers so guests never touch neighboring servings.
54. Grazing Table With Greenery at the Edges
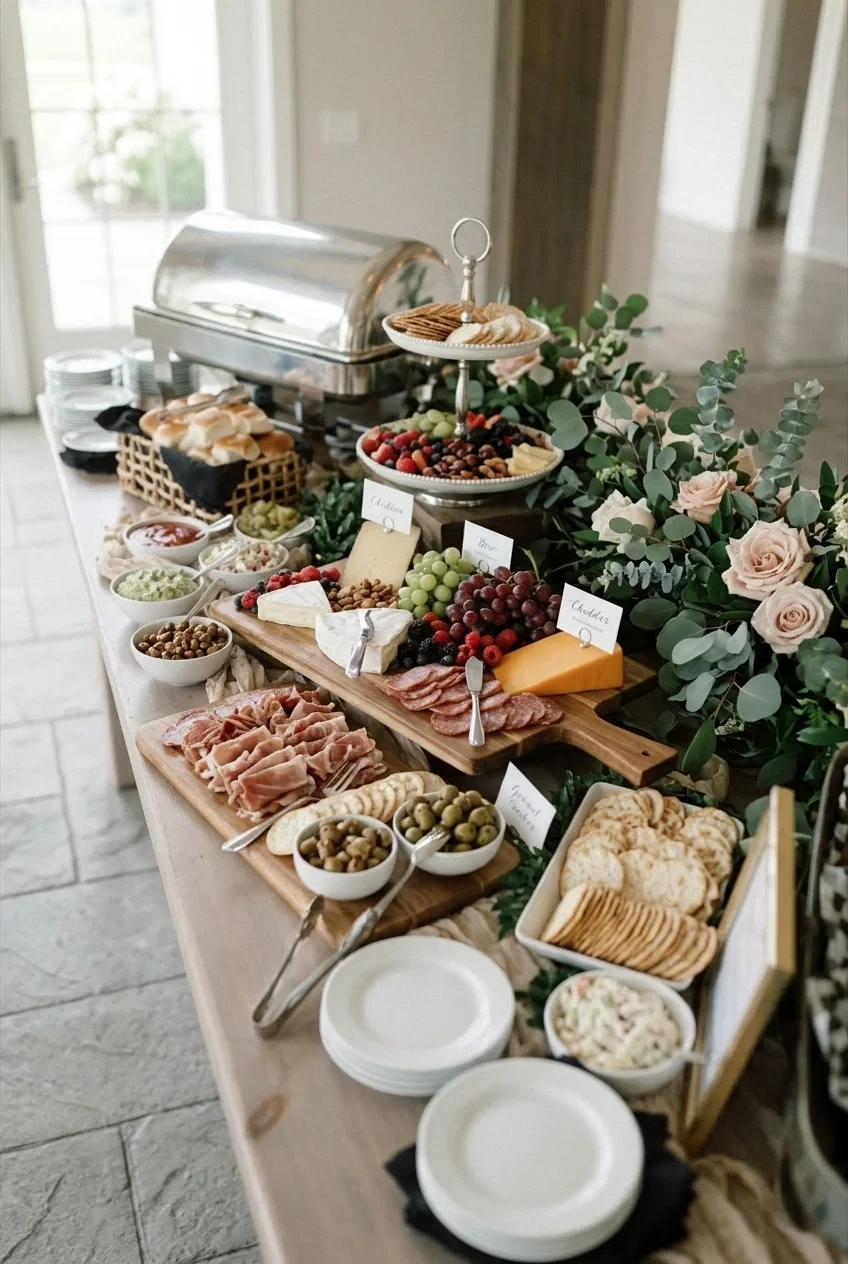
Place greenery and flowers along the outer back edge of a grazing table, reserving the center for food, utensils, labels, and replenishment.
Follow the caterer’s temperature plan and use smaller refreshed boards. Abundant styling should never disguise food that has remained out too long.
55. Coffee Bar With Stacked Cup Shelves
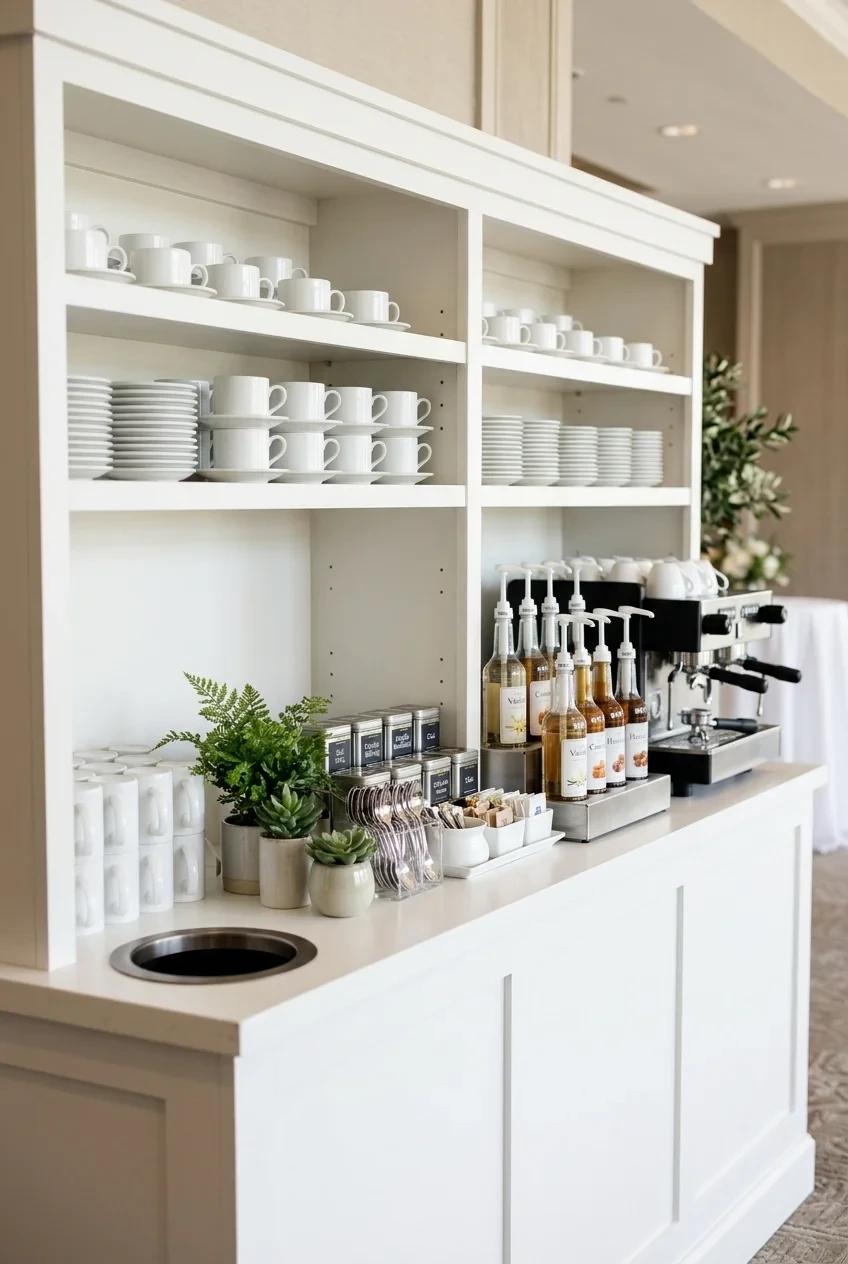
Arrange cups, saucers, syrups, and tea on open shelves, adding one plant or flower cluster where it cannot interrupt the service sequence.
Place milk, waste bins, and stirring supplies where guests naturally finish their drinks. A beautiful counter fails when the queue crosses dinner service.
56. Late-Night Snack Cart With Striped Awning
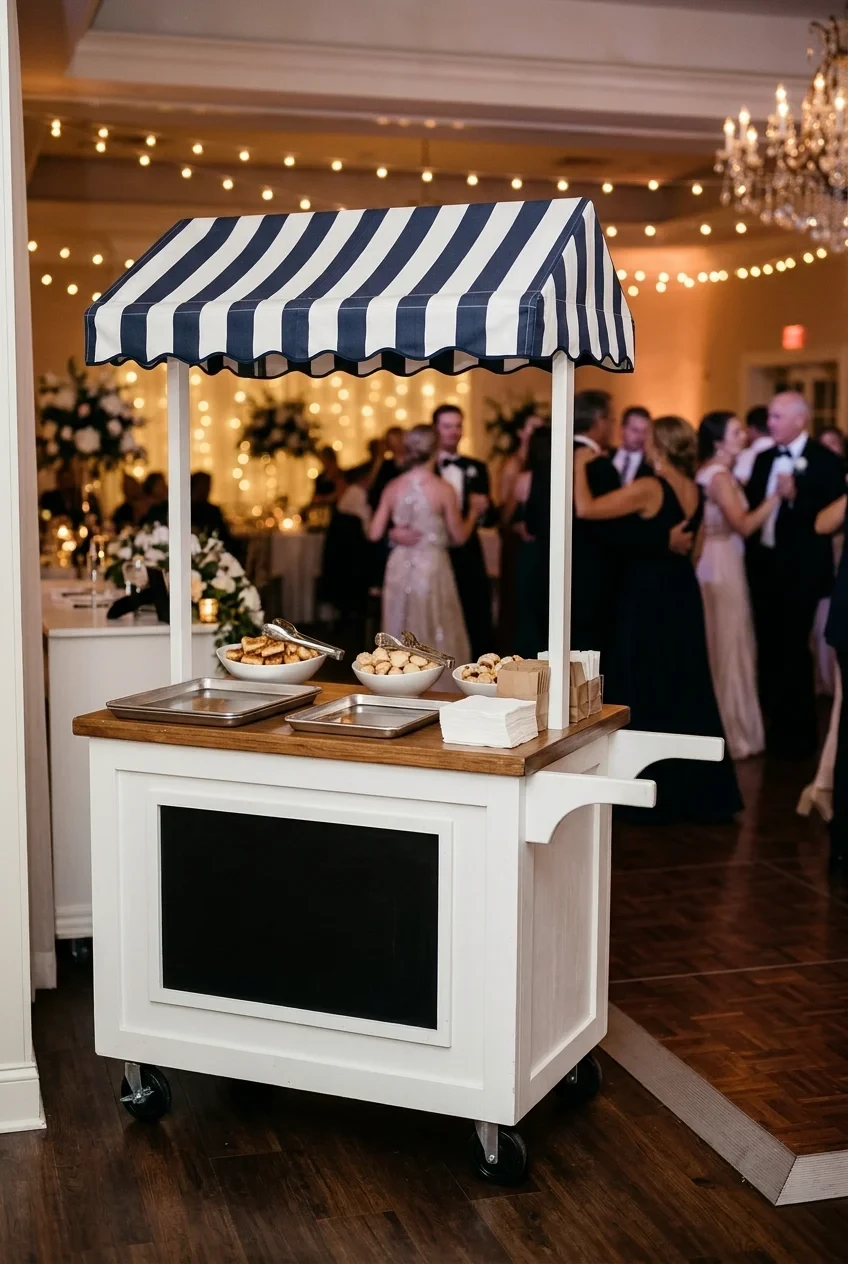
Use a compact wheeled cart with a striped fabric awning and simple menu panel, parking it beside the dance floor after dinner service ends.
Confirm power, refrigeration, and wheel locks before decorating. Keep the awning high enough for staff and the queue outside dance traffic.
Outdoor, Garden, and Tent Reception Decorations
Outdoor decoration should cooperate with wind, sun, ground conditions, and the backup plan. Choose stable elements that still look intentional when weather changes.
57. Market Lights Over Long Tables
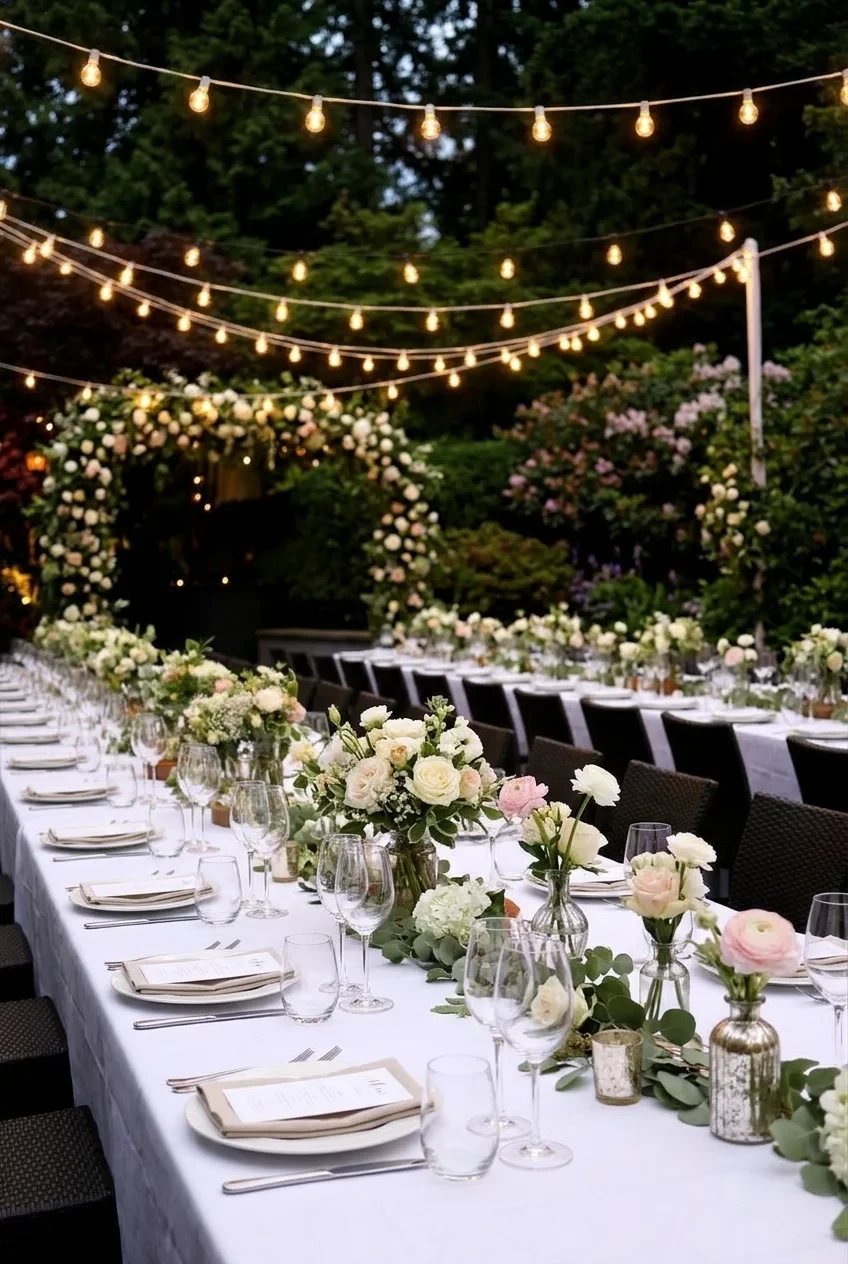
String warm market lights in repeated lines above long tables, aligning them with the layout so illumination falls evenly across dinner and speeches.
Use professional supports and weather-rated equipment. Cables, anchors, and power connections need proper protection from guests, irrigation, and service vehicles.
58. Sailcloth Tent With Statement Chandeliers
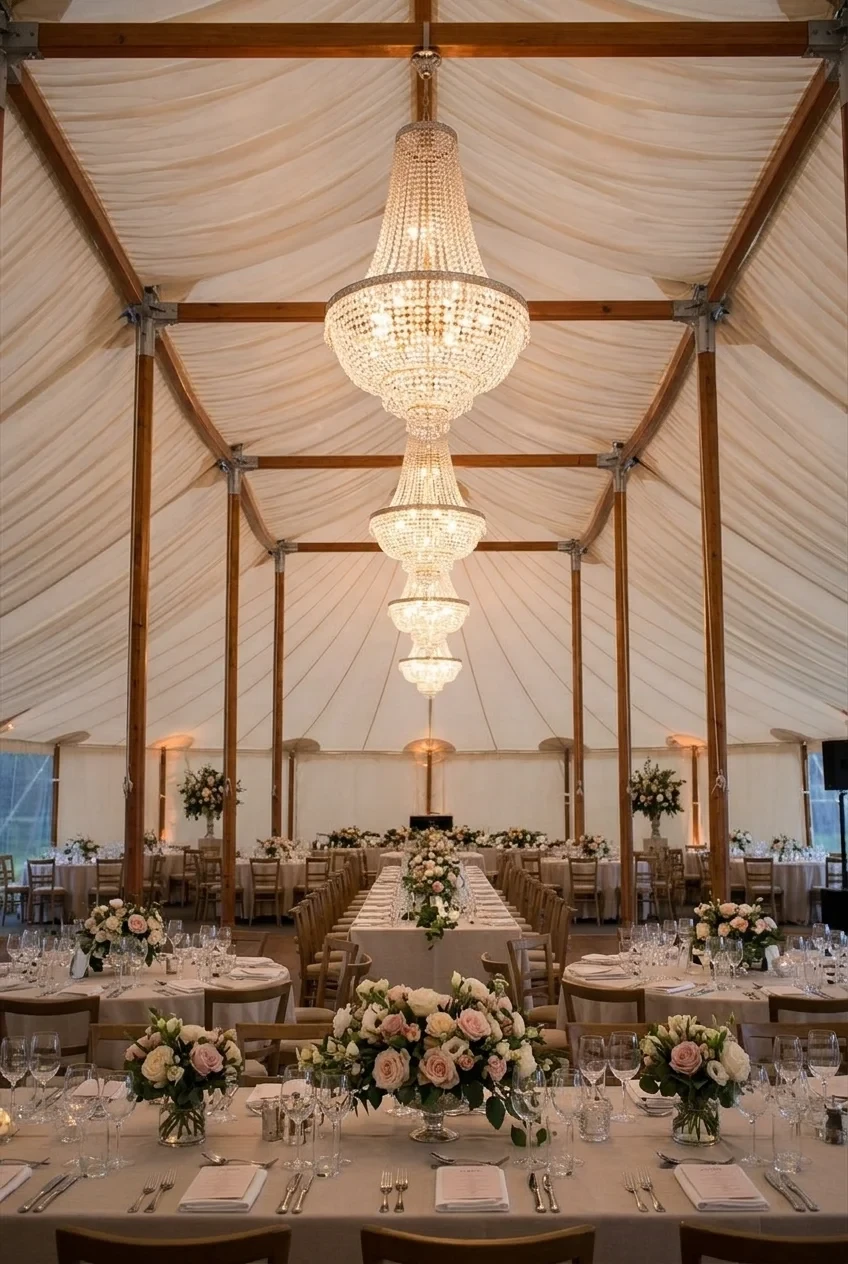
Hang a few large chandeliers along the tent ridge, allowing their scale and warm light to decorate the ceiling without additional hanging clutter.
Coordinate fixture weight, power, and dimming with the tent provider. Small household lights rarely read strongly enough in a wide reception structure.
Place the largest fixtures where structural support is strongest, then distribute smaller lights to maintain a consistent visual rhythm along the tent.
59. Garden Umbrellas in Coordinated Colors
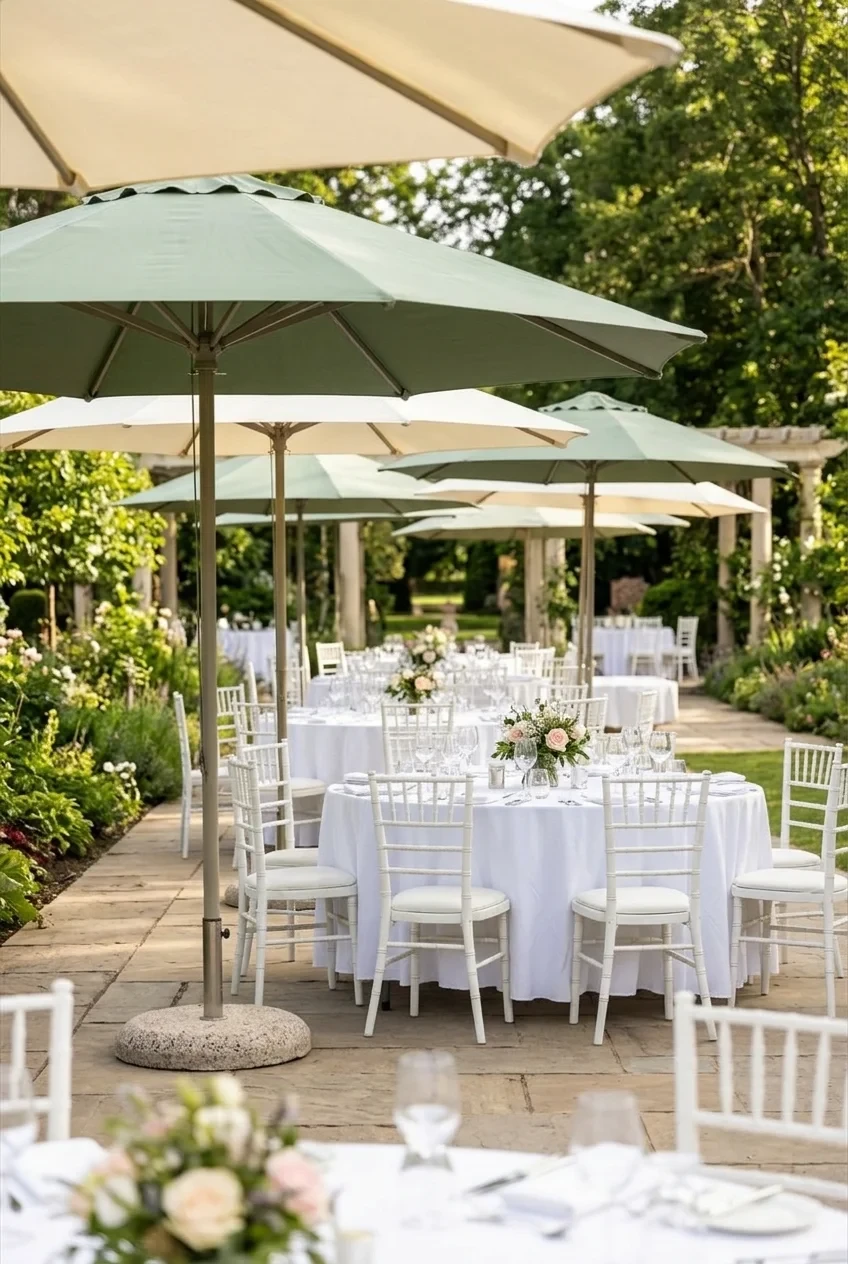
Repeat two umbrella colors across cocktail and dining areas, giving daytime shade a designed role instead of treating it as purely practical equipment.
Use heavy approved bases and close umbrellas when wind limits require it. Keep every canopy clear of branches, heaters, and lighting cables.
60. Potted Trees Framing the Reception Path
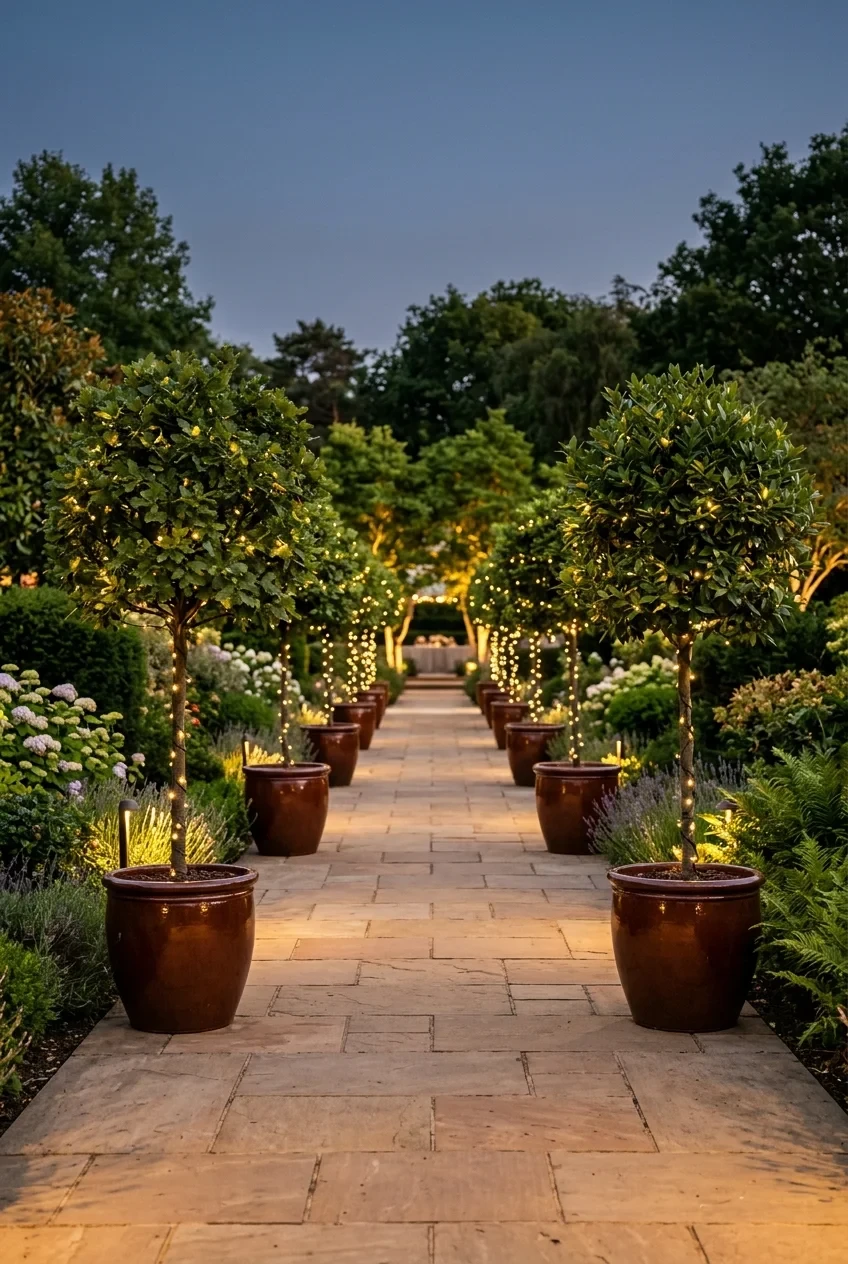
Place pairs of potted trees at meaningful turns along the reception path, repeating their containers to create rhythm without forming a narrow corridor.
Check root-ball weight, drainage, and nighttime visibility. Use real species suited to the conditions rather than plants that wilt during setup.
61. Picnic Lounge With Layered Rugs
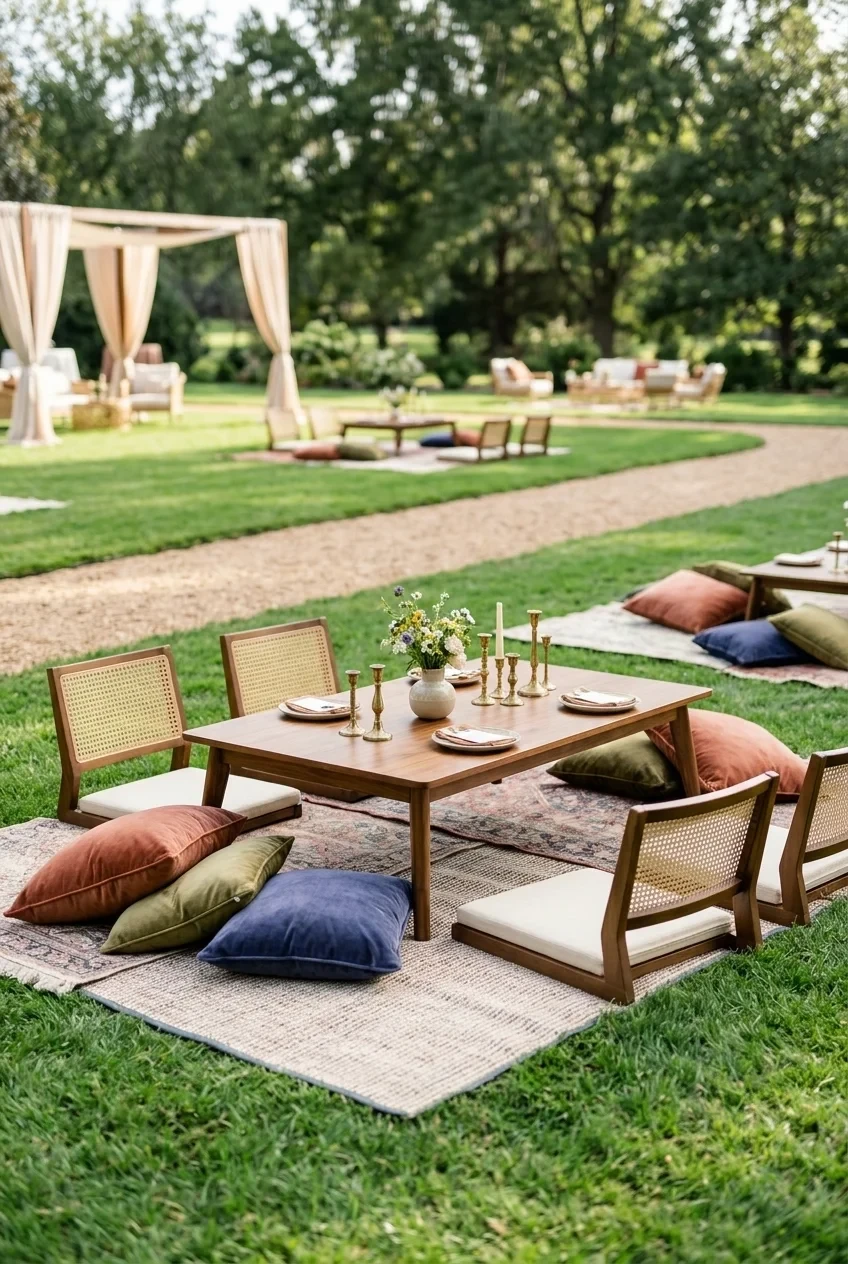
Define a casual lawn lounge with overlapping outdoor rugs, low tables, and upright chairs alongside floor cushions so guests have varied seating choices.
Secure rug edges and inspect ground slope before setup. Keep floor seating separate from the primary accessible lounge and dining route.
62. Poolside Lantern Reflections
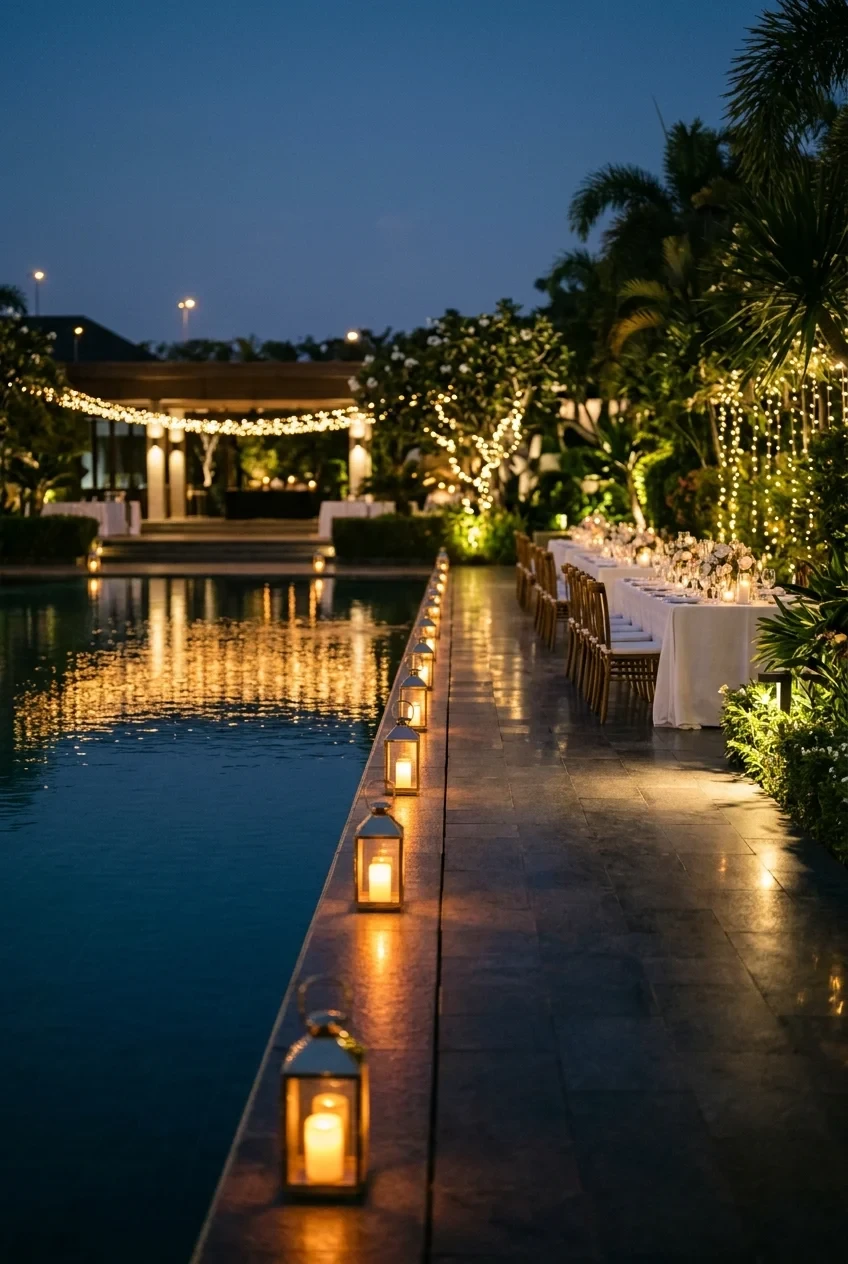
Arrange enclosed battery lanterns along the far pool edge, letting reflections provide atmosphere while keeping the guest side clear and safely lit.
Work with the venue on barriers and electrical rules. Floating objects should be avoided unless the property specifically permits and manages them.
63. Floating Flowers in a Managed Fountain
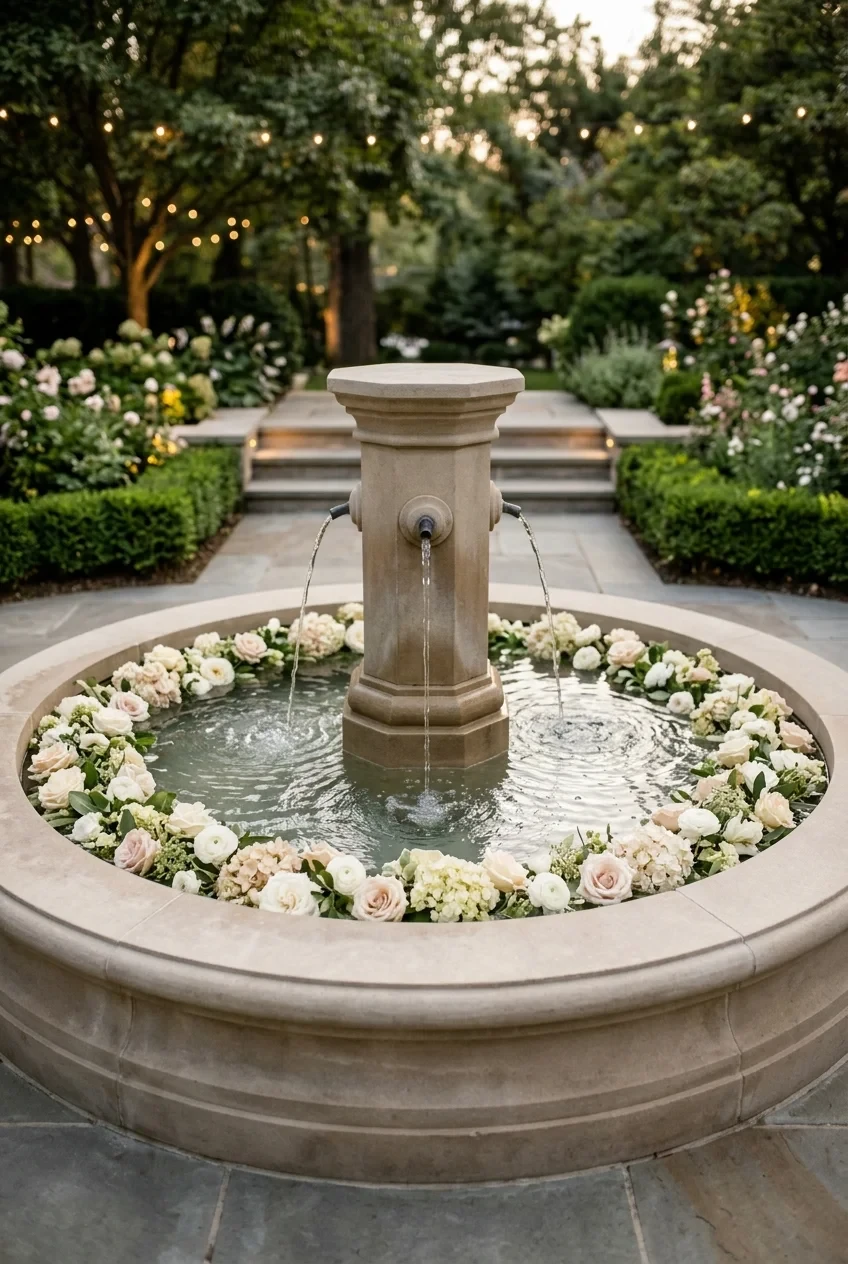
Add a restrained ring of floating flower heads to an ornamental fountain, preserving water flow and leaving the center visibly open.
Obtain venue approval and use only materials the staff accepts. Assign cleanup before petals clog filters or drift into surrounding walkways.
64. Greenhouse Tables With Potted Herbs
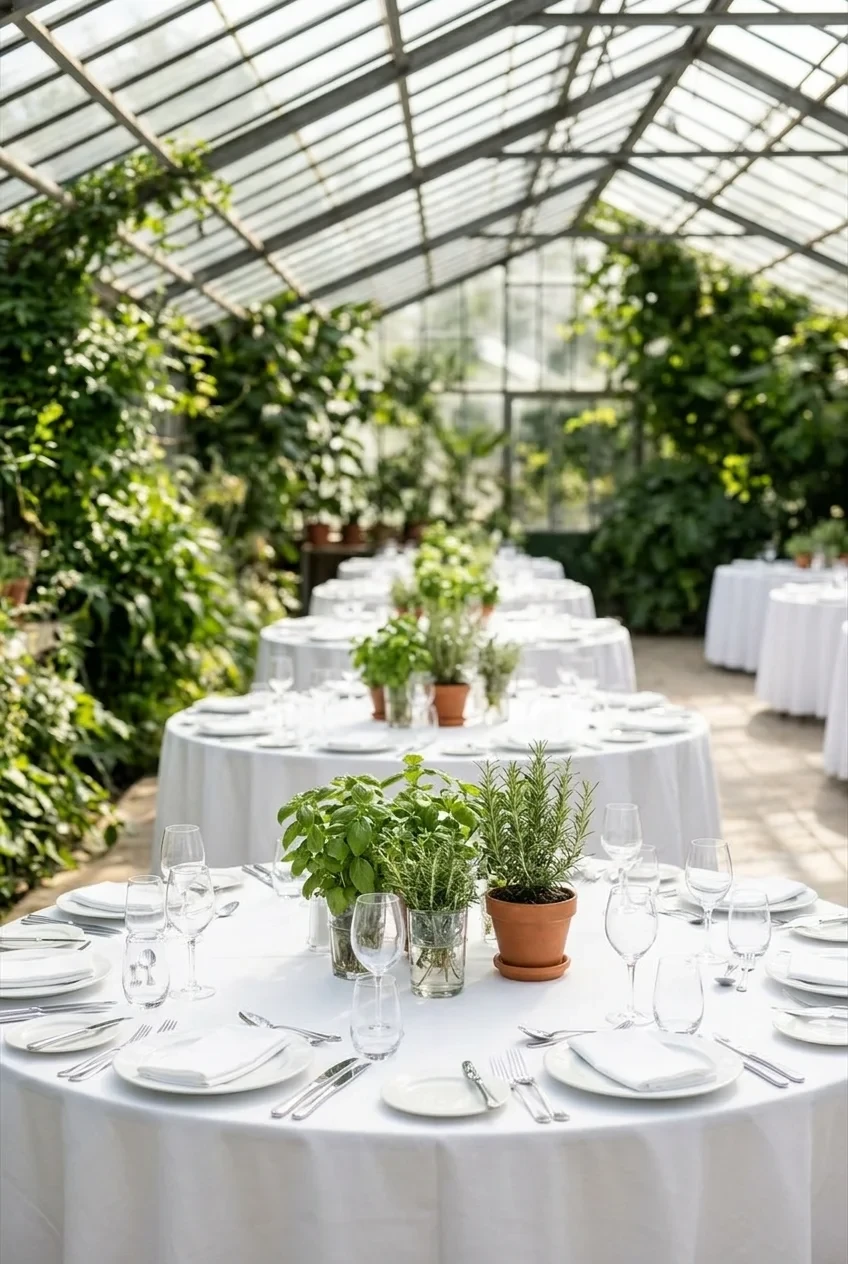
Use potted herbs and clear glass vessels on greenhouse tables, allowing the existing plants and structure to supply most of the decoration.
Keep arrangements narrow and low because glass rooms can feel visually busy. Confirm ventilation, shade, and candle restrictions before adding more layers.
Color-Driven Reception Decoration Ideas
A focused palette can connect rentals, flowers, lighting, and paper without requiring a theme. Let material and proportion keep each color direction distinct.
65. Black and White With Clear Glass
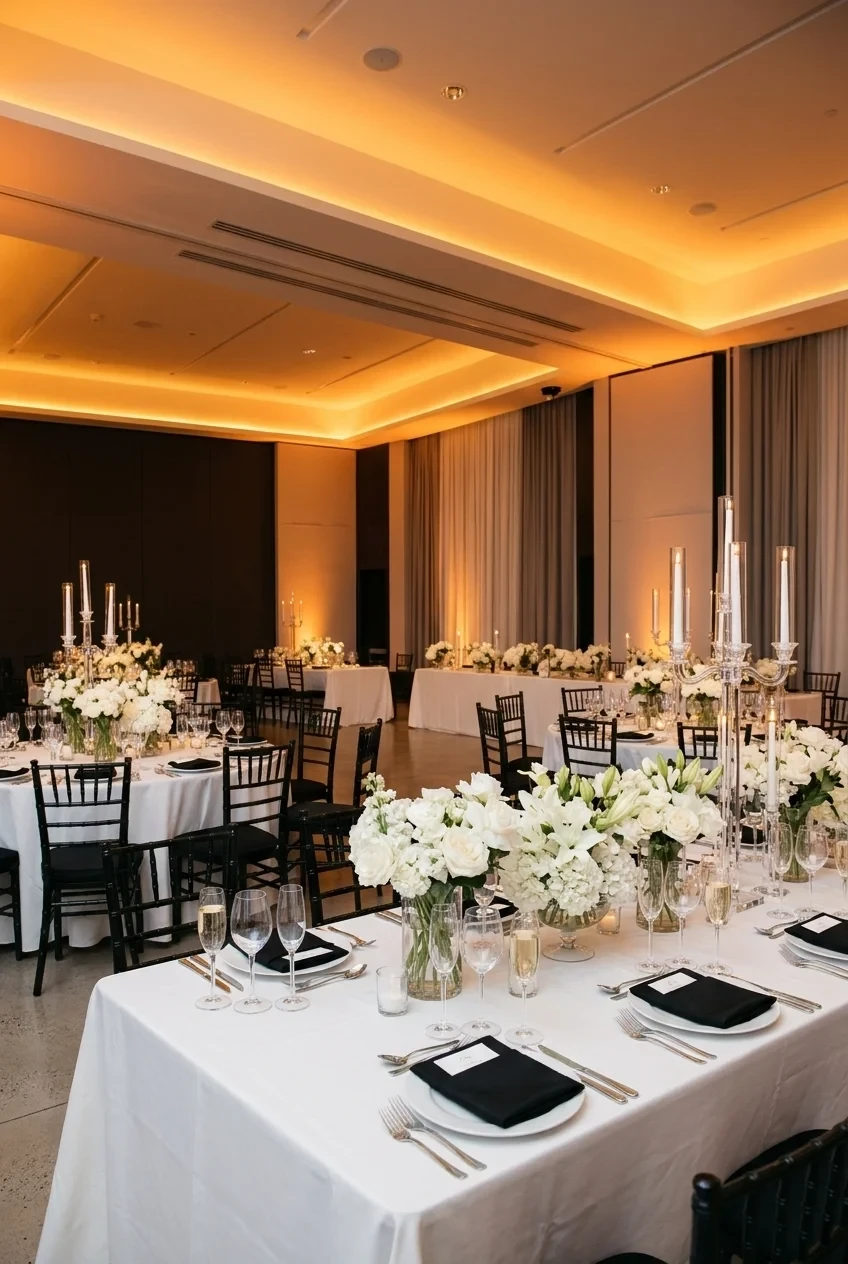
Pair black napkins and chairs with white linen, white flowers, and abundant clear glass so the contrast feels crisp without becoming heavy.
Warm the room through light rather than adding another accent color. Amber lamps or candles soften monochrome tables while preserving their graphic direction.
66. Sage Green and Cream Layers
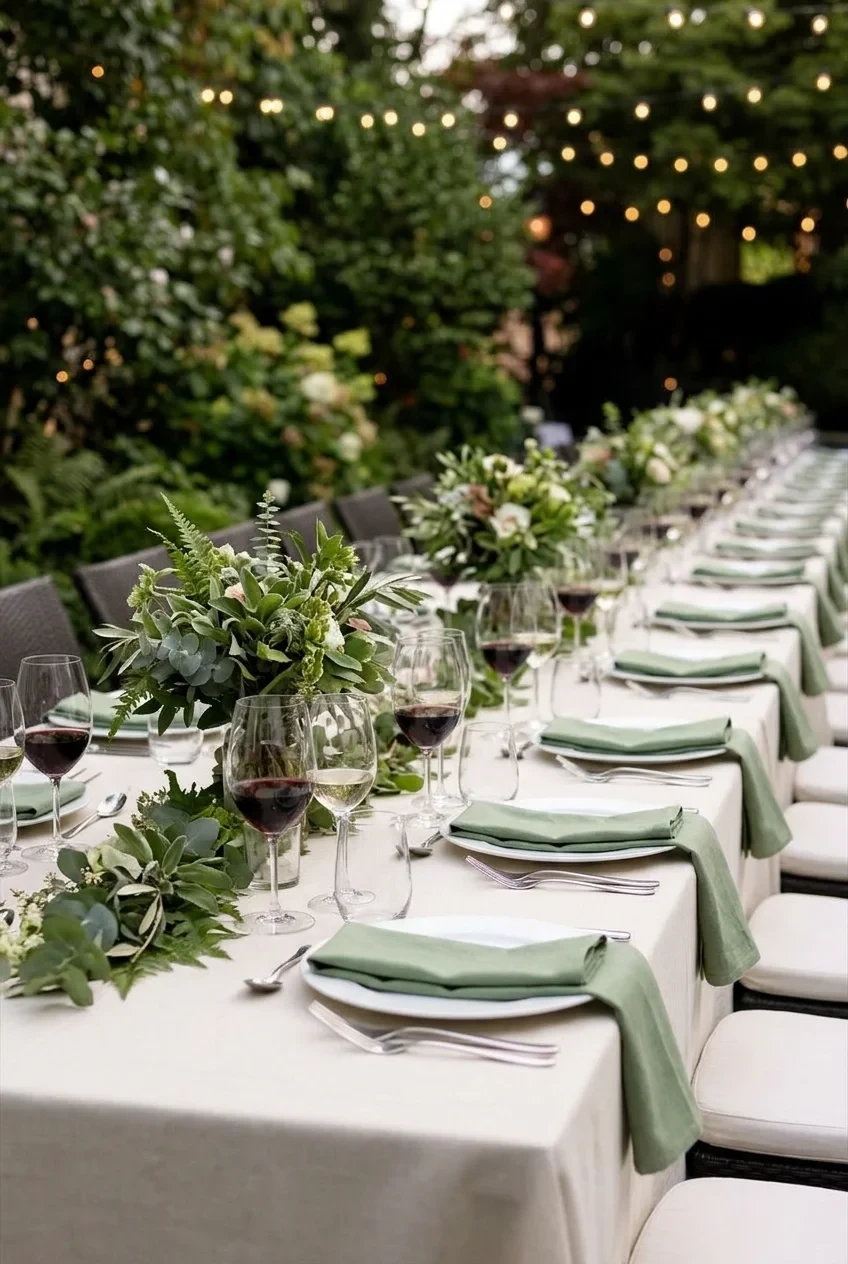
Combine sage napkins, cream linen, and soft green leaves, using white ceramics to prevent the palette from turning into one indistinct green surface.
Mix smooth and woven textiles for depth. Keep greenery species varied enough to show shape without adding unrelated floral colors.
67. Terracotta, Coral, and Dusty Rose
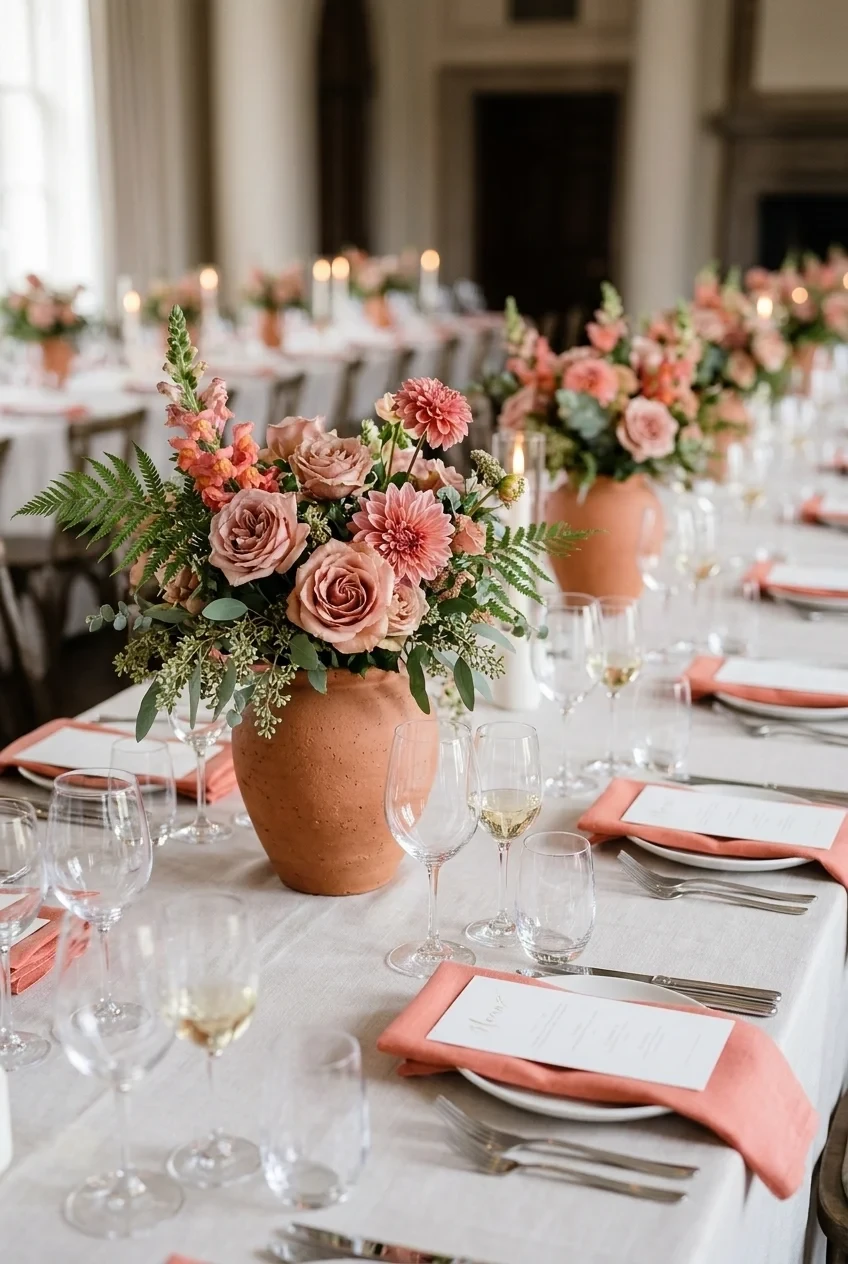
Use terracotta vessels, coral napkins, and dusty-rose flowers in distinct layers, keeping the tablecloth pale so each warm color remains visible.
Choose one dominant tone and two smaller accents. Equal amounts of every warm shade can flatten the palette into an undefined orange field.
68. Cobalt Blue With Citrus Yellow
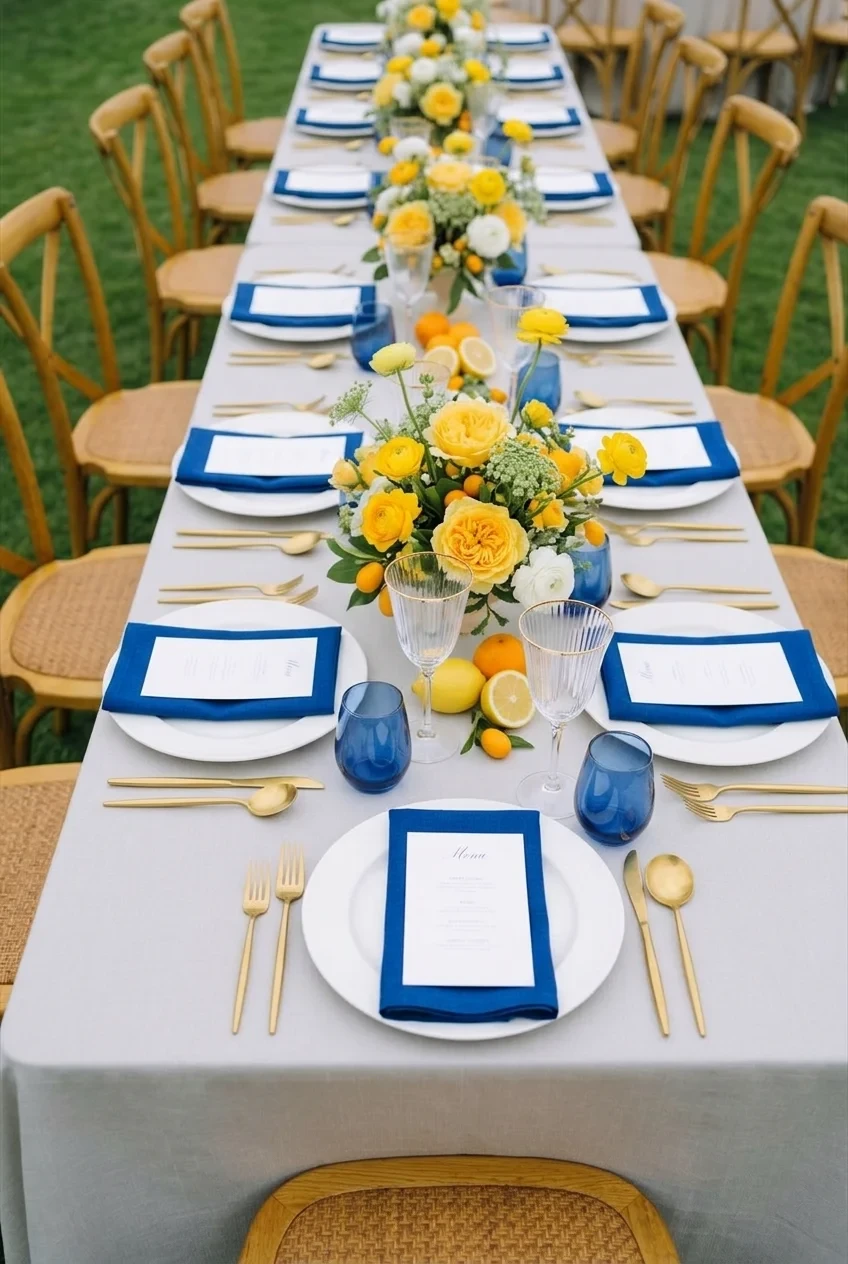
Set cobalt glassware and napkins against white plates, then repeat citrus yellow through flowers or whole fruit in small controlled amounts.
Use green leaves sparingly so the two-color contrast stays clear. Test blue glass under evening light, where it may appear nearly black.
69. Jewel Tones With Brass Details
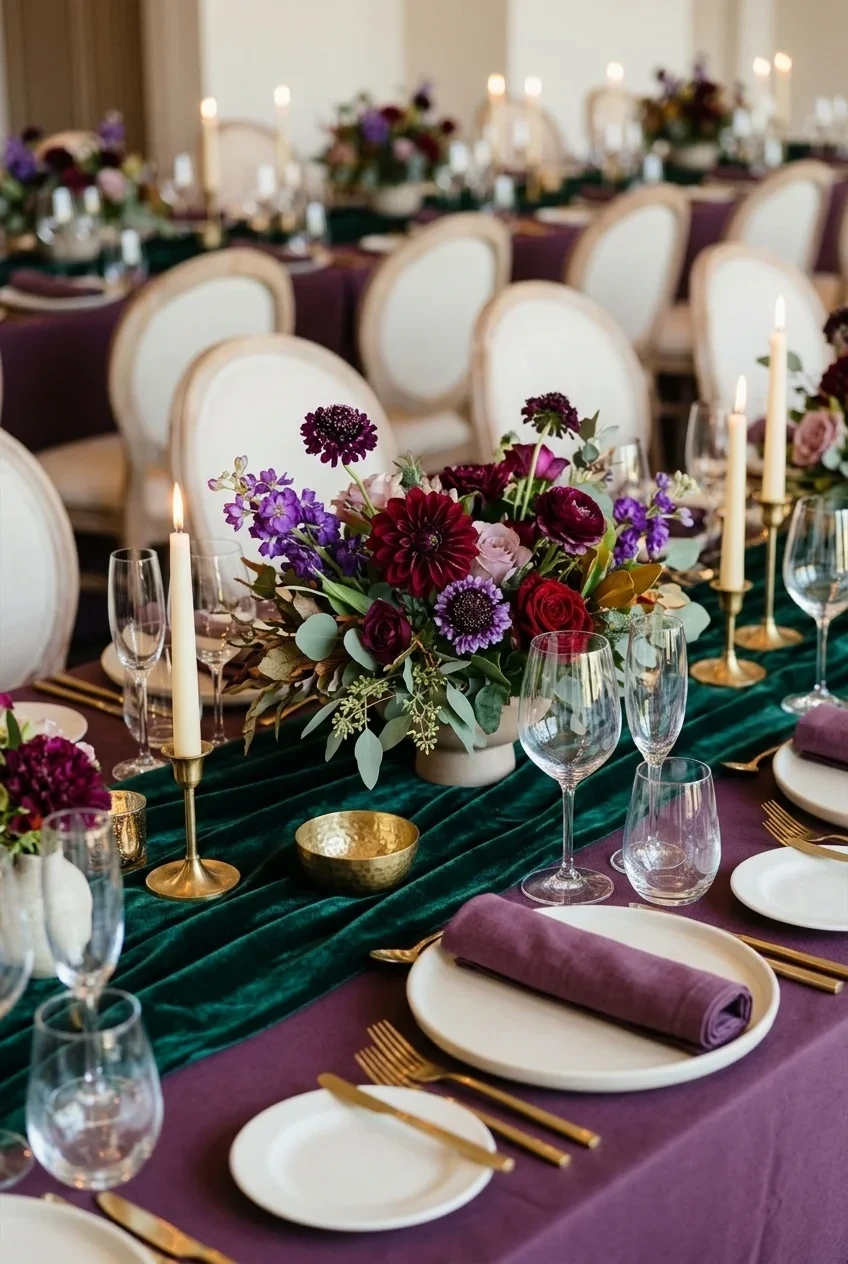
Layer emerald, plum, and ruby through napkins, glassware, and flowers, then use small brass details to connect the saturated colors.
Balance deep tones with candlelight and neutral plates. Dark linen across every surface can absorb light and hide carefully chosen colors.
70. Pastel Garden Mix With One Dark Accent
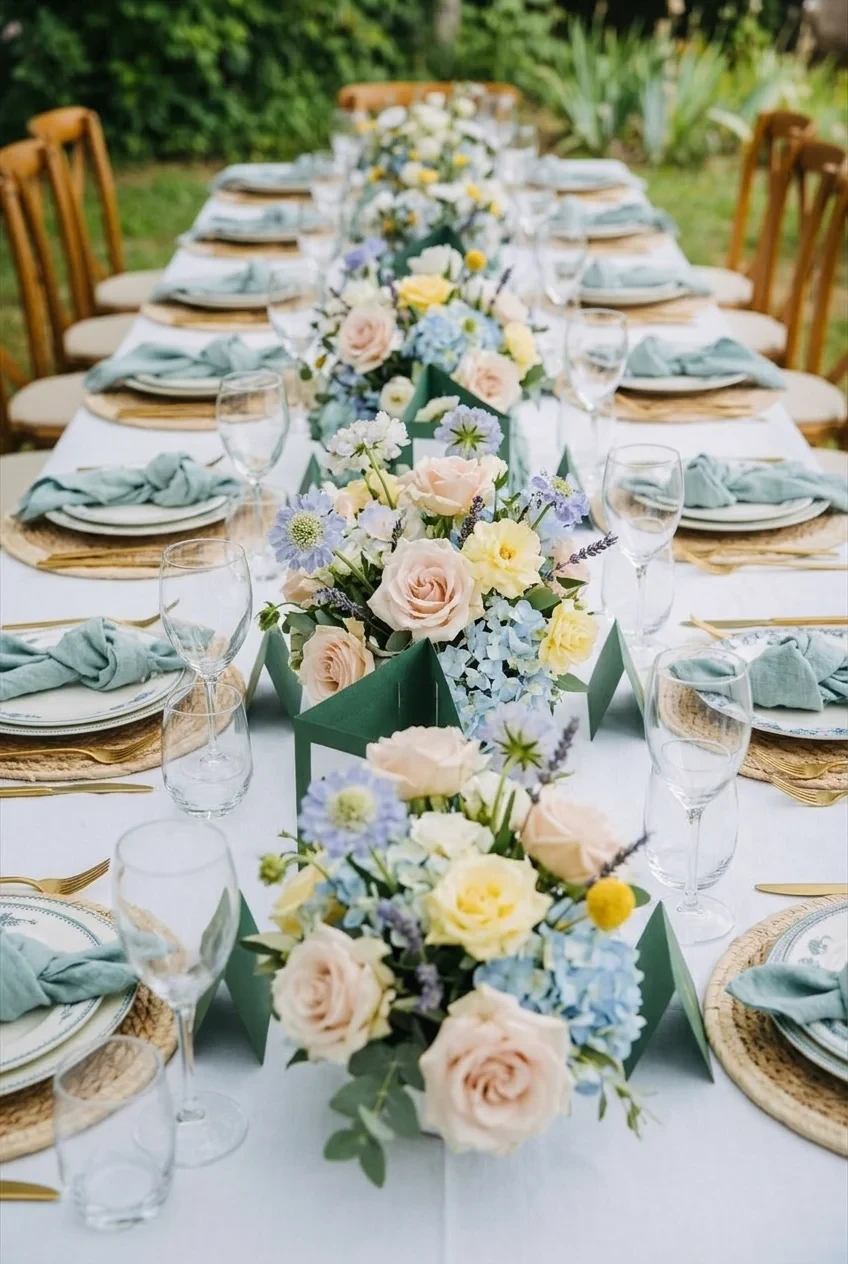
Combine blush, pale blue, butter yellow, and lavender flowers, then repeat one dark green accent through menus, ribbon, or glassware.
The darker note gives pale colors an edge and improves readability. Avoid adding metallics automatically when the garden palette already has enough variation.
71. All-White Decor Built From Texture
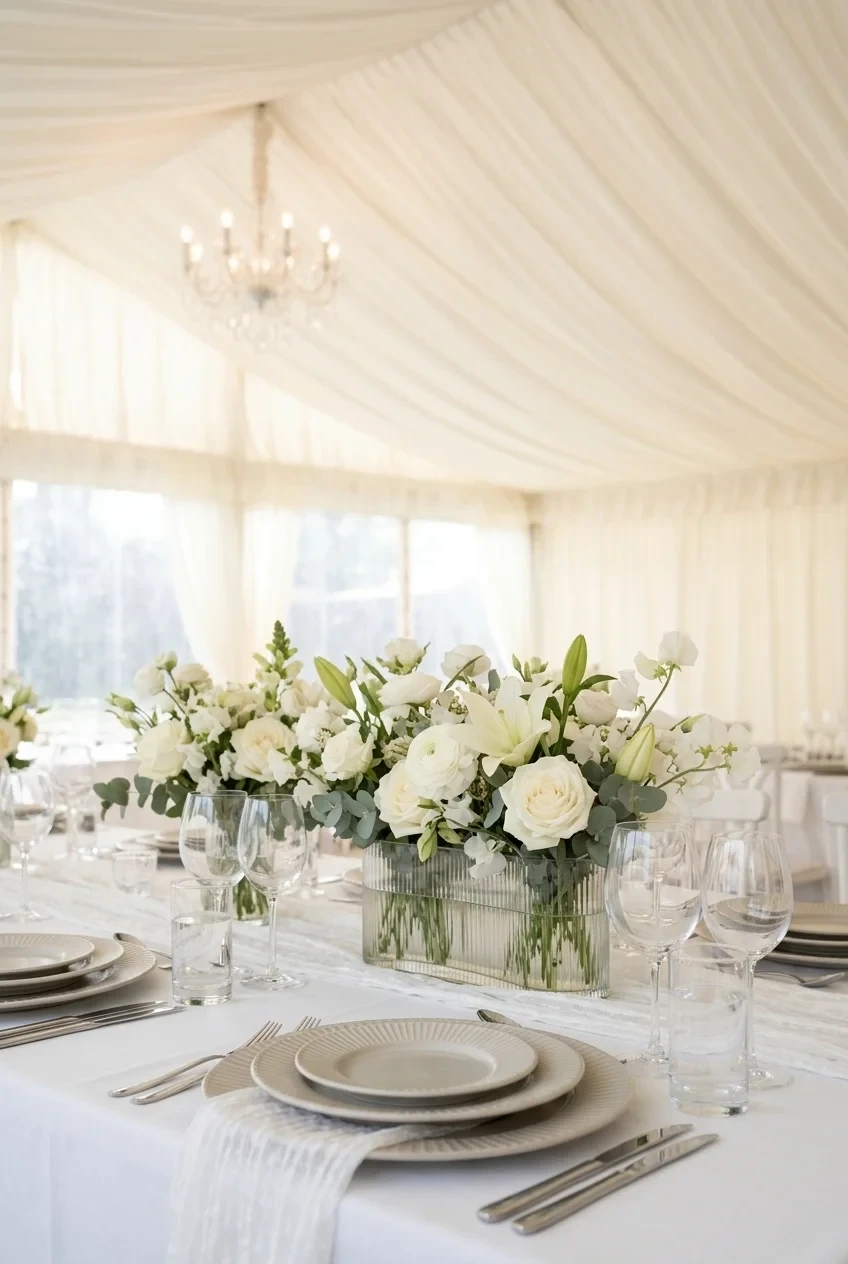
Distinguish white linen, ceramic, flowers, paper, and glass through matte, glossy, ribbed, and sheer surfaces rather than introducing more color.
Use gentle side lighting to reveal those textures. Flat bright light can erase differences and make careful white layers appear unfinished.
72. Bright Modern Color Blocks
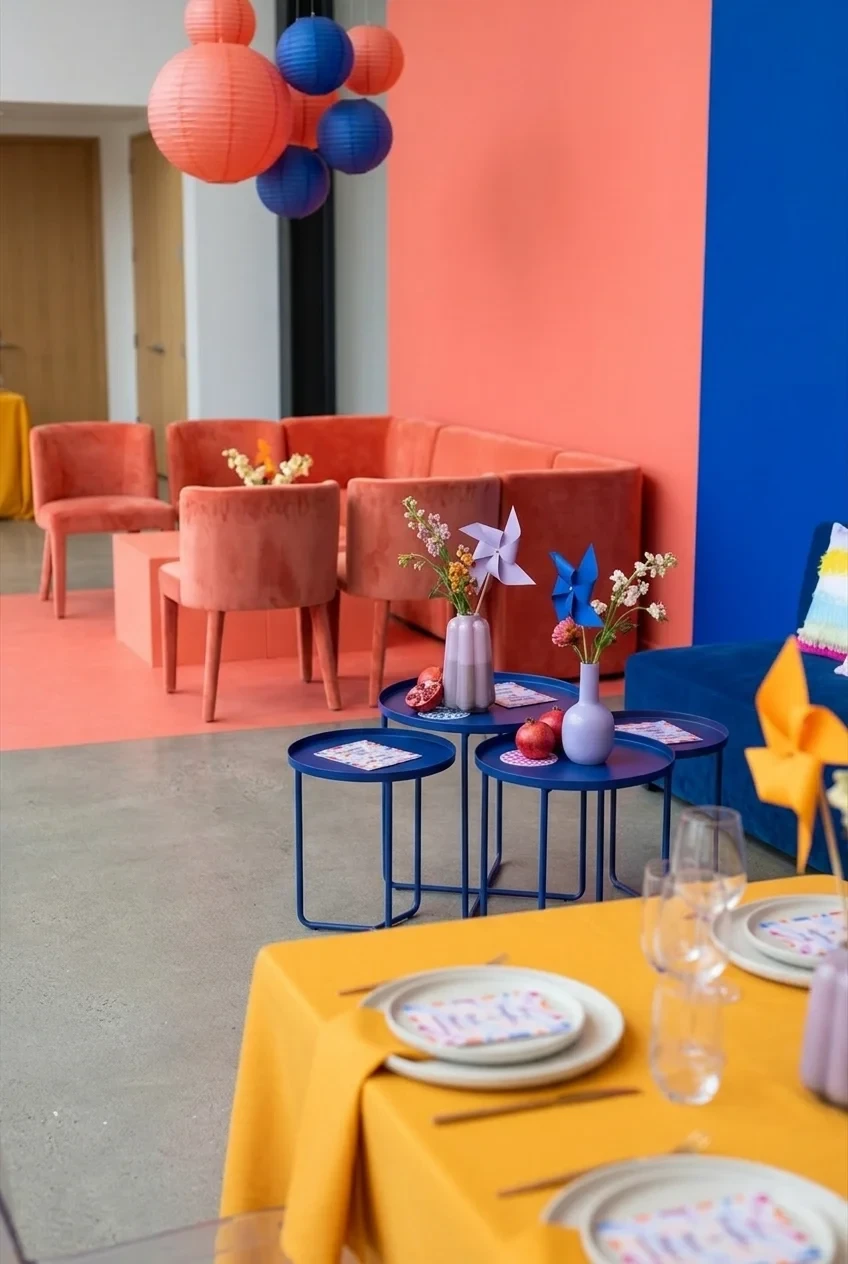
Assign coral, cobalt, and marigold to separate décor zones, repeating each color in strong blocks rather than mixing everything on every table.
Use neutral floors and plates to connect the zones. Large colored surfaces need fewer small decorations, which keeps the room energetic without clutter.
Personal and Functional Finishing Details
Smaller zones matter when they help guests participate, remember, or find what they need. Keep personal displays edited and practical surfaces genuinely usable.
73. Guest Book Table With One Framed Photograph
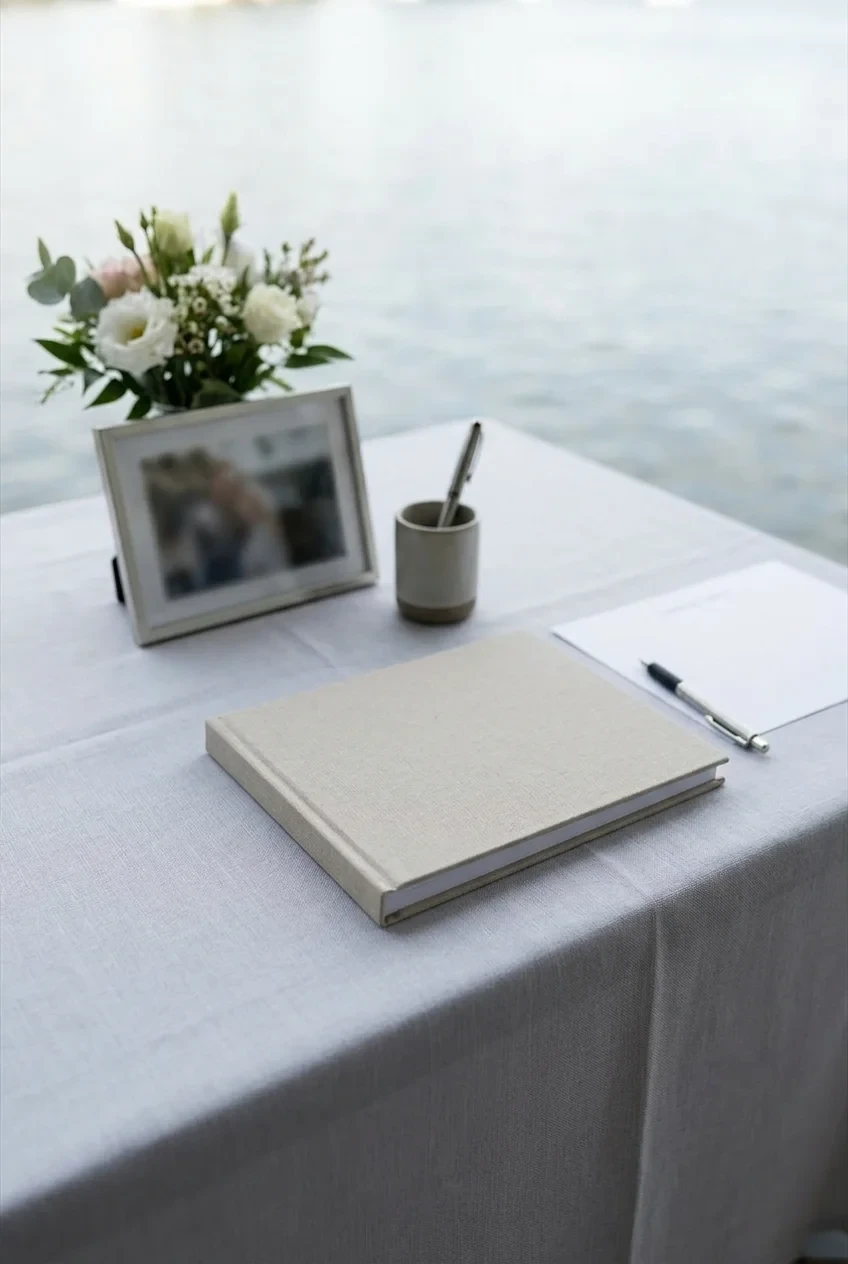
Center the guest book beside one framed photograph and a weighted pen cup, leaving open space for guests to write without moving decorations.
Add soft light if the table sits in a dark corner. An elaborate display cannot compensate for a book guests struggle to notice or use.
74. Card Box Table With a Simple Locked Container
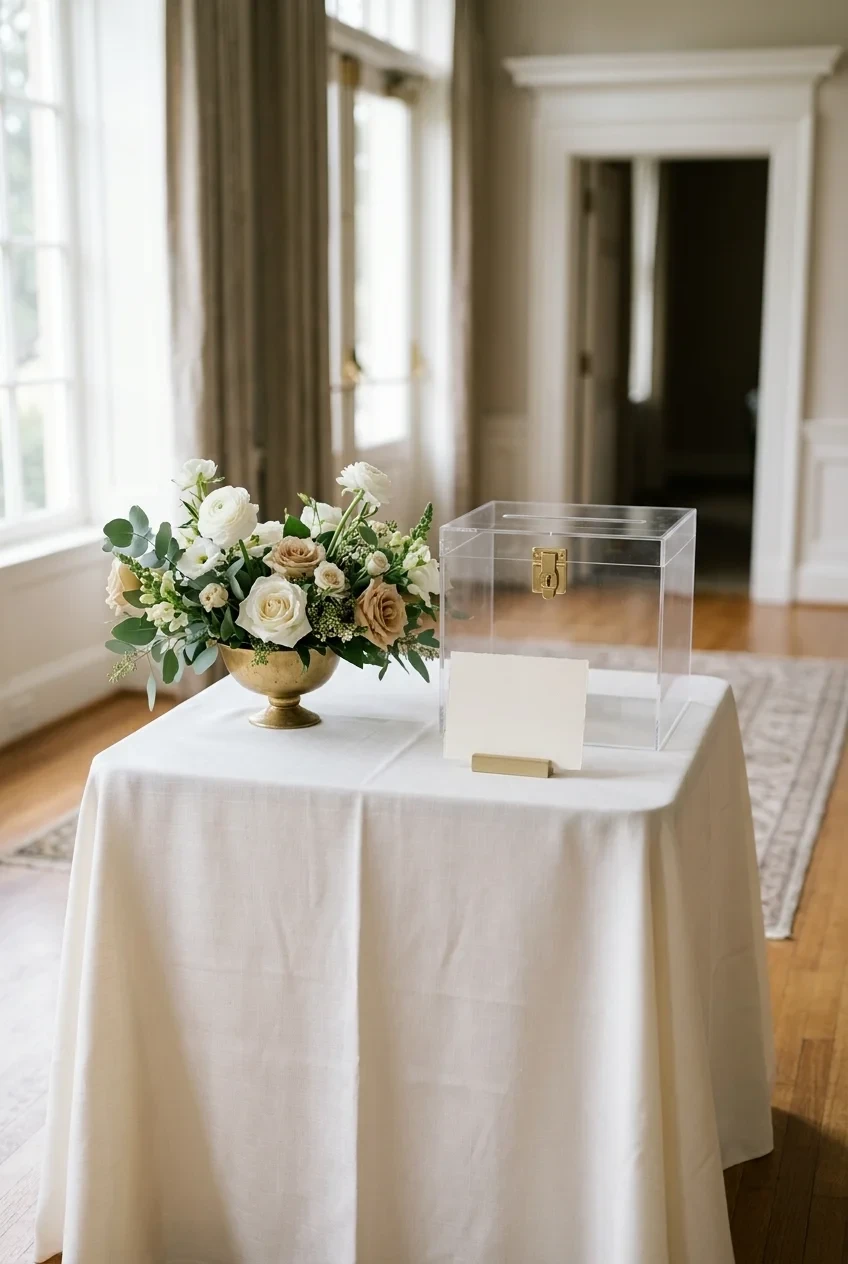
Use a sturdy lockable card box on a small staffed table, adding one flower arrangement and a short sign without surrounding the opening.
Place the table where hosts can monitor it without blocking arrivals. Decorative containers should never sacrifice security, stability, or an obvious card slot.
75. Memory Table With Edited Family Keepsakes
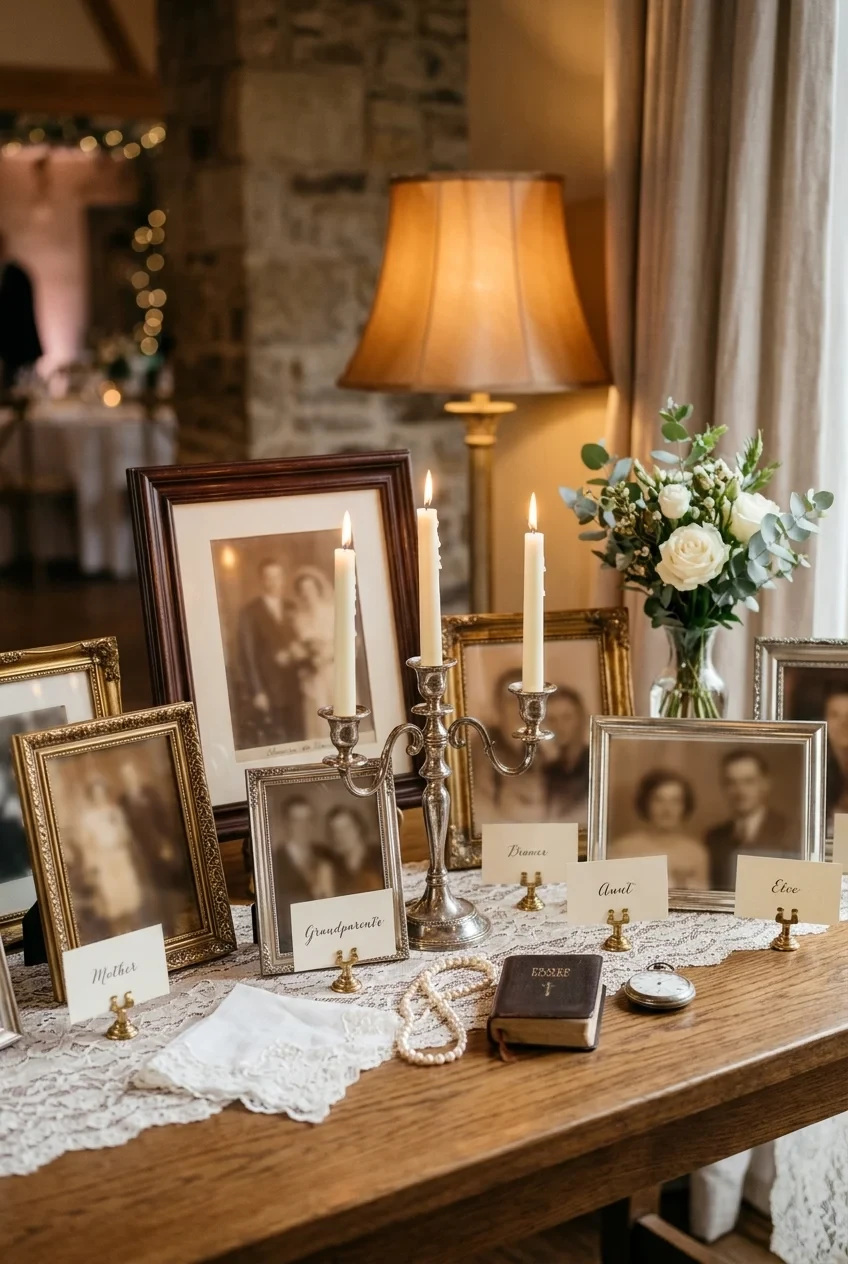
Choose a small group of photographs and meaningful objects, arranging them at varied heights with labels that explain relationships briefly and respectfully.
Keep irreplaceable originals at home when transport or open flames create risk. High-quality copies still carry the story without increasing anxiety.
Use one consistent frame color or material to unite photographs from different decades, especially when image tones and print sizes vary widely.
76. Children’s Table With Refillable Art Caddies
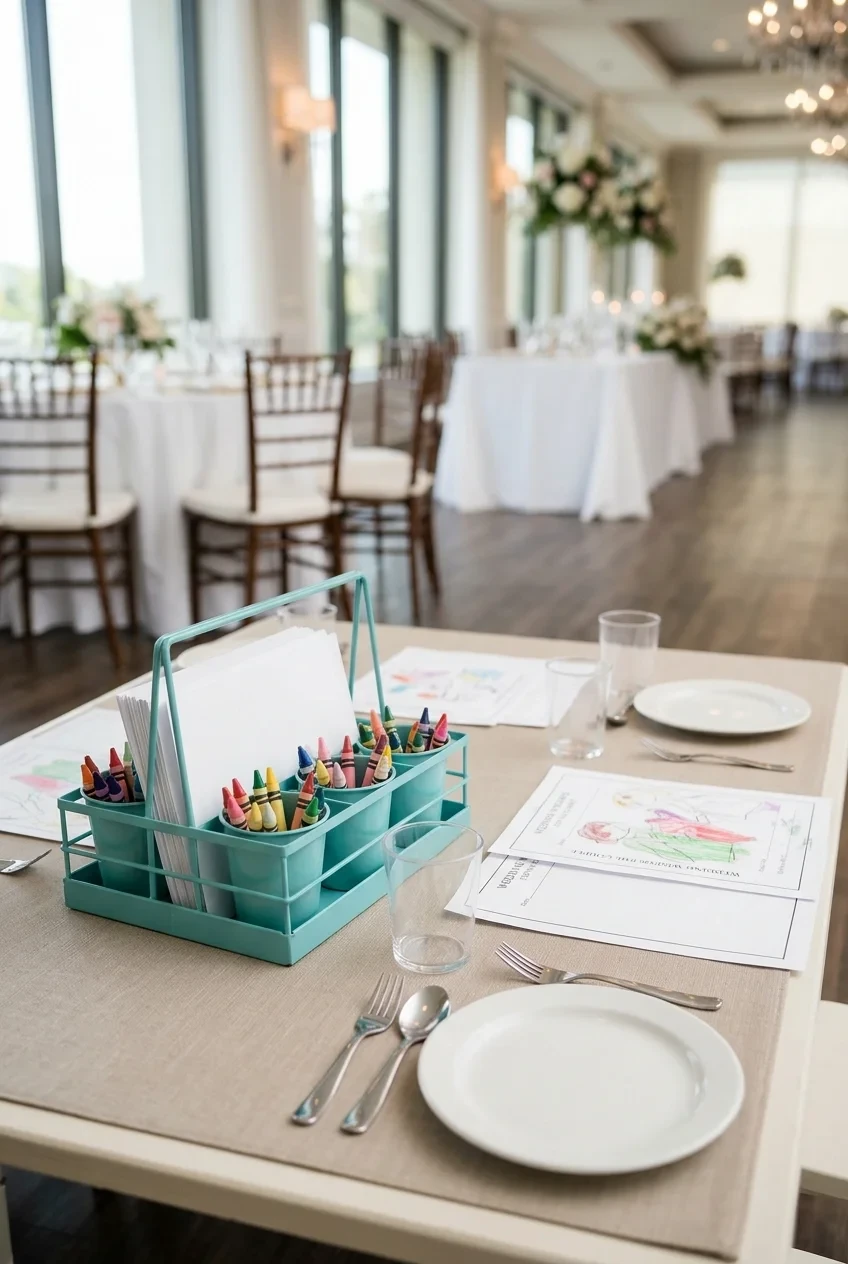
Set washable art caddies between place settings, using paper activities and blunt supplies that match the children’s ages without covering the dinner surface.
Ask caregivers about suitable materials and seat the table within easy adult view. Decorations should survive spills and quick clearing.
77. Restroom Basket With Coordinated Containers
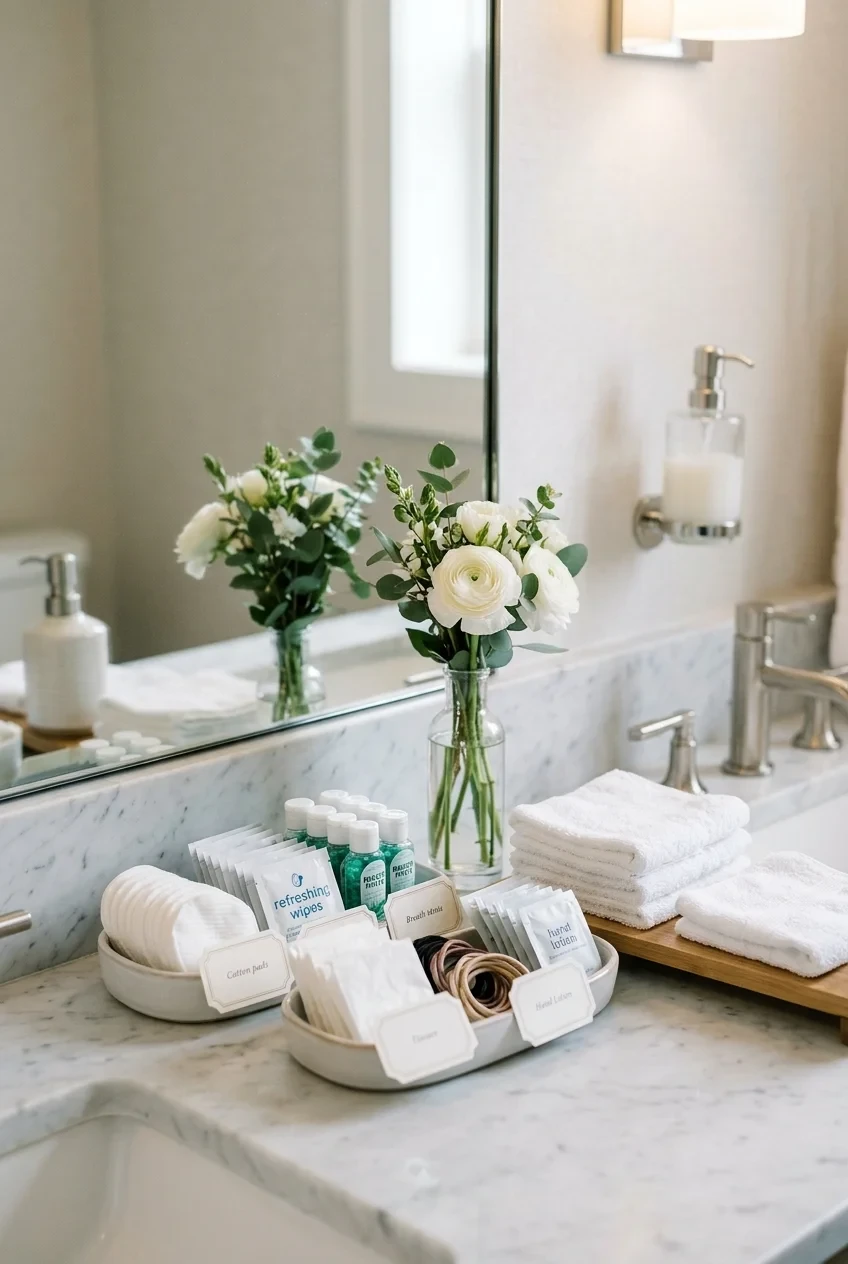
Group approved comfort items in matching shallow containers, using one small blank label per category instead of transferring products into unlabeled jars.
Confirm venue policies and check supplies during the evening. Keep medication, sharp tools, and strong fragrances out of unattended communal baskets.
78. Favor Shelf Near the Exit
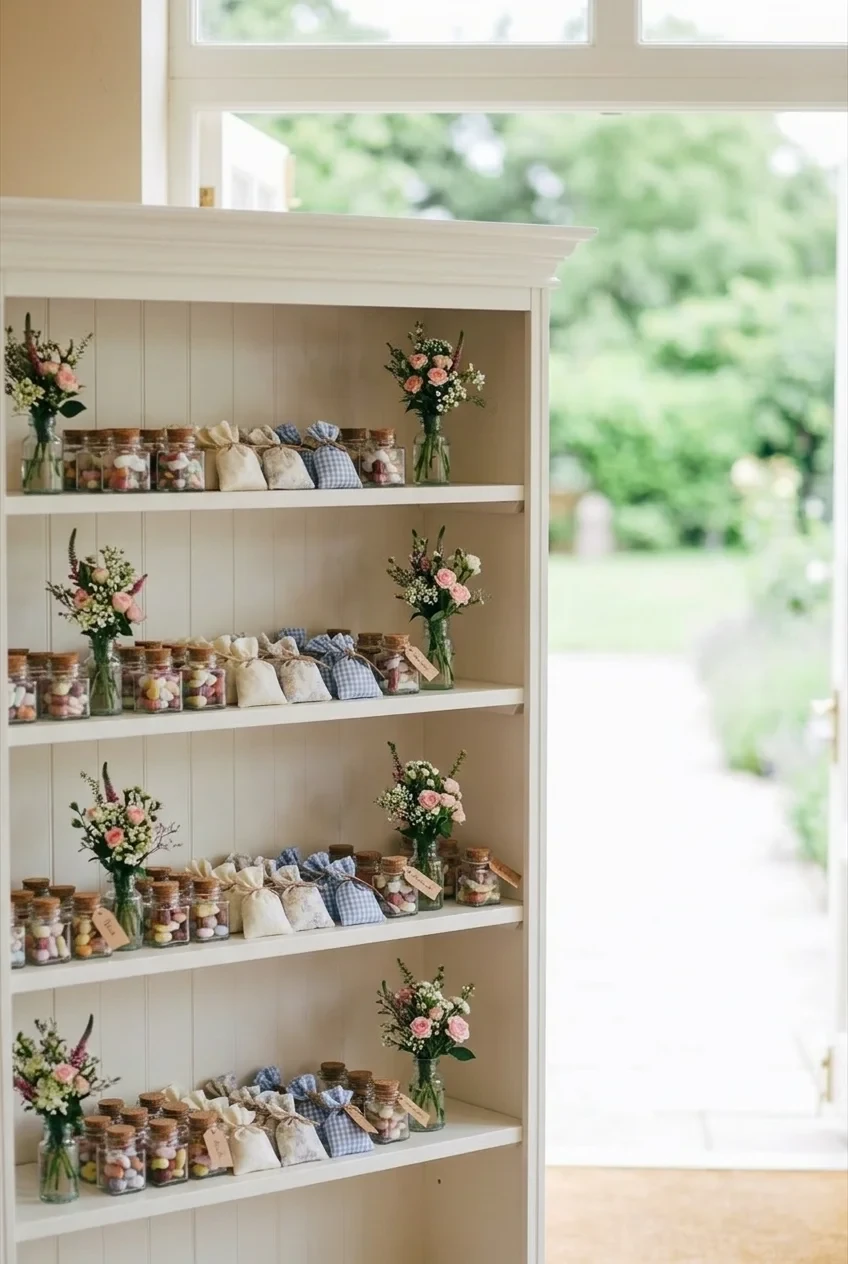
Arrange favors on open shelves near the exit, grouping them in repeated rows so guests recognize the takeaway without another large explanatory sign.
Keep the shelf away from door swing and traffic bottlenecks. Assign someone to replenish rows and pack leftovers after the reception.
79. Floral Photo Backdrop With Open Center
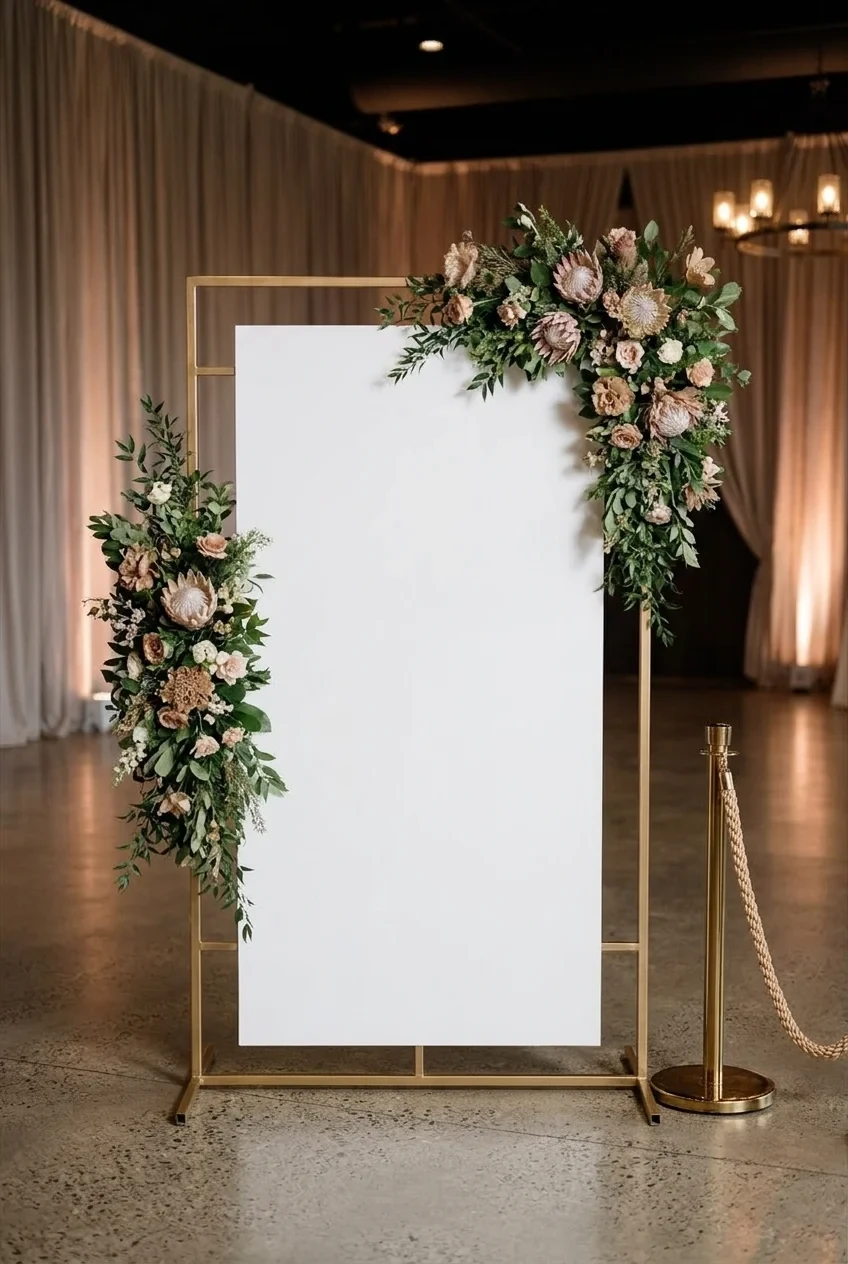
Frame a plain backdrop with asymmetrical flowers around its edges, leaving the center visually quiet for portraits and groups of different heights.
Mark the camera position and queue space before installation. A beautiful backdrop placed beside the bar can create constant traffic conflicts.
80. Ceremony Urns Reused at the Reception Exit
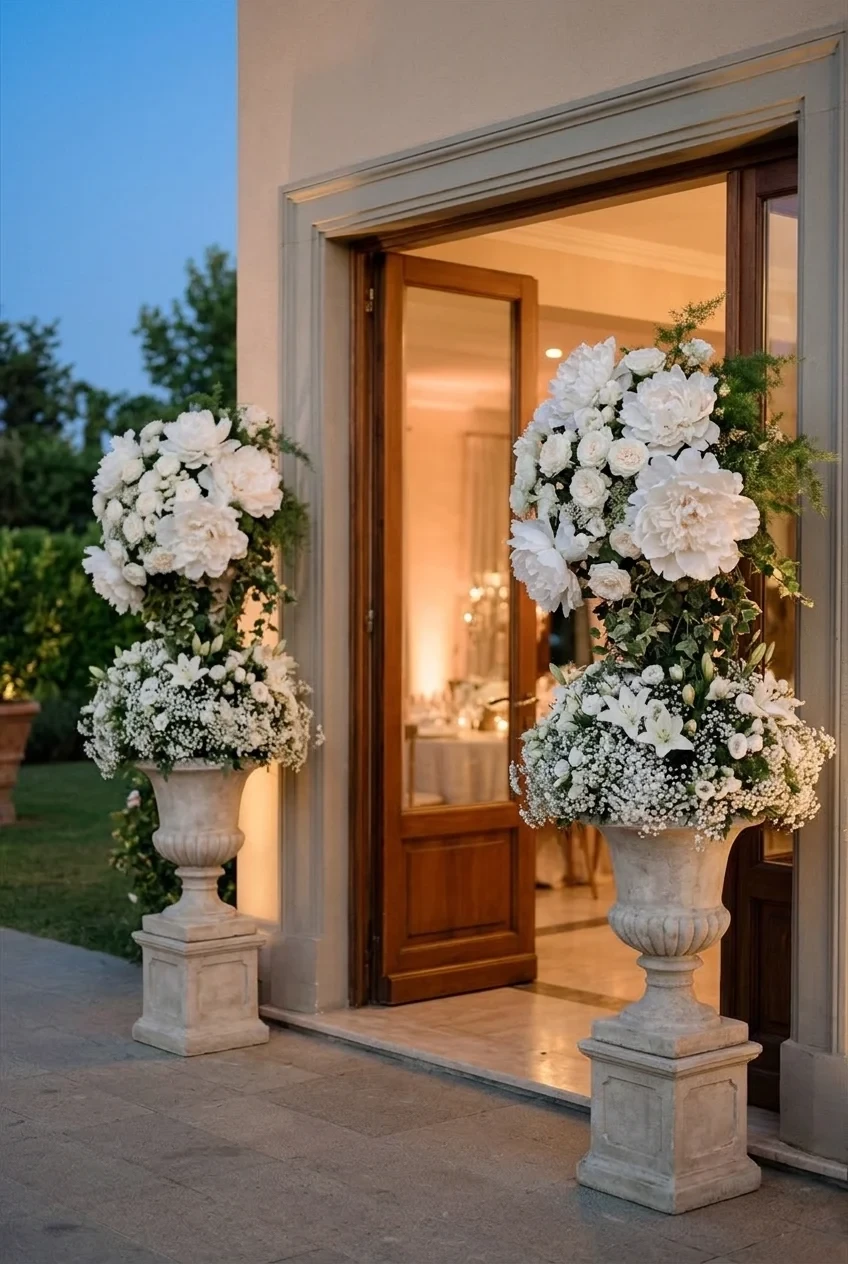
Move large ceremony urns to either side of the reception exit, where their scale creates a final framed view without competing with dinner tables.
Plan the move before the event and use suitable carts. Confirm the vessels remain stable after transport and do not narrow the accessible doorway.
How do we keep 80 inspiration ideas from becoming a cluttered reception?
Choose one focal idea for each important zone, repeat a limited palette, and leave quieter surfaces between decorated areas so the room can breathe.
Which reception zones should we decorate first?
Prioritize the entrance, dining tables, couple’s table, and dance area because guests see and photograph them most, then address smaller functional displays.
Can ceremony flowers be reused at the reception?
Yes, when vessels are stable and a planned team can move them safely. Confirm timing, transport equipment, new placement, and doorway clearances beforehand.
How should we plan decorations around venue rules?
Ask about flames, rigging, wall attachments, electrical capacity, loading times, and cleanup before ordering. Written approvals prevent expensive redesigns near the event date.
Which reception decorations should we test before ordering?
Mock up one complete table, photograph signs under venue lighting, test candles after dark, and measure every large installation against the final floor plan.
This post may contain affiliate links: full affiliate disclosure.