Creating a cake for a Frozen-themed celebration involves balancing the cool tones of the Ice Queen's palace with the charming details of Arendelle.
These design concepts and flavor profiles provide a range of options, from sophisticated ombre finishes to whimsical character-driven centerpieces.
The Elsa ‘Ice Queen’ Aesthetic
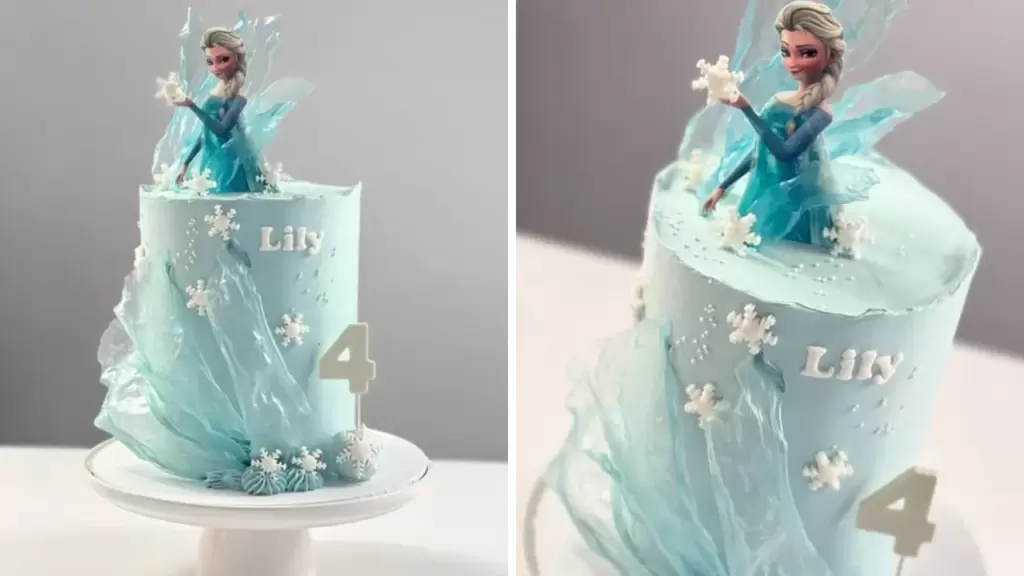
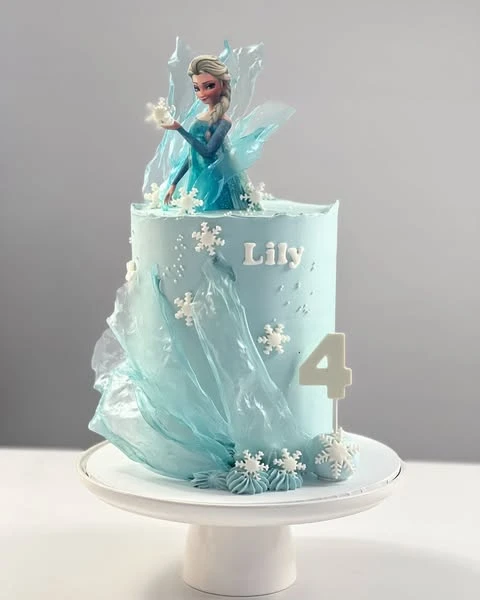
1. Sculpted Ice Queen Sails
Credit: @misba_cakehouse / Instagram
Use translucent rice paper to create the illusion of flowing ice and Elsa’s shimmering cape.
The height of the cake combined with vertical shards creates a dramatic silhouette that mimics the ice palace aesthetic without needing heavy structural supports.
Dip rice paper sheets in water tinted with light blue food coloring, drape them over uneven surfaces to dry, and attach them to a chilled cake using a small amount of frosting.

Credit: @misba_cakehouse / Instagram
Use this extra view of the sculpted ice queen sails setup to check spacing and access.
Keep the strongest detail from the main image. Simplify anything that feels crowded.
Leave enough room for guests to move around the setup comfortably.
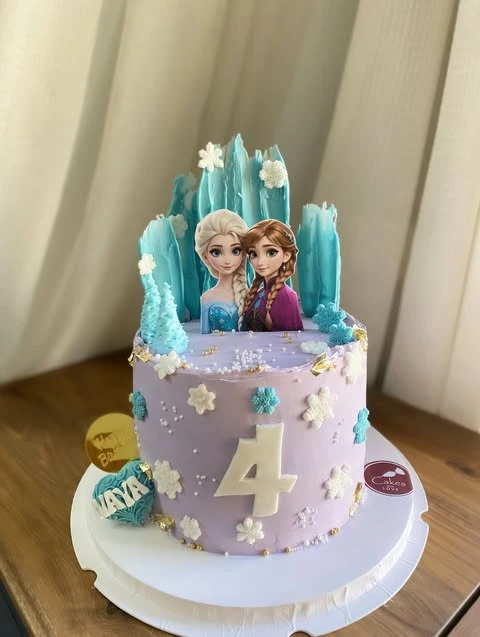
2. Lavender Ice Shard Layers
Credit: @cakes_with_love_nablus / Instagram
Use lavender as a base color to soften the traditional blue and white palette while maintaining a winter feel.
The combination of vertical shards and flat snowflake accents provides height and texture, making a single-tier cake appear more substantial on a dessert table.
Secure the paper character toppers with toothpicks or skewers hidden behind the figures to keep them upright against the chocolate shards.
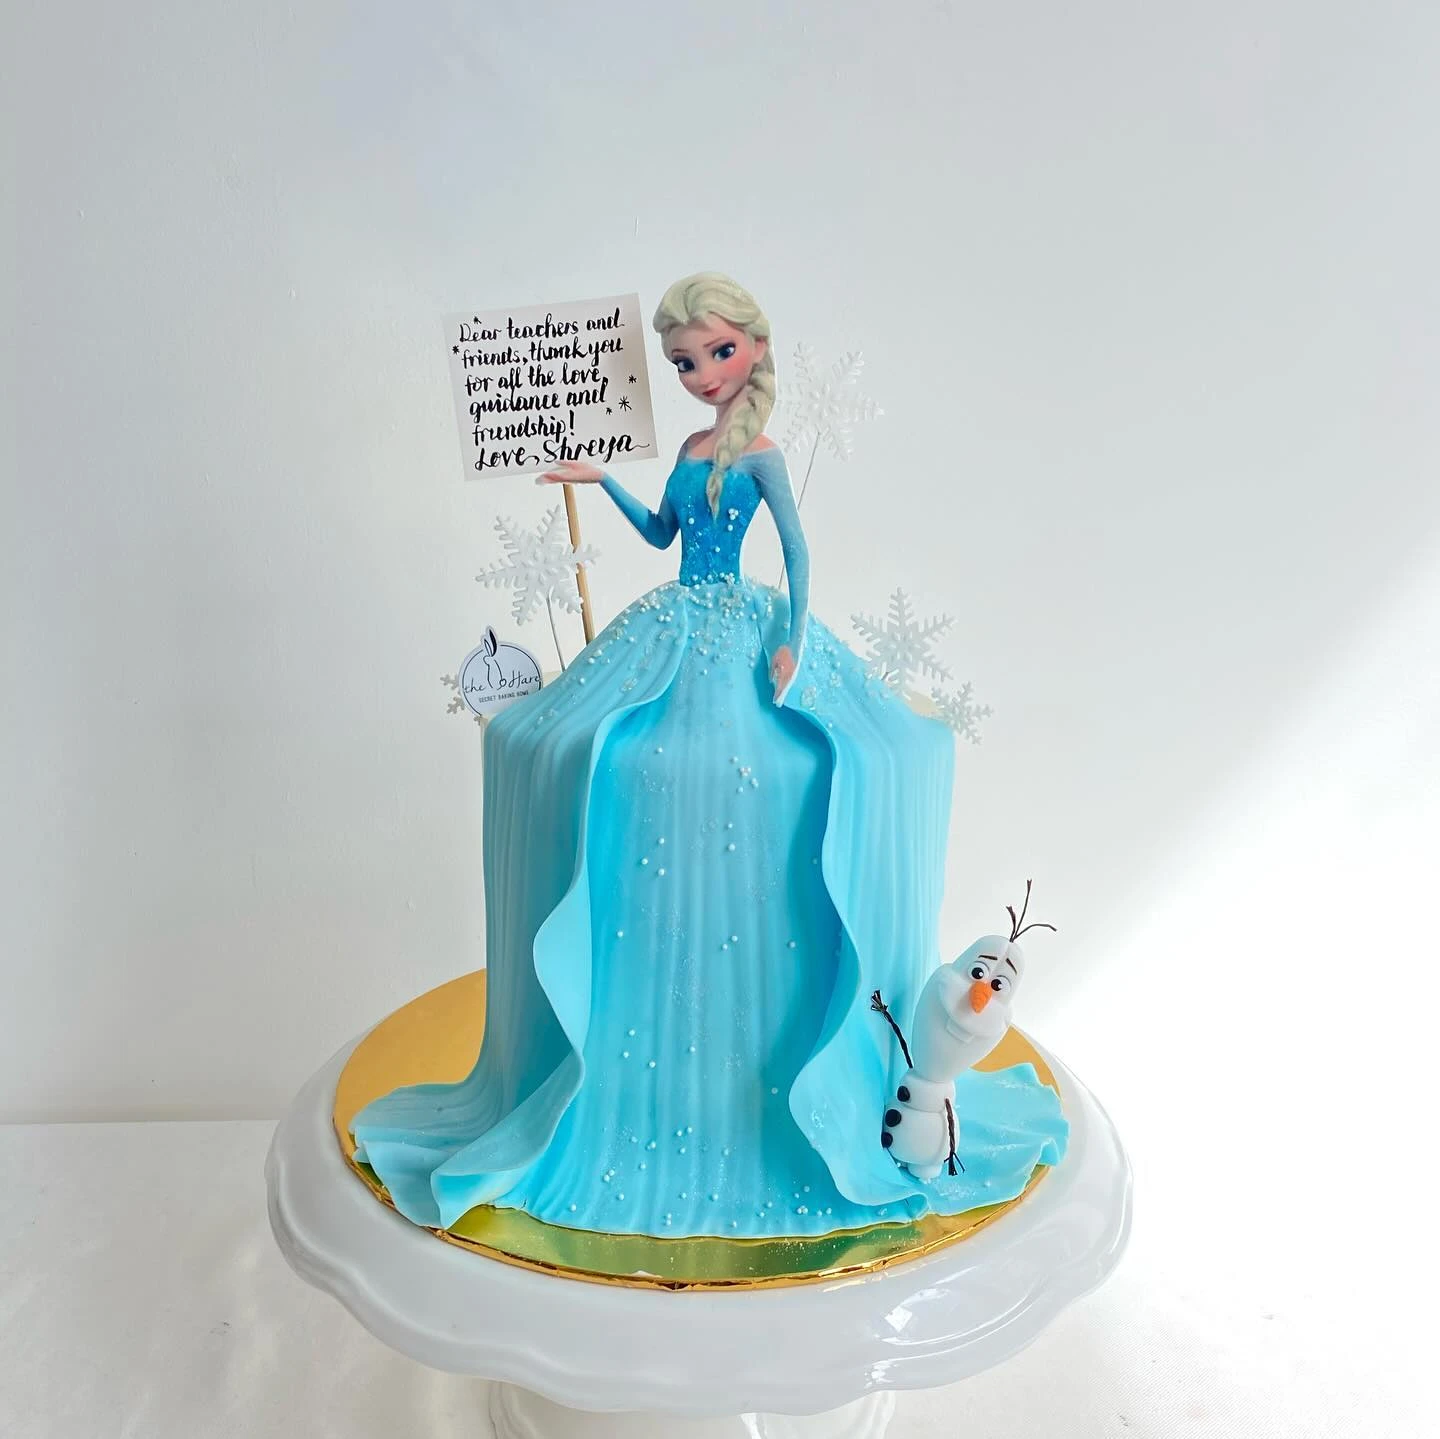
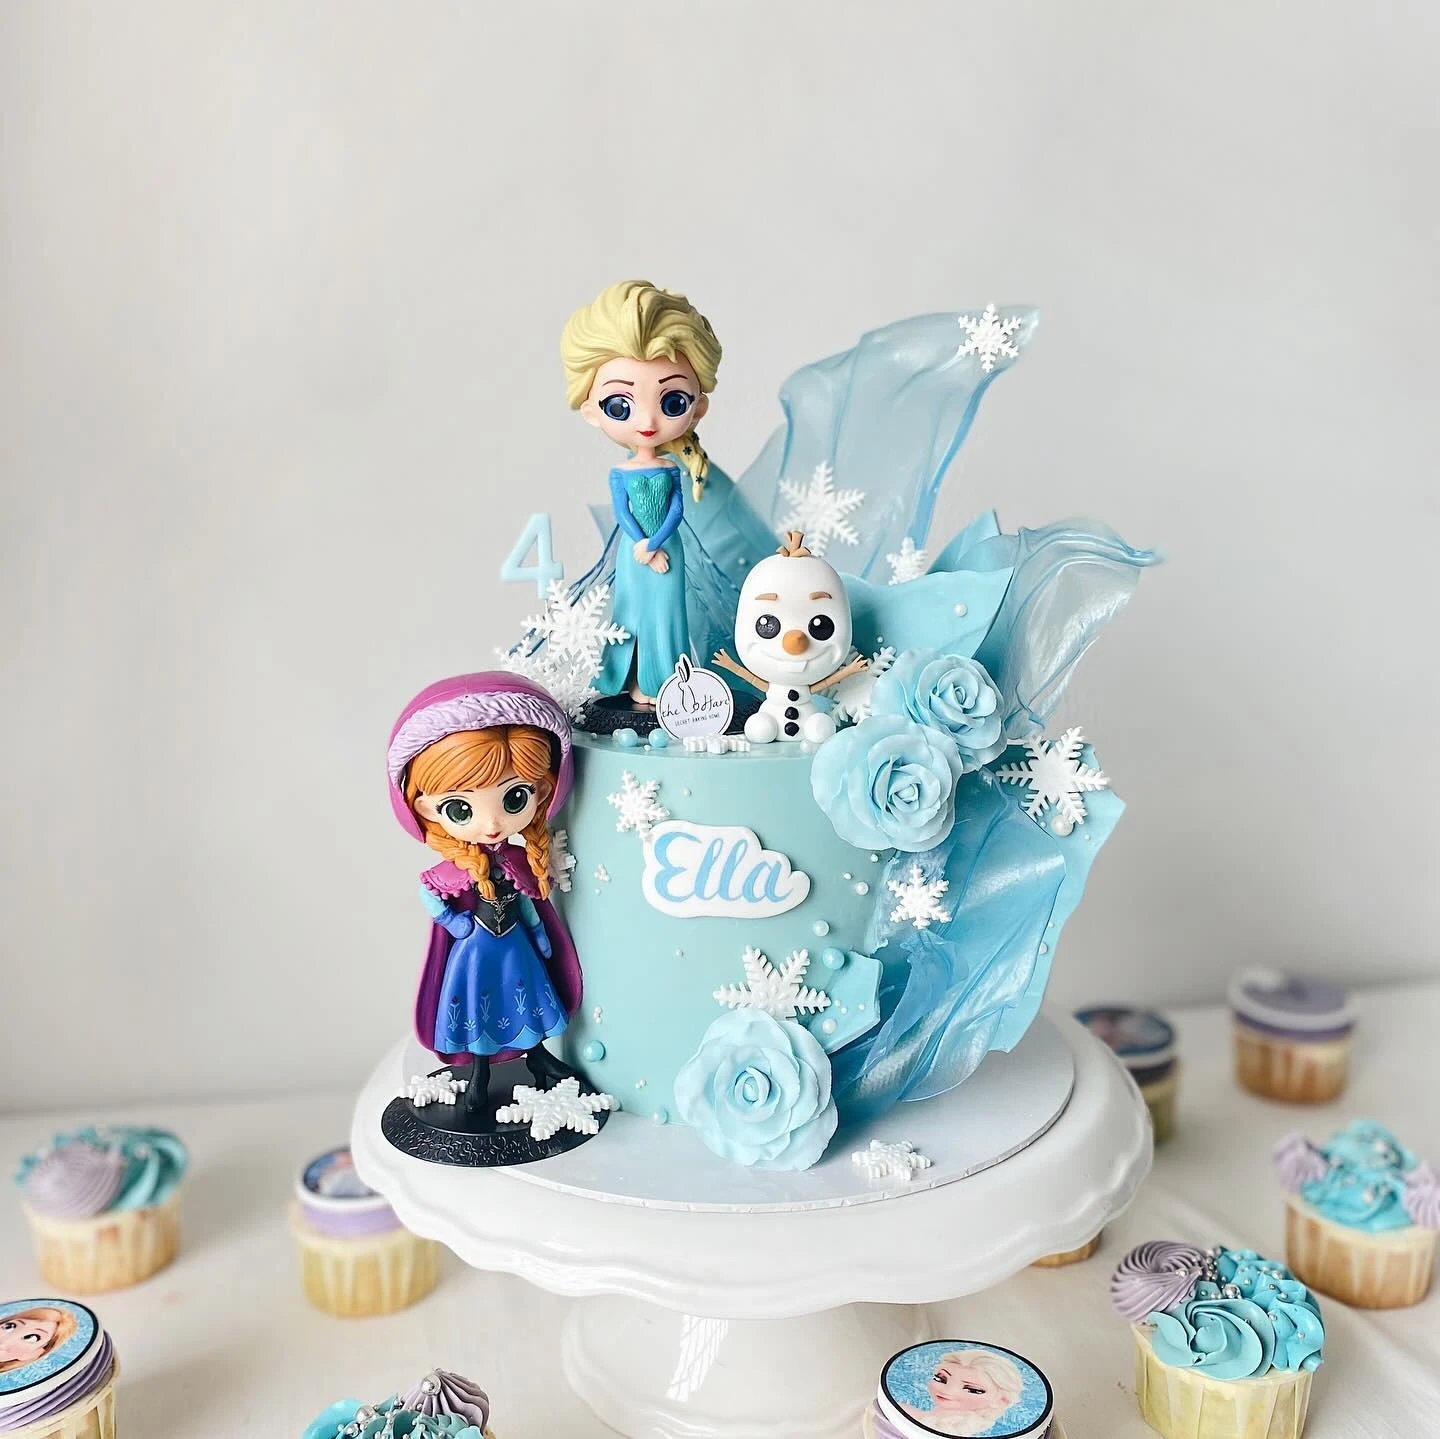
3. Flowing Fondant Gown
Credit: @thehare_sbh / Instagram
Extend a character figurine’s dress into the cake design using draped fondant for a dramatic effect.
This technique merges the topper with the cake body, making the doll appear as a natural part of the edible art while adding significant height.
Roll the fondant thin and use a modeling tool to press in vertical lines, mimicking the texture of fabric folds that pool at the base of the cake stand.
4. Vertical Character Collage
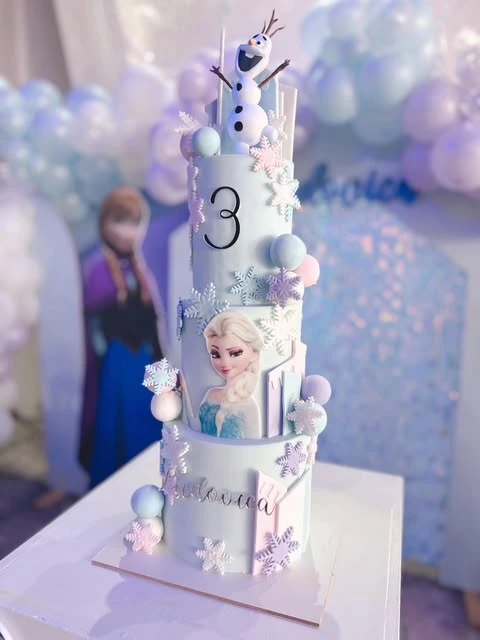
Credit: @julianapasteleriadeco / Instagram
Build a striking focal point with extra-tall, narrow tiers that emphasize height and vertical space.
A uniform sky blue base allows colorful accents like lavender snowflakes and white fondant spheres to stand out while maintaining a cohesive look.
Secure tall tiers with internal dowels for stability and use printed edible images for characters to ensure they look exactly like the movie versions.
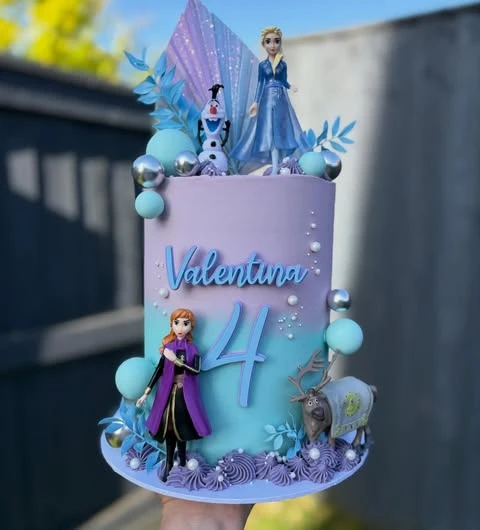
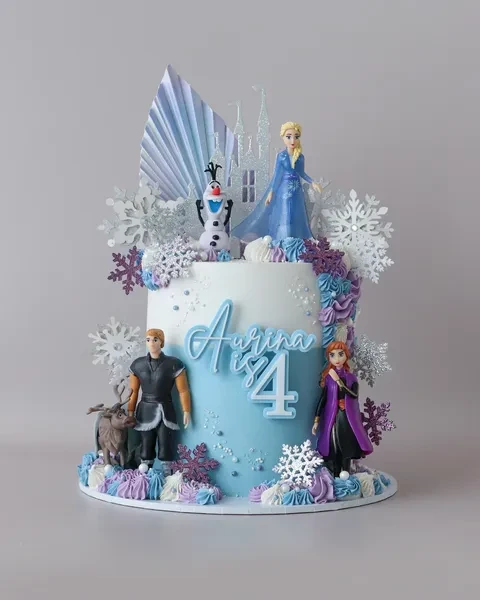
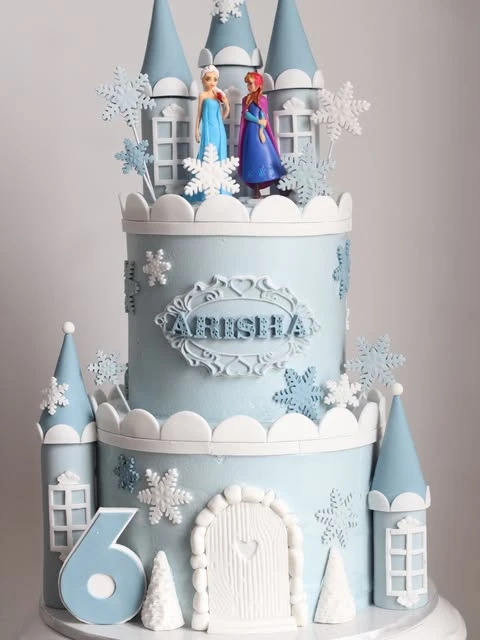
5. Pastel Character Tall Tier
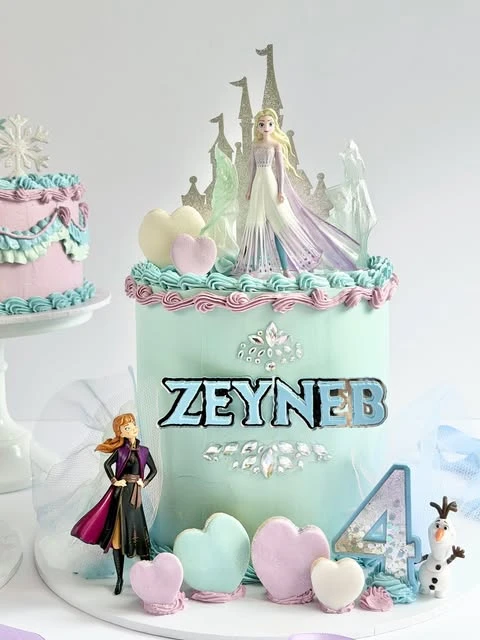
Credit: @esmaacarcakes / Instagram
Use a tall, single-tier cake to create a vertical stage for character figurines and a custom nameplate.
The extra height provides ample surface area for decorative jewels and large lettering without crowding the top figurines.
Secure heavy plastic figurines with a dab of royal icing or food-safe adhesive to prevent shifting during transport.
6. Lavender Frosting Character Scene
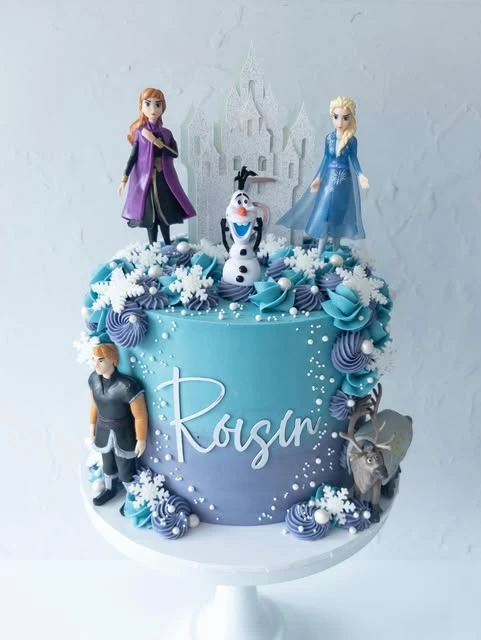
Credit: @cooperscakesandbakes / Instagram
Use a smooth blue-to-purple ombre base to create a cold, wintry backdrop for a variety of character figures.
Adding textured buttercream swirls in contrasting shades of teal and violet provides a stable surface for toys while mimicking snowdrifts.
Choose a glittery cardstock castle topper to add height and a focal point without the complexity of building a fondant structure.
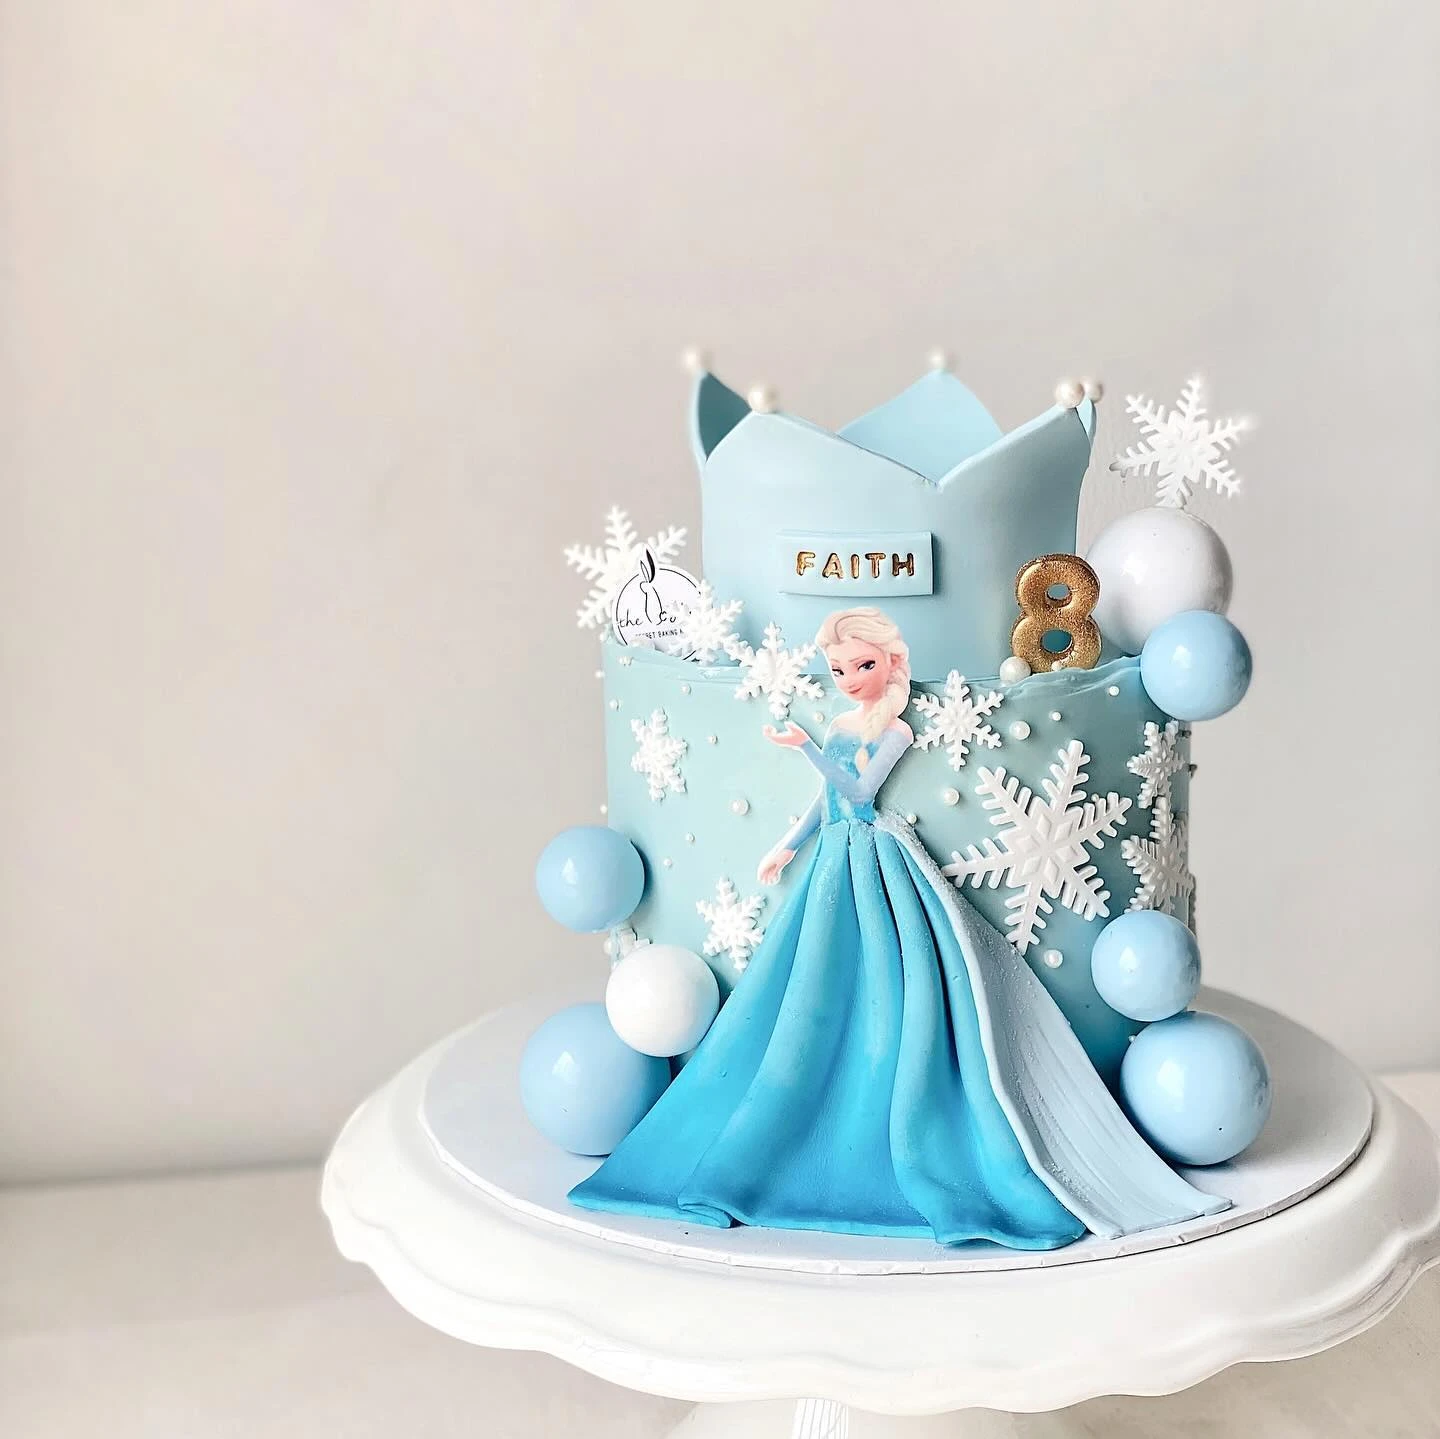
7. Dimensional Elsa Skirt Detail
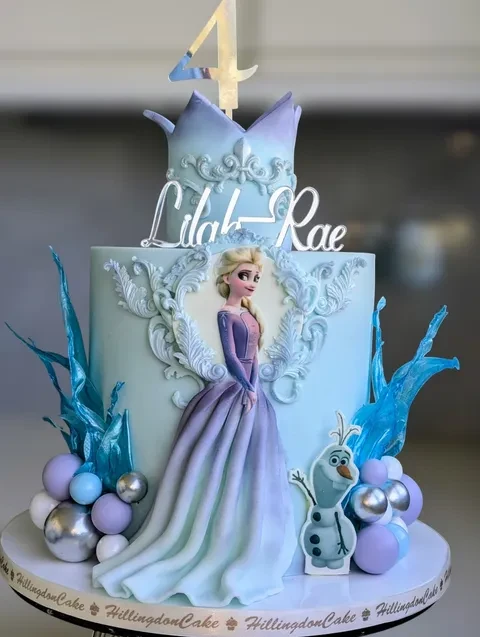
Credit: @clare_manley1 / Instagram
Create a focal point by blending a flat character image with a three-dimensional fondant skirt that flows down the side of the cake.
This technique provides the visual impact of a custom-sculpted figure while remaining accessible for those using edible prints or cardstock toppers.
Arrange blue sugar shards or ice sails behind the figure to add height and frame the character within the icy theme.
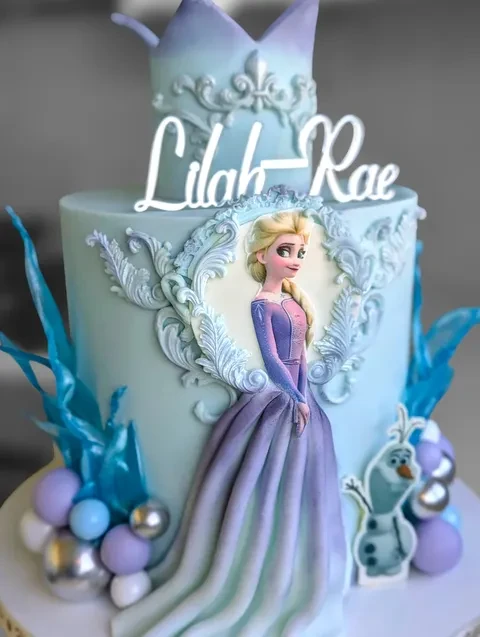
Credit: @clare_manley1 / Instagram
Use a crown-shaped top tier to elevate the design and provide a dedicated space for name and age toppers.
Dividing the cake into a character-focused base and a regal top tier keeps the presentation organized and prevents the decorations from feeling crowded.
Place smaller accents like edible silver spheres and character cutouts at the very base of the cake to ground the design and fill empty space on the cake board.
8. Vintage Cameo Ruffle Tier
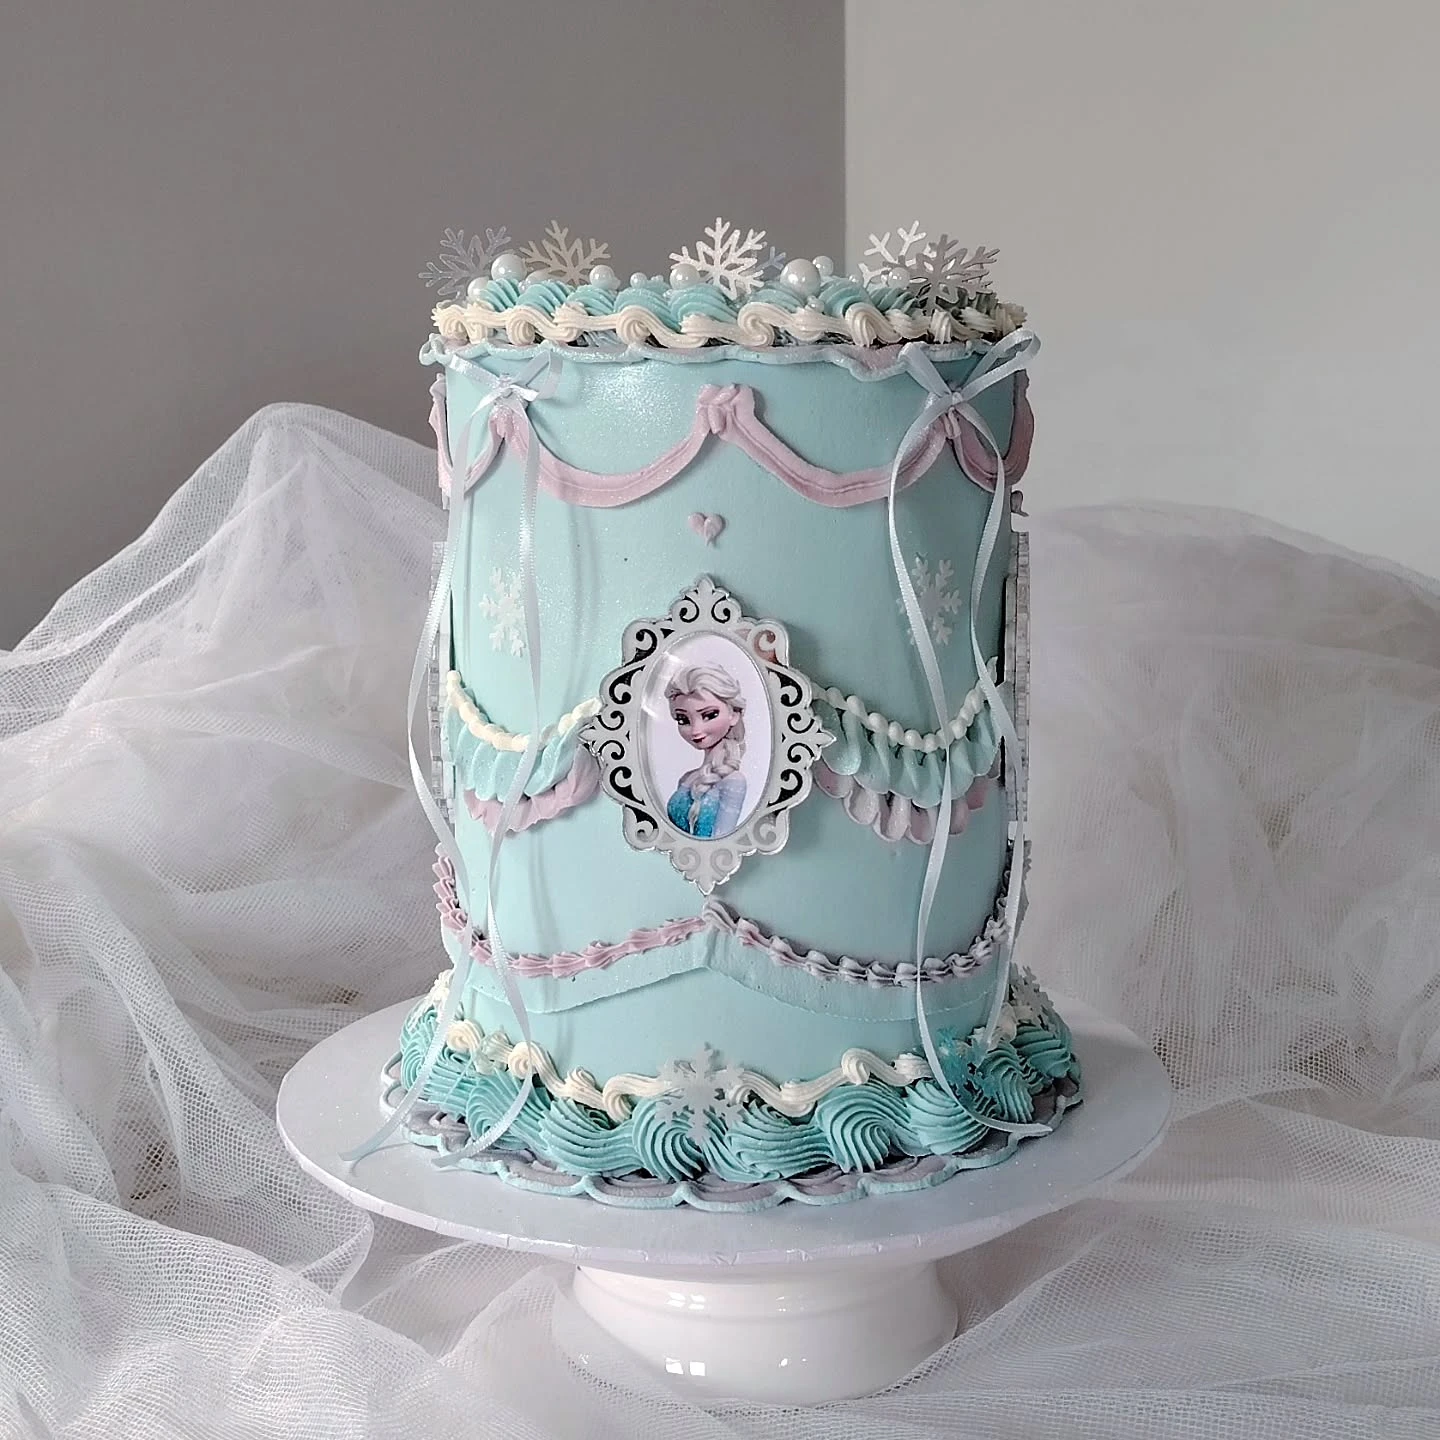
Credit: @thelittleshopoftoppers / Instagram
Use vintage piping techniques to create a regal, dress-like texture on a tall cake.
The combination of ruffled swags and a framed character portrait gives a sophisticated, Victorian-inspired look to a child’s party theme.
Secure thin satin ribbons to the top edge with a dot of frosting to add movement and a soft, fabric-like finish to the display.
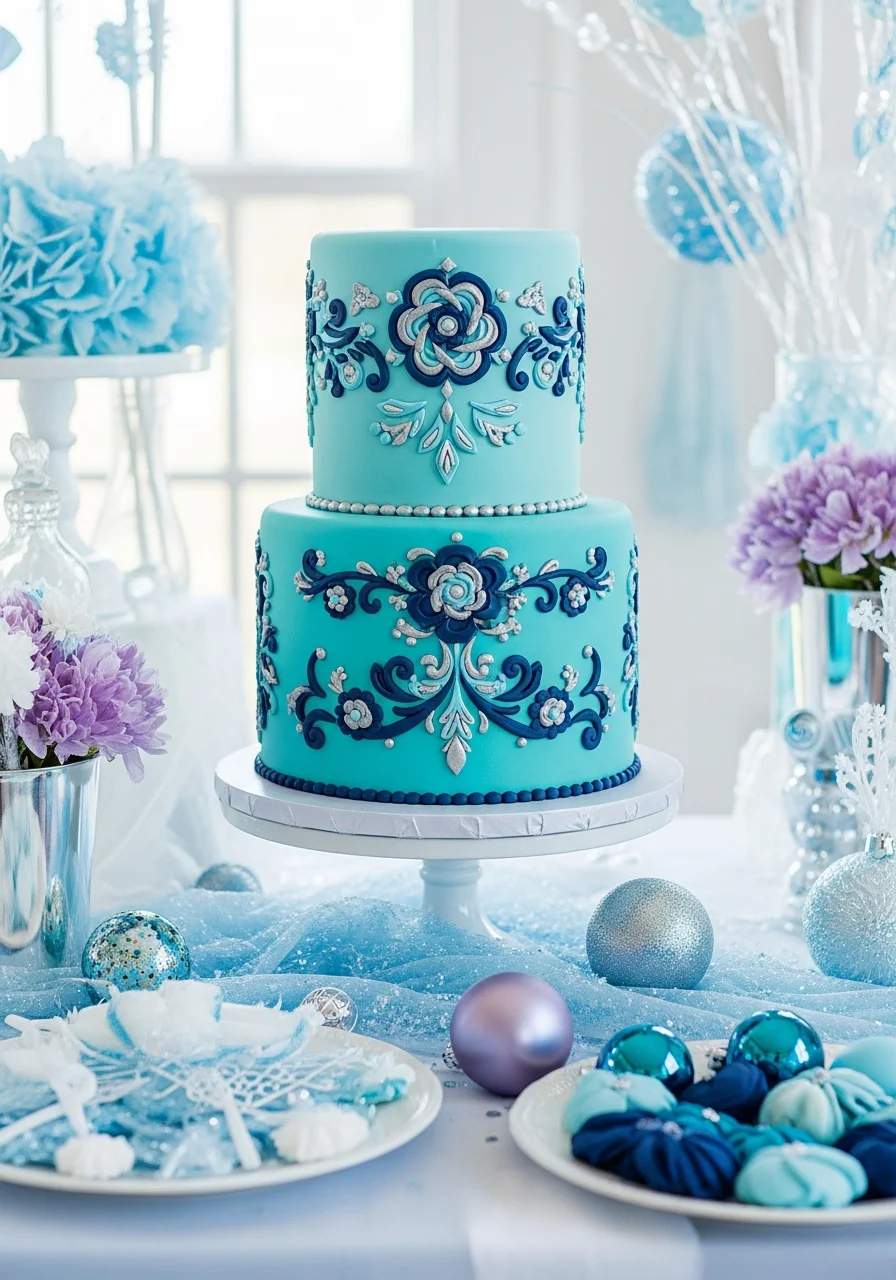
9. Intricate Pastel Lambeth Piping

Credit: @disneyfrozen / Instagram
Elevate a standard round cake by layering traditional Lambeth-style piping with a central character print for a classic royal look.
The multi-layered ruffles and swags create a vintage elegance that mimics the intricate details of palace architecture.
Use a star tip for the shell borders and a petal tip for the ruffles, alternating between sky blue and lavender frosting to achieve a soft, multi-tonal effect.
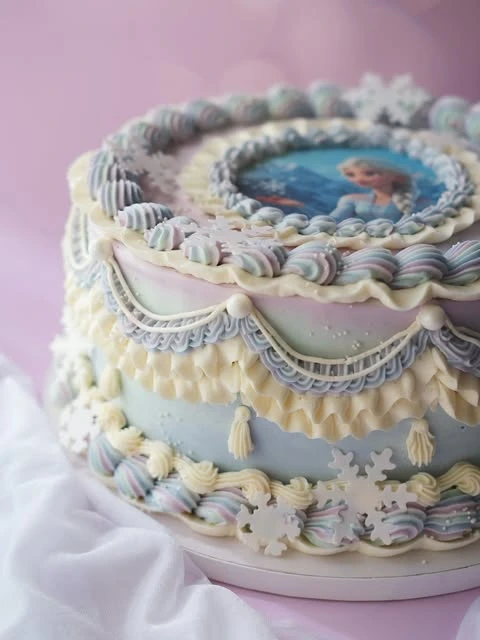
Credit: @disneyfrozen / Instagram
Add dimension to the cake’s profile by using a petal tip to create vertical ruffles that simulate the flow of a gown.
Focusing on the side-profile details ensures the design remains visually interesting from every angle of the dessert table.
Space the frosting swags evenly around the circumference and finish with small white sugar pearls at each intersection for a polished, jewelry-inspired appearance.
10. Heart Shaped Elsa Portrait
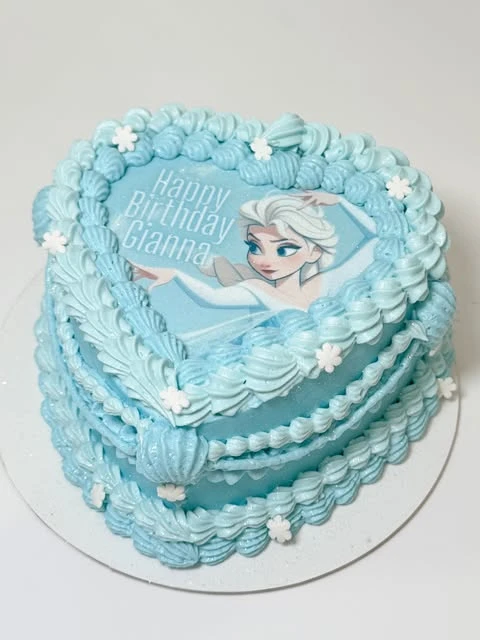
Credit: @disneyfrozen / Instagram
Create a vintage-style heart cake by framing a character portrait with dense buttercream ruffles.
Layering multiple rows of shell piping in sky blue provides a textured border that secures the edible image while maintaining a clean finish.
Place the cake on a white pedestal to contrast with the blue frosting, and scatter small sugar snowflakes across the piping to add dimension without cluttering the design.
11. Sharp Geometric Mountain Peaks

Credit: @cake_boutique.by.lele / Instagram
Use flat, triangular fondant cutouts to create a layered mountain effect around the perimeter of a single-tier cake.
This technique adds height and a thematic backdrop for character toppers without the need for complex multi-tiered construction.
Cut triangles in varying heights and shades of blue, then press them directly into the buttercream while it is still soft to ensure they stay upright.
12. Two-Tone Character Pillar
Credit: @toppers.247 / Instagram
Design a tall, single-tier cake using a vertical color blend and sharp decorative accents to create an elegant, statuesque centerpiece.
A smooth transition between lavender and teal offers a fresh alternative to standard palettes while maintaining a crisp, icy look.
Use paper fans or sugar shards at the top to add height and mimic the look of frozen peaks without complex structural engineering.
Whimsical Olaf Designs
13. Snowball Sphere Cake
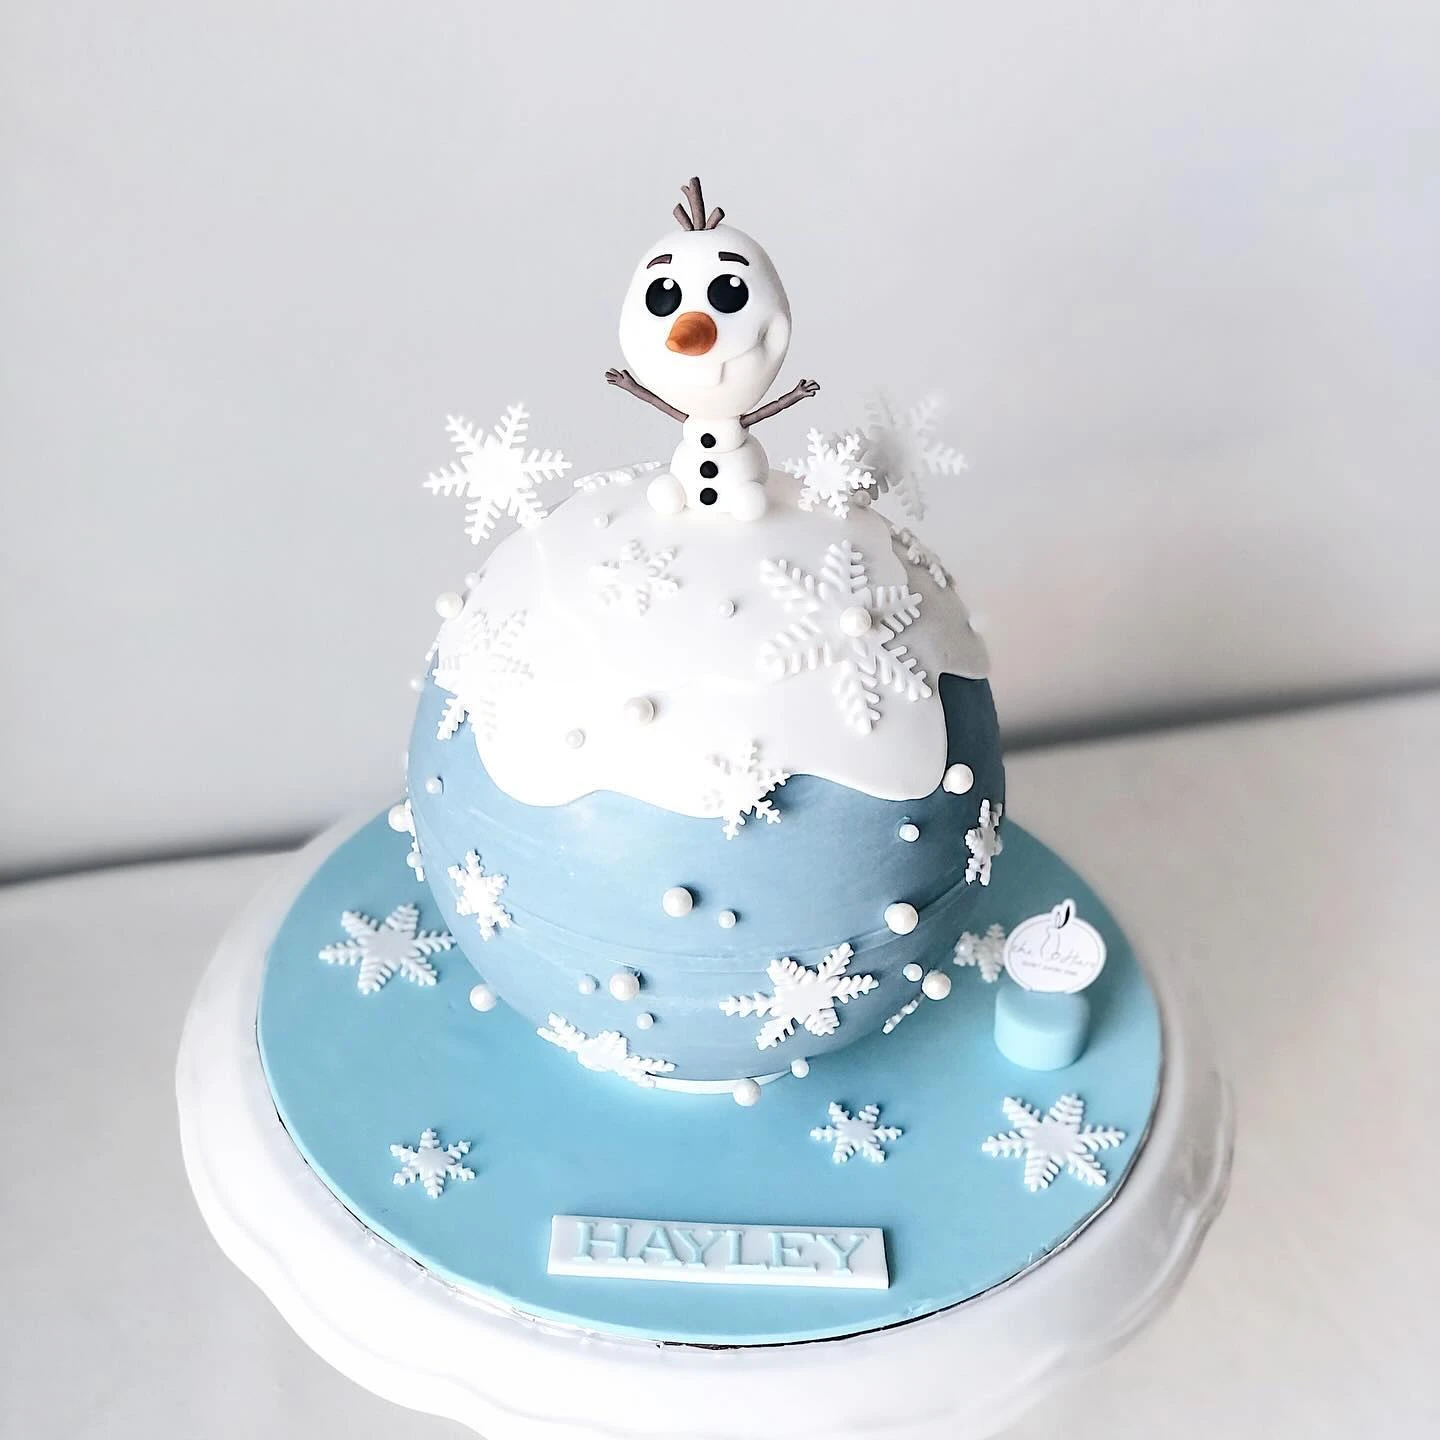
Credit: @thehare_sbh / Instagram
Shape the cake into a perfect sphere to represent a giant snowball for a character topper to sit on.
The round geometry is playful and provides a unique canvas for white chocolate drips that look like melting snow.
Use a crumb coat and a flexible plastic scraper to smooth the frosting on the curved surface before adding a thick royal icing drip over the top.
14. Three-Tiered Sculpted Olaf Body
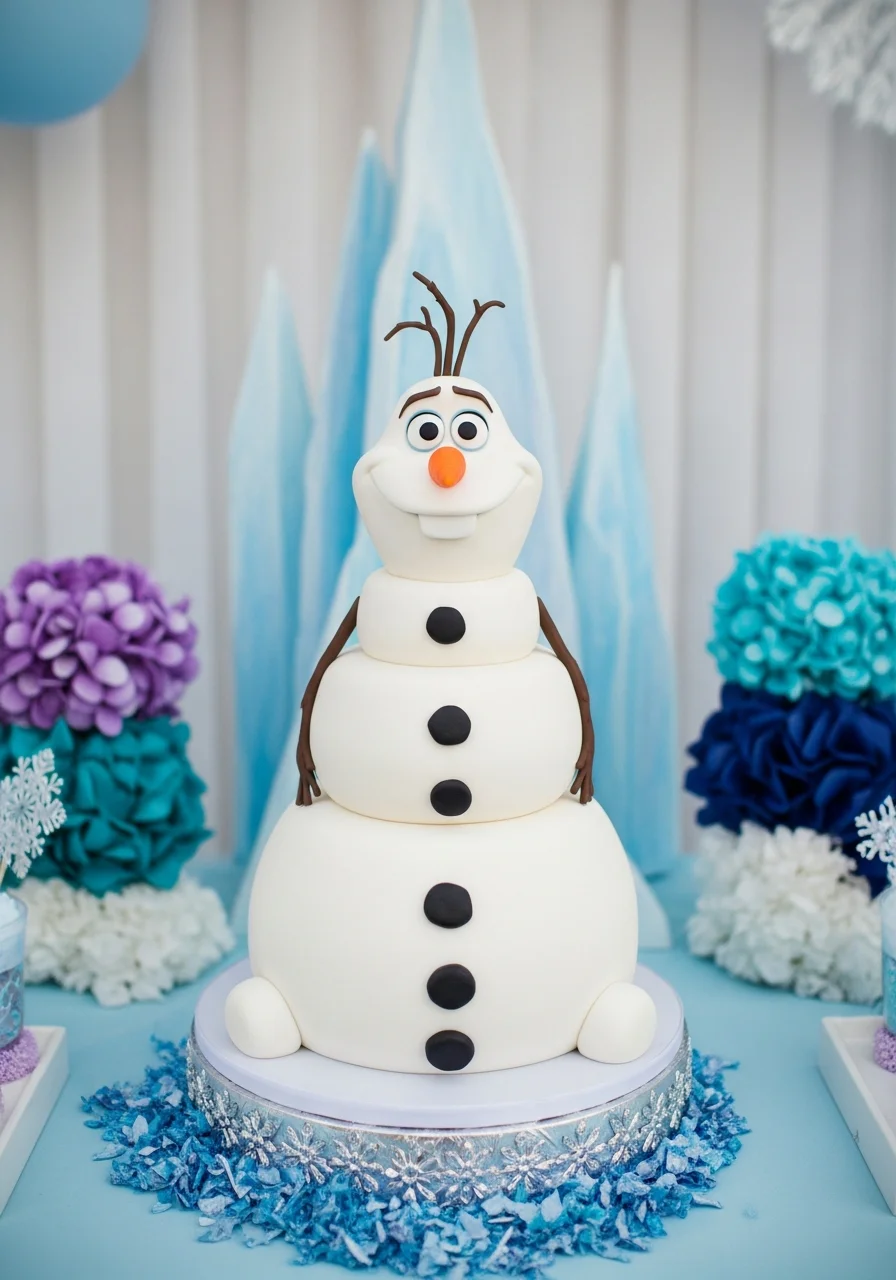
Stack three spherical cake tiers of varying sizes to create a three-dimensional representation of the character.
This design serves as a focal point for the dessert table and provides a recognizable silhouette without requiring complex fondant modeling.
Insert a central dowel through all three tiers to maintain structural integrity and prevent the spheres from shifting.
15. Olaf’s ‘In Summer’ Beach Scene
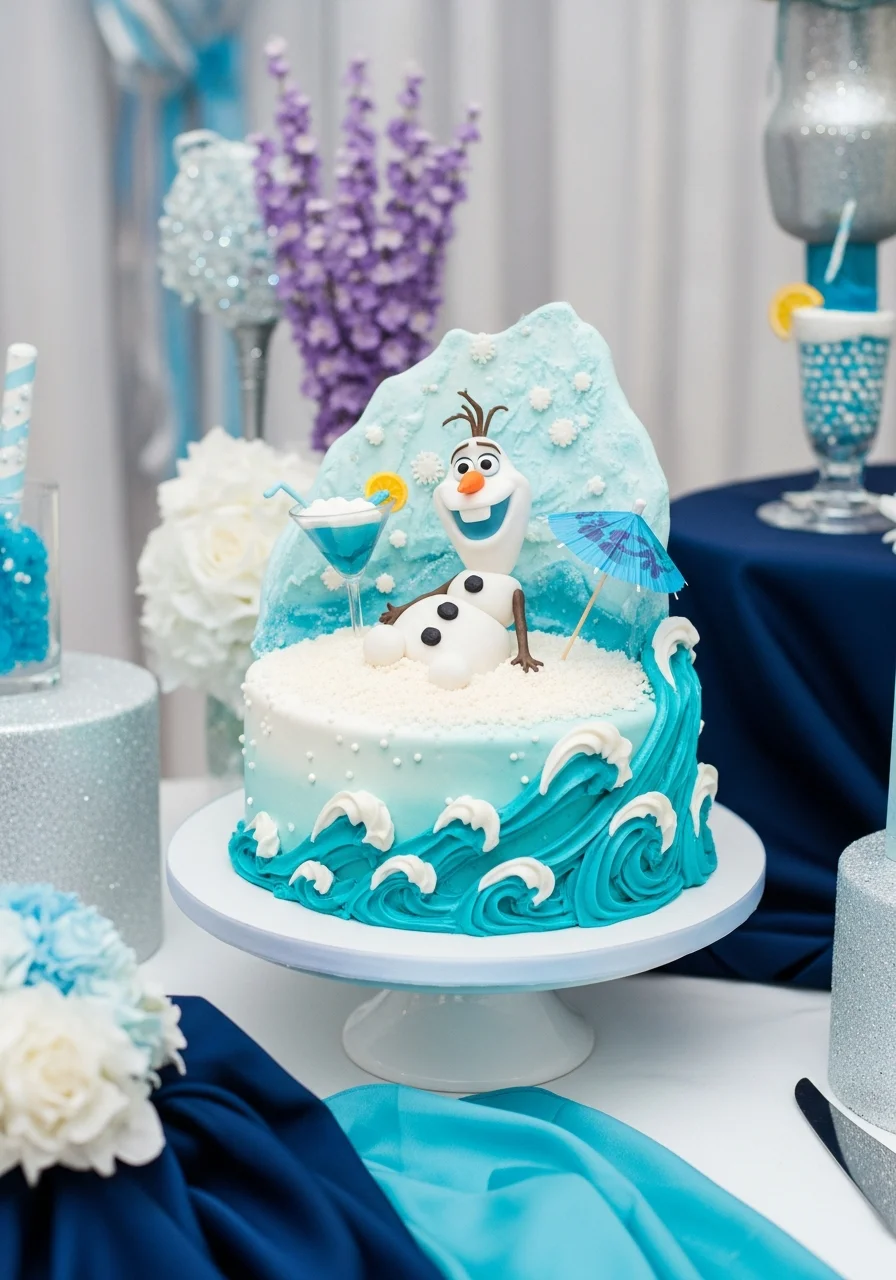
Feature the character lounging on a sugar-sand beach to offer a humorous contrast to the winter theme.
It adds a splash of warmth and color to the party palette while referencing a popular movie moment.
Use crushed graham crackers or light brown sugar to create the appearance of sand on top of the cake board.
Modern Ombre & Snowflake Minimalist
16. Stylized Crown Topper
Credit: @thehare_sbh / Instagram
Use geometric accents like spheres and a clean-edged crown for a contemporary winter look.
The round snowball elements provide a modern alternative to traditional piped decorations and help fill empty space on the cake board.
Use lightweight foam or hollow chocolate spheres painted with edible silver luster dust to prevent the accents from sinking into the buttercream.
17. Ombre Base Character Display
Credit: @belbearbakes / Instagram
Use a tall, single-tier cake to create a vertical canvas for character figurines and paper decorations.
A smooth blue-to-white ombre buttercream finish creates a crisp backdrop that highlights colorful figurines and glittery silver snowflakes.
Secure lightweight cardstock fans and castle silhouettes into the top of the cake to add significant height without the need for additional cake tiers.
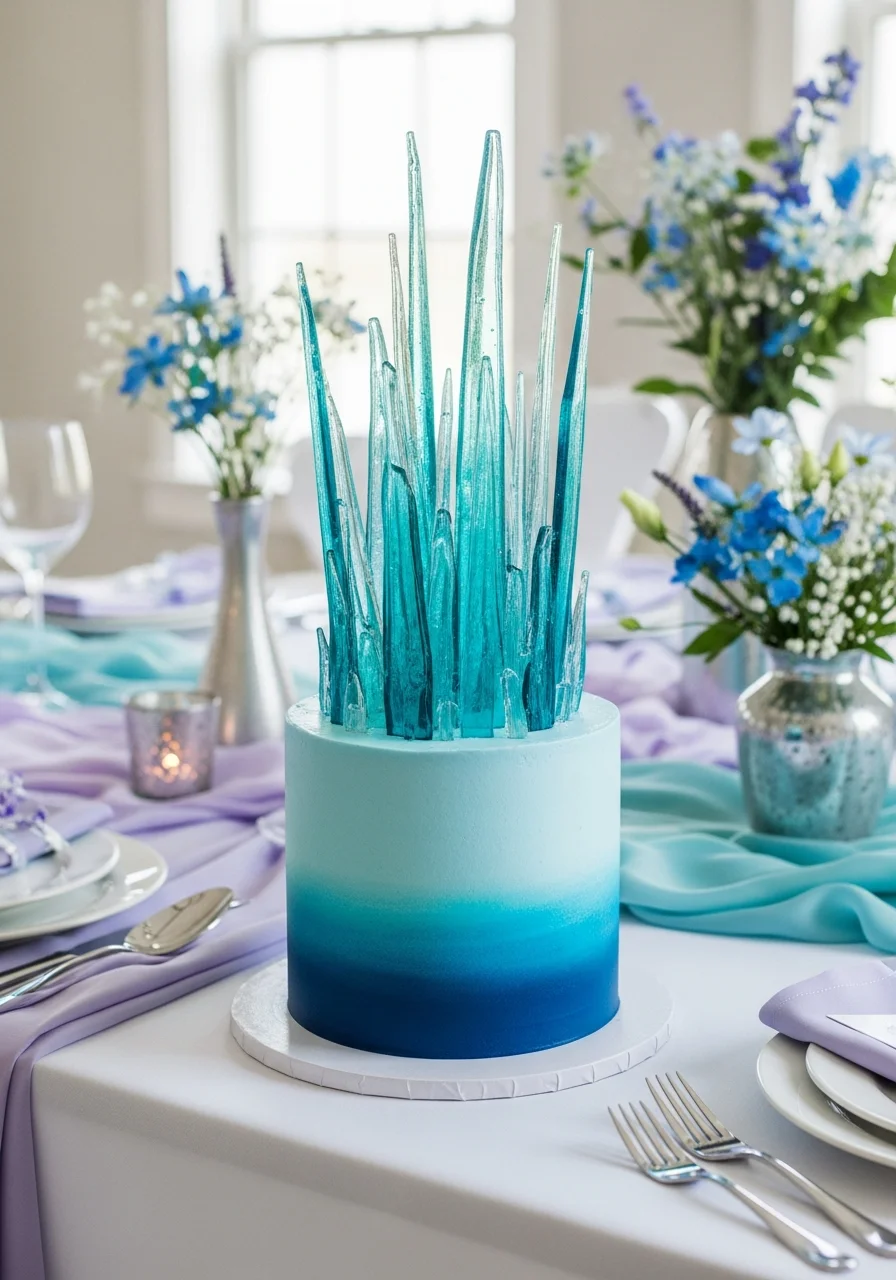
18. Navy to Sky Blue Vertical Ombre

Apply a seamless vertical gradient of blue shades to the cake exterior.
The gradient effect adds depth and visual interest without the need for heavy character decorations.
Apply the different shades in horizontal bands first, then use a bench scraper to blend them vertically for a smooth transition.
19. White-on-White Snowflake Stencil

Create a subtle, embossed texture using white royal icing over a white fondant base.
This tone-on-tone technique provides a high-end, sophisticated look suitable for older children or milestone birthdays.
Ensure the base fondant is completely dry before applying the stencil to prevent the icing from bleeding.
20. Silver Leaf & Frosted Berry Accents
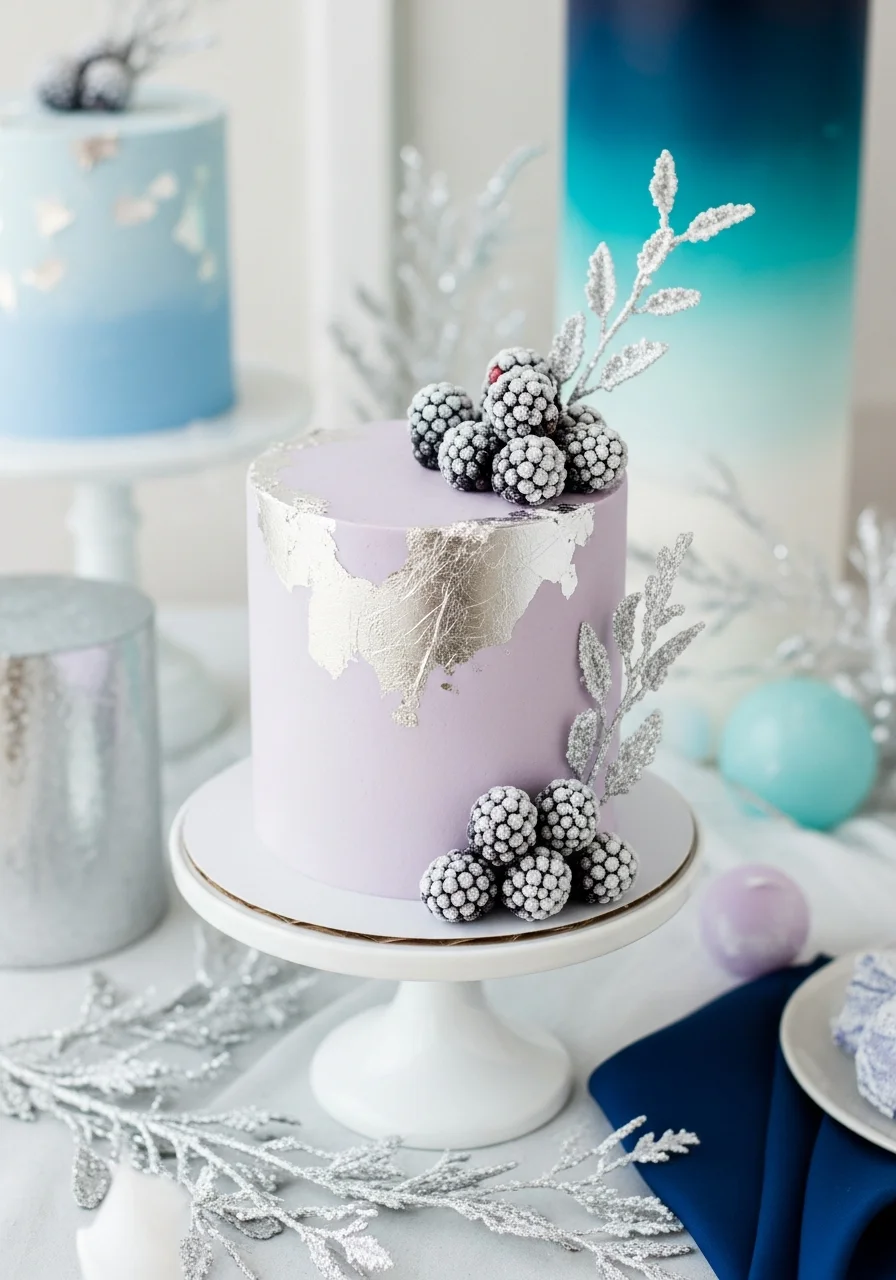
Apply edible silver leaf and sugar-coated berries to a simple cake for a luxury finish.
The metallic accents and textured fruit create an elegant, organic winter look without character figures.
To frost the berries, dip them in egg white or simple syrup and then roll them in granulated sugar.
Rock Candy & Geode ‘Ice’ Cakes
21. Crystalline Ice Sails
Credit: @thehare_sbh / Instagram
Mimic the look of a frozen cavern with translucent, jagged ice sails that wrap around the tier.
These vertical elements add height and a crystalline texture that feels more organic and sophisticated than molded fondant pieces.
Create these sails by melting isomalt or using softened rice paper, then shaping them over a rolling pin to dry in wind-swept, frozen forms.
22. Deep Navy Ice Cavern Geode
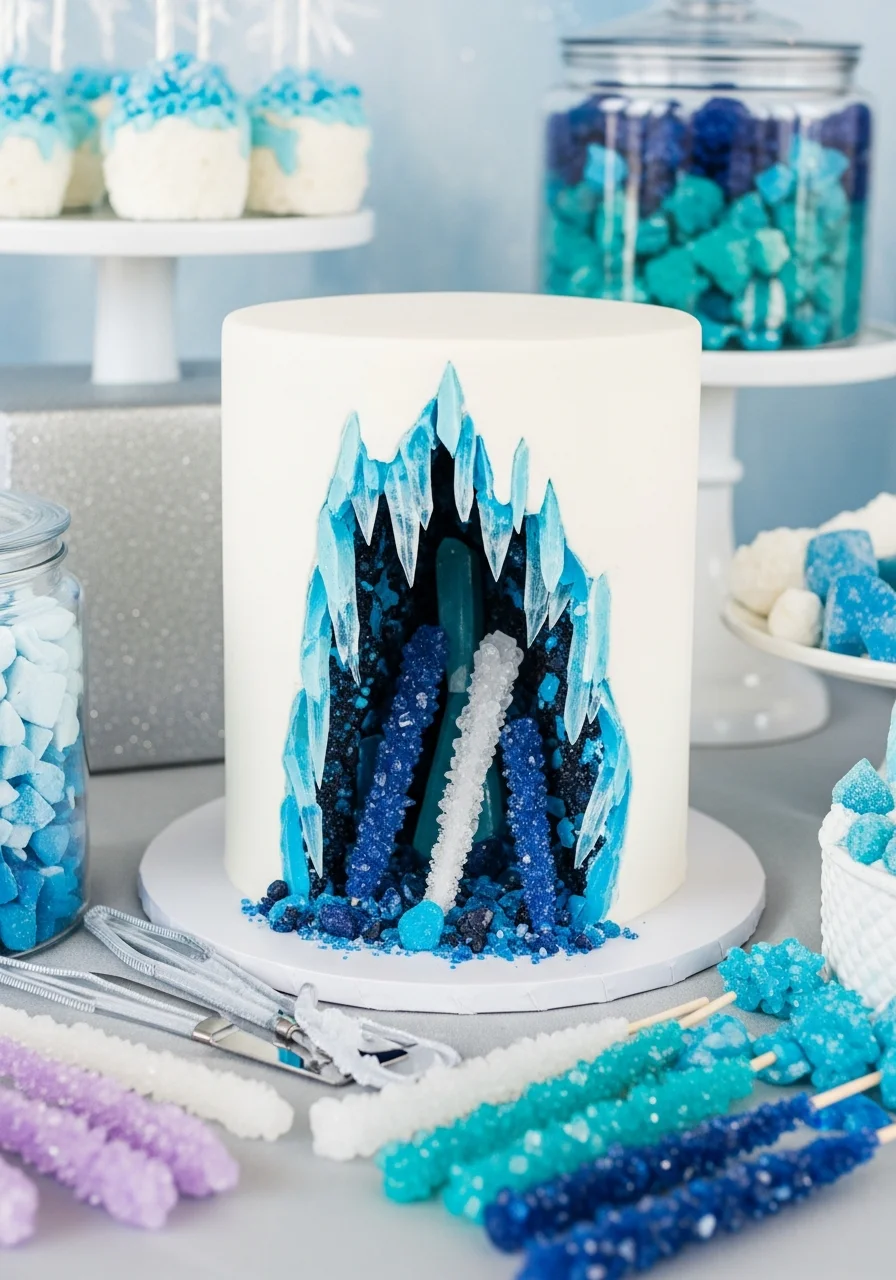
Carve a section out of the cake and fill it with rock candy to resemble a frozen cave.
The jagged crystals provide a realistic ‘ice’ texture that is both edible and visually striking.
Apply a thin layer of frosting to the carved-out area before pressing the rock candy into place to ensure they stick.
23. Shattered Sugar Glass Crown
Top a simple cake with tall, translucent shards of sugar glass to create a dramatic crown effect.
The shards mimic the sharp, crystalline architecture of the ice palace and add significant height to the design.
Make the sugar glass by boiling sugar, water, and corn syrup to the hard-crack stage, then pouring it thin to cool.
Arendelle Castle Tiers
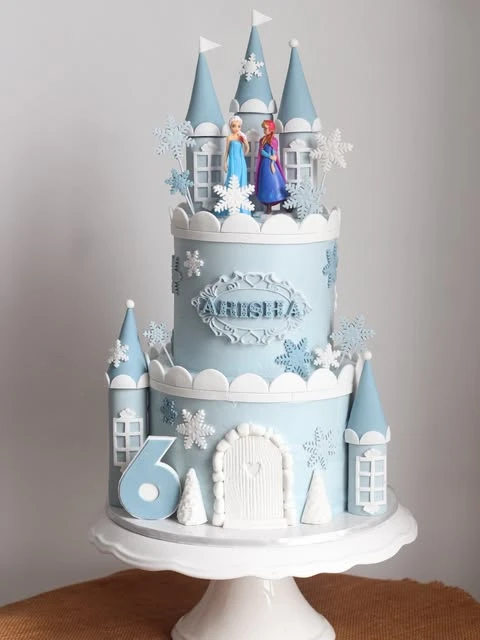
24. Towered Palace Architecture
Credit: @thehare_sbh / Instagram
Build a multi-level cake featuring the iconic spires and balconies of a royal palace.
Architectural details like gold-framed windows and battlements create a sense of scale and grandeur that anchors a large dessert table.
Use cake pops or small fondant-covered cones for the tower tops to keep the weight manageable on the upper tiers and prevent leaning.
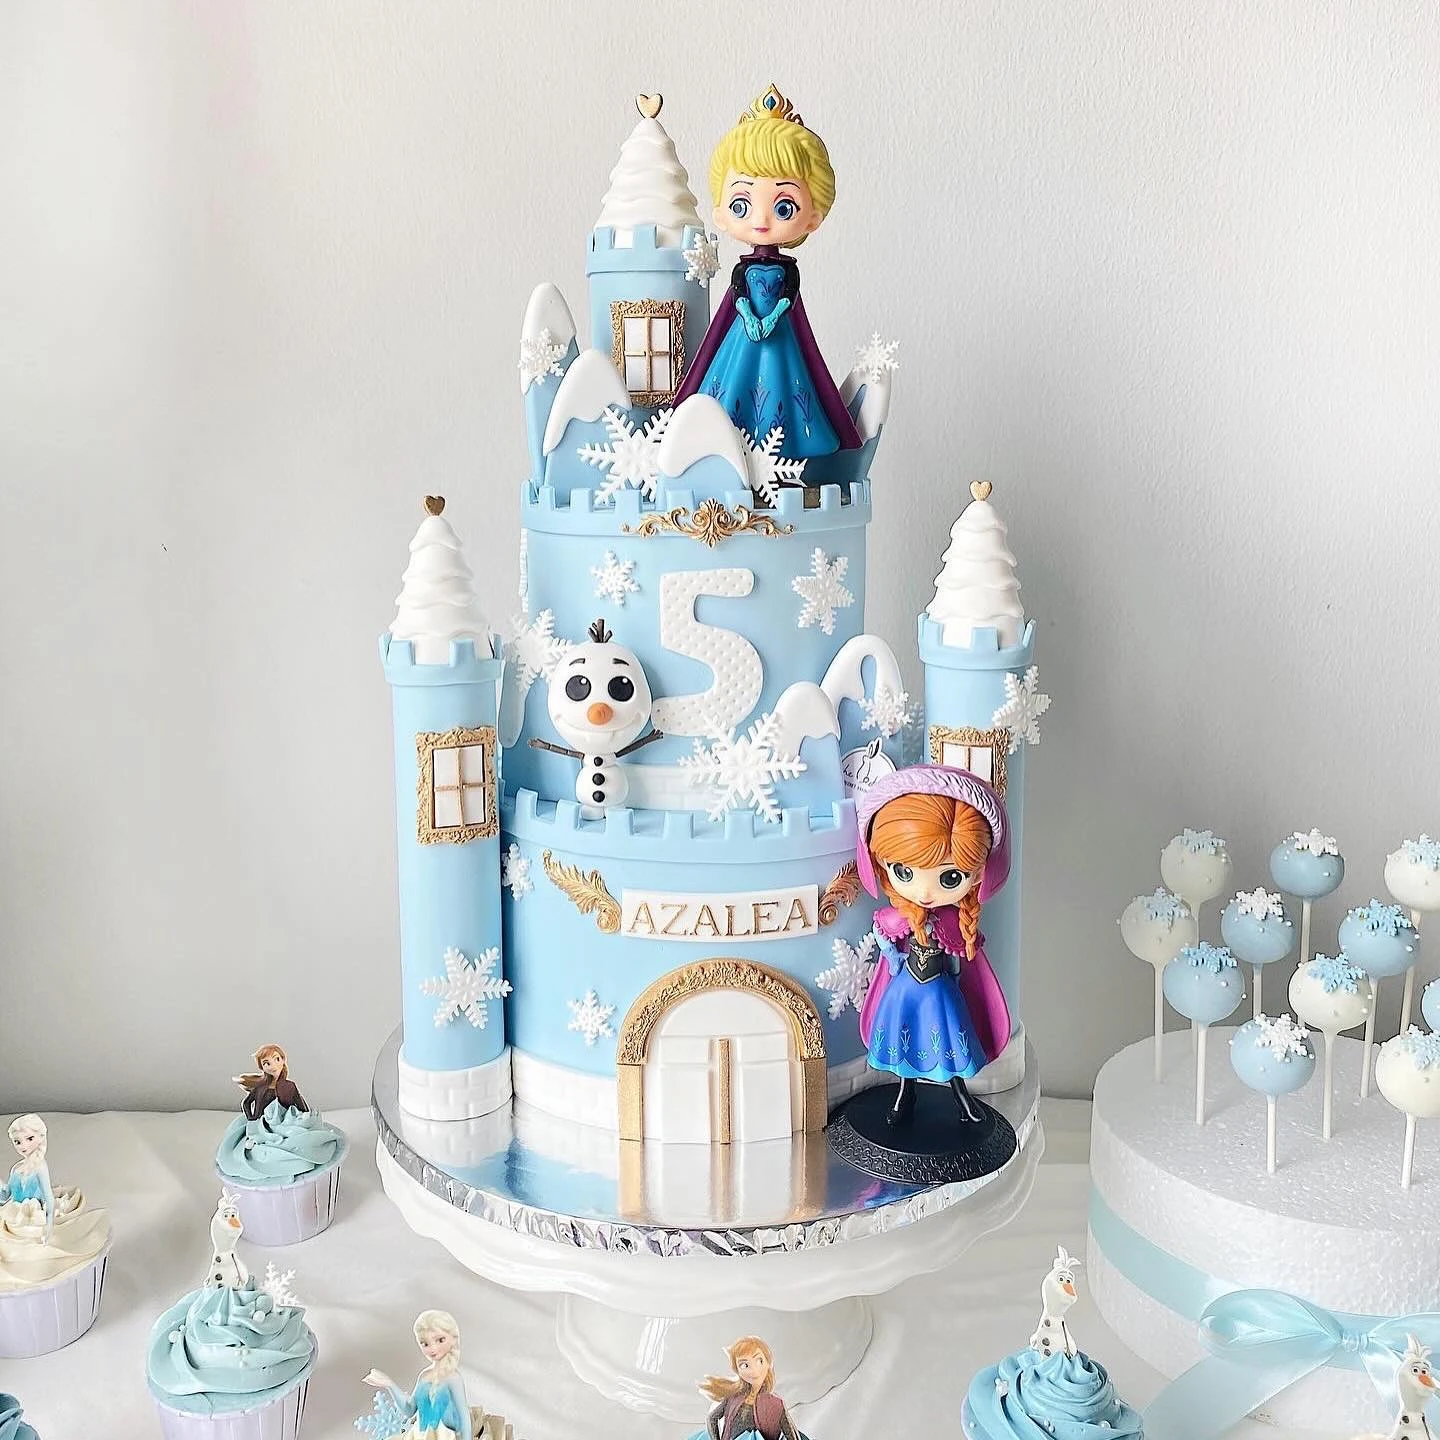
25. Tiered Royal Fortress Design
Credit: @craveitbyyaya / Instagram
Build a multi-story fortress using light blue fondant and white scalloped borders to define each level.
The high-contrast white trim against the soft blue background emphasizes the height of the tiers, making the cake look more imposing.
Use a circular cookie cutter to punch out consistent half-moon shapes for the white trim to ensure a uniform look across all tiers.
Credit: @craveitbyyaya / Instagram
Personalize the design with a central name plaque and character figurines to ground the theme.
Placing the name in a decorative frame at the center of the top tier makes the birthday child the focus, while official figurines ensure the characters look accurate.
Secure the figurines with a small dab of royal icing or melted chocolate to prevent them from shifting during transport or display.
26. Minimalist Castle Silhouette Topper
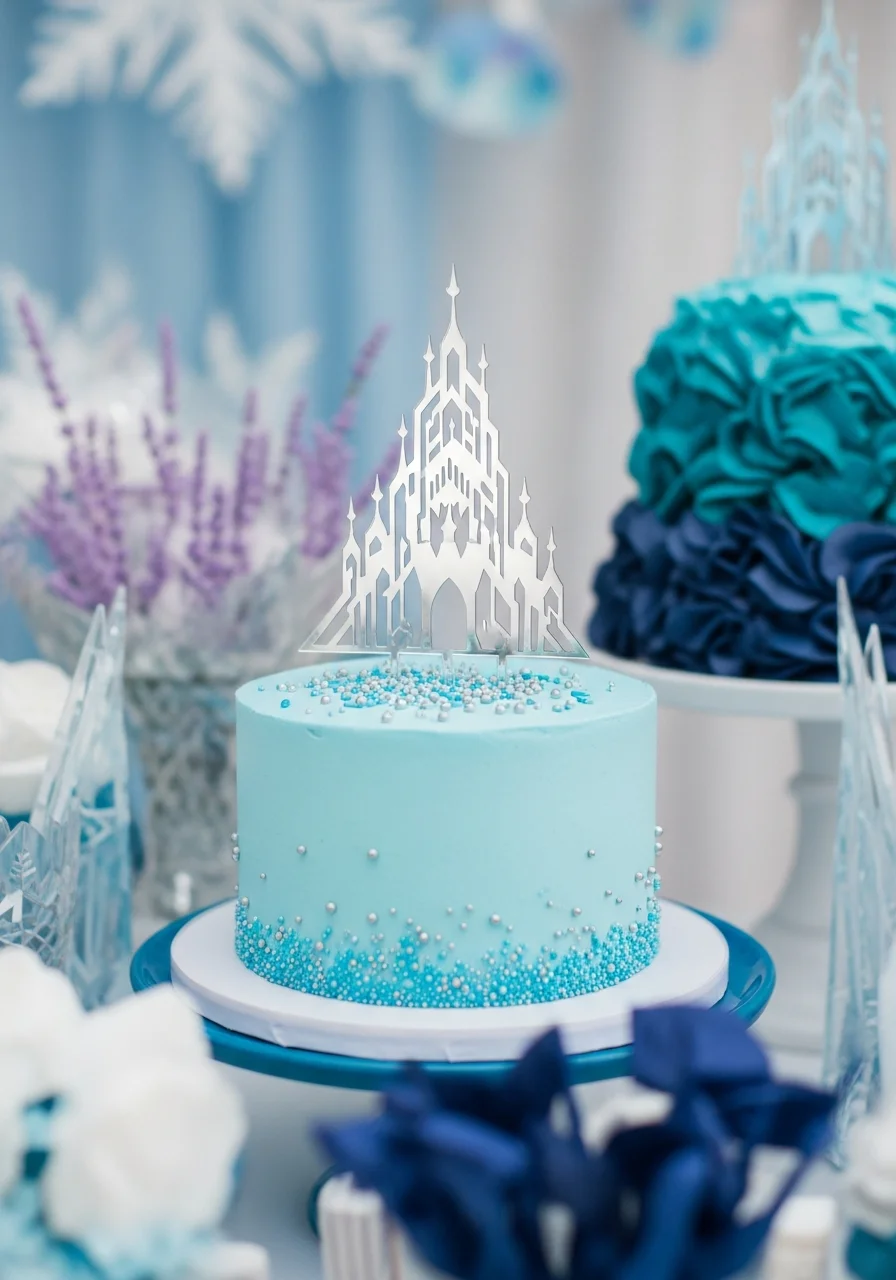
Use a sharp, clean silhouette topper on a single-tier cake for a modern look.
This approach is ideal for amateur bakers who want a professional appearance without carving complex structures.
Choose a silver acrylic or cardstock topper and pair it with silver pearl sprinkles to coordinate the metallic accents.
27. Ice Palace Spiral Staircase
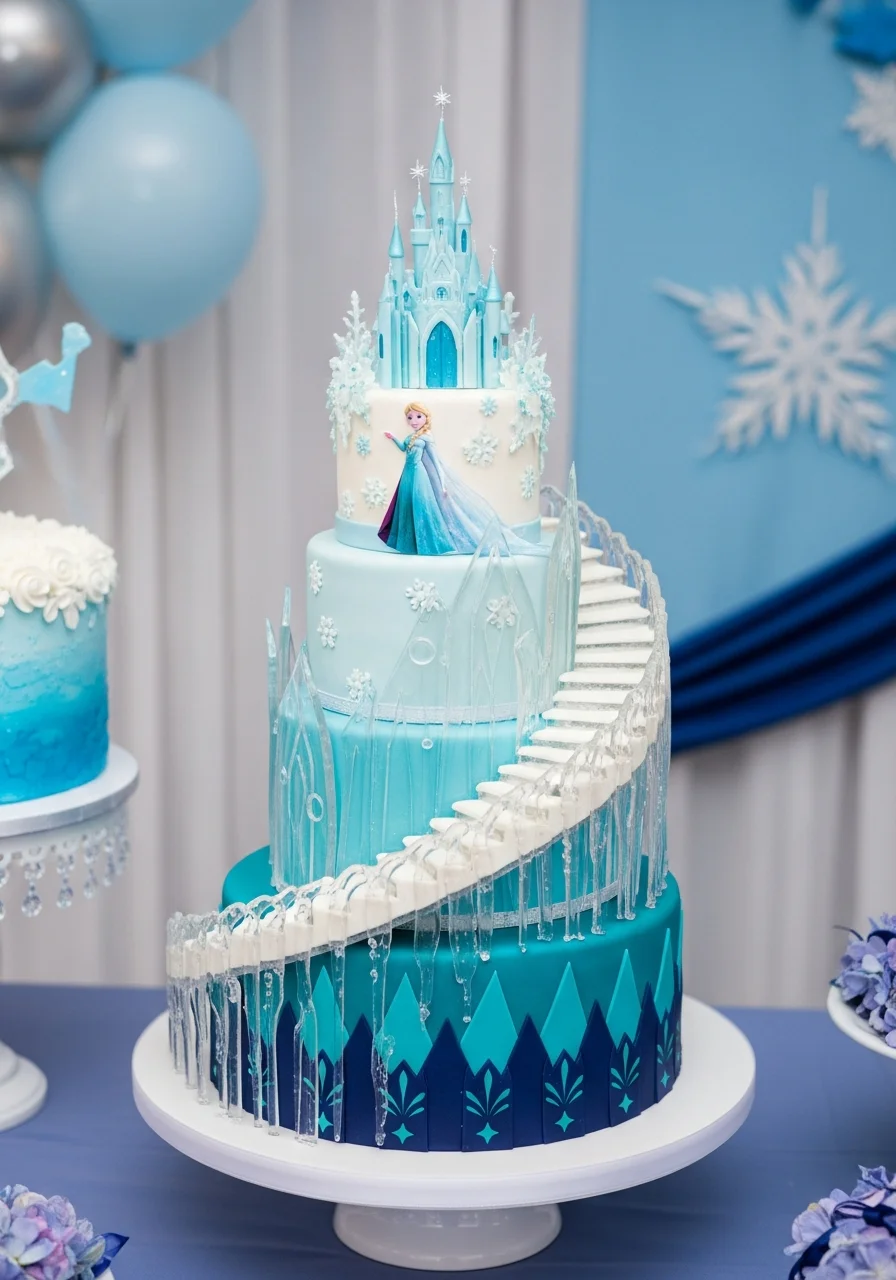
Wrap a winding staircase made of clear sugar around the tiers of the cake.
It recreates a specific architectural detail from the film, adding a dynamic sense of movement to the design.
Use clear isomalt to create the staircase for a glass-like appearance that won’t yellow over time.
Anna-Inspired Floral Patterns
28. Ruffled Lyric Heart Design
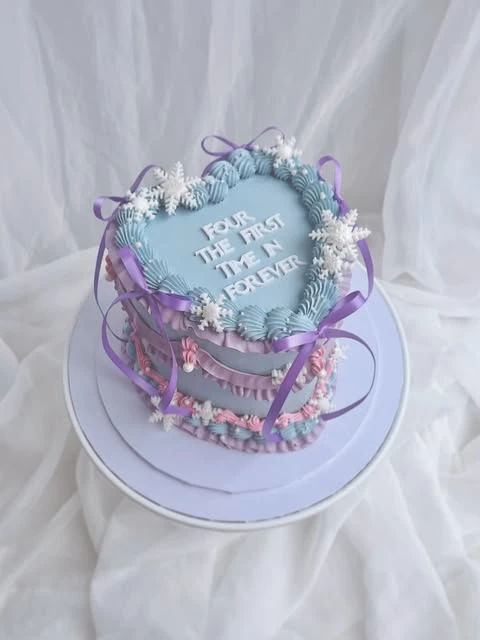
Credit: @studiofour_shop / Instagram
Incorporate a play on words using movie lyrics to highlight the birthday age.
A pun like ‘Four the first time in forever’ provides a clever thematic link that feels custom and thoughtful.
Apply thin satin ribbons and delicate sugar snowflakes to a heart-shaped base to achieve a vintage-inspired look without complex sculpting.
29. Teal Rosemaling Embroidery Piping
Incorporate traditional Norwegian folk art patterns using intricate piping techniques.
It honors the character of Anna and the cultural setting of the story through detailed floral motifs.
Use a small round piping tip and a steady hand to replicate the teardrop shapes characteristic of Rosemaling.
30. Nordic Winter Bloom Tier
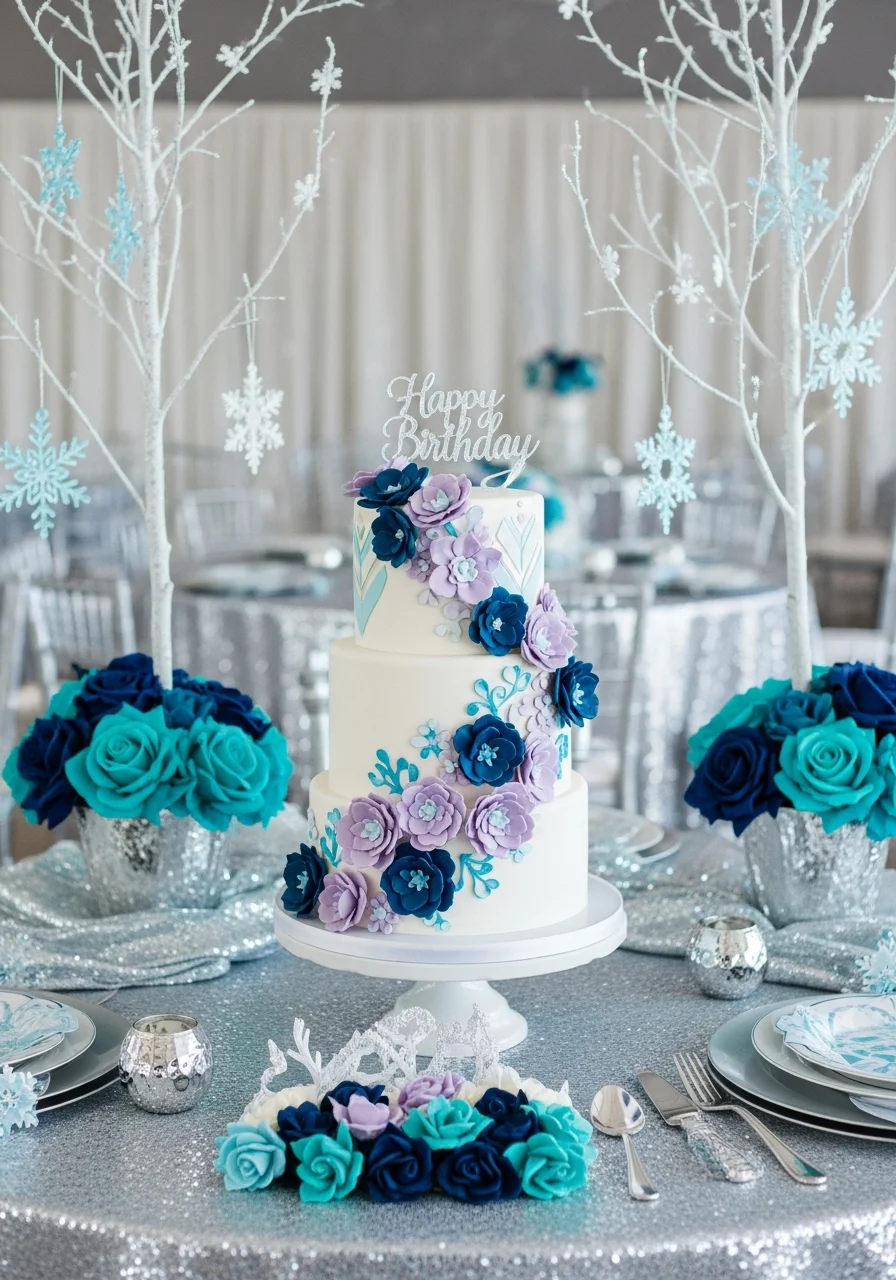
Decorate the cake with stylized sugar flowers in shades of lavender and navy.
This adds a natural, organic element to the icy theme and softens the overall aesthetic.
Place the sugar flowers in small clusters rather than covering the entire cake to maintain a balanced look.
Pull-Apart Cupcake Cakes
31. Giant Snowflake Cupcake Array
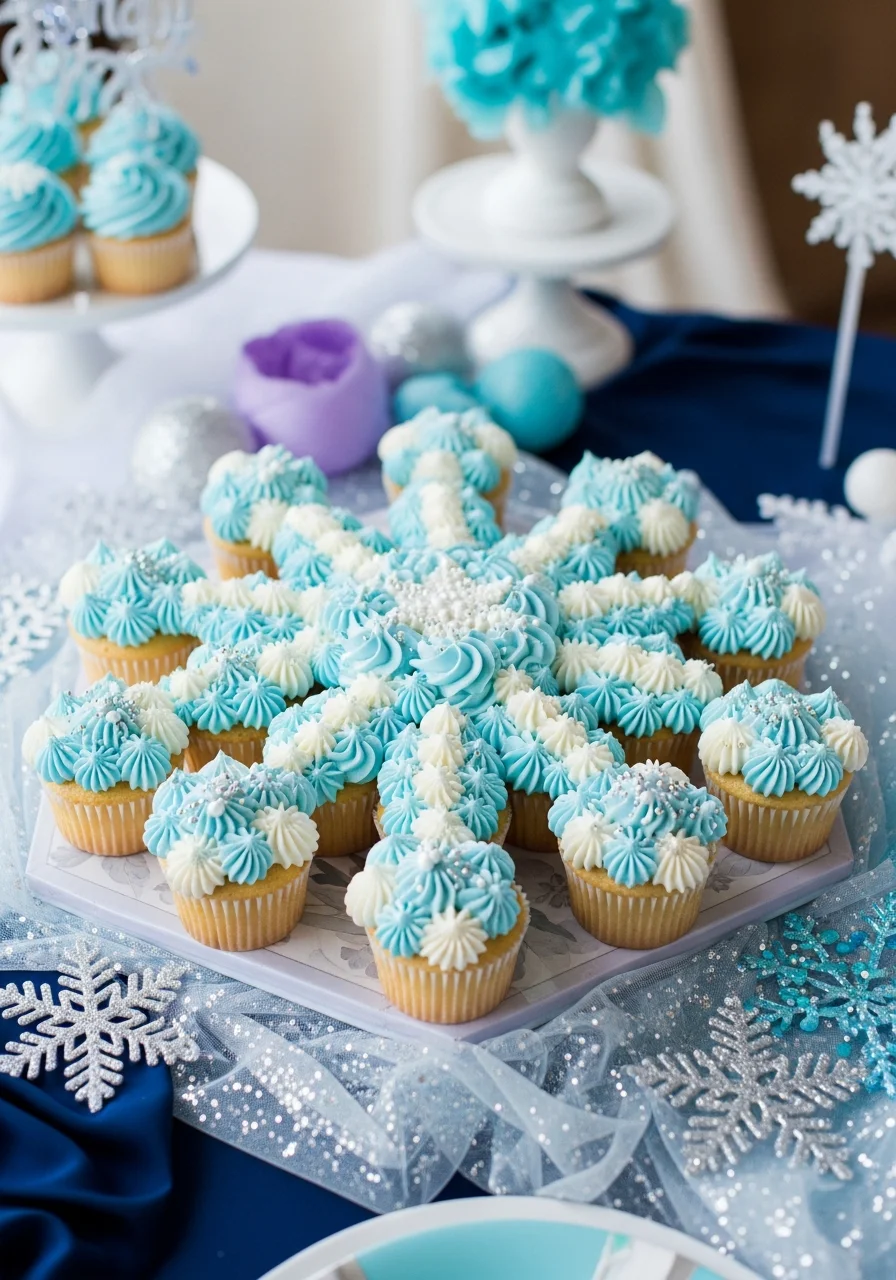
Arrange cupcakes in a hexagonal pattern to form the shape of a large snowflake.
This is a practical solution for large parties as it requires no cutting and allows for easy distribution.
Secure the cupcakes to the board with a small dab of frosting to prevent them from moving while you apply the top layer of icing.
32. Elsa’s Ombre Cape Layout
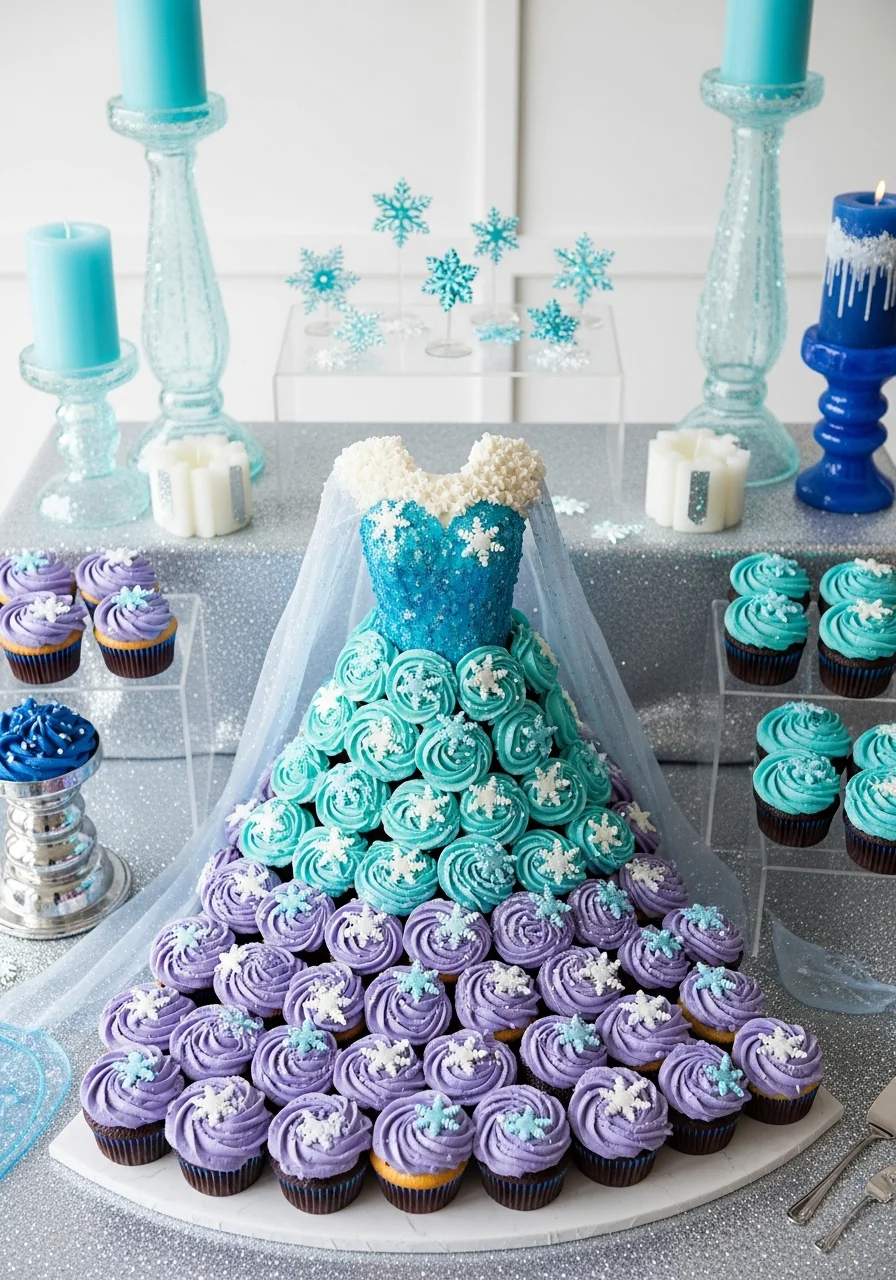
Position cupcakes to outline the silhouette of a flowing dress and cape.
It creates a large-scale visual impact using a simple layout that is easy to assemble.
Use a variety of piping tips to create different textures for the ‘fabric’ of the dress and the ‘ice’ of the cape.
Winter Flavor Pairings
33. White Chocolate Peppermint Bark Garnish
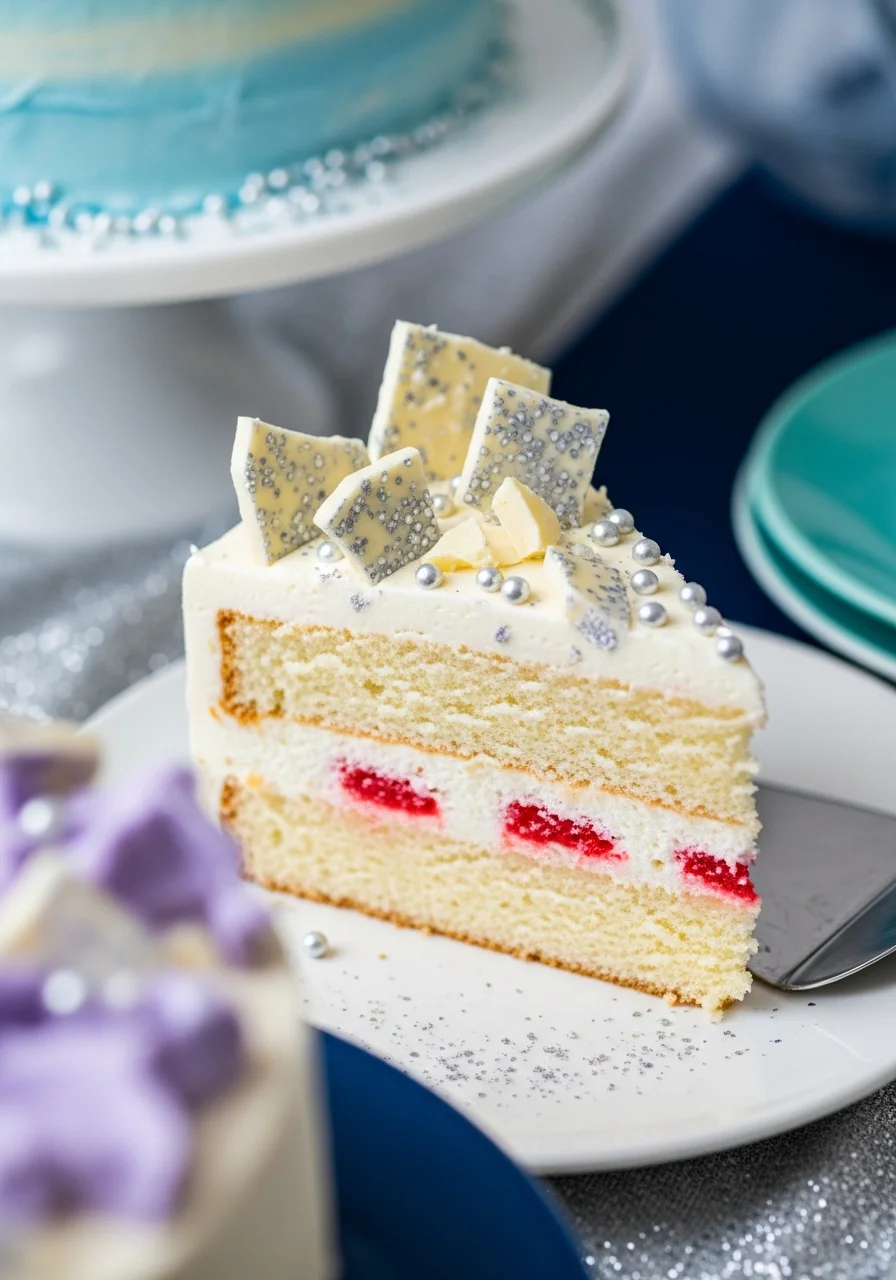
Pair a white chocolate cake with peppermint filling for a flavor profile that matches the winter theme.
The cool sensation of peppermint reinforces the ‘frozen’ theme through taste.
Garnish the top of the cake with large chunks of peppermint bark to give guests a hint of the flavor inside.
34. Vanilla Bean ‘Snow’ Dusted Sponge
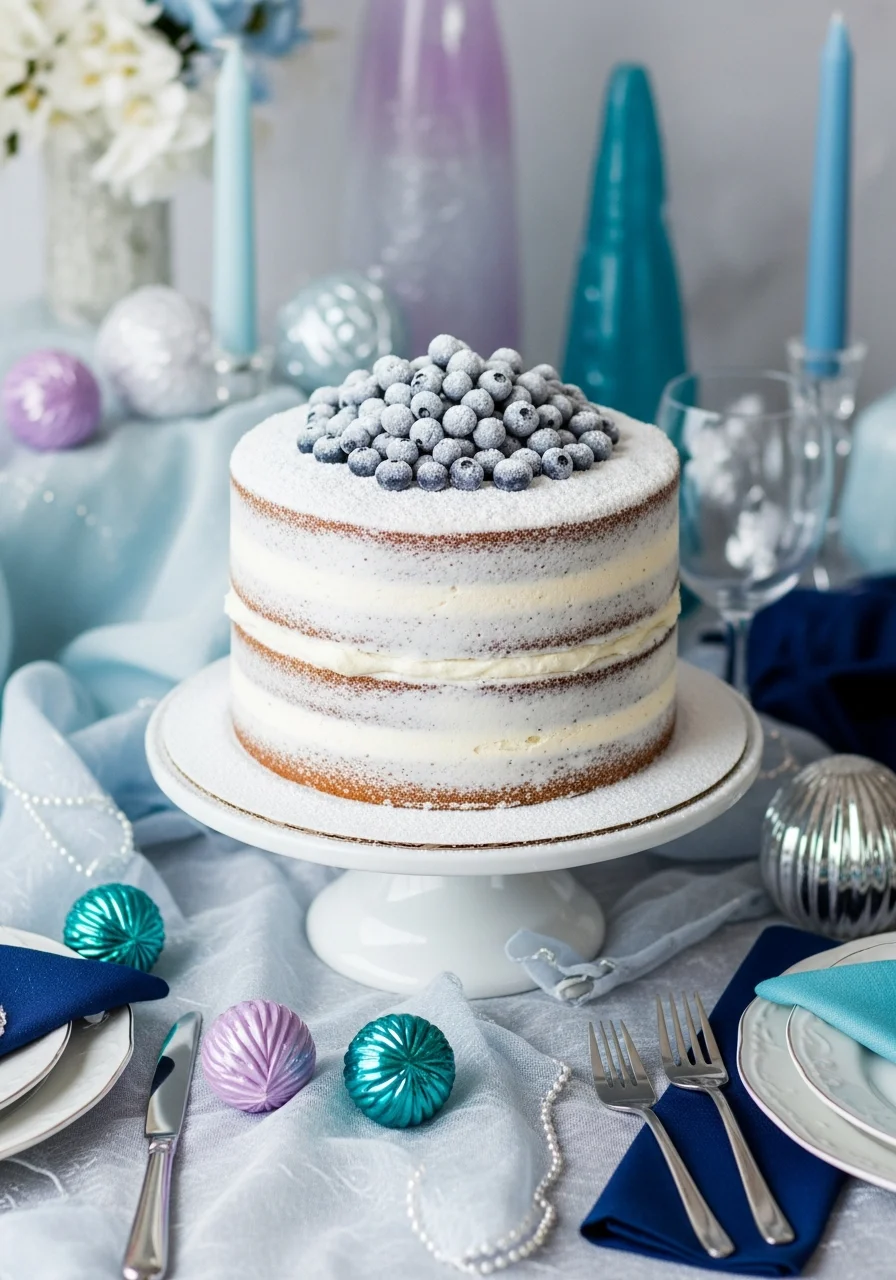
Use a heavy dusting of powdered sugar over a vanilla bean sponge for a rustic, snowy appearance.
It provides a less-sweet alternative to fondant while maintaining the white, wintry aesthetic.
Sift the powdered sugar just before serving to ensure the ‘snow’ looks fresh and fluffy.
35. Blueberry Lemon ‘Ice’ Filling
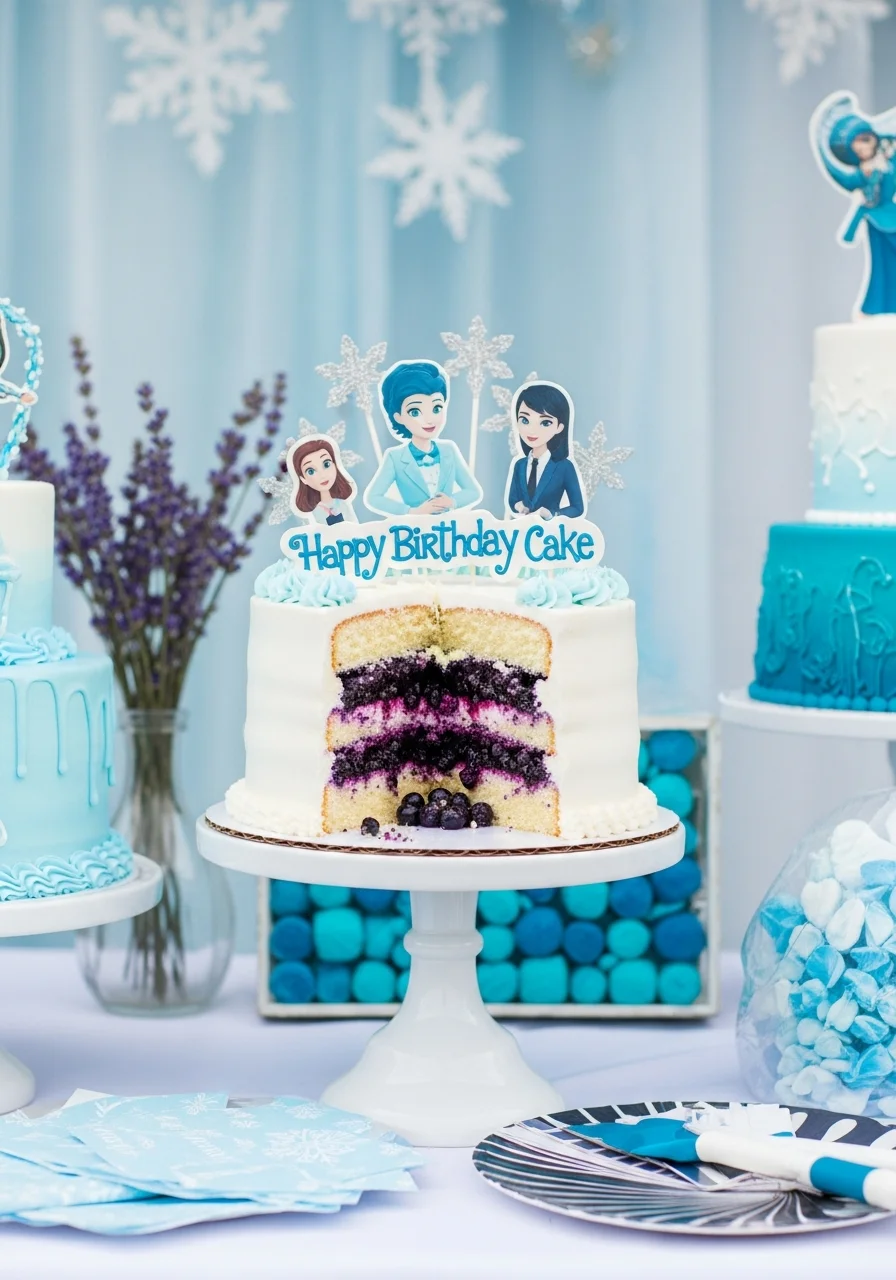
Combine a bright lemon sponge with a deep blue blueberry compote filling.
The natural deep navy of the blueberries fits the color scheme perfectly without the need for extra food coloring.
Thicken the blueberry compote with a little cornstarch to ensure it stays between the cake layers when sliced.
This post may contain affiliate links: full affiliate disclosure.