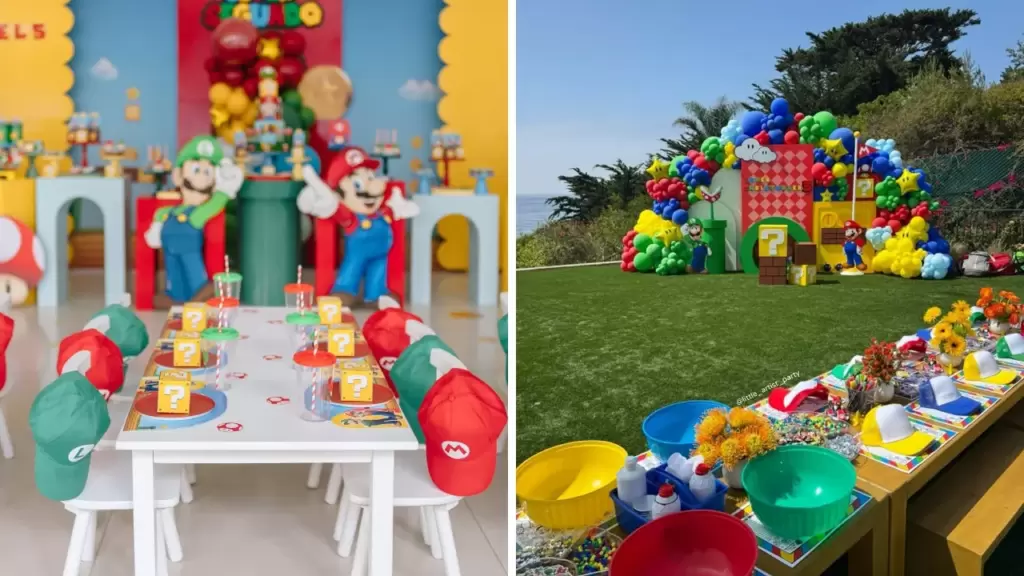
Bringing the Mushroom Kingdom to life requires a blend of vibrant colors, iconic game elements, and interactive play.
This guide provides practical ways to transform any space into a video game world using simple DIY decorations, themed snacks, and engaging activities that appeal to fans of all ages.
Entrance and Atmosphere
1. Mushroom Kingdom Backdrop
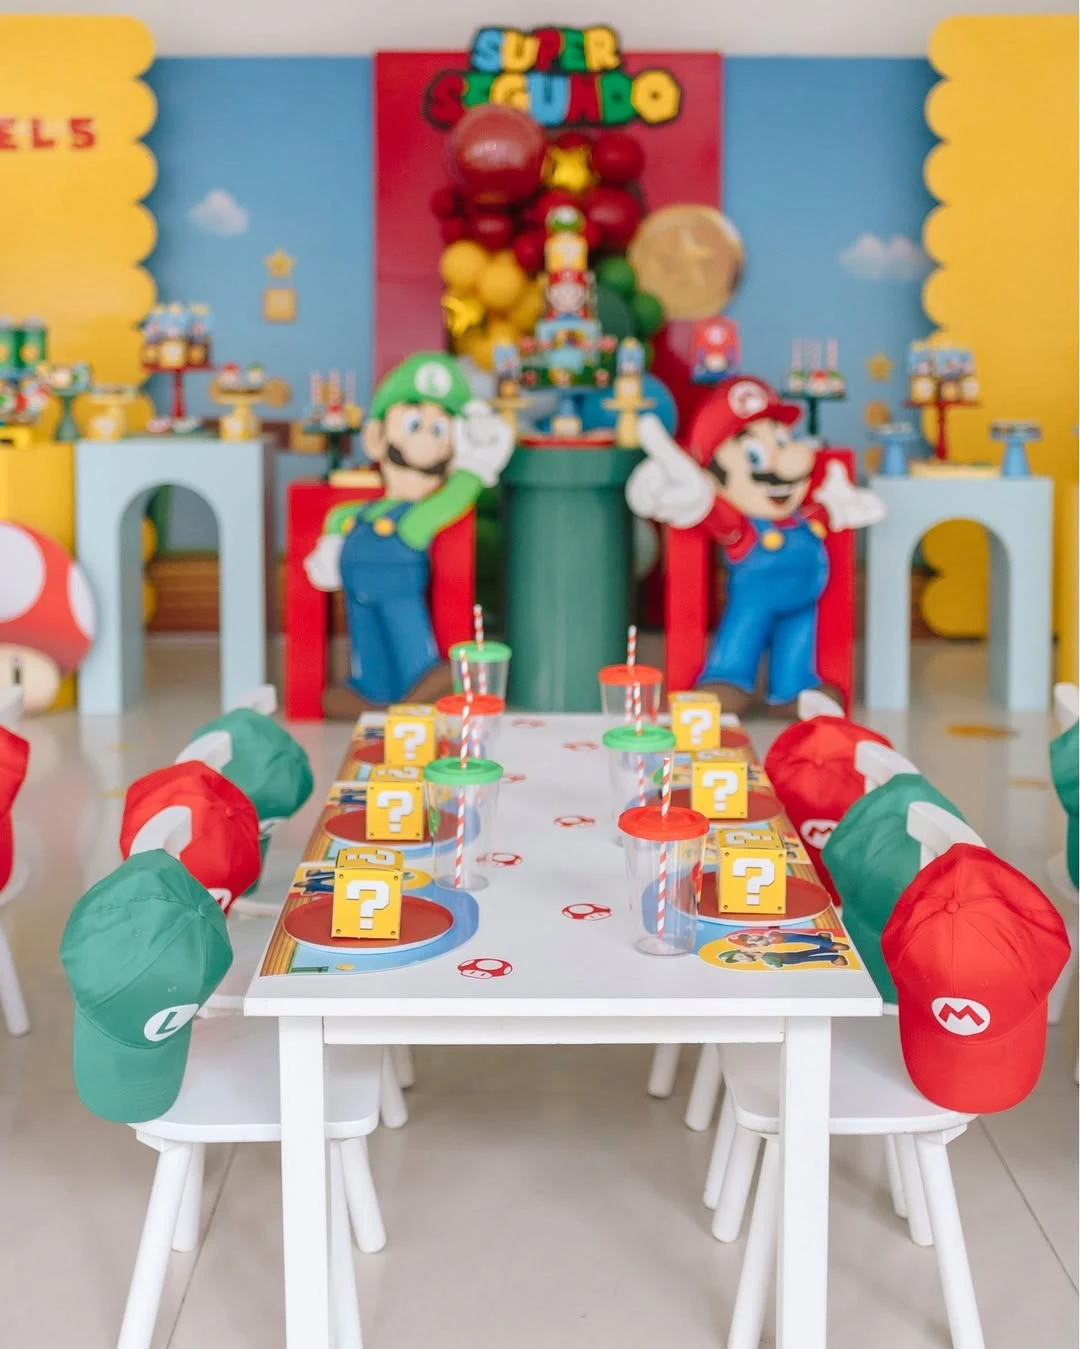
Credit: @peditresdeseos / Instagram
Construct a layered focal point using character standees and primary-colored balloon clusters.
Oversized 2D cutouts provide high-impact visuals without the cost of custom 3D builds.
Repurpose a large cardboard tube painted green as a warp pipe pedestal for the cake.
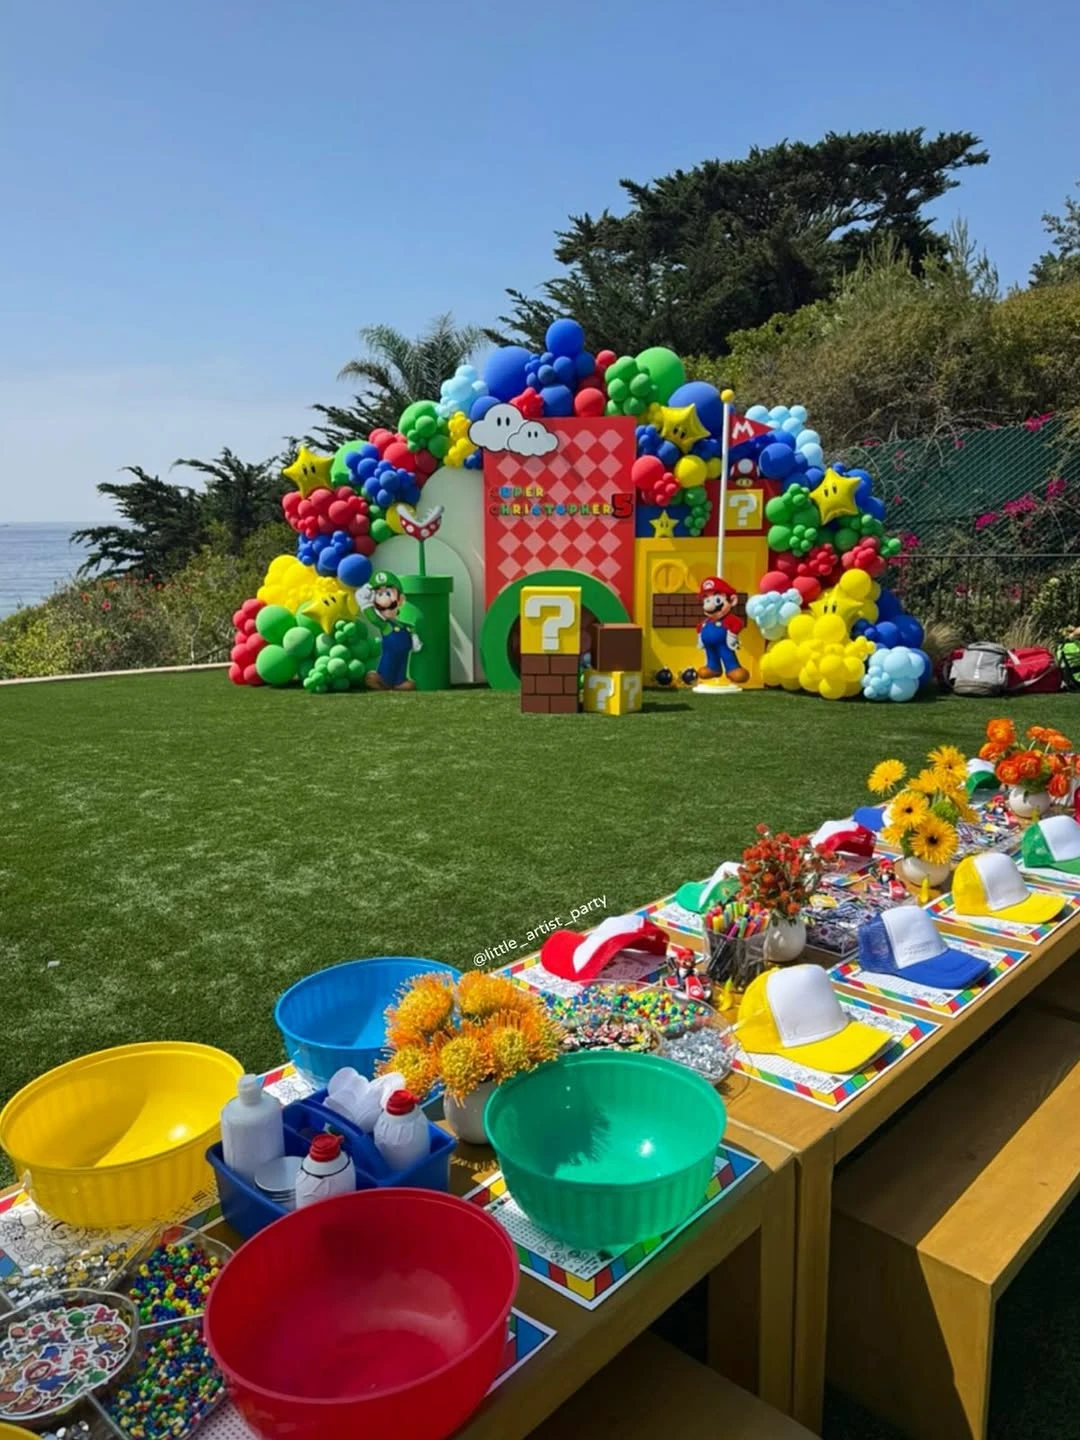
Credit: @little_artist_party / Instagram
Design a layered focal point with character cutouts, balloon clusters, and 3D props like warp pipes.
Physical elements add depth to photos and define the party area in open outdoor spaces.
Use painted cardboard for blocks and PVC for pipes to manage the budget while maintaining scale.
2. Player Selection Welcome Station
Credit: @toastwithtiff / Instagram
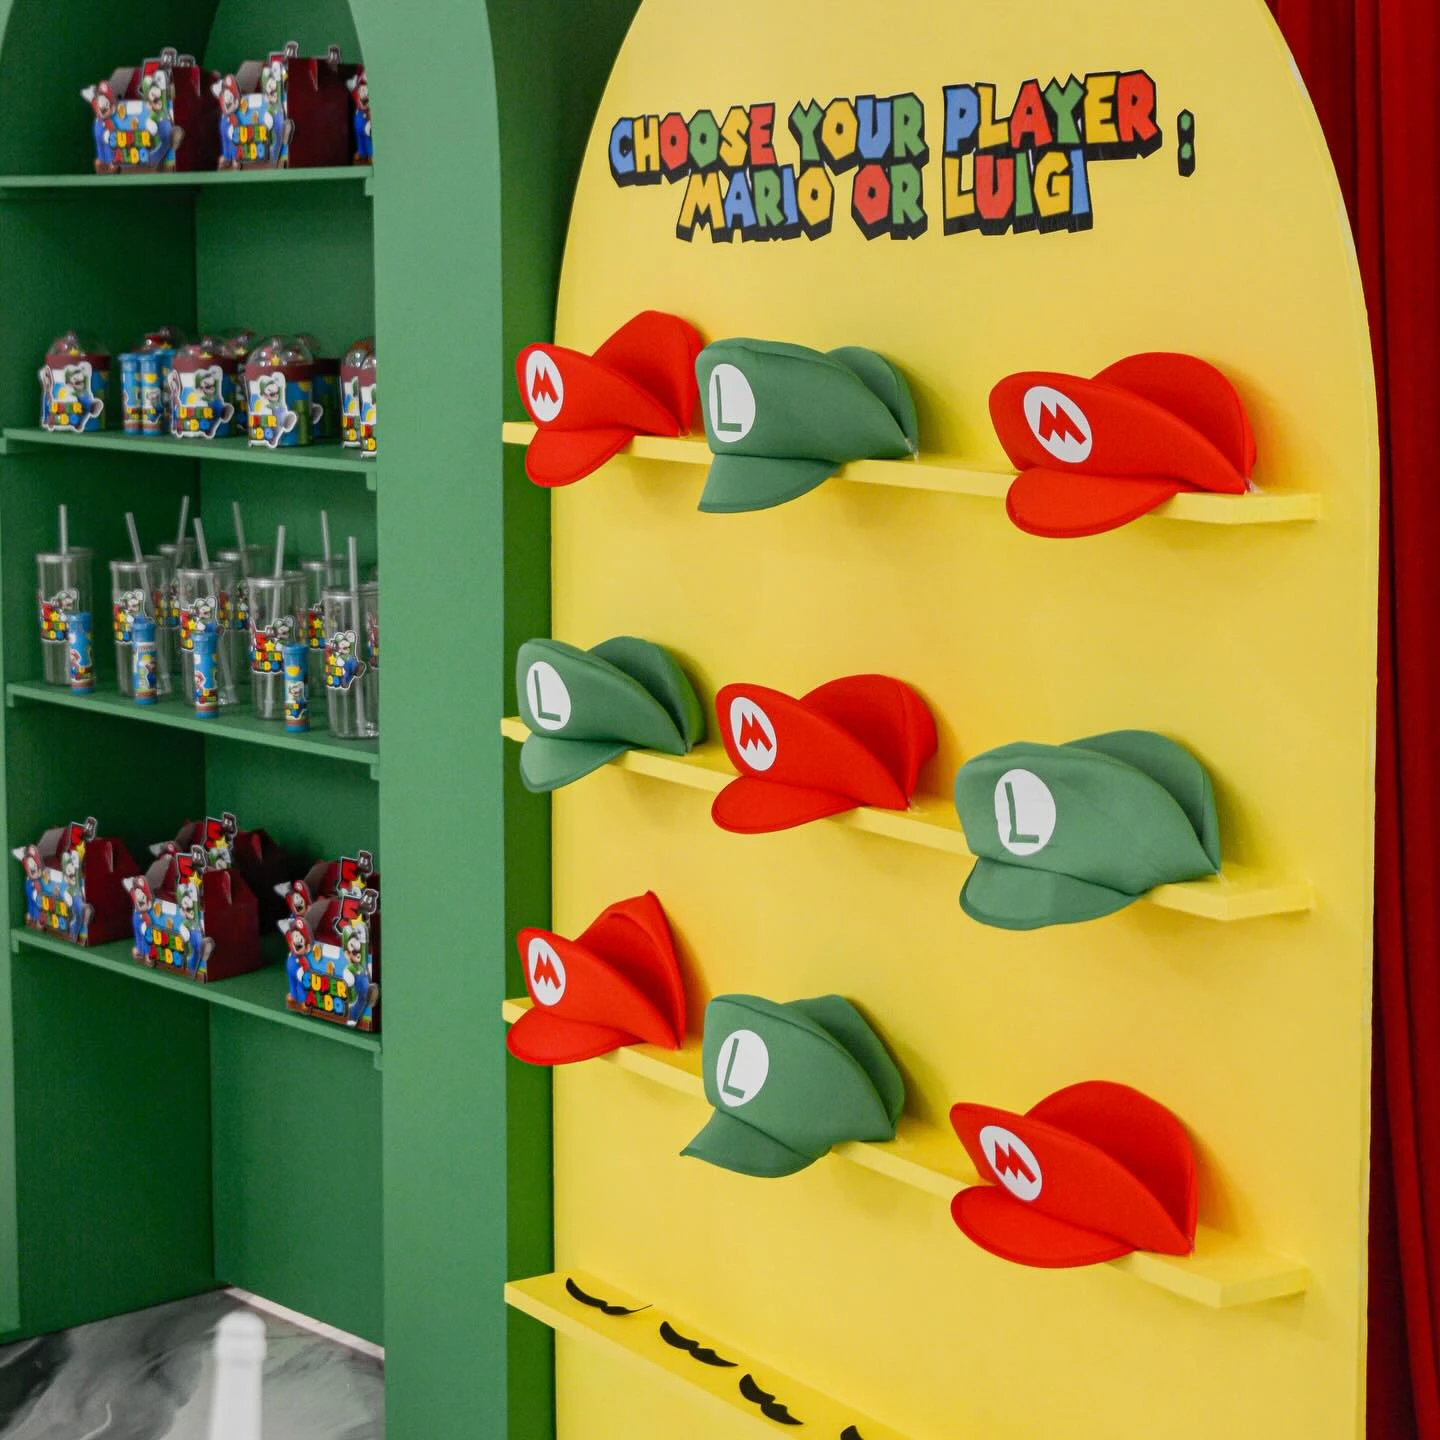
Greet guests with a character selection wall that lets them choose their identity before the party starts.
This setup mimics the start of the video game, providing an immediate costume element like hats and mustaches that serves as both a favor and a photo prop.
Build the backdrop using a large yellow foam board or painted plywood, adding thin wooden ledges to hold hats. Place stick-on mustaches on a lower shelf so children can reach them easily.
Credit: @vana_geor / Instagram
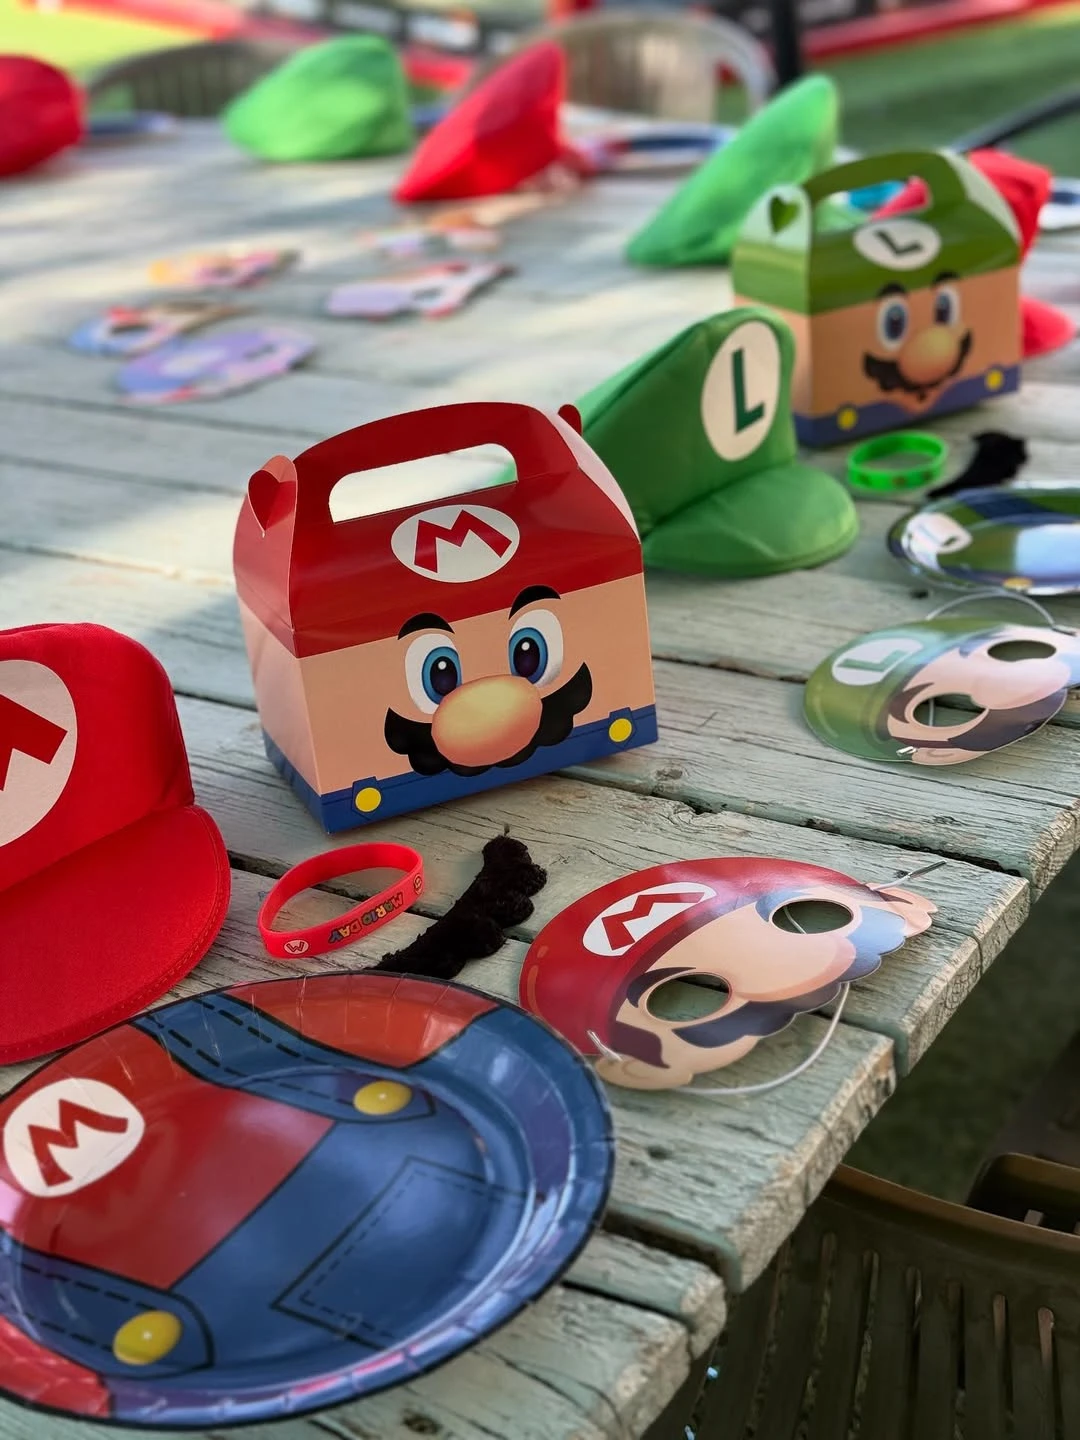
Simplify the dressing-up process by pre-packing character-themed gable boxes with masks and accessories.
These bundles serve as immediate decor and allow guests to choose their favorite character as soon as they arrive at the party area.
Arrange these kits on a rustic wooden surface or a plain table to provide a neutral background that makes the bright character colors stand out.
3. Outdoor Mushroom Kingdom
Credit: @glow_eventss / Instagram
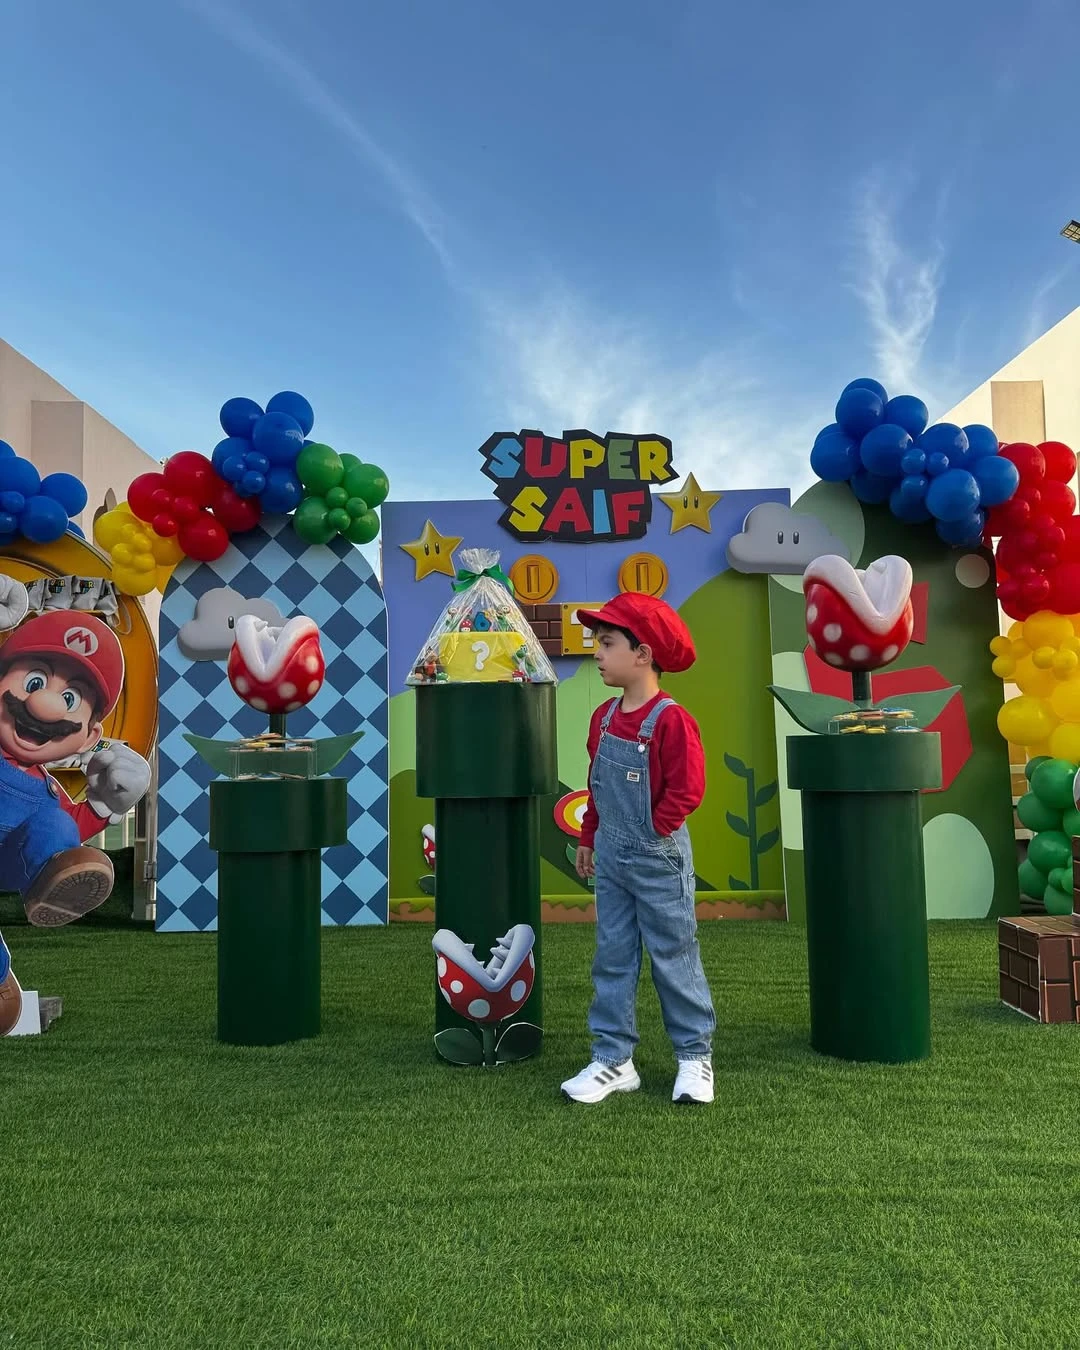
Build a life-sized game level using large foam backdrops and 3D props for a high-impact entryway.
High-contrast colors and varying heights create a focal point that serves as both decor and a photo station.
Paint large cardboard tubes or plastic barrels dark green to serve as warp pipe pedestals for cakes or favors.
Credit: @glow_eventss / Instagram
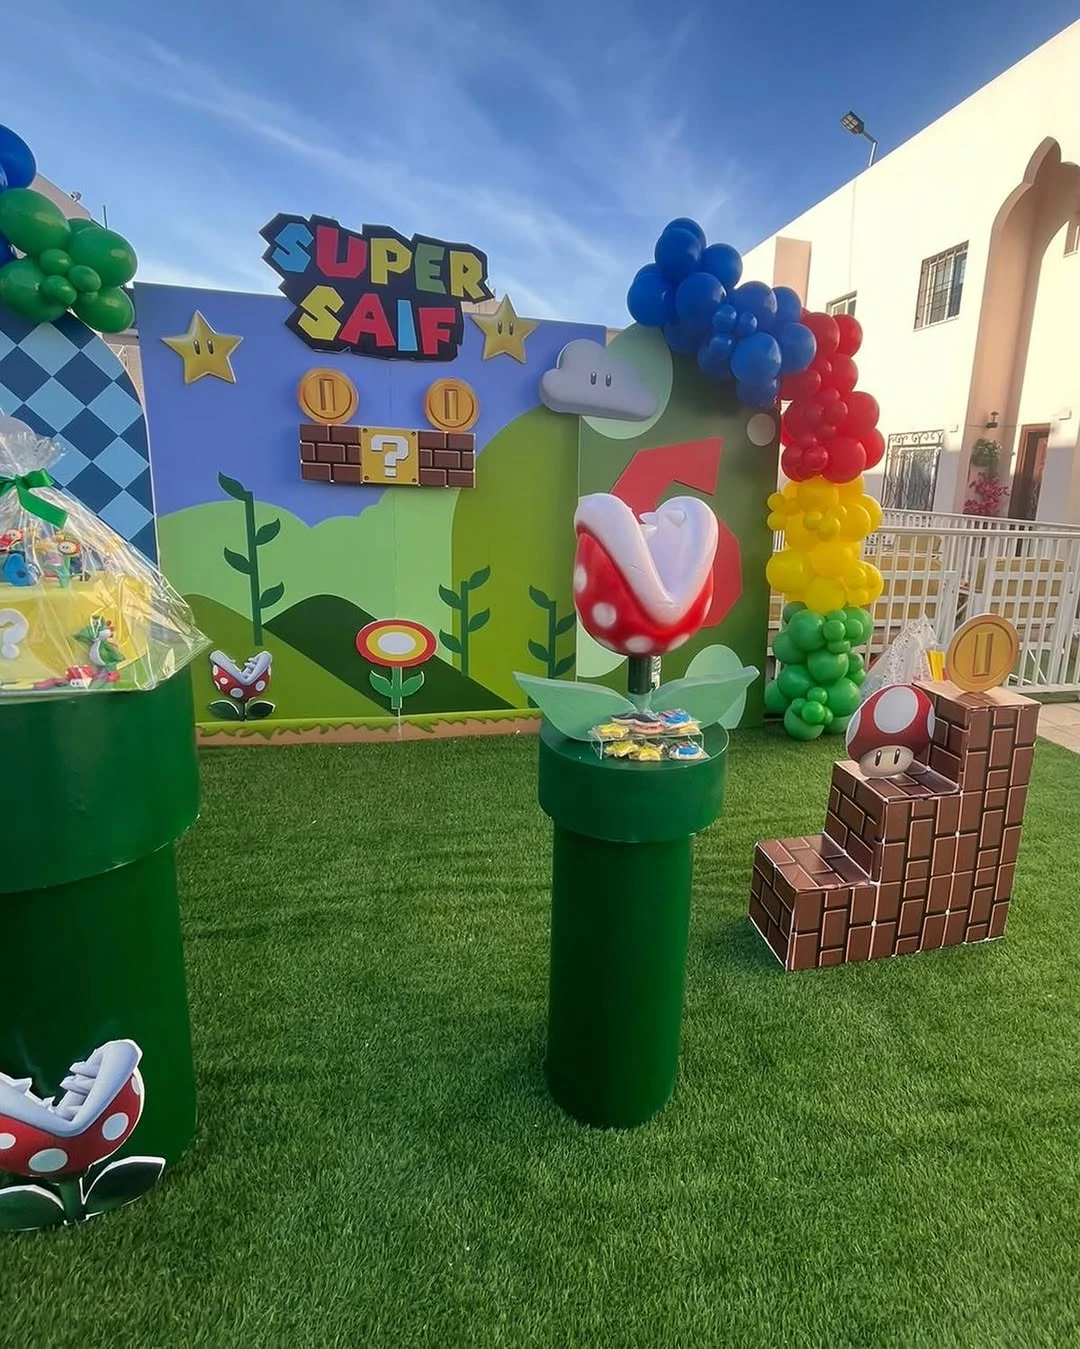
Add depth to the scene by layering brick-patterned stairs and character cutouts at different distances.
This multi-dimensional layout mimics the side-scrolling visuals of the classic video game.
Wrap square moving boxes in brick-print paper to create lightweight, stackable stairs for displaying mushrooms or coins.
4. Character Welcome Zone
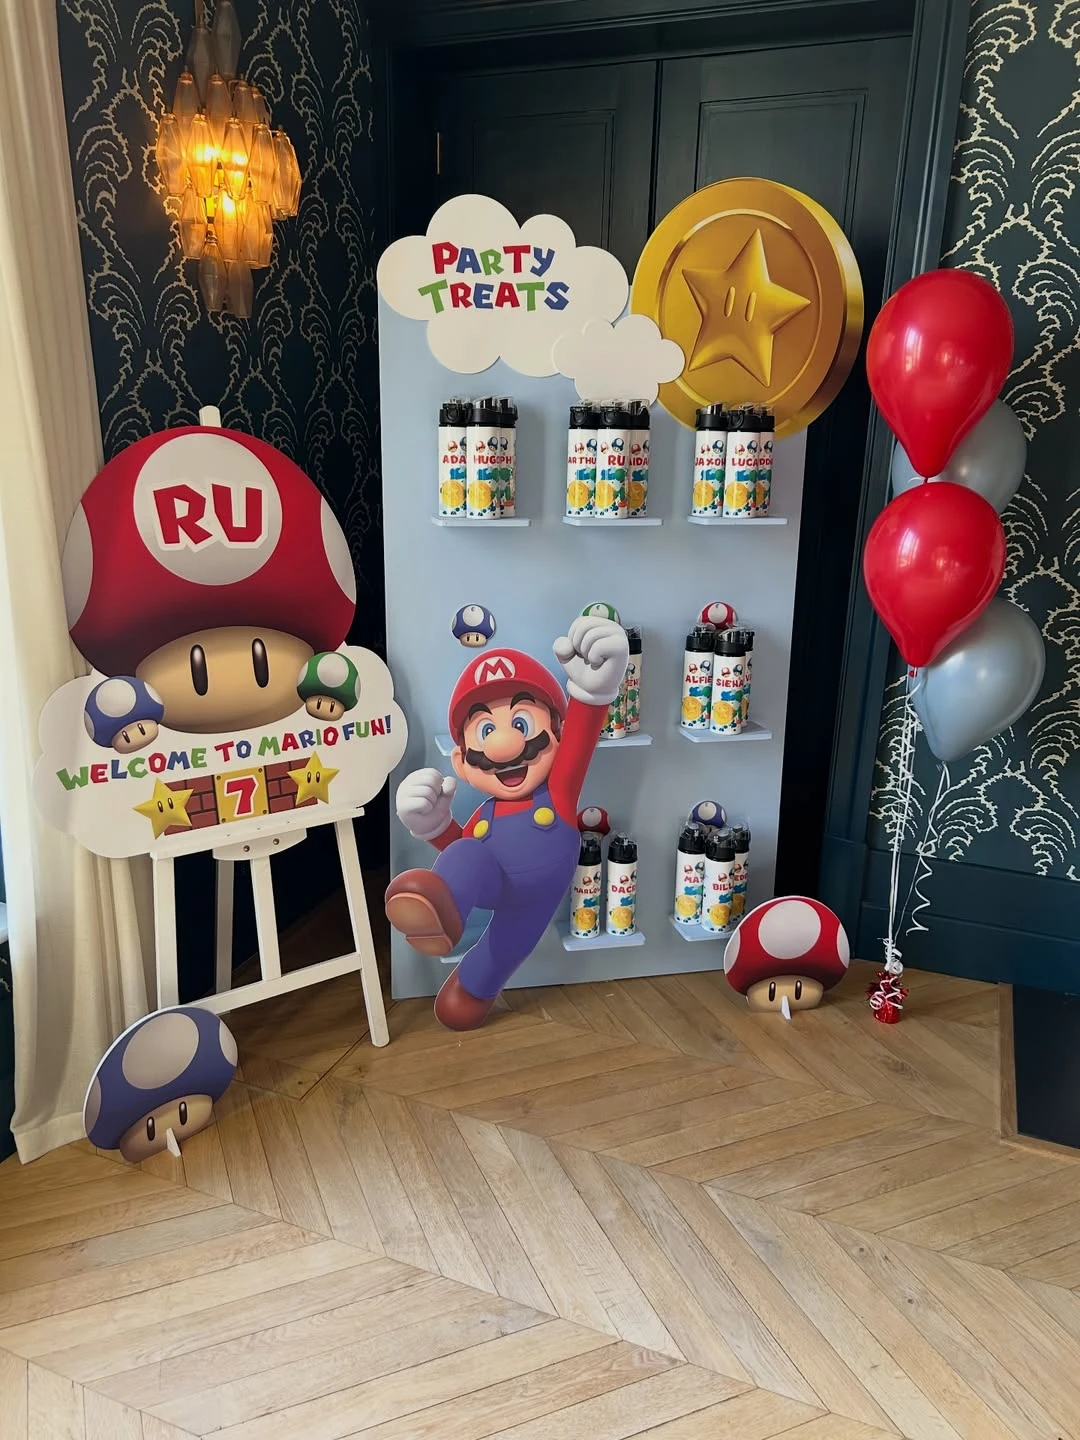
Credit: @shinyhappyparty / Instagram
Position a custom mushroom-shaped welcome sign on an easel to greet guests and establish the theme immediately.
Large-scale cutouts create a focal point for photos and clearly mark the entrance of the Mushroom Kingdom.
Mount printed graphics on foam board for a sturdy, lightweight finish that stands up throughout the event.
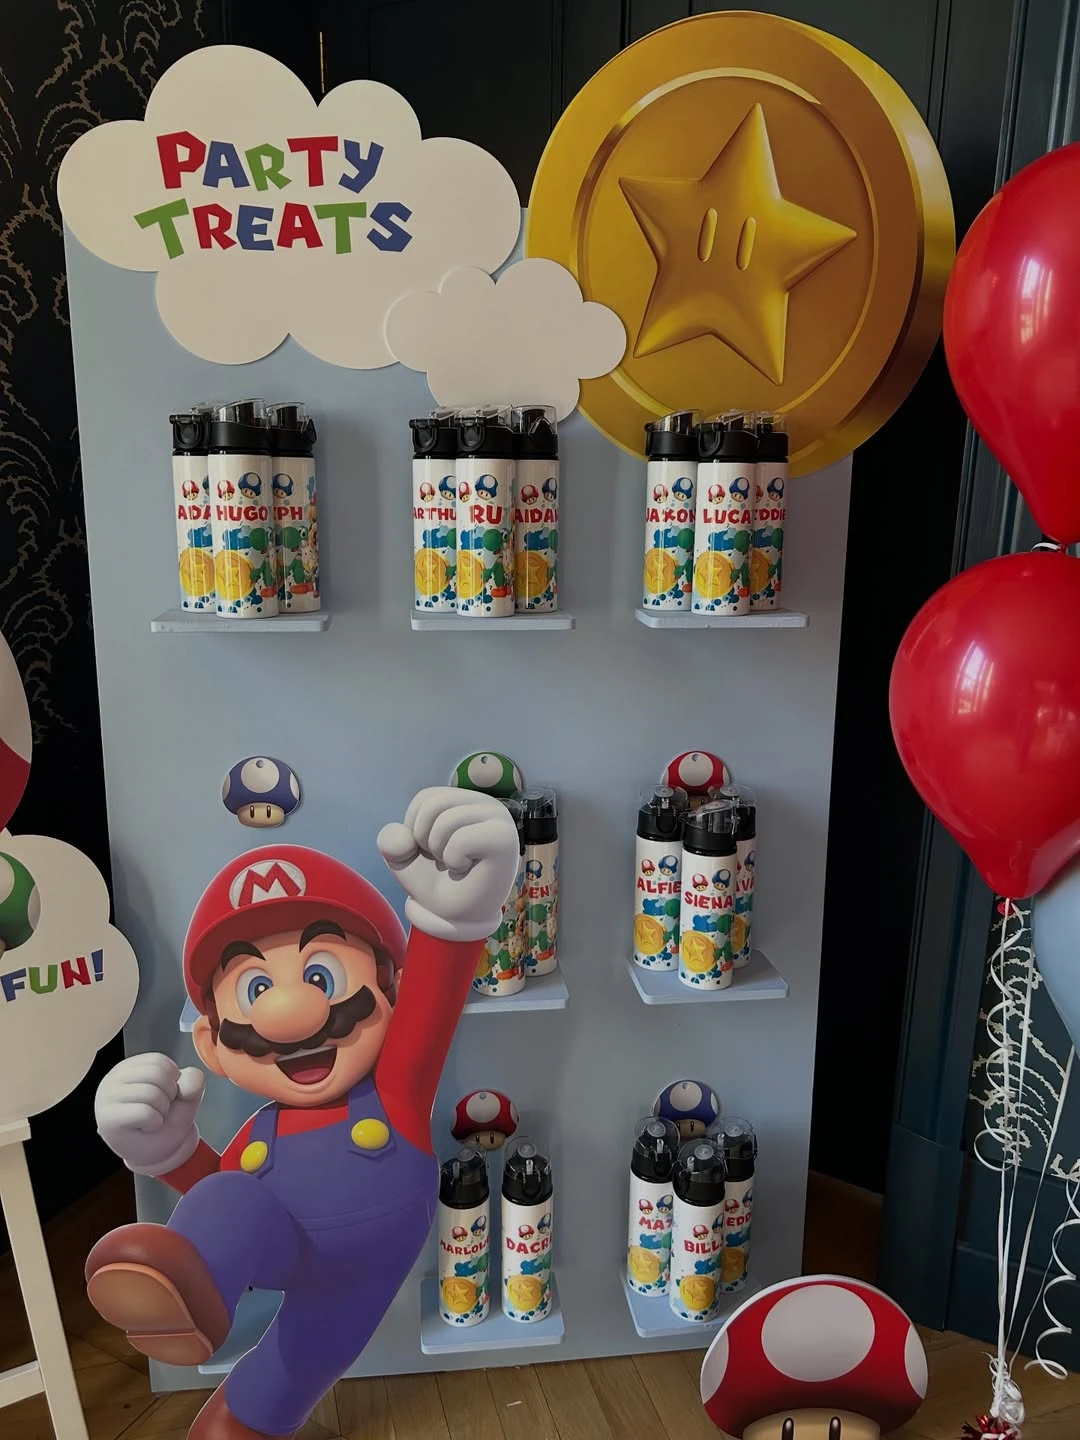
Credit: @shinyhappyparty / Instagram
Build a vertical favor station with light blue backing and cloud cutouts to display personalized bottles.
Wall-mounted shelves keep favors organized and turn functional gifts into part of the room’s decor.
Add a large gold coin cutout at the top to draw the eye upward and maximize the vertical space.
5. Star Shape Entry Arch
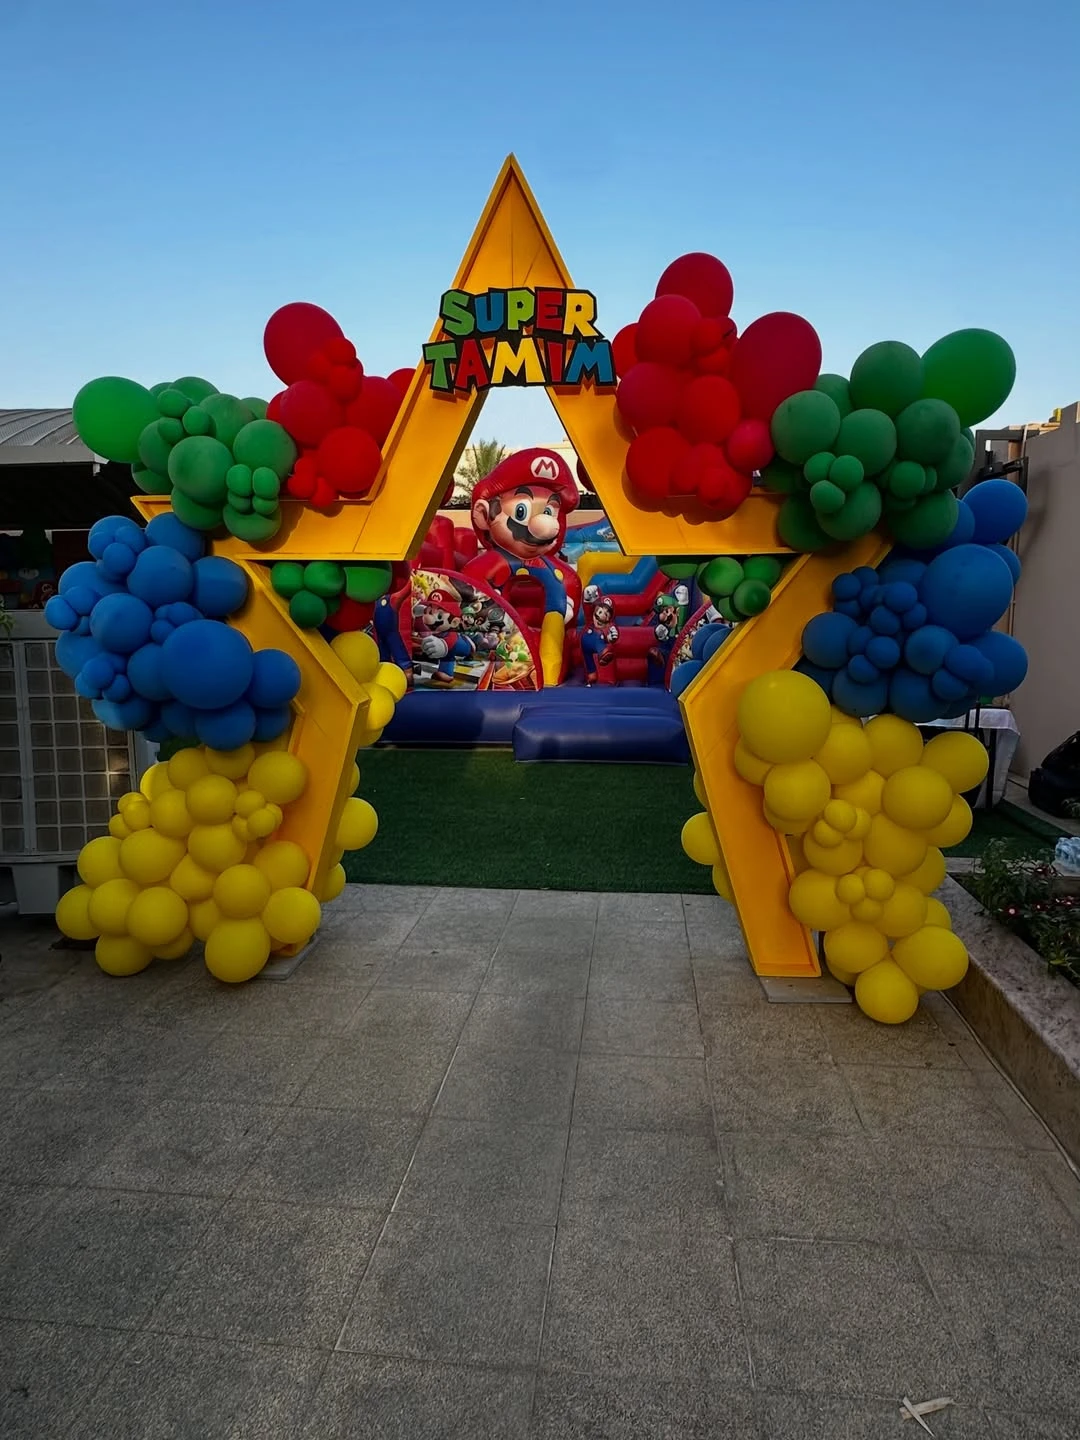
Credit: @parfait_qatar / Instagram
Build a large star-shaped gate for the venue entry.
It provides a clear focal point and photo backdrop.
Construct the frame from plywood and anchor with weights.
6. Floating Cloud Ceiling Decor
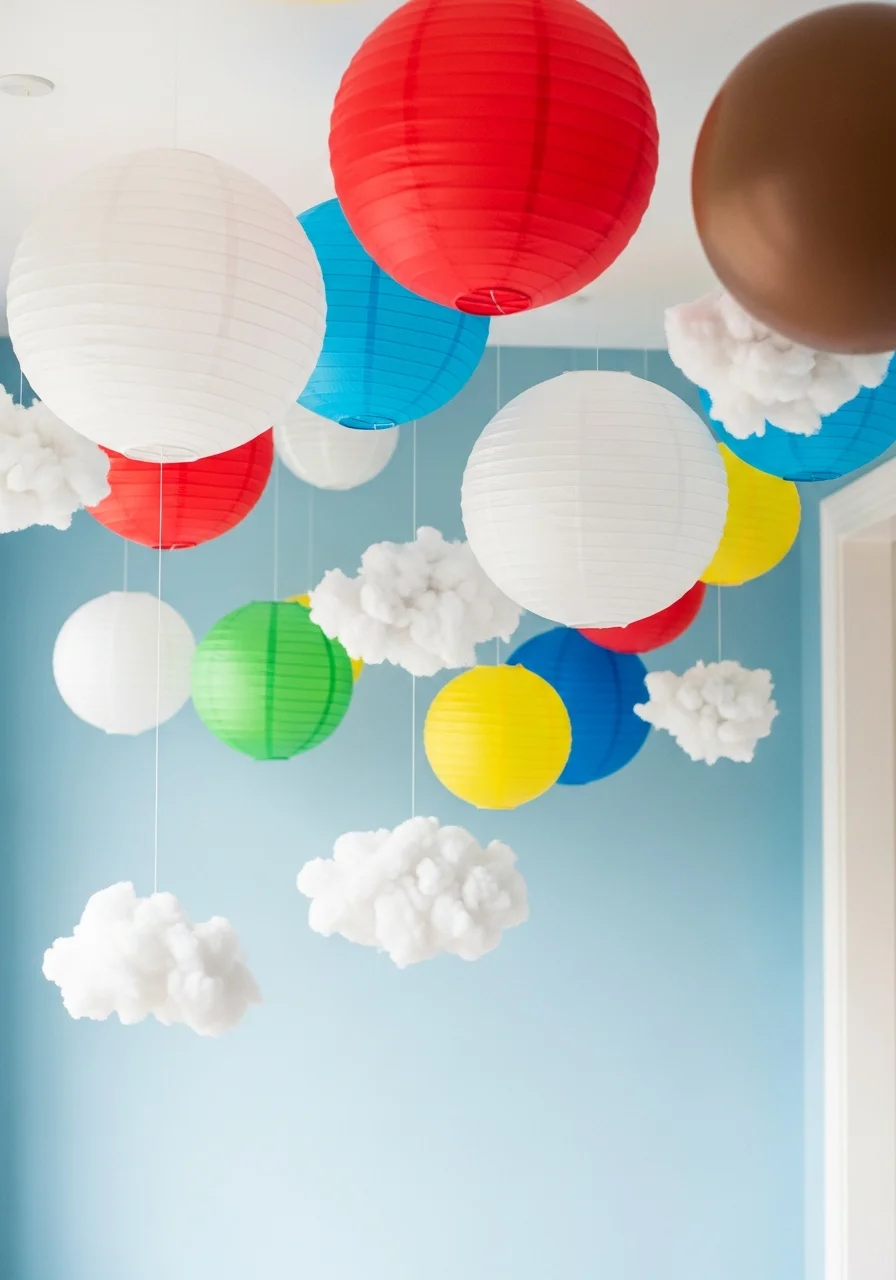
Hang fluffy white clouds from the ceiling to recreate the look of Level 1-1.
This adds vertical interest and makes the indoor venue feel like an open-air game world.
Use clear fishing line to hang white paper lanterns or clusters of polyester fiberfill for a weightless appearance.
7. Racing Track Welcome Area
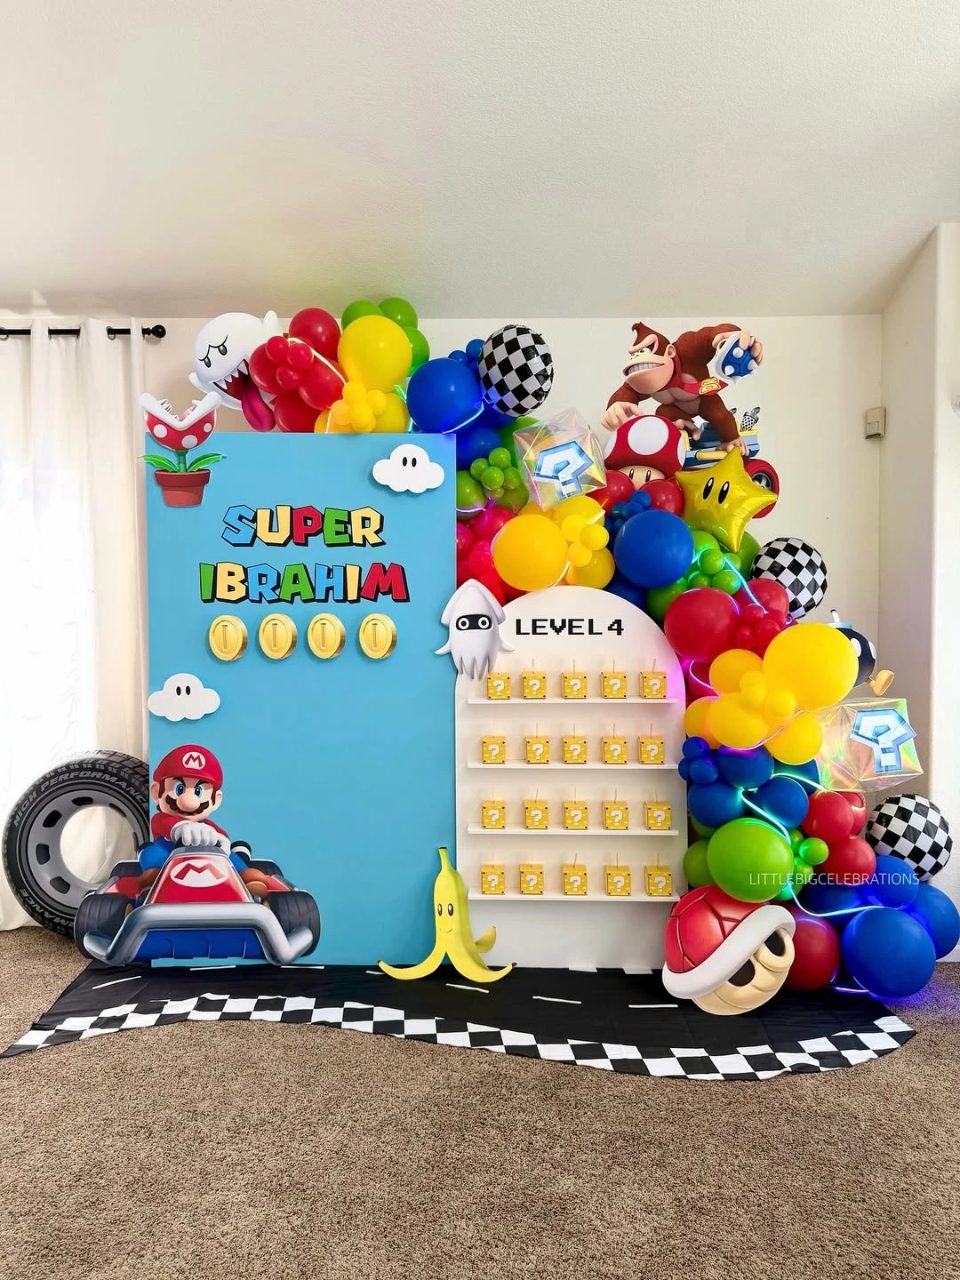
Credit: @marys_hobby_life / Instagram
Construct a high-impact photo station using a blue backdrop panel and a checkered floor runner.
Large character cutouts and a balloon arch create a polished look with simple materials.
Secure a black fabric runner with white tape for the road and use 3D gold coins for depth.
8. Cohesive Game Stage Layout
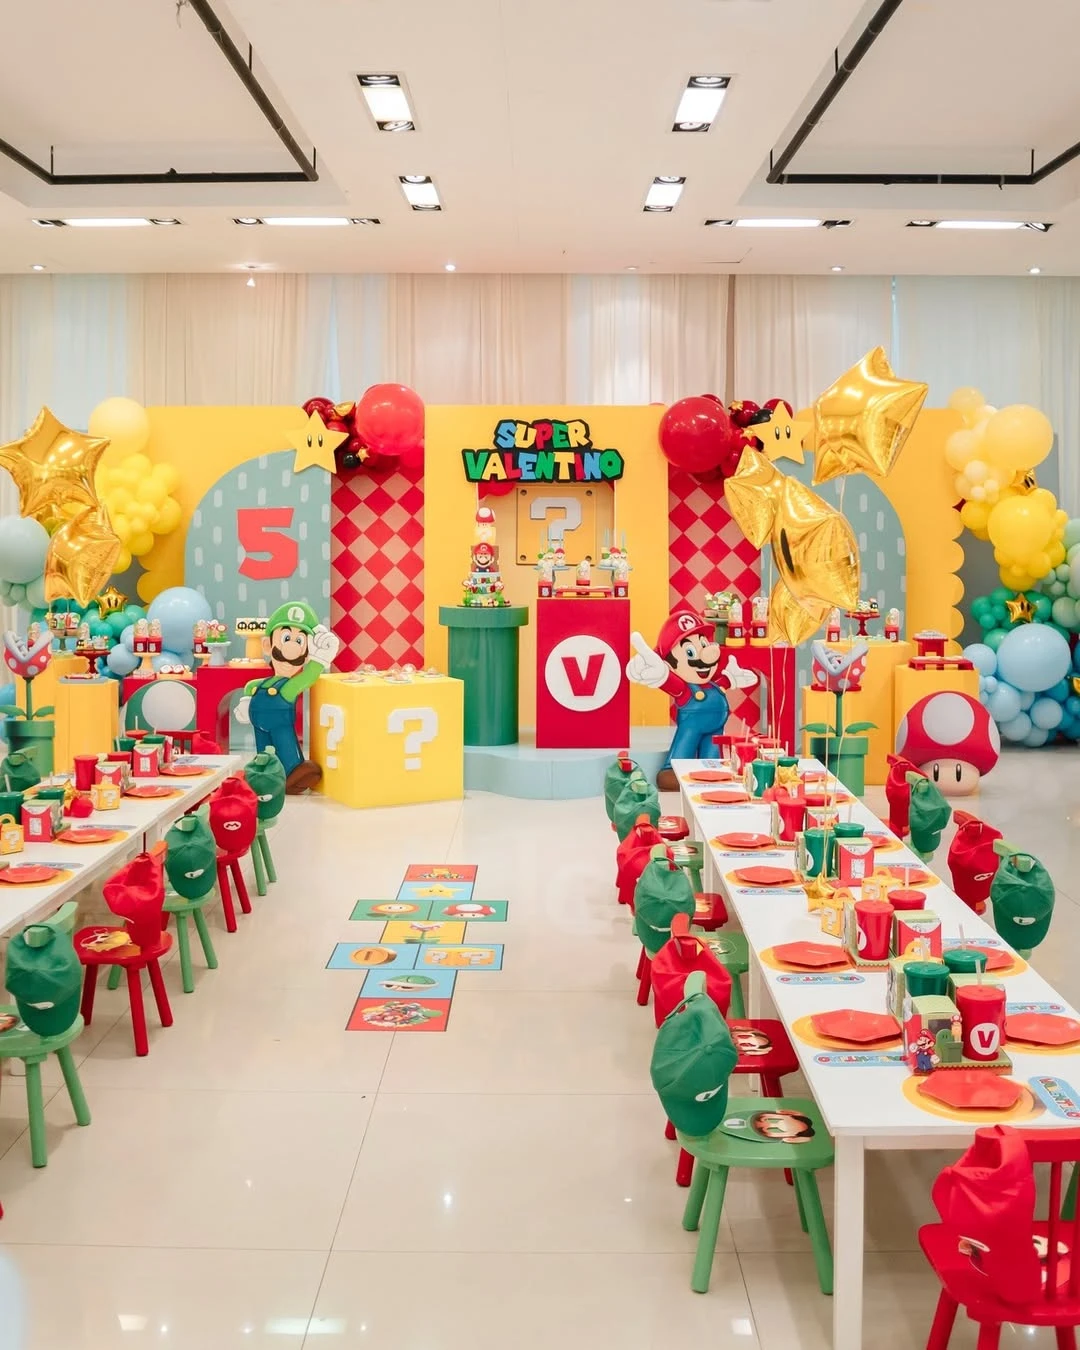
Credit: @peditresdeseos / Instagram
Build a life-sized game stage using vertical panels and floor decals.
High-contrast colors and large cutouts define the space without requiring complex construction.
Use removable vinyl for floor paths and hang star balloons at varying heights to fill vertical gaps.
9. Themed Level Stage Design
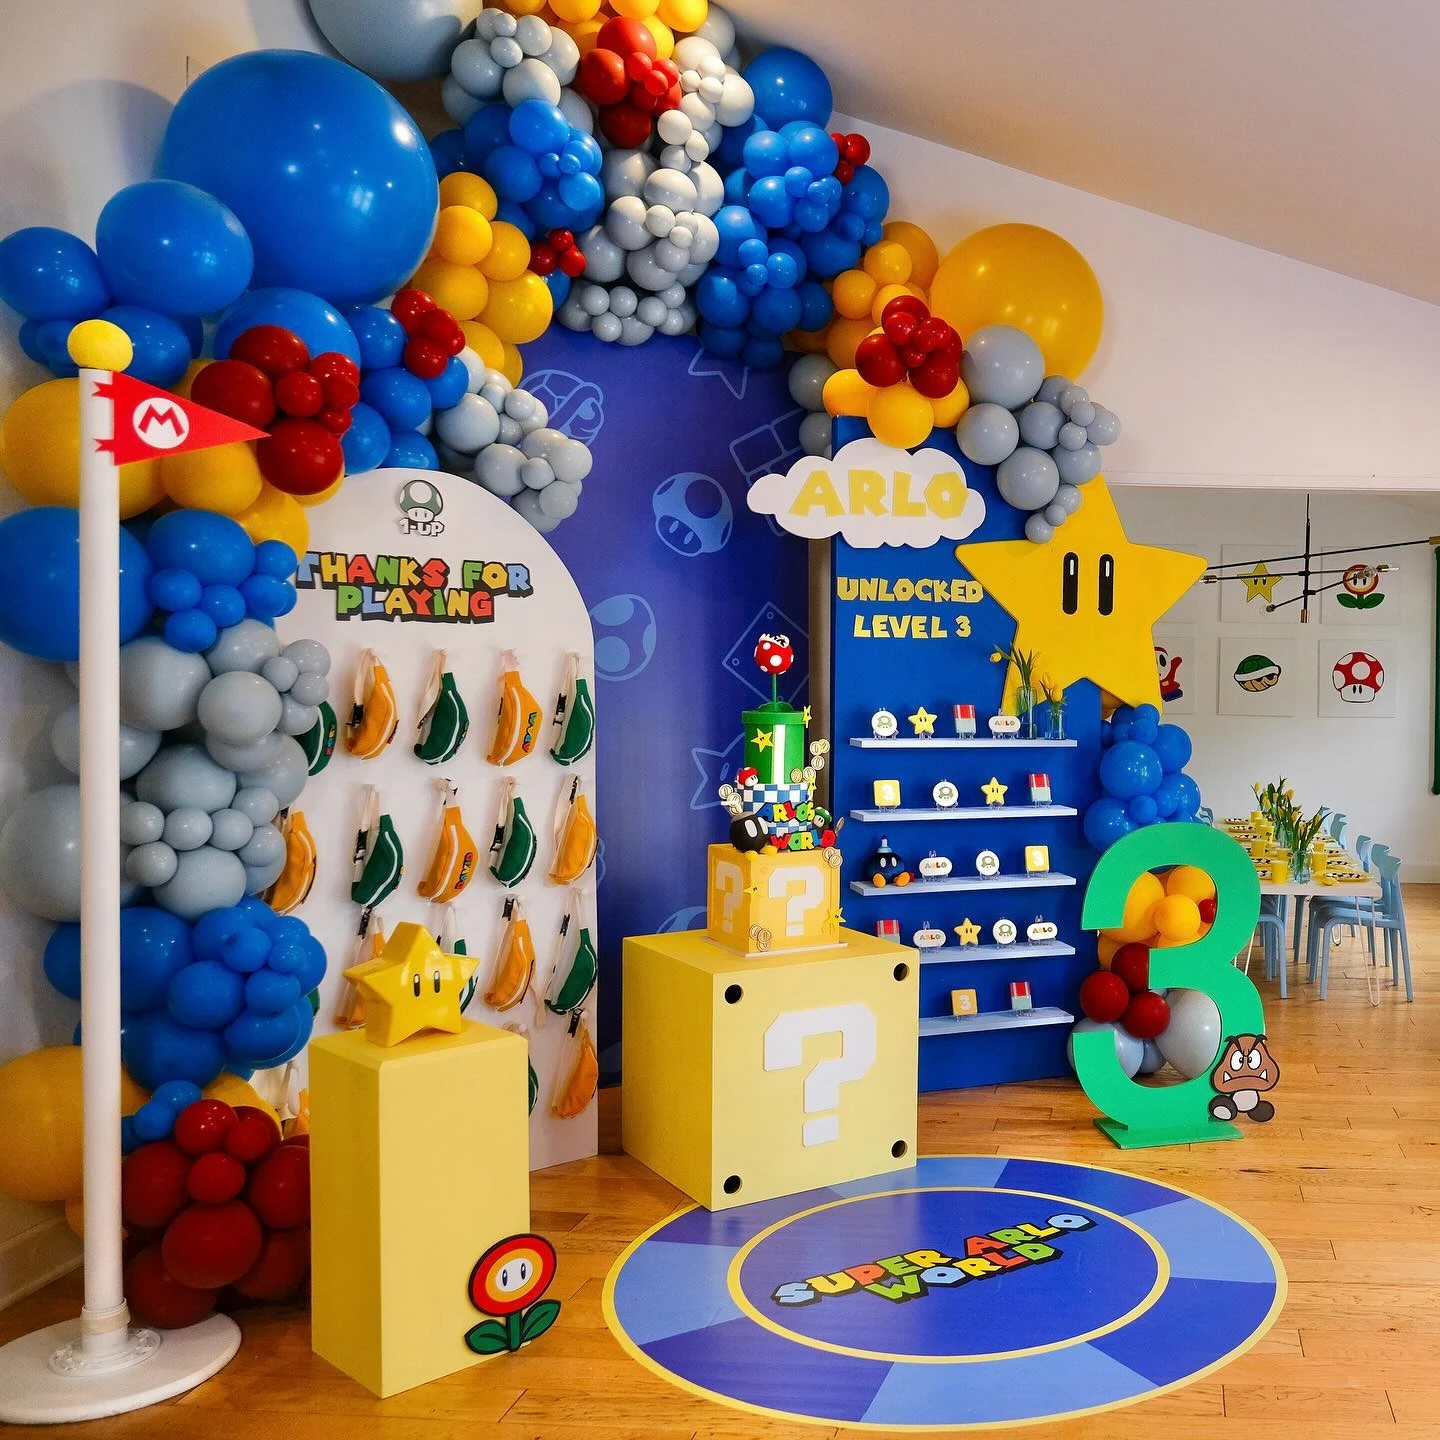
Credit: @pinkbballoons / Instagram
Build a central focal point that combines a photo backdrop, dessert display, and favor station into one cohesive game level.
Using oversized props like giant stars and question block pedestals creates a sense of scale that makes guests feel like they are standing inside the video game.
Construct pedestals out of large cardboard shipping boxes painted yellow with white vinyl question marks to provide sturdy surfaces for cakes or decor at a low cost.
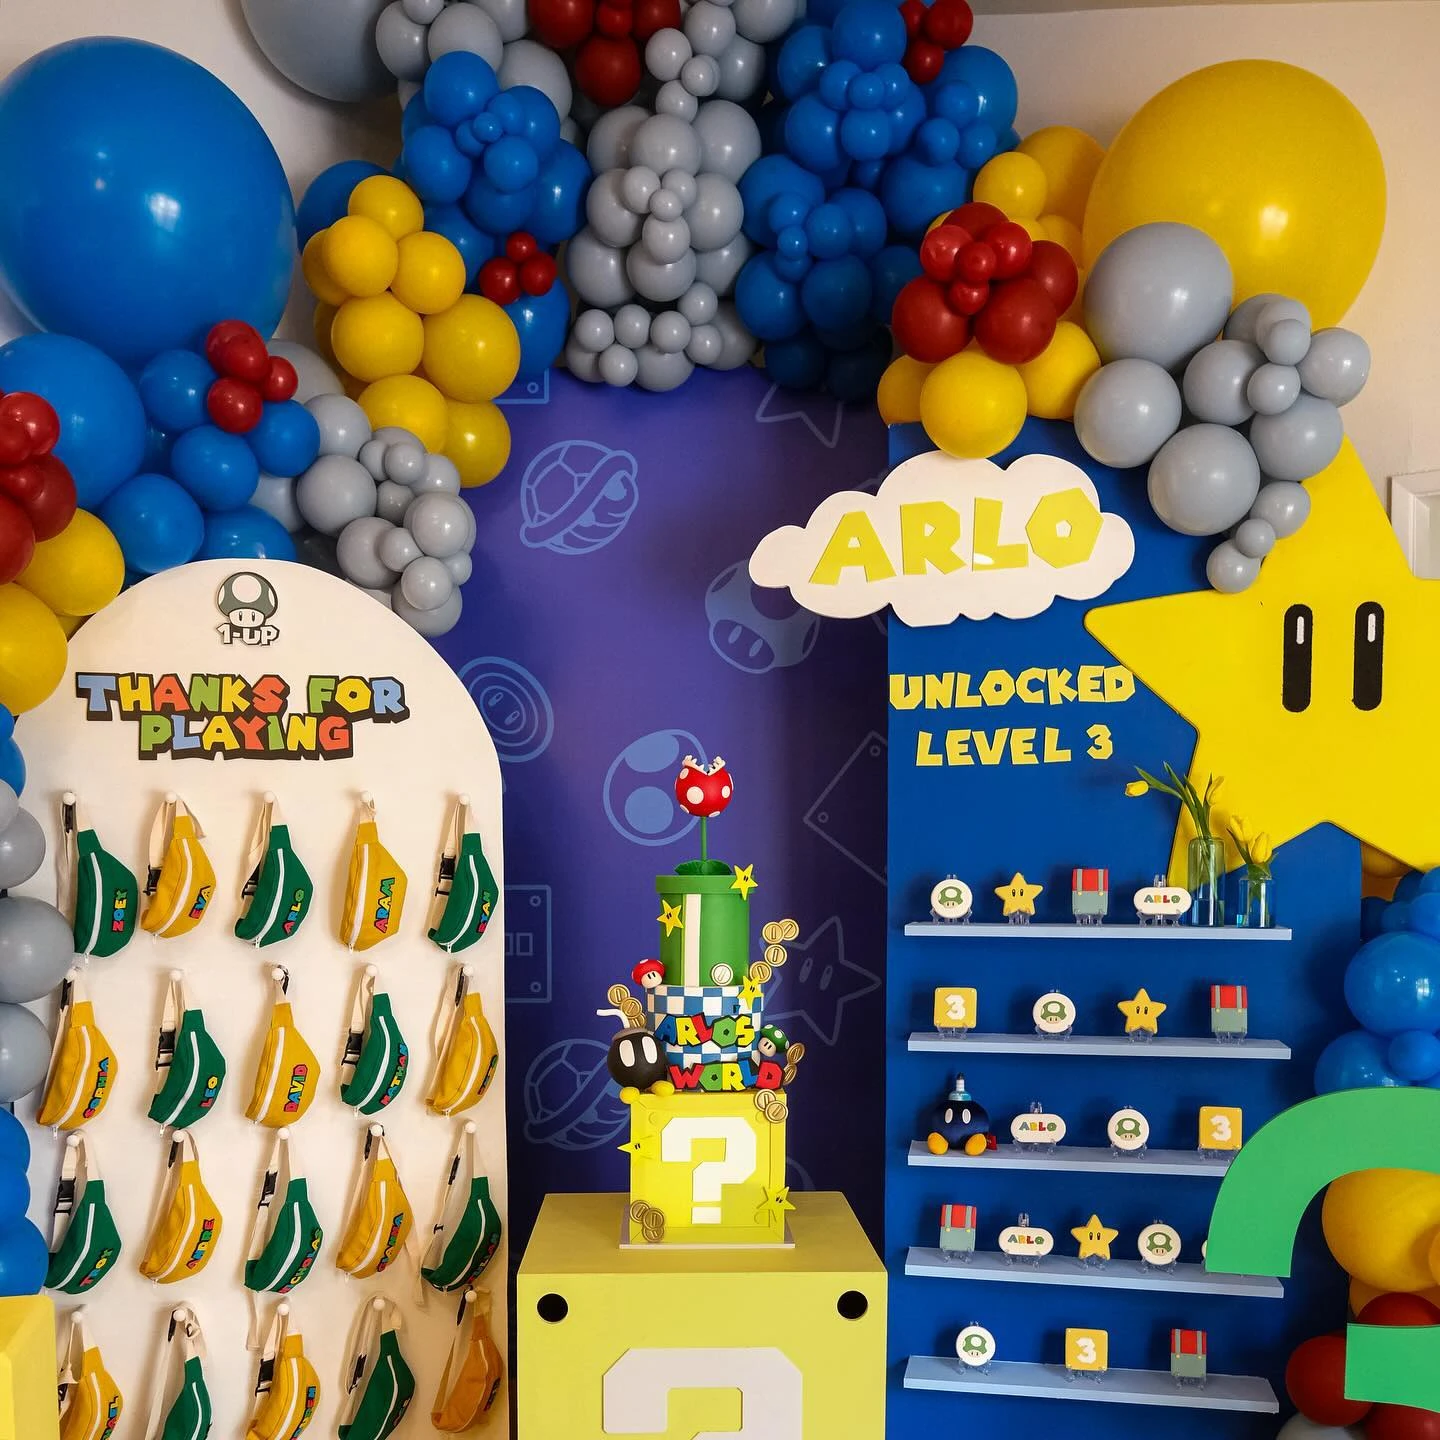
Credit: @pinkbballoons / Instagram
Organize party favors on a vertical ‘Thanks for Playing’ wall to save floor space and enhance the visual theme.
Hanging wearable items like themed bags or hats on pegs allows the favors to double as wall decor until they are distributed at the end of the party.
Use a white foam board or plywood sheet with simple adhesive hooks to create a clean, organized grid that is easy for children to navigate when picking their prize.
10. Cardboard Warp Pipe Photo Prop
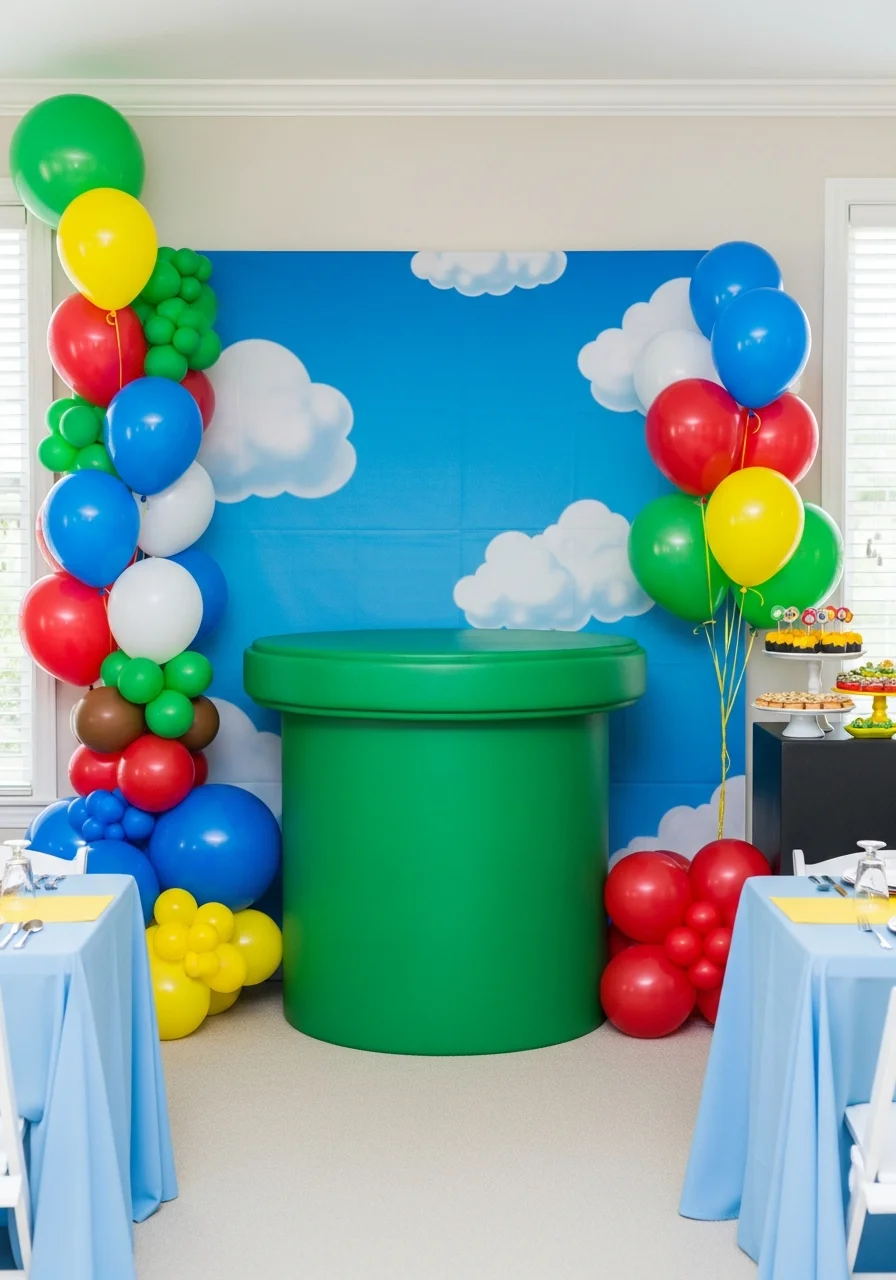
Build a large-scale green pipe to serve as a signature photo opportunity.
The warp pipe is one of the most iconic symbols of the series and makes for a great entrance piece.
Use a heavy-duty cardboard tube or a large trash can painted bright green for the base.
11. Brick Wall Backdrop with Floating Blocks
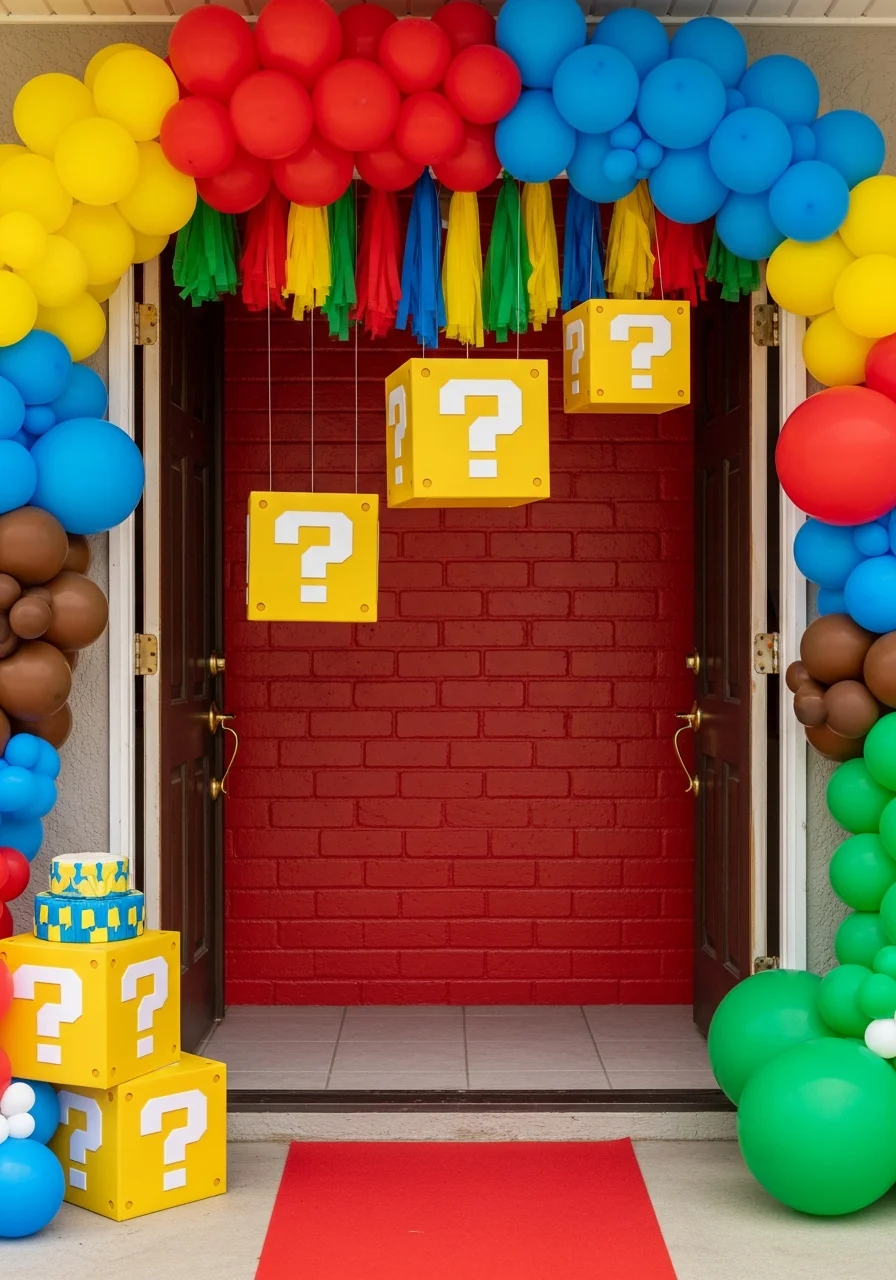
Cover a wall with brick patterns and hang yellow question blocks in front of it.
This creates a layered, three-dimensional look that mimics the actual game levels.
Use lightweight square boxes for the floating blocks so they can be easily secured with clear tape or line.
Power-Up Tablescapes
12. Immersive Table Settings
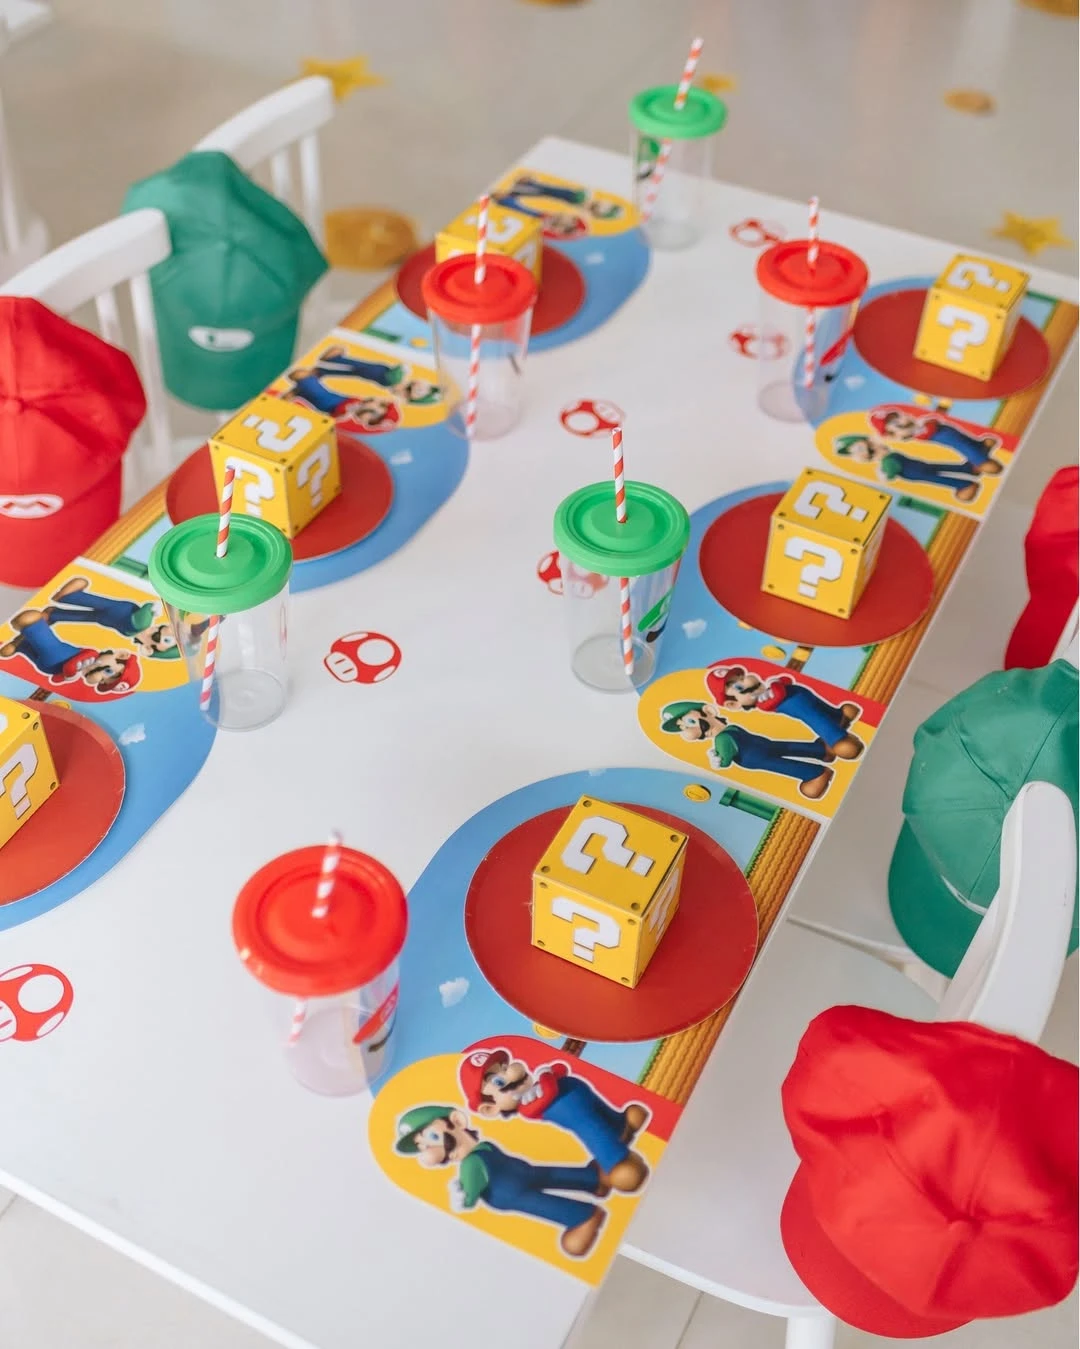
Credit: @peditresdeseos / Instagram
Protect surfaces with custom-printed placemats featuring game level graphics and characters.
Themed paper goods offer a professional look on a minimal budget.
Align placemats precisely with the table edge for a tidy, organized appearance.
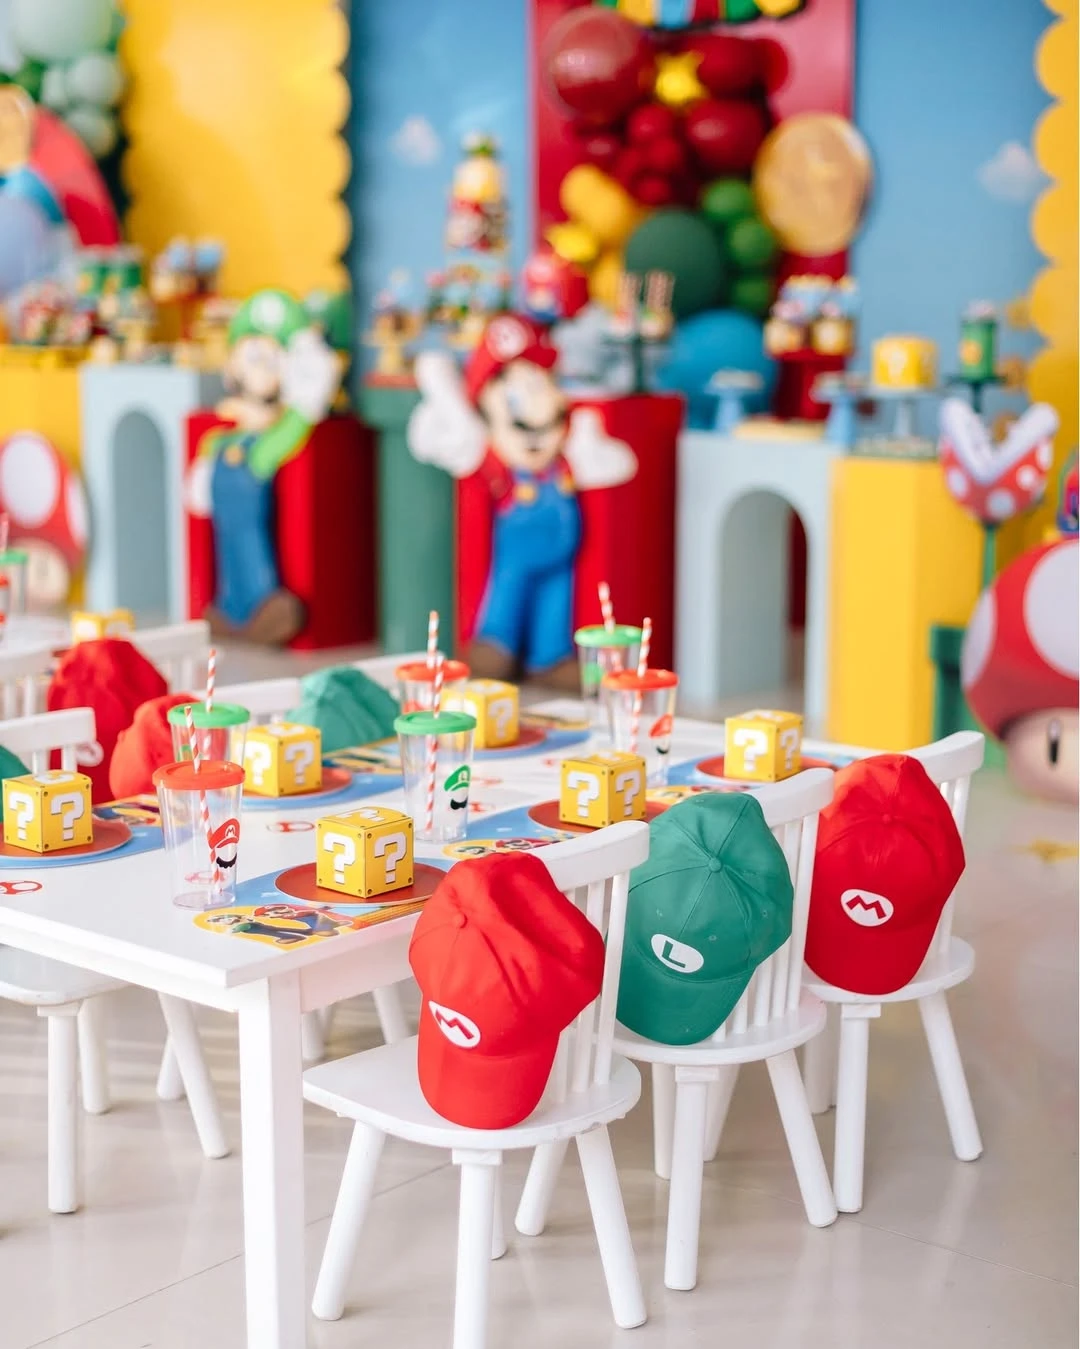
Credit: @peditresdeseos / Instagram
Drape character hats over chair backs to double as decor and guest costumes.
Using functional items as decorations saves space and simplifies the party setup.
Alternate red and green hats to balance the room’s color palette across the seating area.
13. Racing Stripe Tables
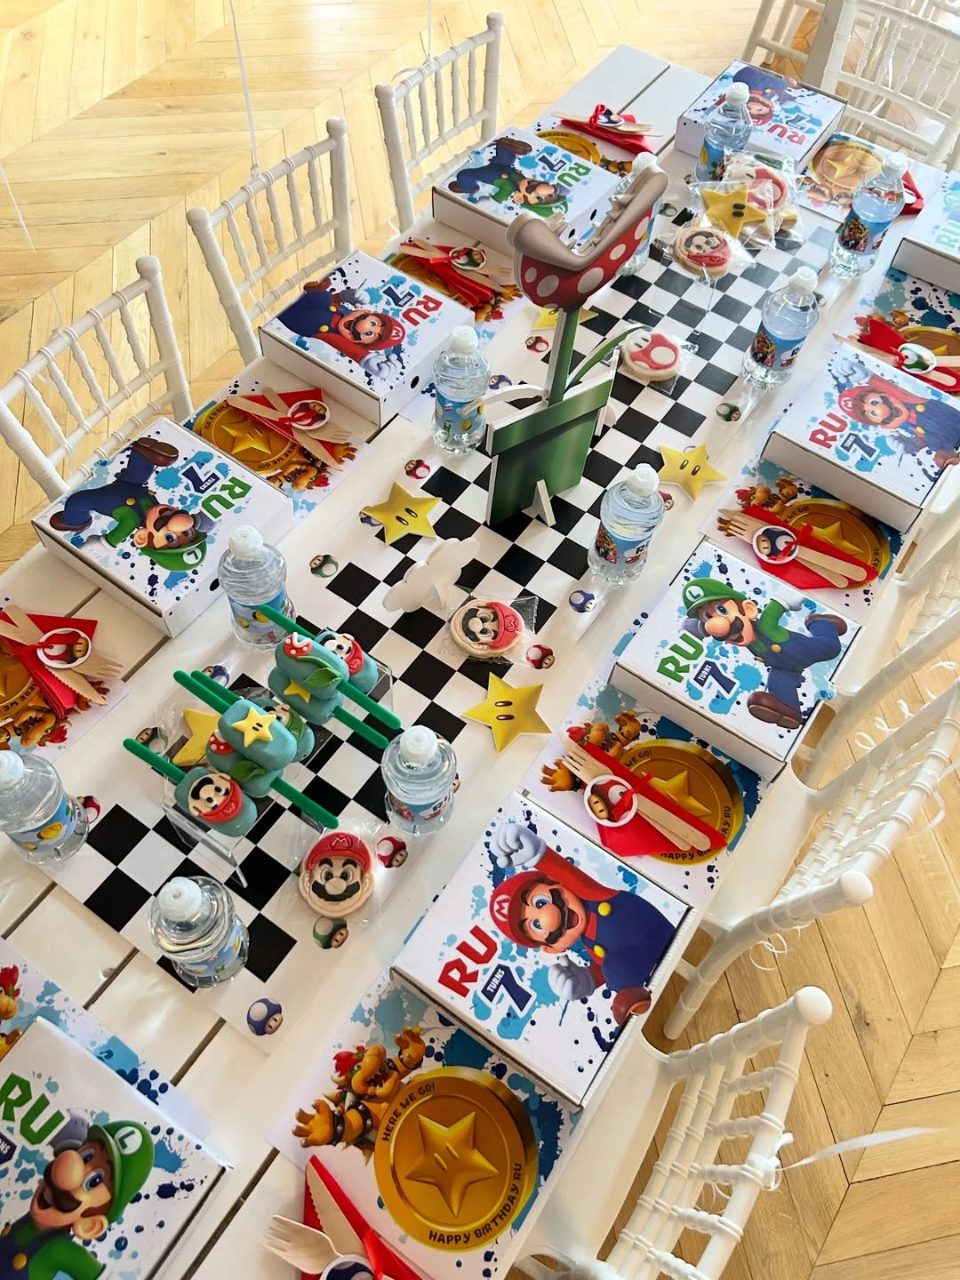
Credit: @shinyhappyparty / Instagram
Layer a black-and-white checkered runner over a white table to anchor vibrant character lunch boxes and star cutouts.
High-contrast patterns mimic the Mario Kart finish line while making colorful themed plates and water bottles pop.
Space out individual lunch boxes to define each child’s seat and prevent table clutter during the meal.
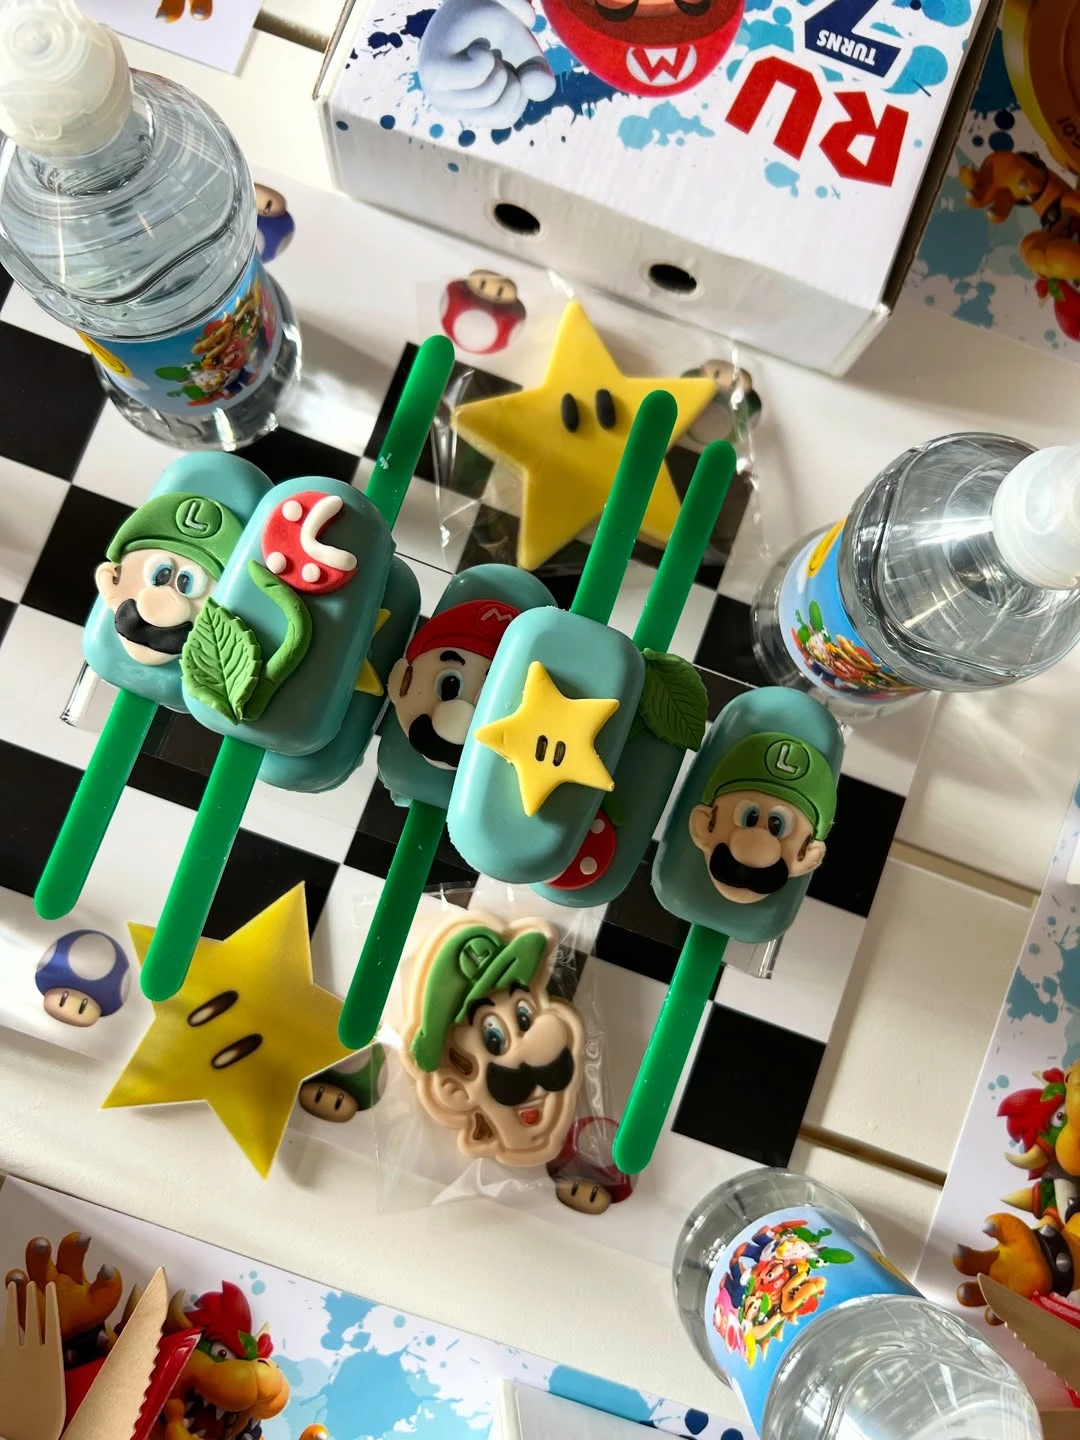
Credit: @shinyhappyparty / Instagram
Display character-themed cake pops on a tiered stand to serve as a functional, edible centerpiece.
Vertical treat displays save table space and allow detailed fondant work, like Mario and Luigi faces, to be seen.
Use green sticks to represent warp pipes or beanstalks, reinforcing the game’s visual language.
14. Mushroom Seating and Tableware
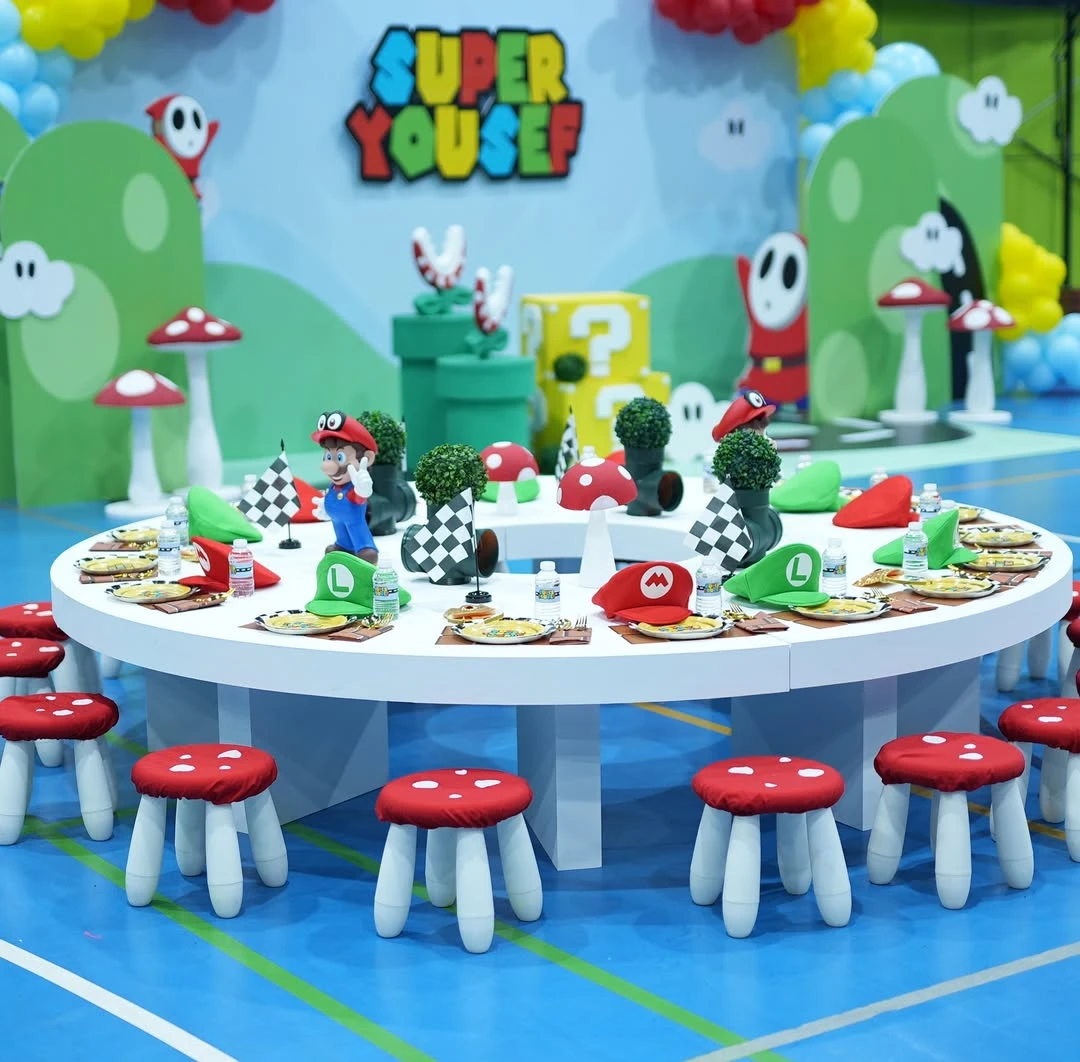
Credit: @thepartyfactory / Instagram
Transform a standard seating area into a themed forest using DIY stool covers and wearable place settings.
Red stool cushions with white polka dots mimic power-up mushrooms, providing a high-impact visual that fills the space with color without requiring custom furniture.
Stretch red fabric over round stools and attach white felt circles; place character hats and checkered flags at each setting to serve as both decor and interactive elements.
15. Question Block Centerpiece Ideas
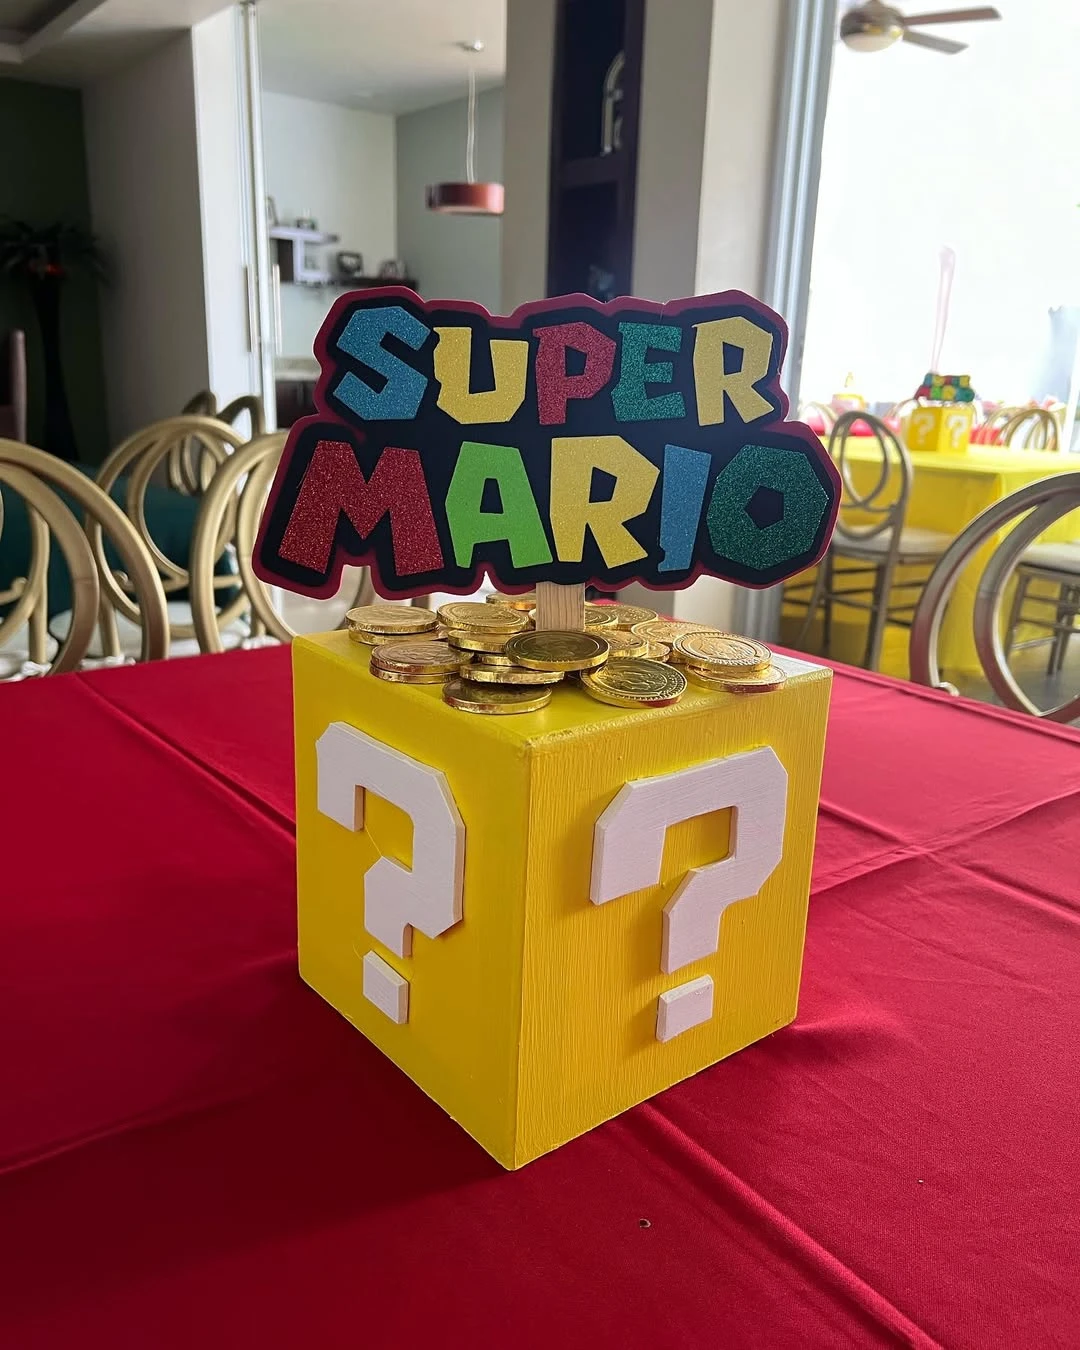
Credit: @decoraciones_cyta / Instagram
Build a focal point for guest tables using iconic game elements that double as interactive decor.
The bright yellow block contrasts sharply with a red tablecloth, instantly signaling the theme. Adding gold chocolate coins or plastic tokens provides a tactile element for guests to enjoy throughout the event.
Use a square wooden or cardboard box painted yellow with white foam question marks glued to the sides. Secure a themed logo sign with a wooden dowel inserted into a foam block inside the box to keep it upright and stable.
16. Character Themed Table Zones
Credit: @algo_sorpresa / Instagram
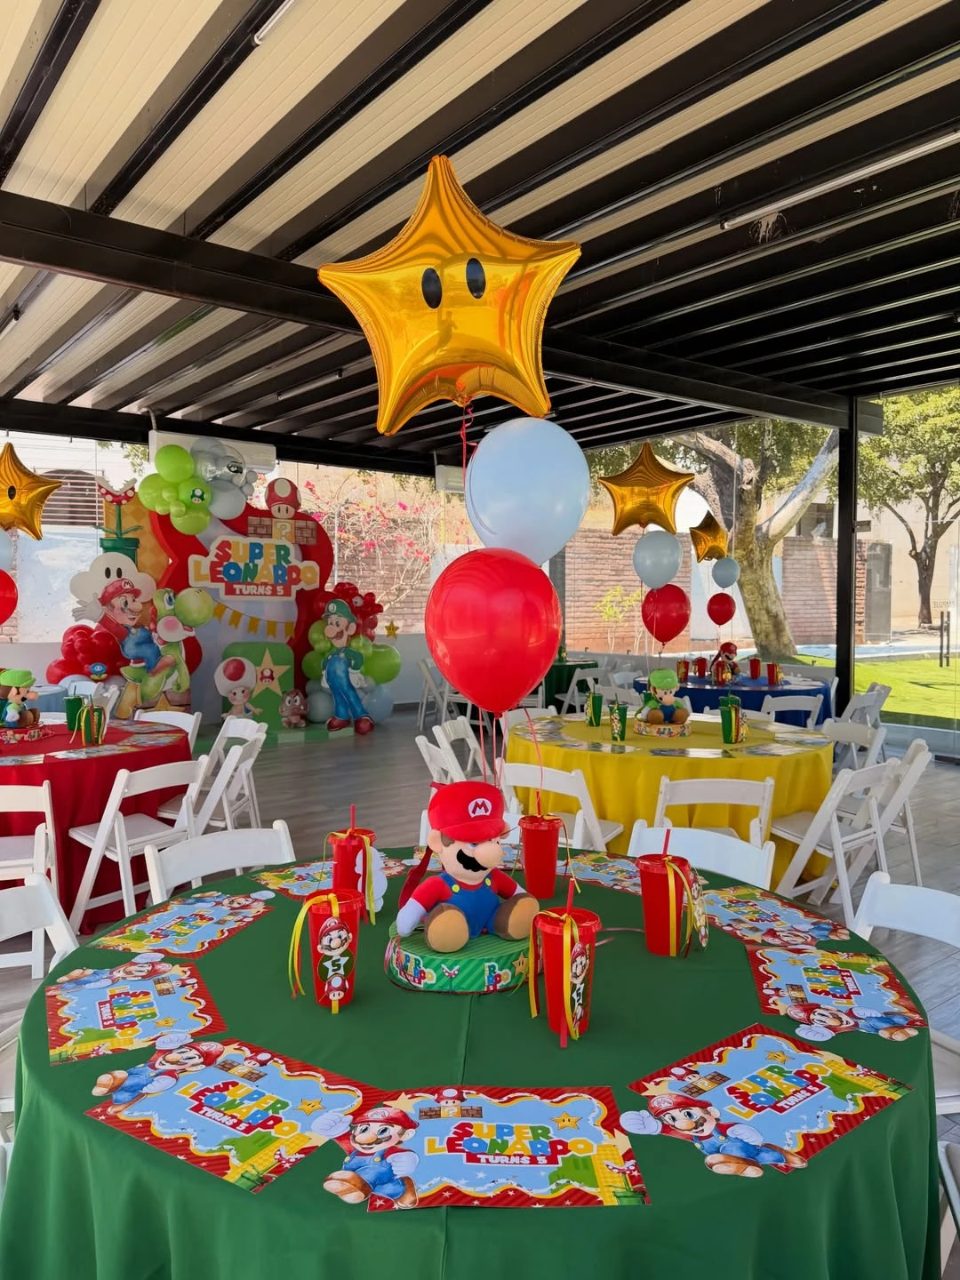
Assign a specific primary color to each guest table to represent different game characters like Mario, Luigi, or Toad. Use solid-colored linens in red, green, blue, and yellow to create a high-contrast look that fills the venue with energy.
This approach organizes the seating area into distinct zones and makes the space feel cohesive without requiring complex decorations.
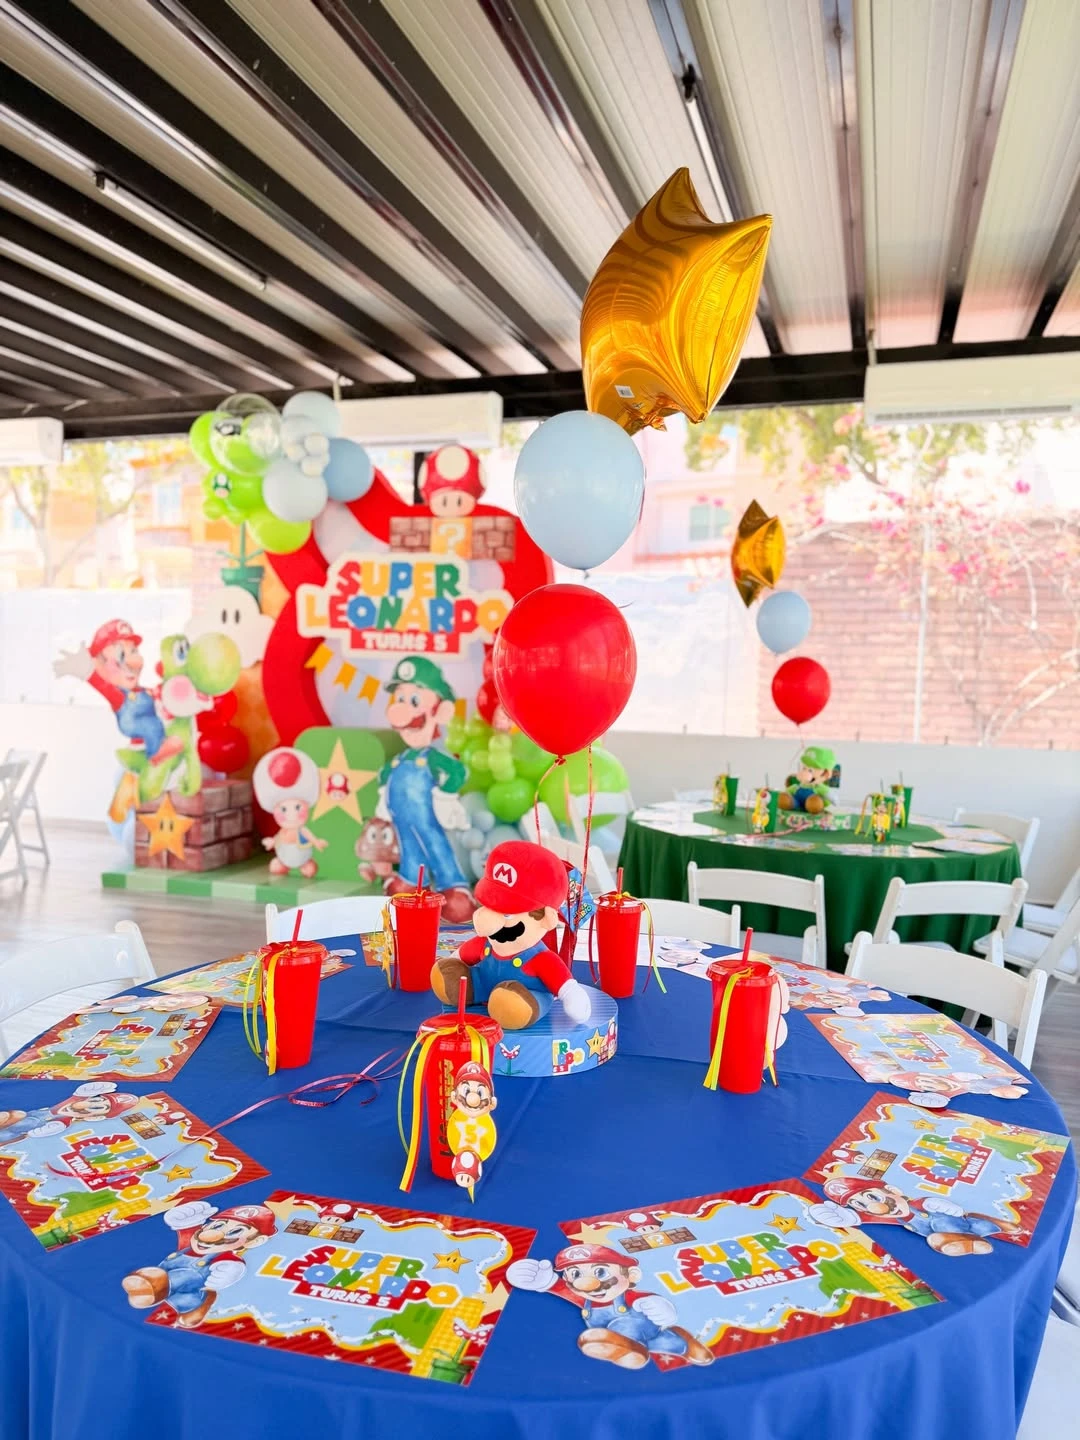
Place a character plush in the center of each table to serve as a soft, safe centerpiece that doubles as a gift for the birthday child or a prize for game winners.
Credit: @algo_sorpresa / Instagram
Layer personalized paper placemats and themed cups over the solid linens to tie the individual seating areas back to the central party theme. Using red cups with yellow accents mimics the colors of iconic character outfits.
Detailed paper goods add visual interest at the guest level while protecting the table linens from spills during the meal.
Secure a balloon bouquet featuring a gold star to the central plush toy to add vertical height to the decor and help guests locate their assigned tables from across the room.
17. Bold Primary Color Tables
Credit: @parfait_qatar / Instagram
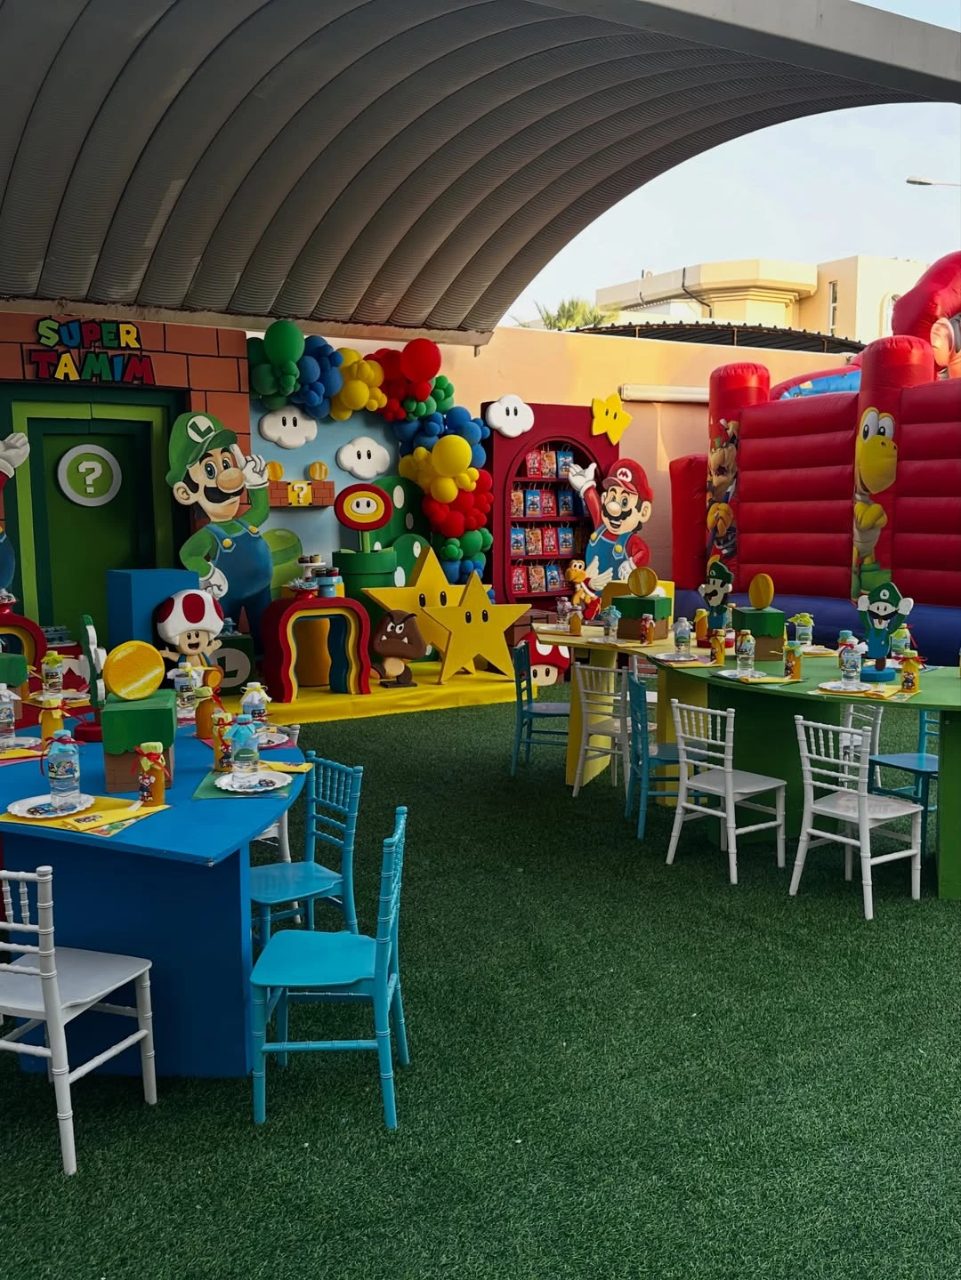
Use solid-colored tables to define different seating zones.
Bright blue and green surfaces mimic the game environment.
Mix chair colors to increase visual energy.
18. Star-Powered Seating Stations
Credit: @papillon.event / Instagram
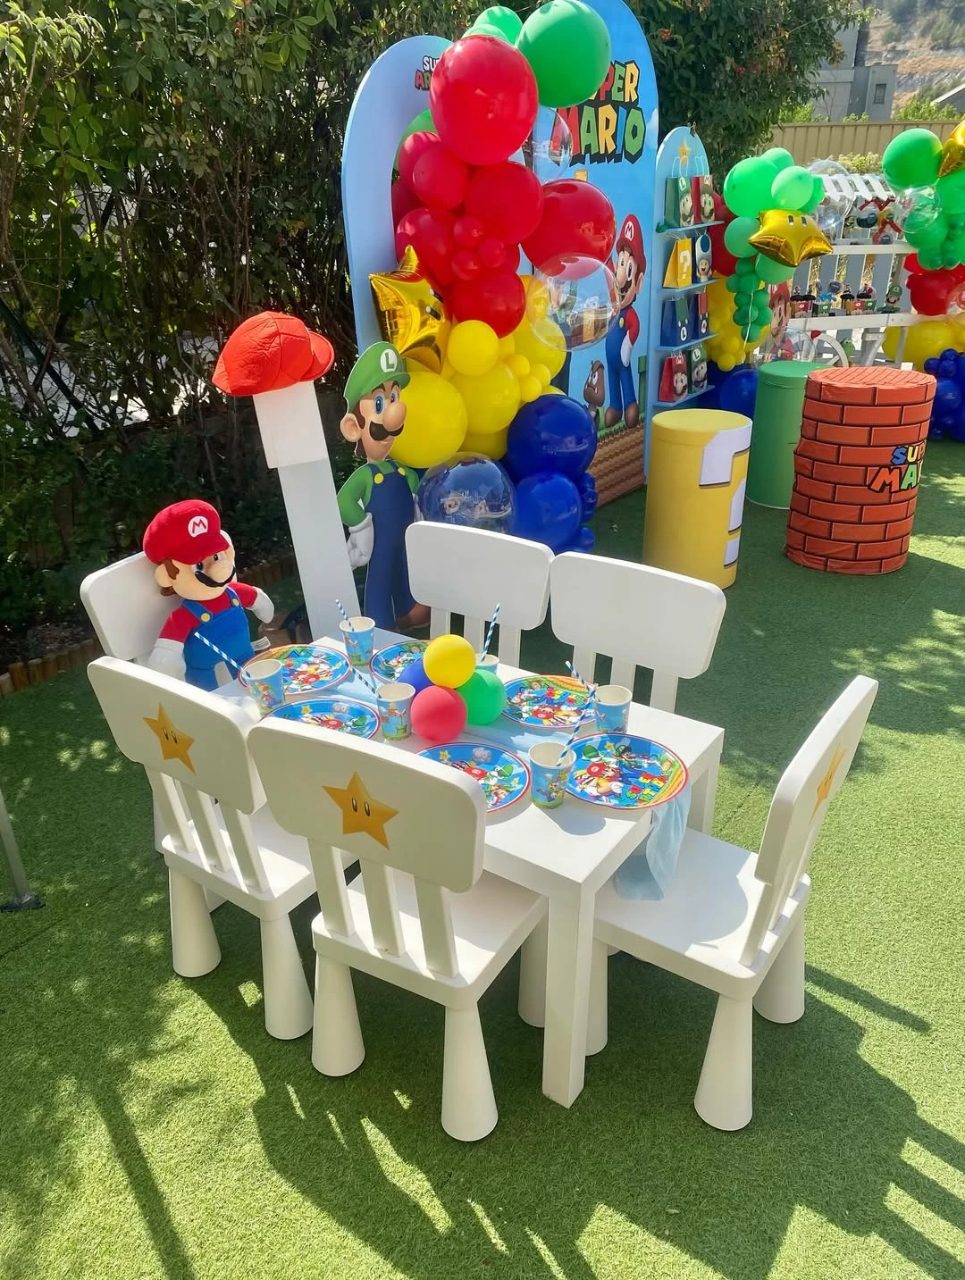
Designate a special seat for the guest of honor by placing a large character plush at the head of a kid-sized table.
Using a plush toy instead of a person in a costume is a budget-friendly way to bring the characters to the table while providing a soft, approachable photo prop for toddlers.
Surround the table with oversized props like brick-patterned cylinders and green pipes to make the dining area feel like a level from the game.
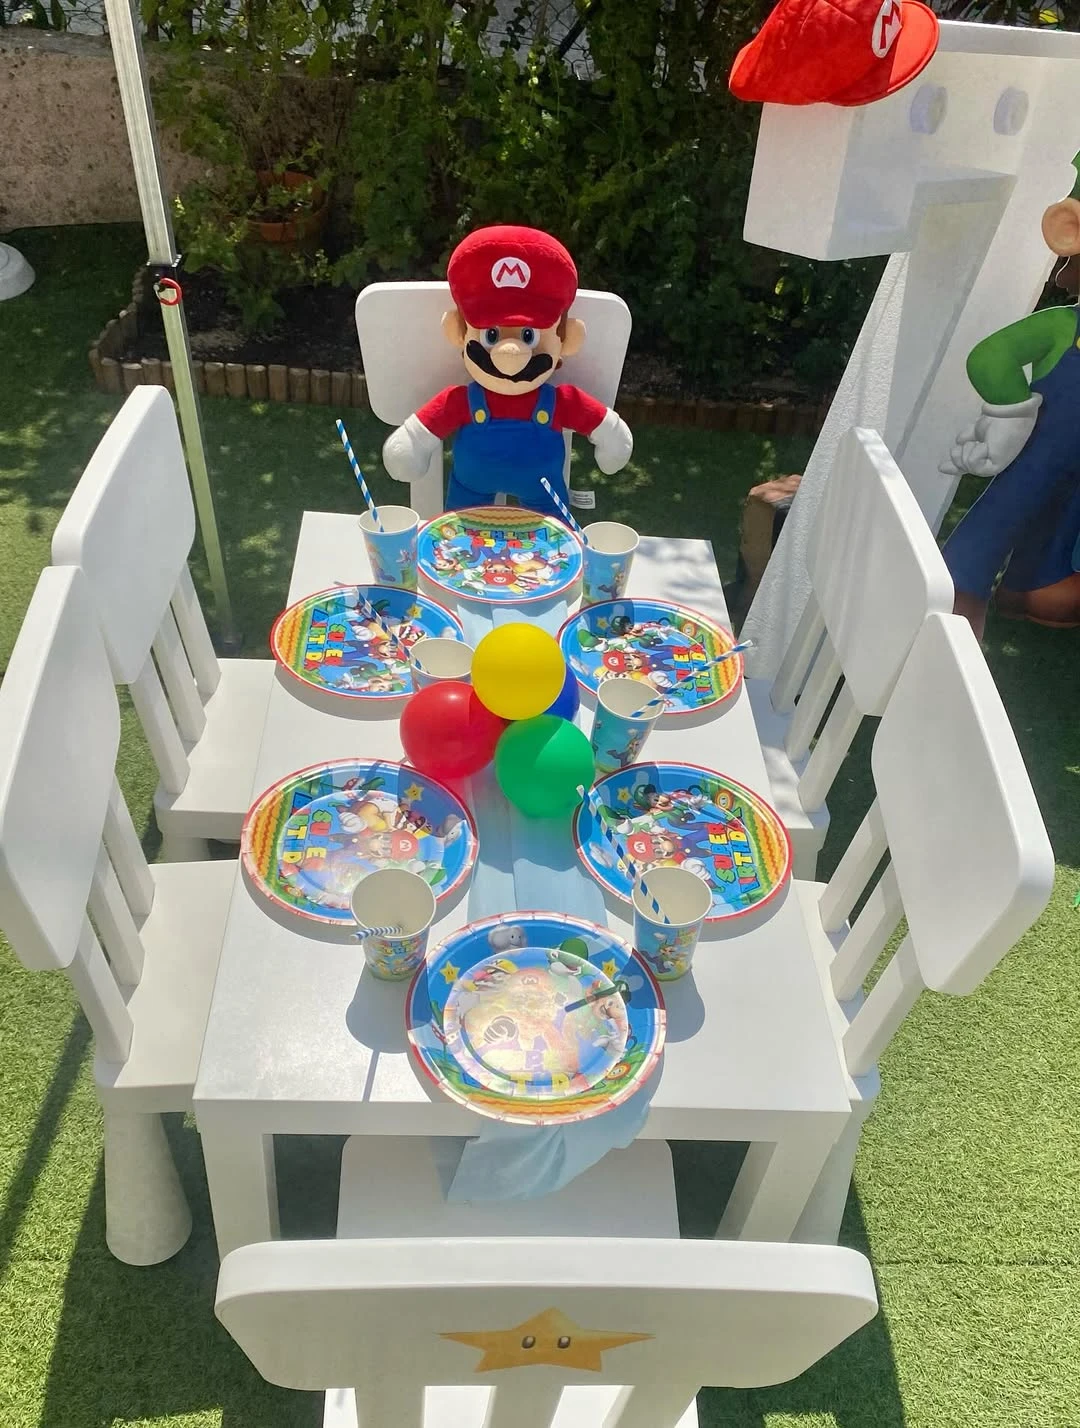
Credit: @papillon.event / Instagram
Apply gold star decals to the back of simple white chairs to create a cohesive theme throughout the seating area.
This quick DIY modification ties basic rental or household furniture into the specific game aesthetic with minimal effort or cost.
Keep the tabletop manageable by using a small cluster of air-filled balloons as a centerpiece, which avoids the need for helium and stays below eye level for seated children.
19. High-Contrast Dining Zones
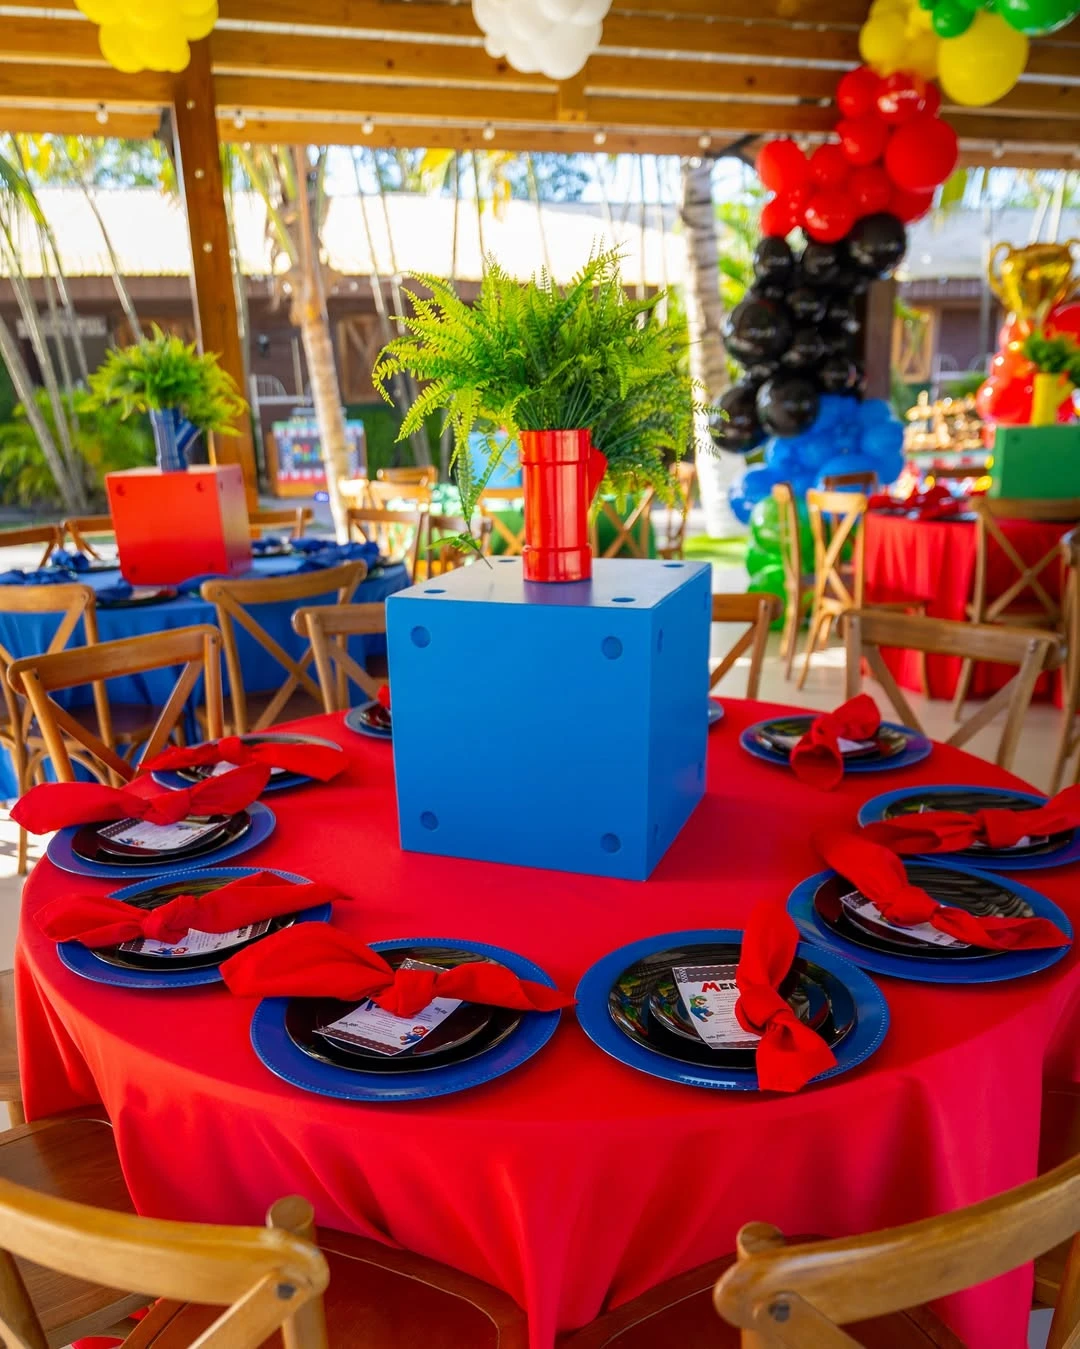
Credit: @epbydanievents / Instagram
Establish a high-energy dining area by using solid red and blue linens that mirror the character outfits. Large, geometric blocks placed in the center of the table provide a structured foundation for greenery or themed props.
This method uses color theory to set the tone, which is often more budget-friendly and visually cohesive than relying solely on printed merchandise.
Paint square wooden crates or cardboard boxes in primary colors to act as elevated stands, helping to fill the vertical space above the table.
20. Warp Pipe Table Runners
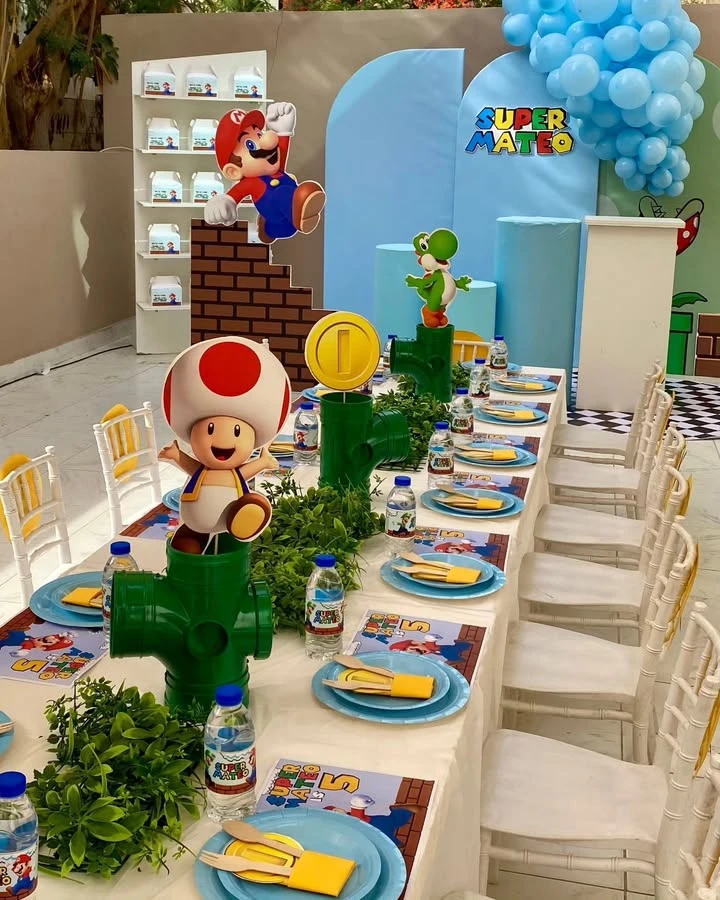
Credit: @perfect_party_pp / Instagram
Construct a dynamic table runner using green-painted pipes to elevate character cutouts and gold coins above the place settings.
This approach adds height and visual interest to long tables, ensuring the theme is visible even when guests are seated and the table is full.
Use floral foam inside the pipes to keep the cutouts upright and surround the bases with artificial grass or faux greenery to mimic the game’s terrain.
21. Low-Profile Picnic Stations
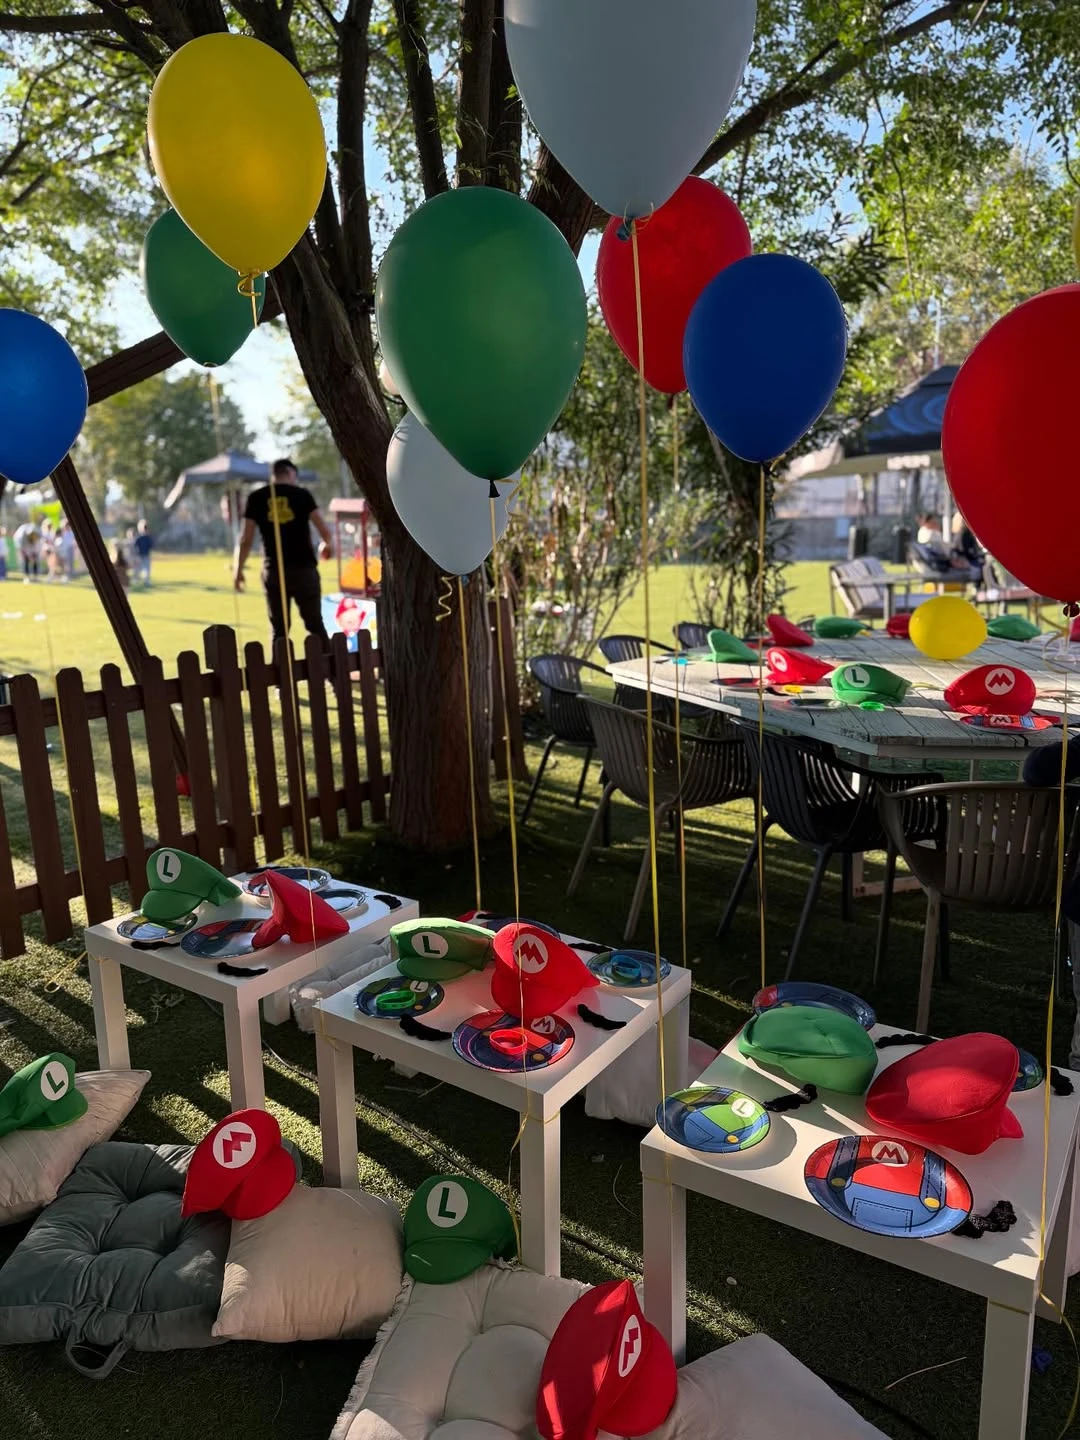
Credit: @vana_geor / Instagram
Transform a standard lawn into a kid-sized play zone by using low-profile tables and floor cushions.
Using primary-colored balloons and matching hats at every seat identifies the theme without the need for expensive or tall centerpieces that block sightlines.
Set up simple white side tables or coffee tables on the grass and provide plush outdoor pillows to keep the seating flexible and budget-friendly.
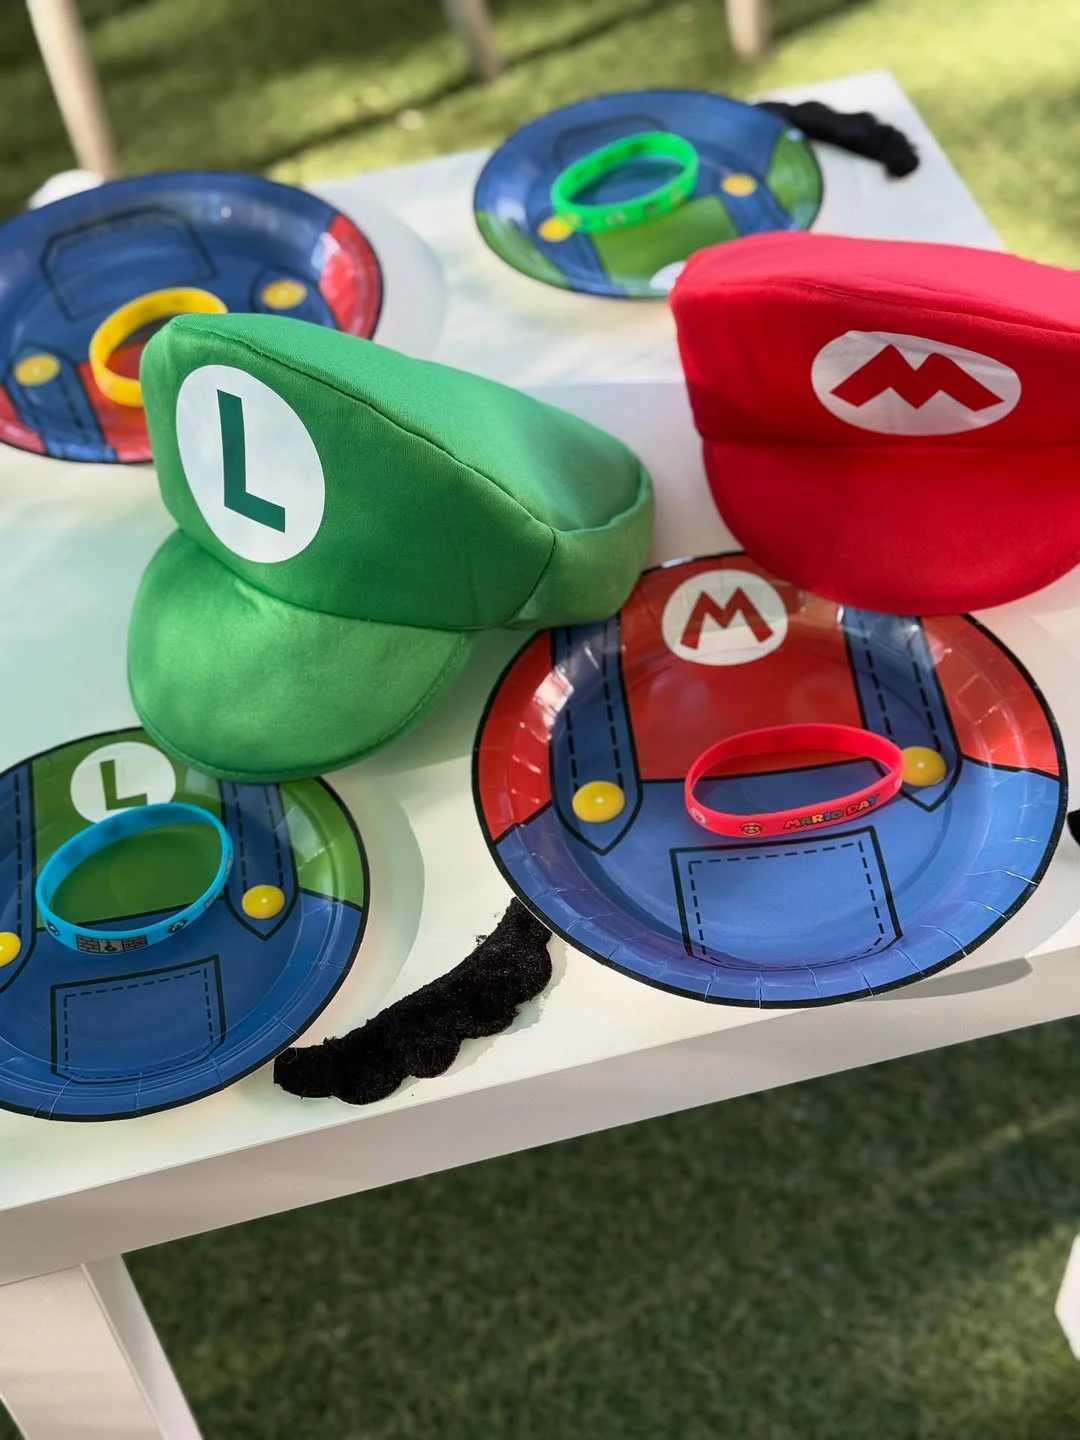
Credit: @vana_geor / Instagram
Incorporate interactive elements into the table setting by layering wearable items over themed paper goods.
Placing a mustache and a character hat at every setting turns the meal into a costume activity and keeps the table looking full and festive.
Opt for disposable plates with overalls or character icons to simplify cleanup while maintaining the high-contrast red and green color palette.
22. Question Block Table Centerpieces
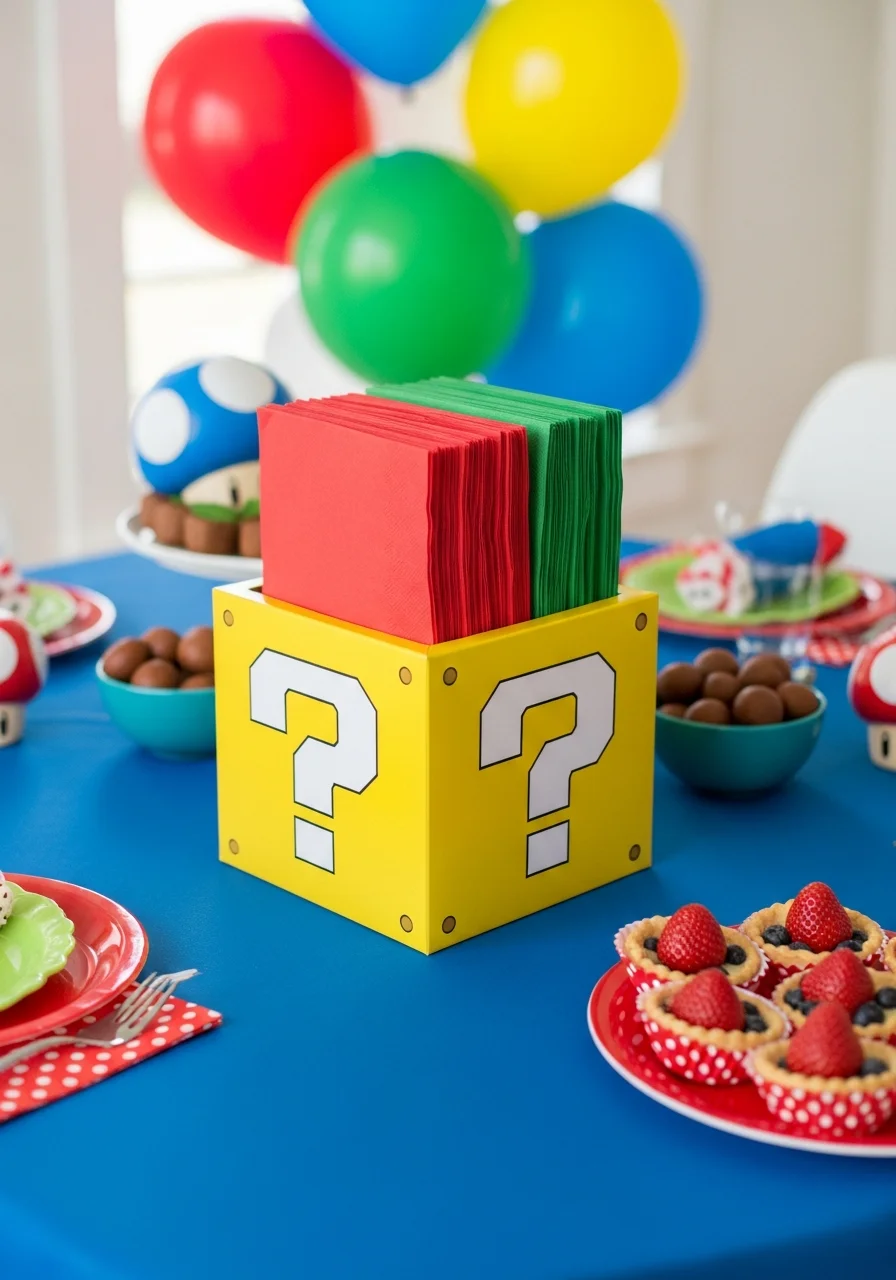
Use square yellow boxes as central decor pieces on the guest tables.
These blocks are versatile and can be used to hold napkins, utensils, or additional snacks.
Paint empty square tissue boxes yellow and add white question marks for an affordable DIY option.
Level-Up Cakes and Desserts
23. Multi-Level Cake Display
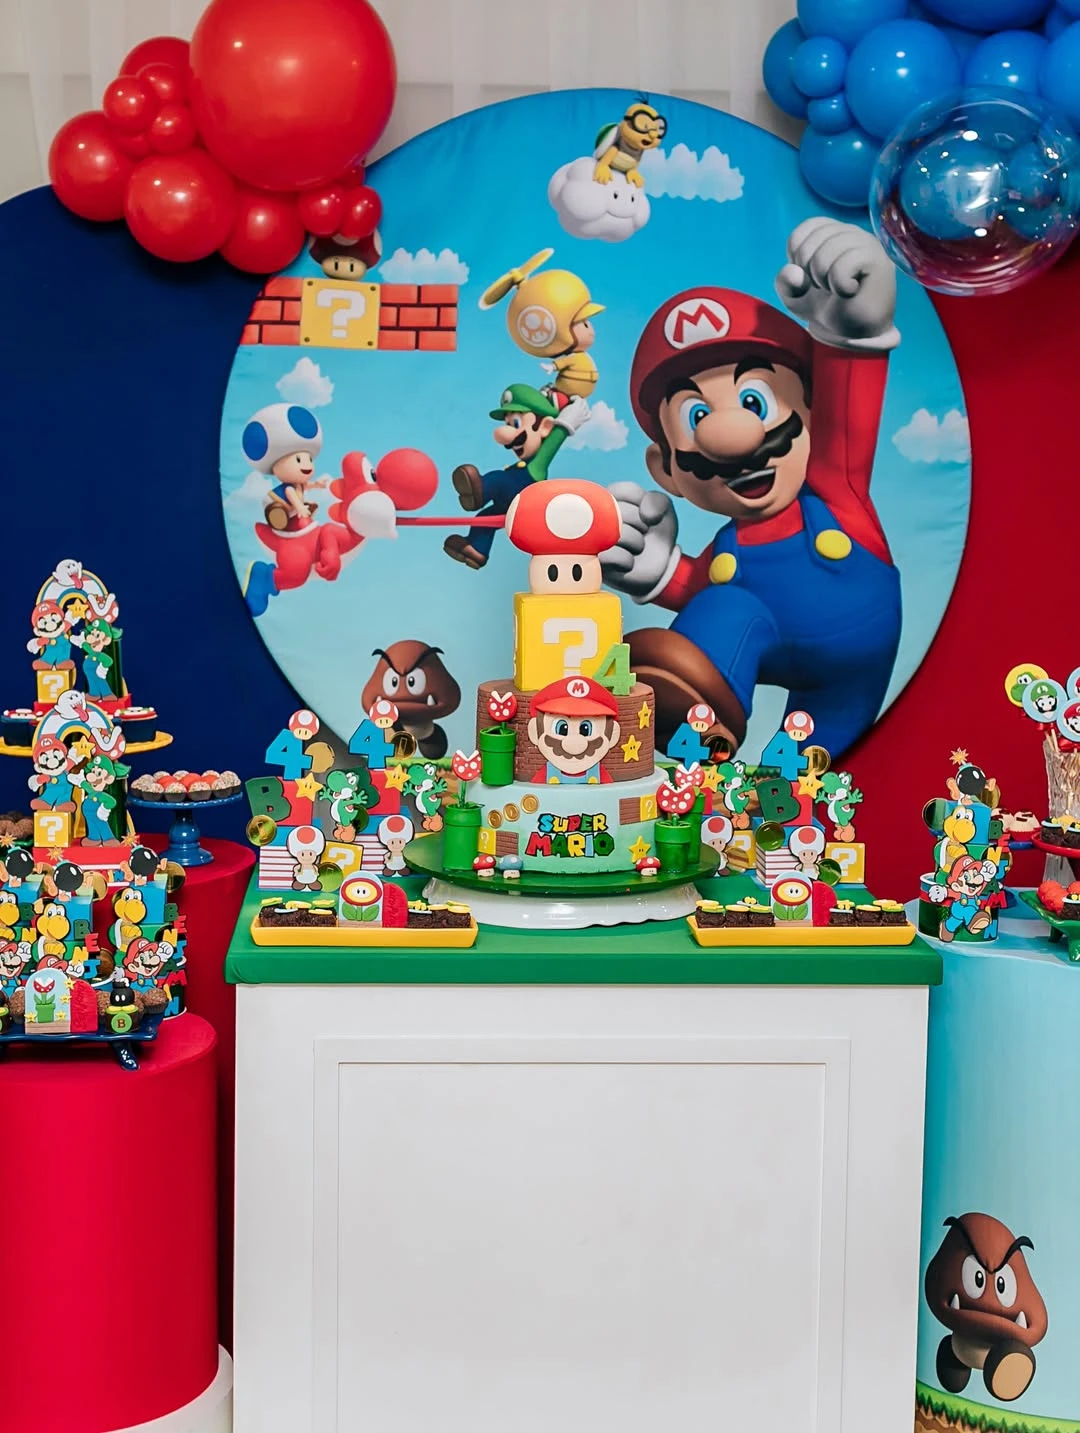
Credit: @isabellanicolau / Instagram
Build a focal point with a round backdrop and multi-height pedestals to organize the cake and snacks.
Varying heights prevent a flat look and clearly separate the main cake from secondary treats.
Center the tallest cake and use primary-colored cylinders for smaller items like cupcakes or favors.
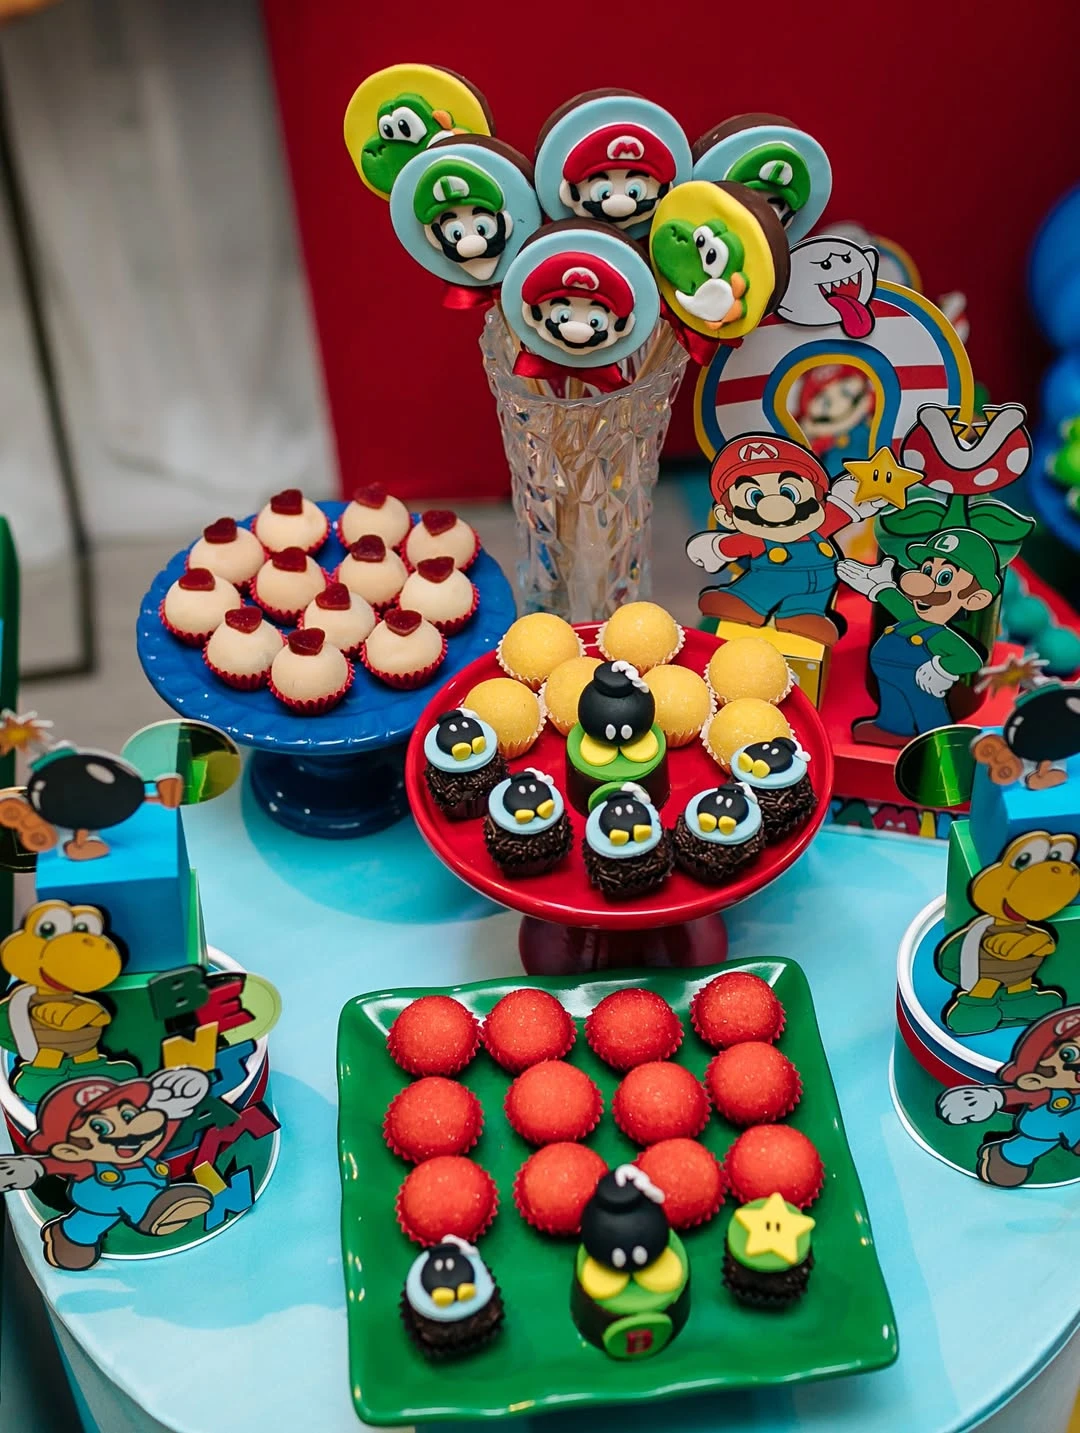
Credit: @isabellanicolau / Instagram
Decorate small desserts like truffles and cake pops with fondant details or character faces to represent Bob-ombs and heroes.
Bite-sized options are easier for children to handle and add variety to the dessert spread.
Use colored candy melts for the base and add simple paper cutouts for complex character elements.
24. Bowser’s Castle Cupcake Tower
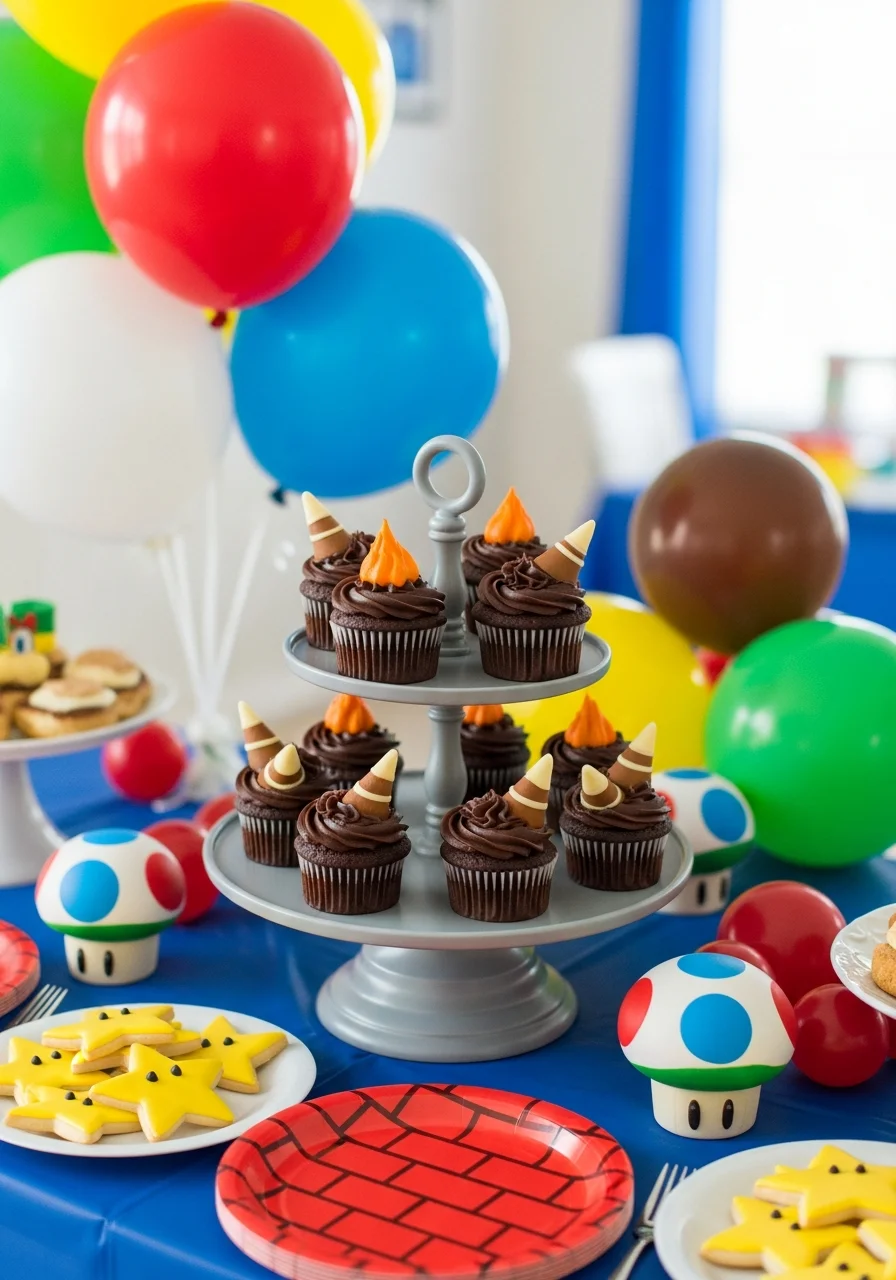
Create a darker, villain-themed dessert display to contrast the bright hero colors.
It introduces a different visual element to the dessert table and highlights the game’s antagonist.
Frost cupcakes with dark grey icing and use orange peaks to represent fire or lava.
25. Yoshi Egg Cake Pops
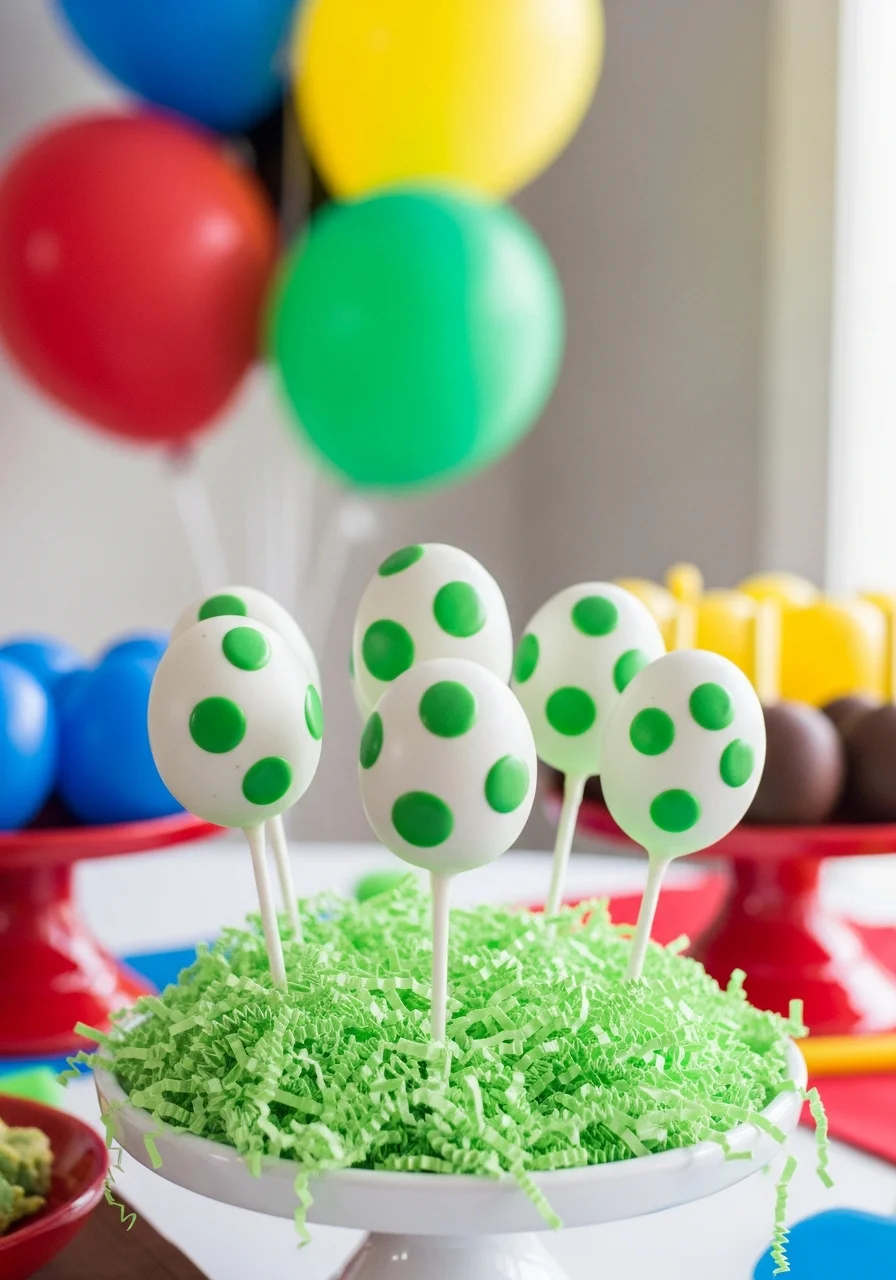
Serve oval-shaped cake pops decorated to look like Yoshi’s eggs.
These are easy-to-eat, portion-controlled treats that fans will immediately recognize.
Display the cake pops in a tray filled with green shredded paper to mimic a nest.
26. Winding Race Track Cakes
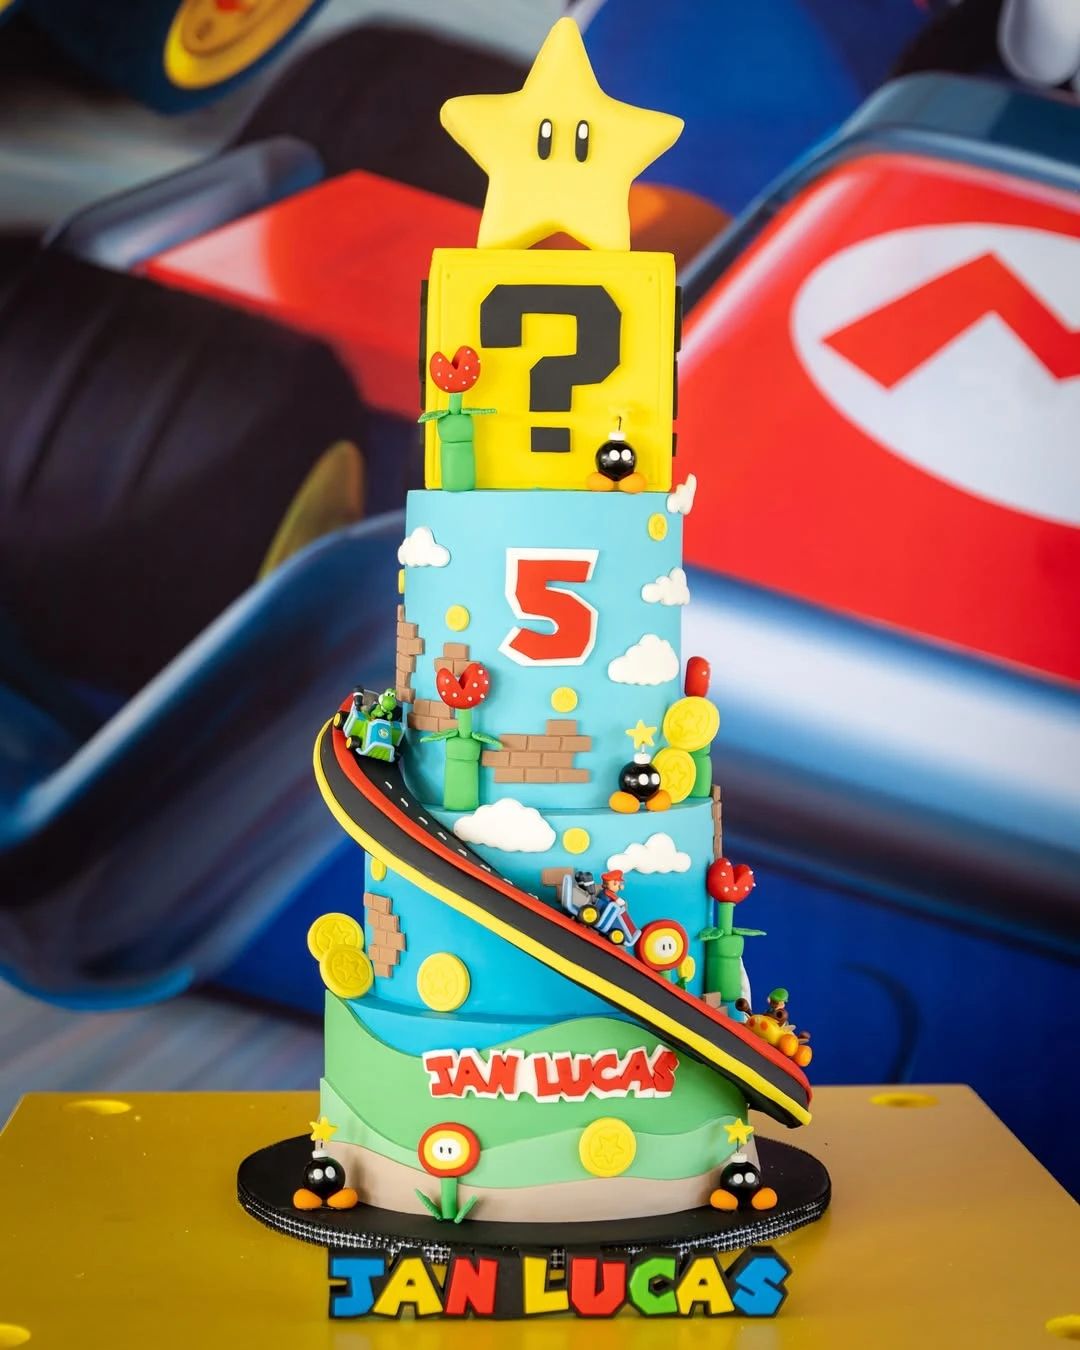
Credit: @epbydanievents / Instagram
Create a focal point for the dessert table with a tall cake that features a winding race track connecting each level. Use game icons like stars and question blocks to crown the top tiers for maximum visibility.
A vertical design allows for a narrative flow, showing characters racing through different environments from the bottom to the top.
Save time on intricate sculpting by using small, cleanable plastic figurines for the racers and focusing fondant work on the track and environmental details.
27. Sky Blue Character Cakes
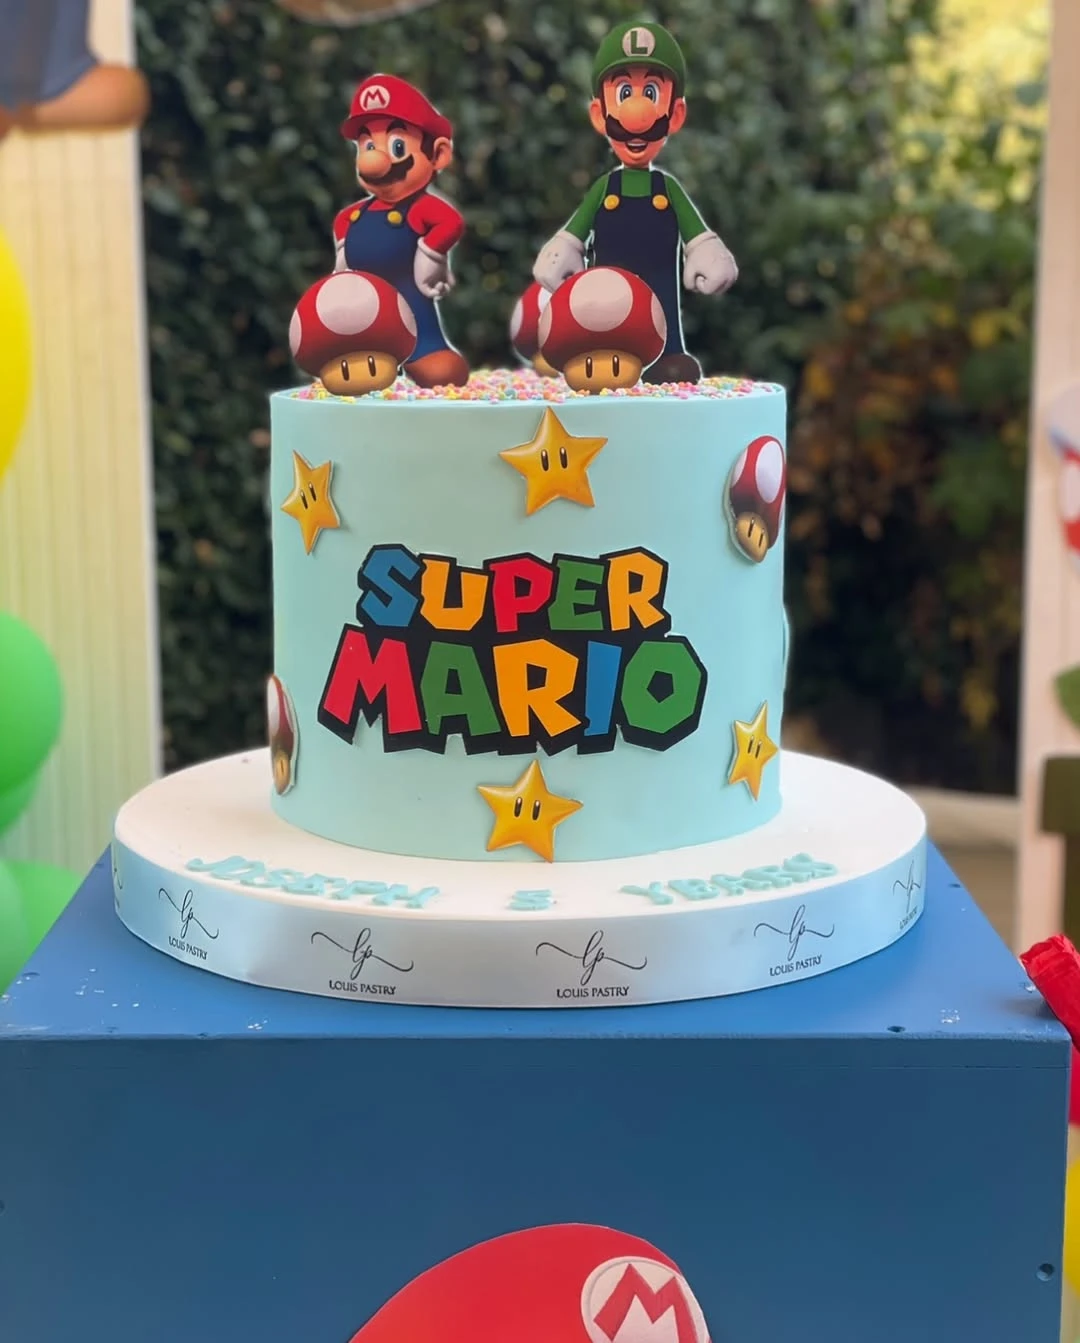
Credit: @the.event.house.decoration / Instagram
Use a sky-blue frosting base to mimic classic game levels, providing a neutral but thematic backdrop for colorful character toppers.
This approach allows for a polished look using simple 2D cardstock or plastic figures, which is more accessible than sculpting 3D characters from sugar.
Place larger figures like Mario and Luigi on top for height, then scatter smaller icons like stars and mushrooms around the sides to create a sense of movement.
28. Character Cakesicle Sticks
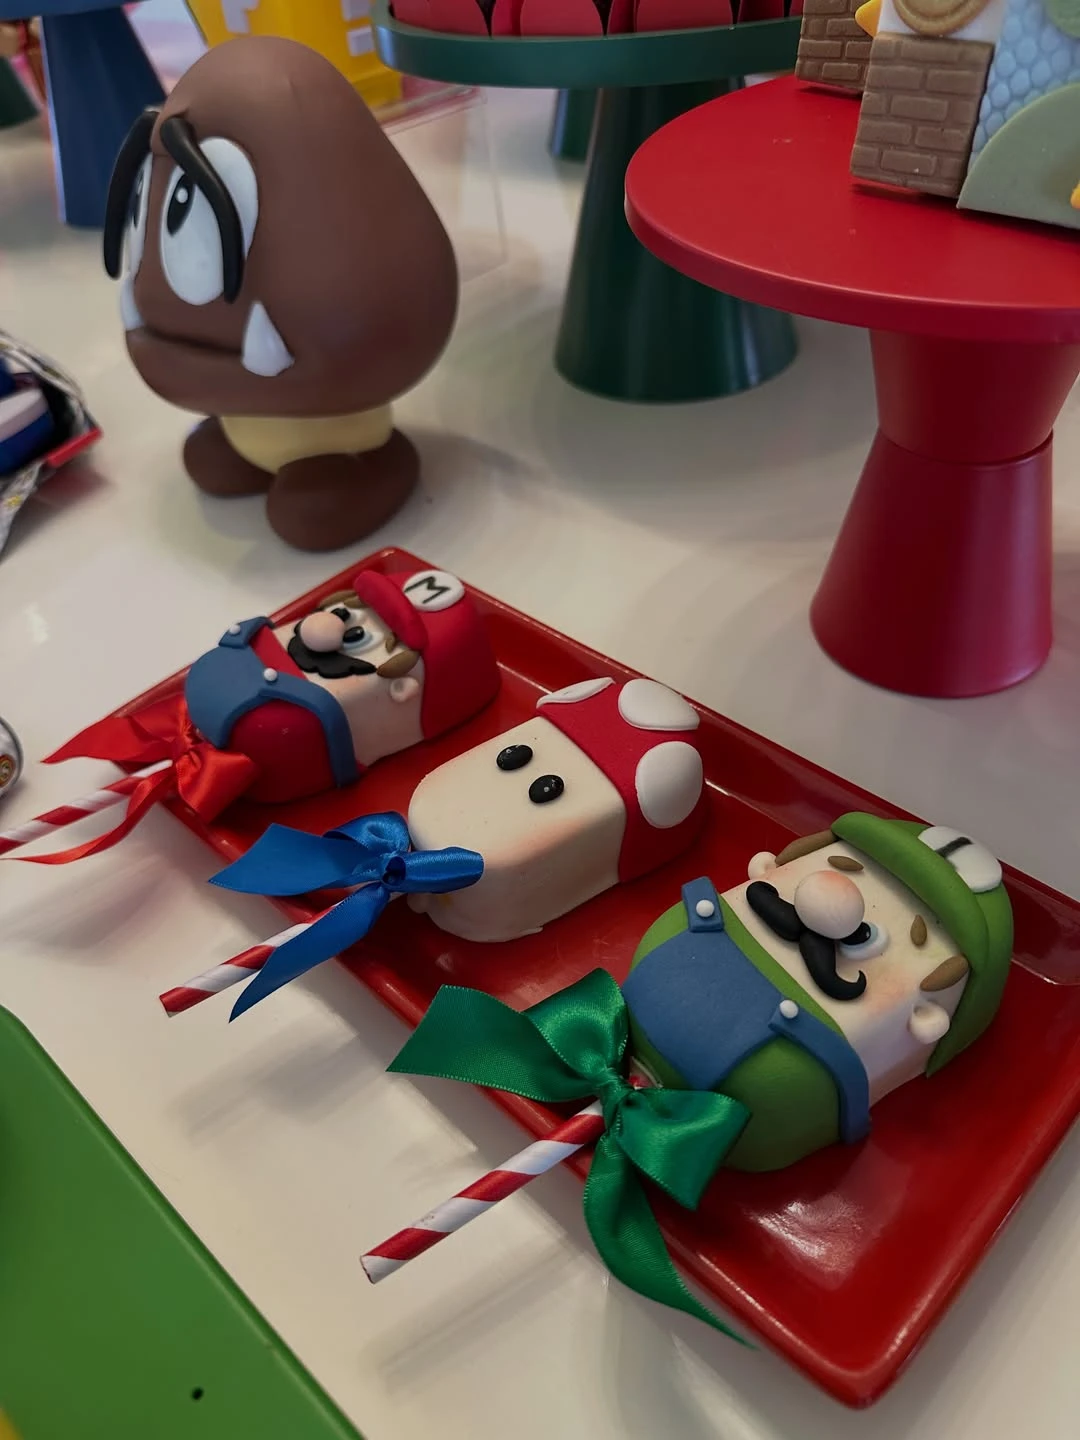
Credit: @jn.partyplanner / Instagram
Decorate portable cakesicles with fondant to represent Mario, Luigi, and power-up mushrooms.
Individual servings are easier for children to manage than traditional cake slices.
Tie satin bows in matching colors to the sticks for a polished, professional finish.
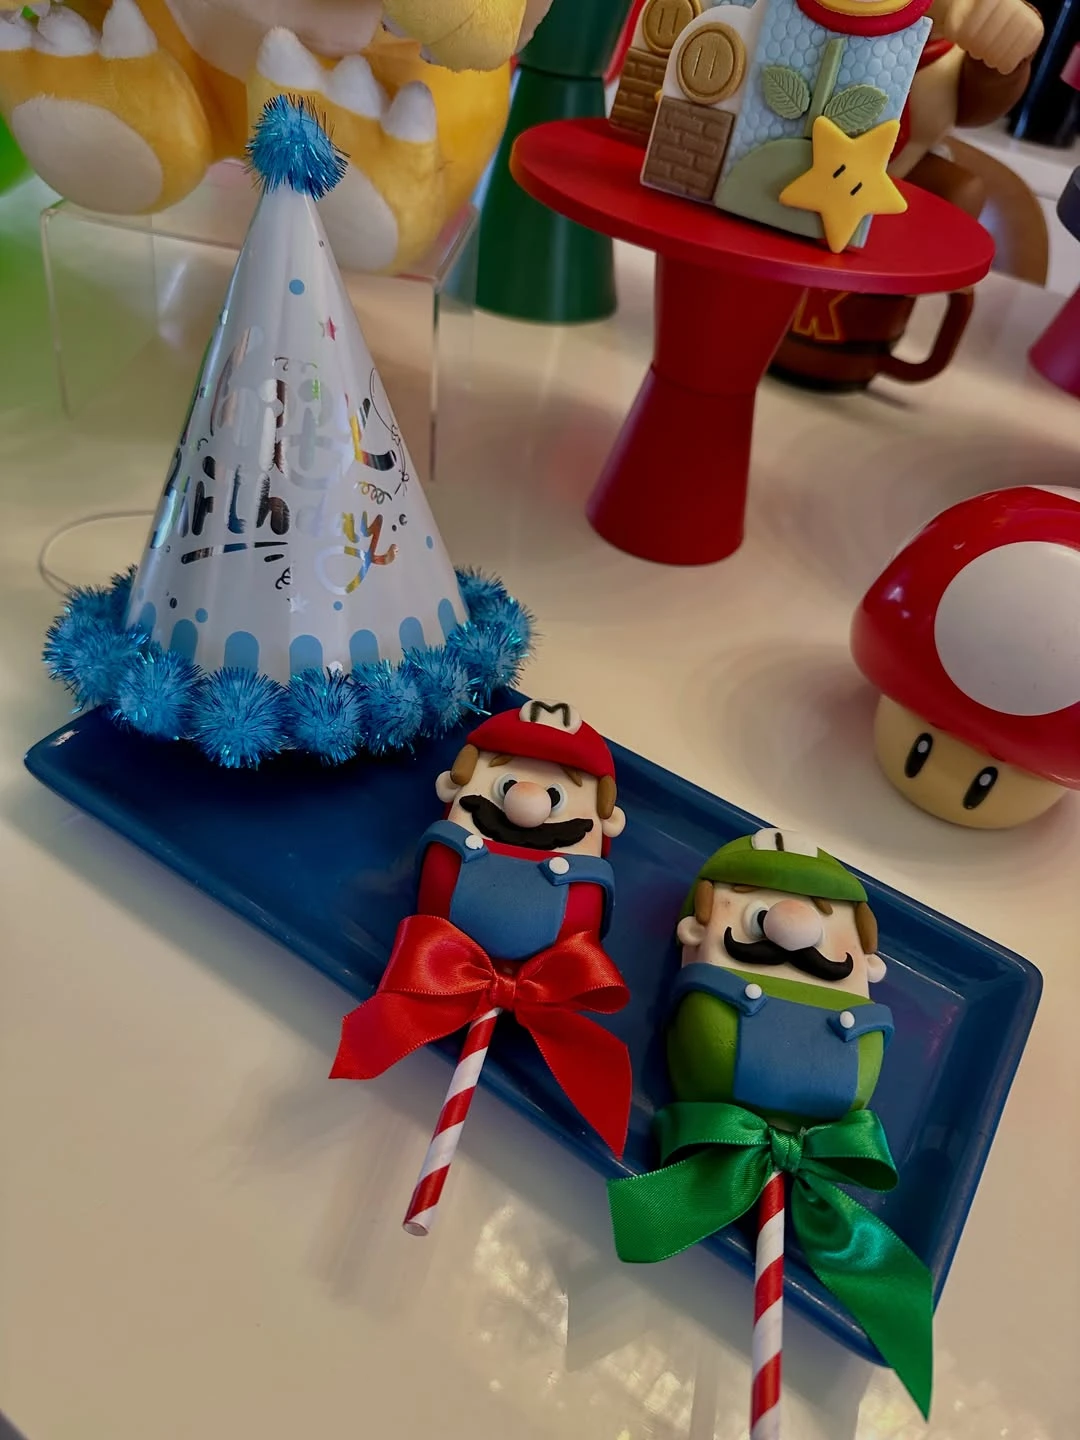
Credit: @jn.partyplanner / Instagram
Display character treats on flat, solid-colored trays to make the details pop.
A contrasting tray color helps the intricate fondant work stand out.
Use striped paper straws instead of plain sticks to add more patterns to the setup.
29. Layered Scene Cake Decorating
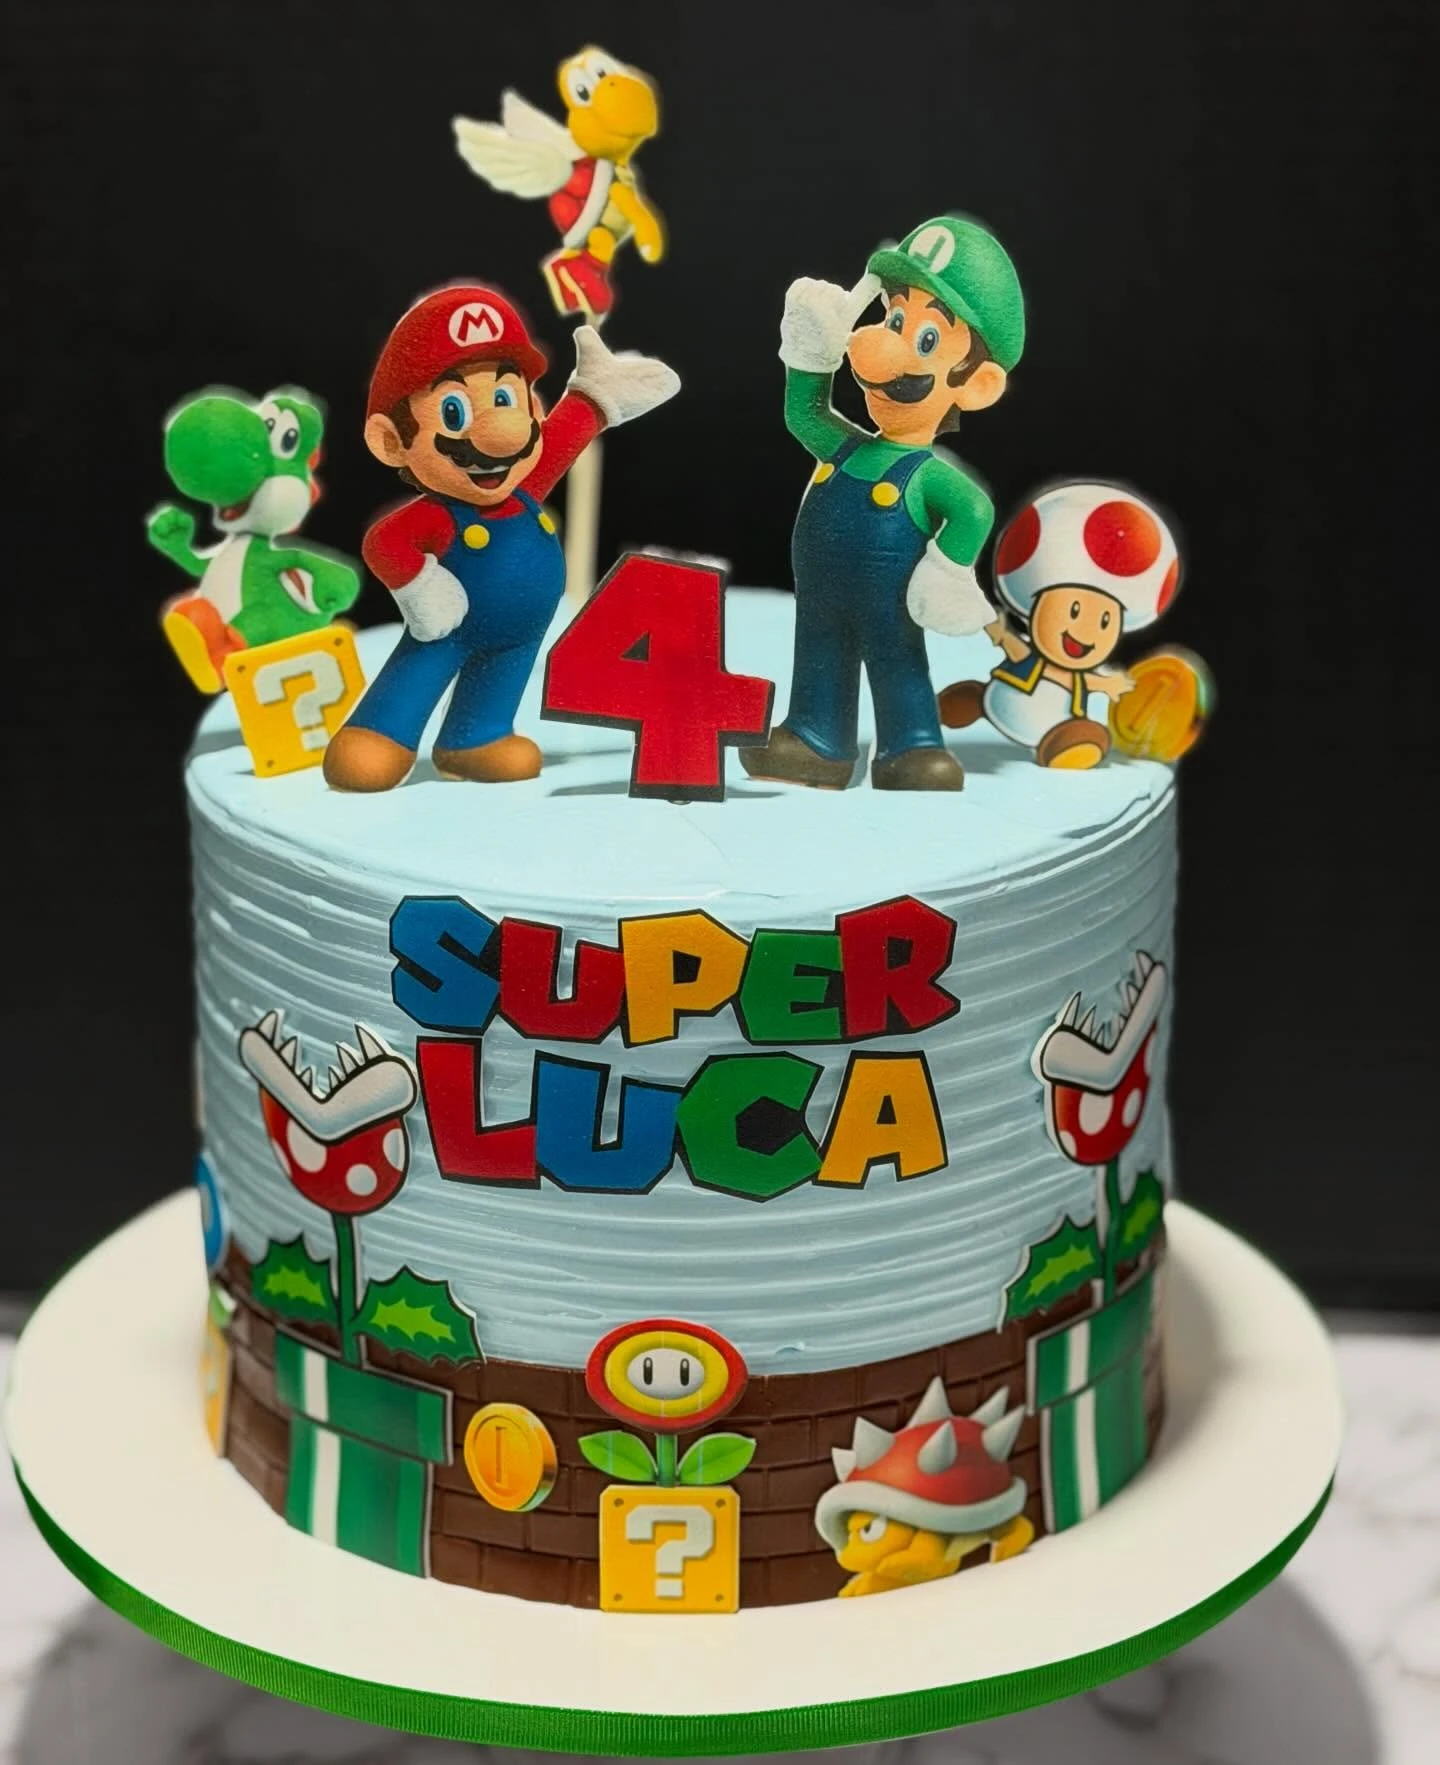
Credit: @gladisbakeryinc / Instagram
Build a vibrant scene using a sky-blue textured buttercream base that mimics the game’s background for character toppers.
Cardstock or plastic toppers provide a high-detail look without the cost or technical skill required for fondant sculpting.
Wrap the bottom edge of the cake in a brick-patterned edible print or chocolate wrap to ground the design and represent the game’s ground levels.
Mushroom Kingdom Menu
30. Fire Flower Veggie Trays
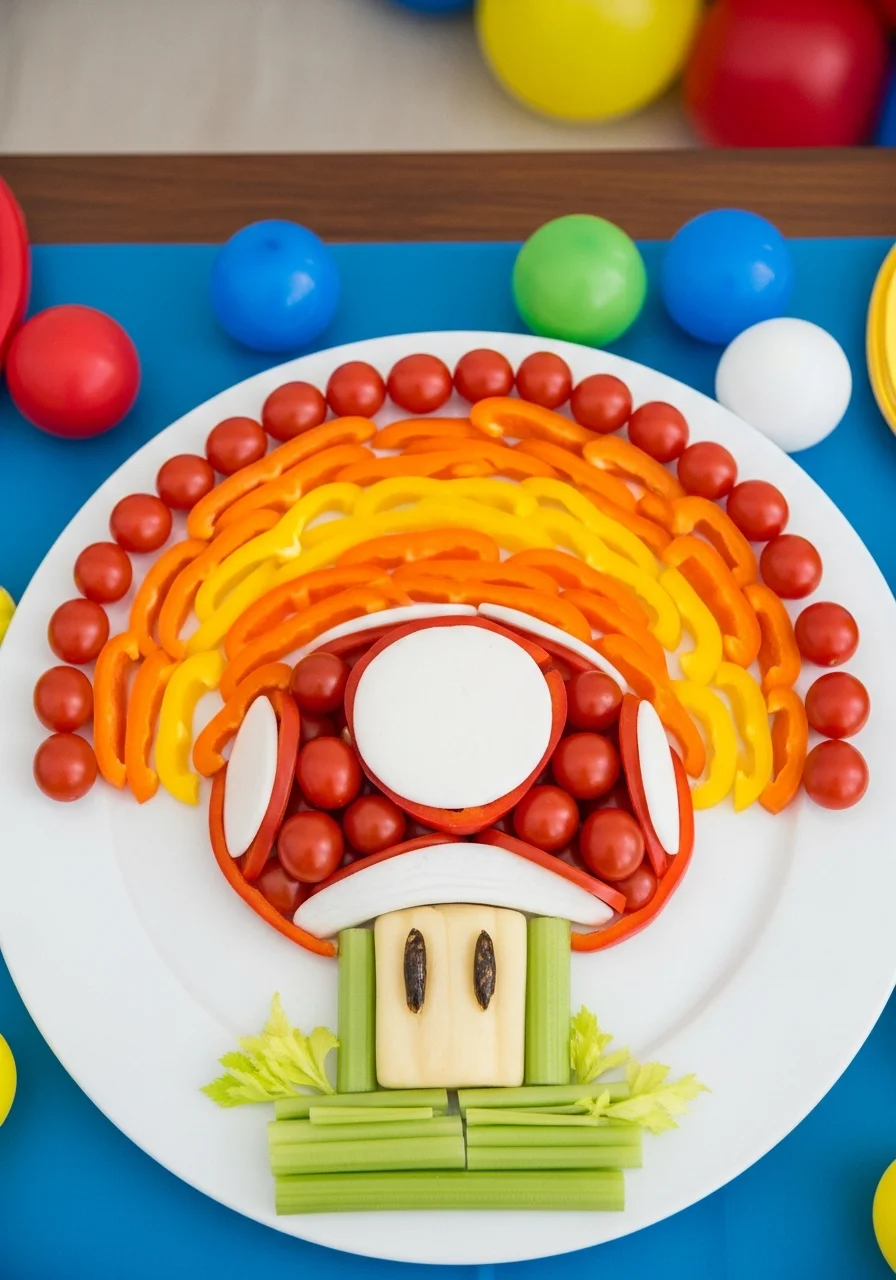
Arrange a healthy snack platter to look like the classic Fire Flower power-up.
This provides a nutritious option that remains visually consistent with the game’s bright aesthetic.
Use a small bowl of hummus or ranch dressing as the center of the flower to hold the vegetable petals in place.
31. Piranha Plant Fruit Skewers
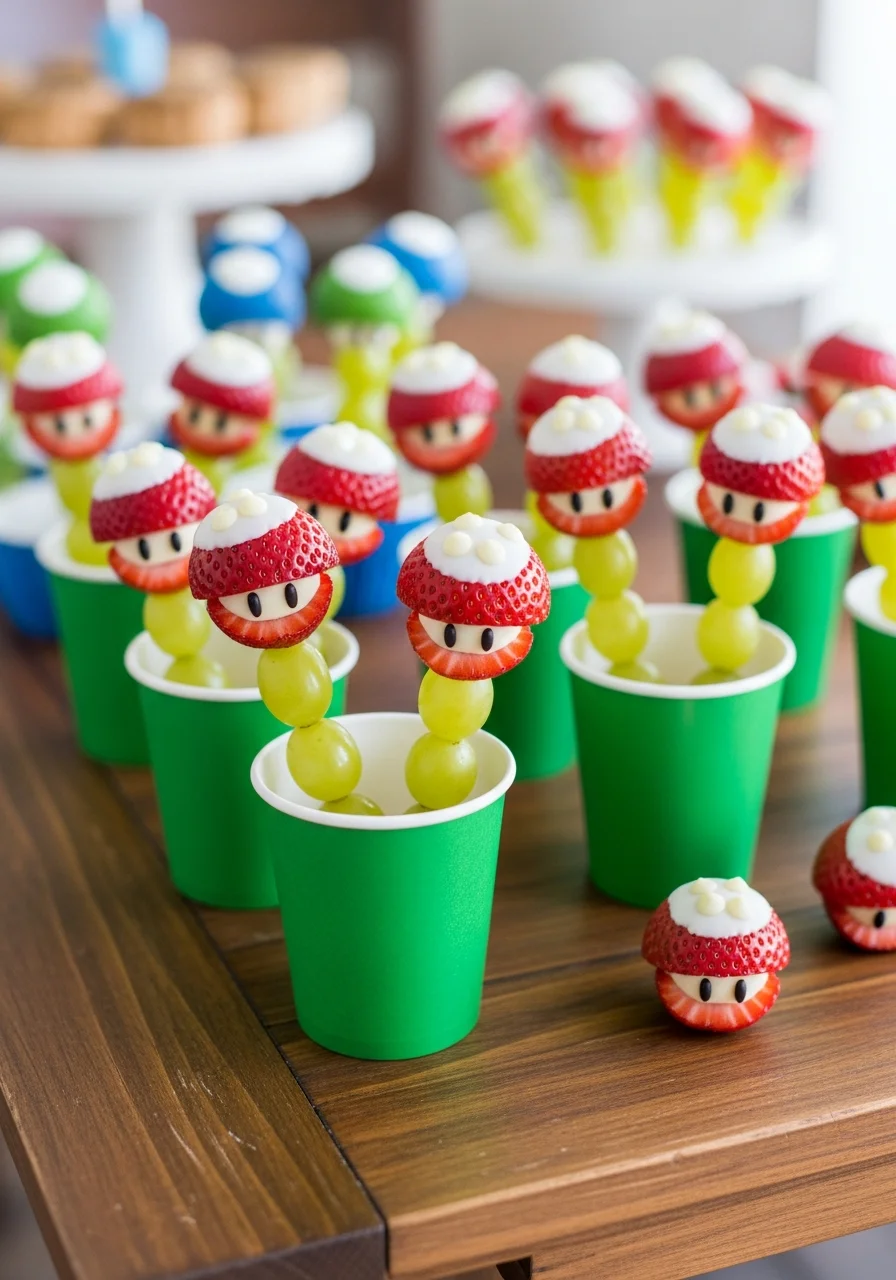
Construct fruit skewers that mimic the look of the piranha plants emerging from pipes.
It is a creative way to serve fruit while incorporating a well-known game obstacle.
Place the skewers inside green paper cups to represent the green warp pipes.
32. Sweet Power-Up Platter
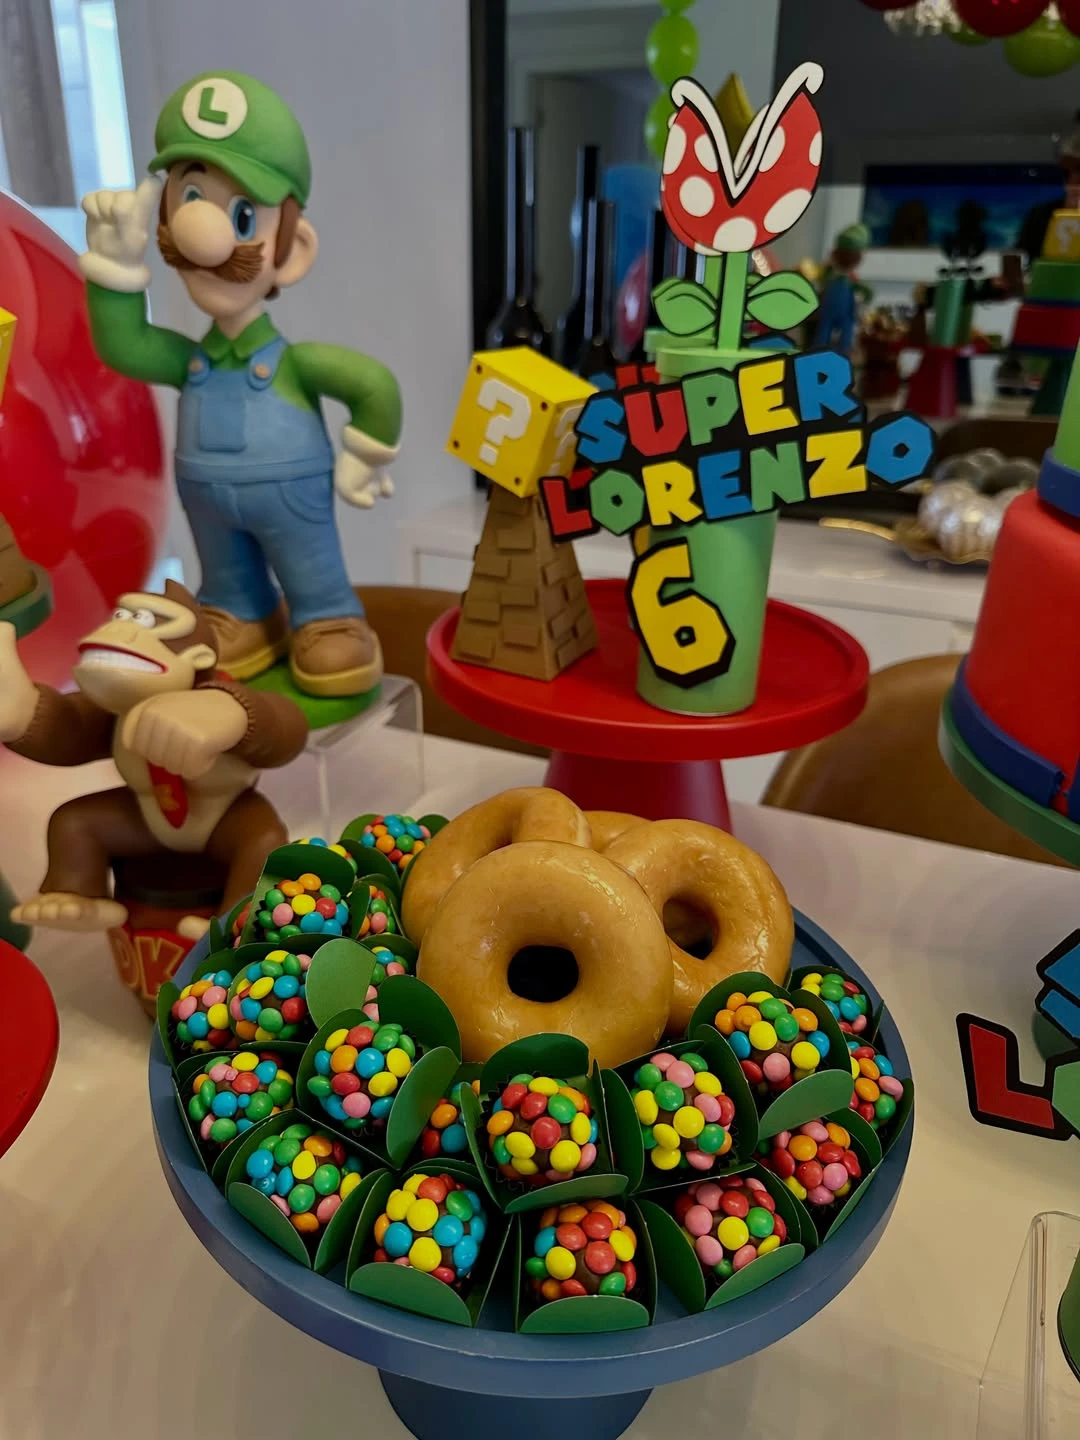
Credit: @jn.partyplanner / Instagram
Serve glazed donuts and chocolate truffles in vibrant paper liners to mimic game items.
Simple treats become themed snacks when grouped on primary-colored stands with character figures.
Use red, green, and blue cake stands of varying heights to create a dynamic display.
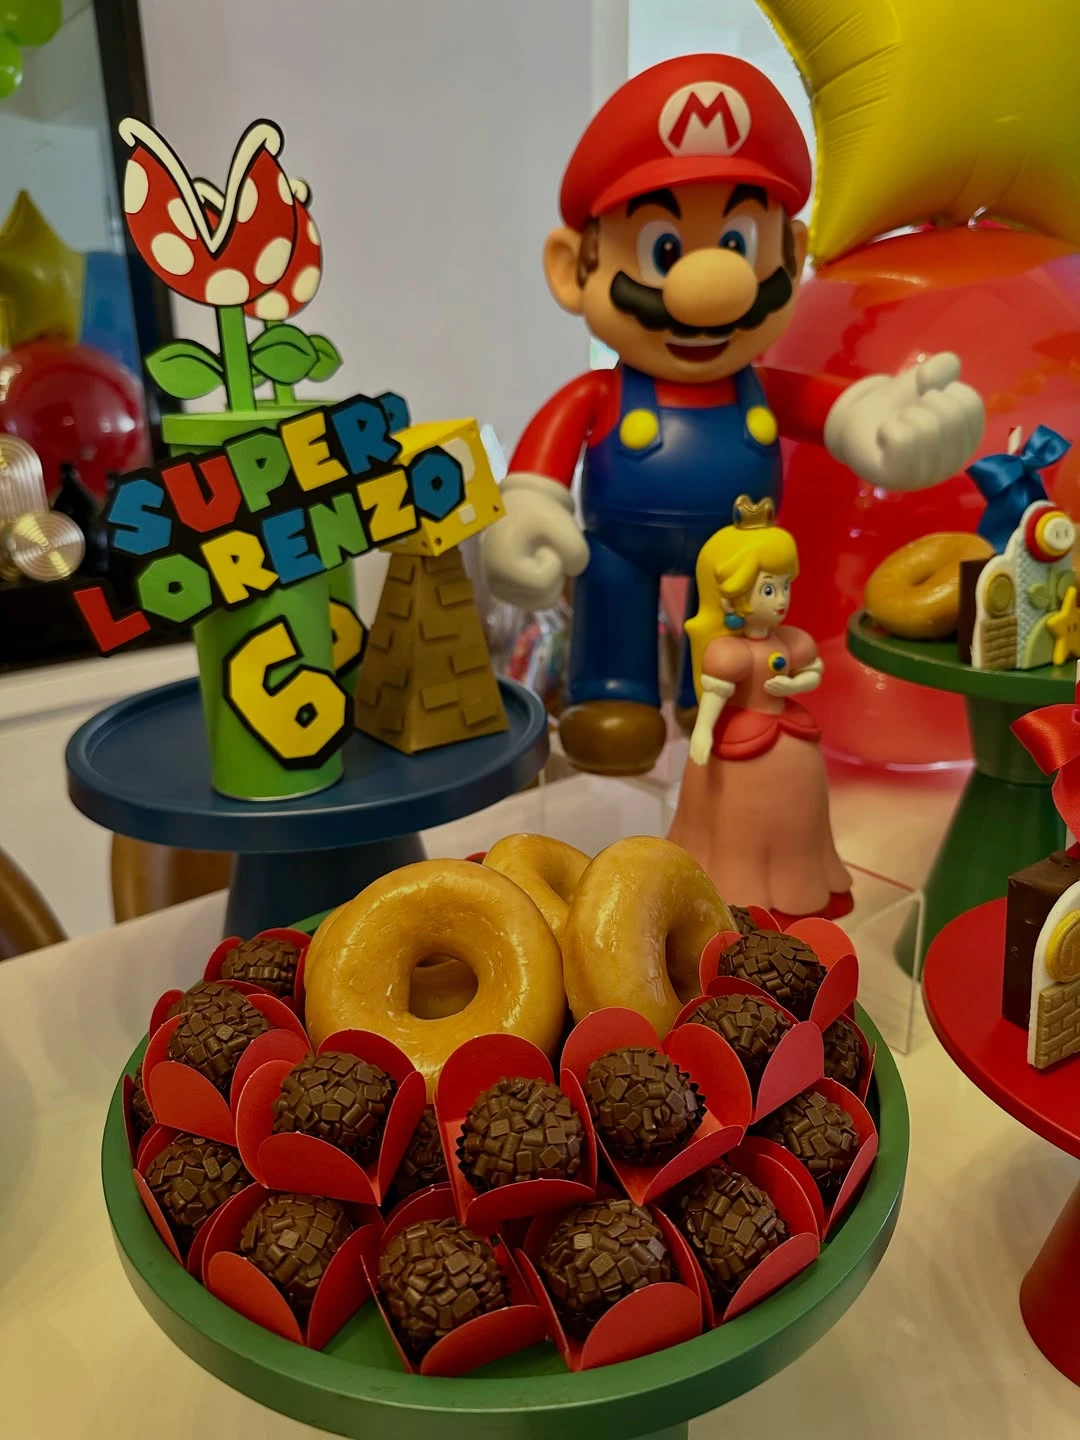
Credit: @jn.partyplanner / Instagram
Arrange bite-sized chocolates in red liners around a central donut stack.
This creates a structured, clean look that fits the bold aesthetic of the game.
Place larger character statues behind the food to fill vertical space without crowding the table.
33. Star-Shaped Power-Up Sandwiches
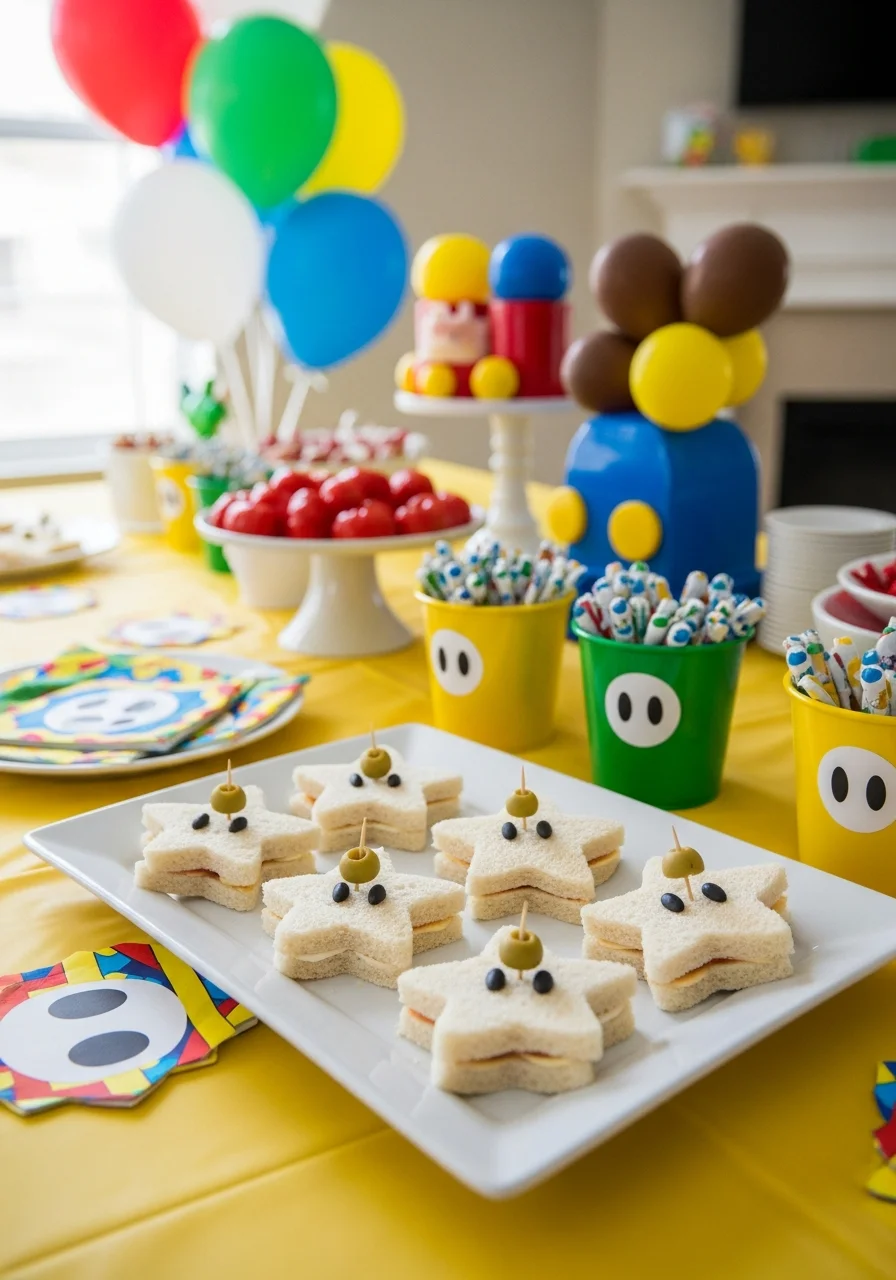
Use a star-shaped cookie cutter to turn standard sandwiches into Super Stars.
It is a simple and effective way to theme a main course for younger guests.
Place two small dots of balsamic glaze or black olives on the top to represent the star’s eyes.
Real-Life Mario Kart and Activities
34. Stomp the Goomba Balloon Game
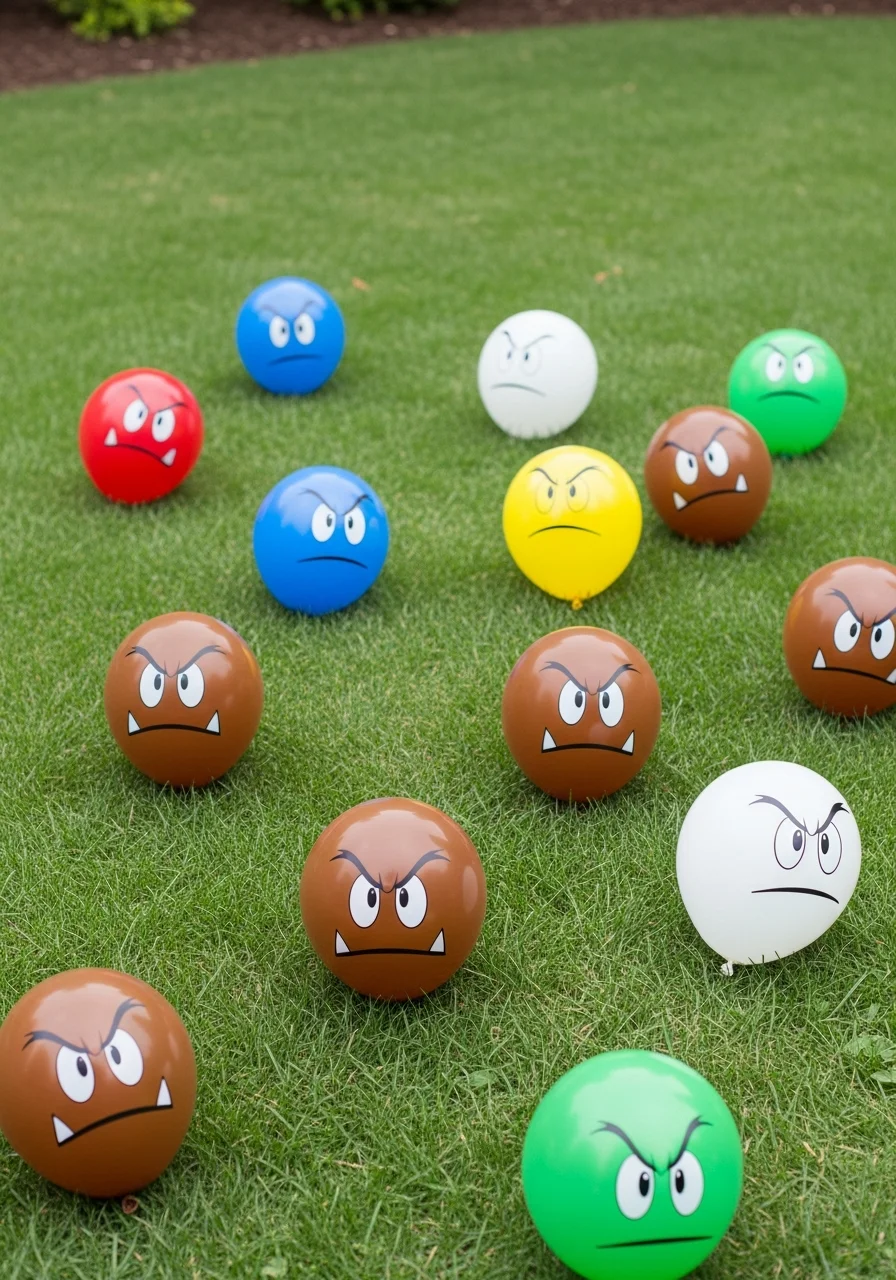
Organize an energetic activity where guests jump on brown balloons to ‘defeat’ enemies.
This is a low-cost game that mimics the primary mechanic of the Super Mario series.
Draw the Goomba faces with a thick black permanent marker before inflating the balloons to prevent smudging.
35. Coin Hunt Scavenger Hunt
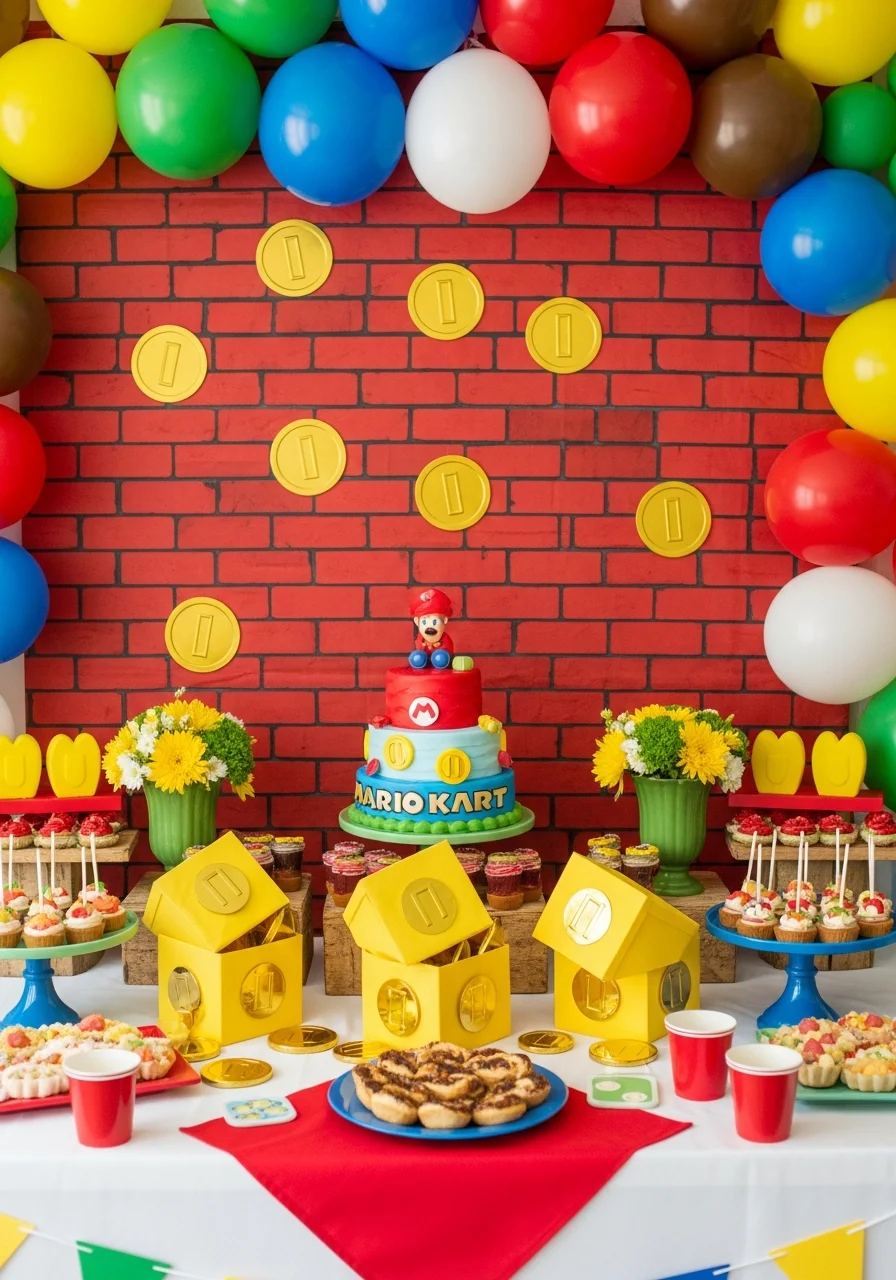
Hide plastic gold coins around the venue for guests to find during the party.
It keeps guests active and engaged in the theme throughout the event.
Hide a few ‘special’ coins inside yellow boxes to represent high-value prizes.
36. Interactive Hero Canvas Art
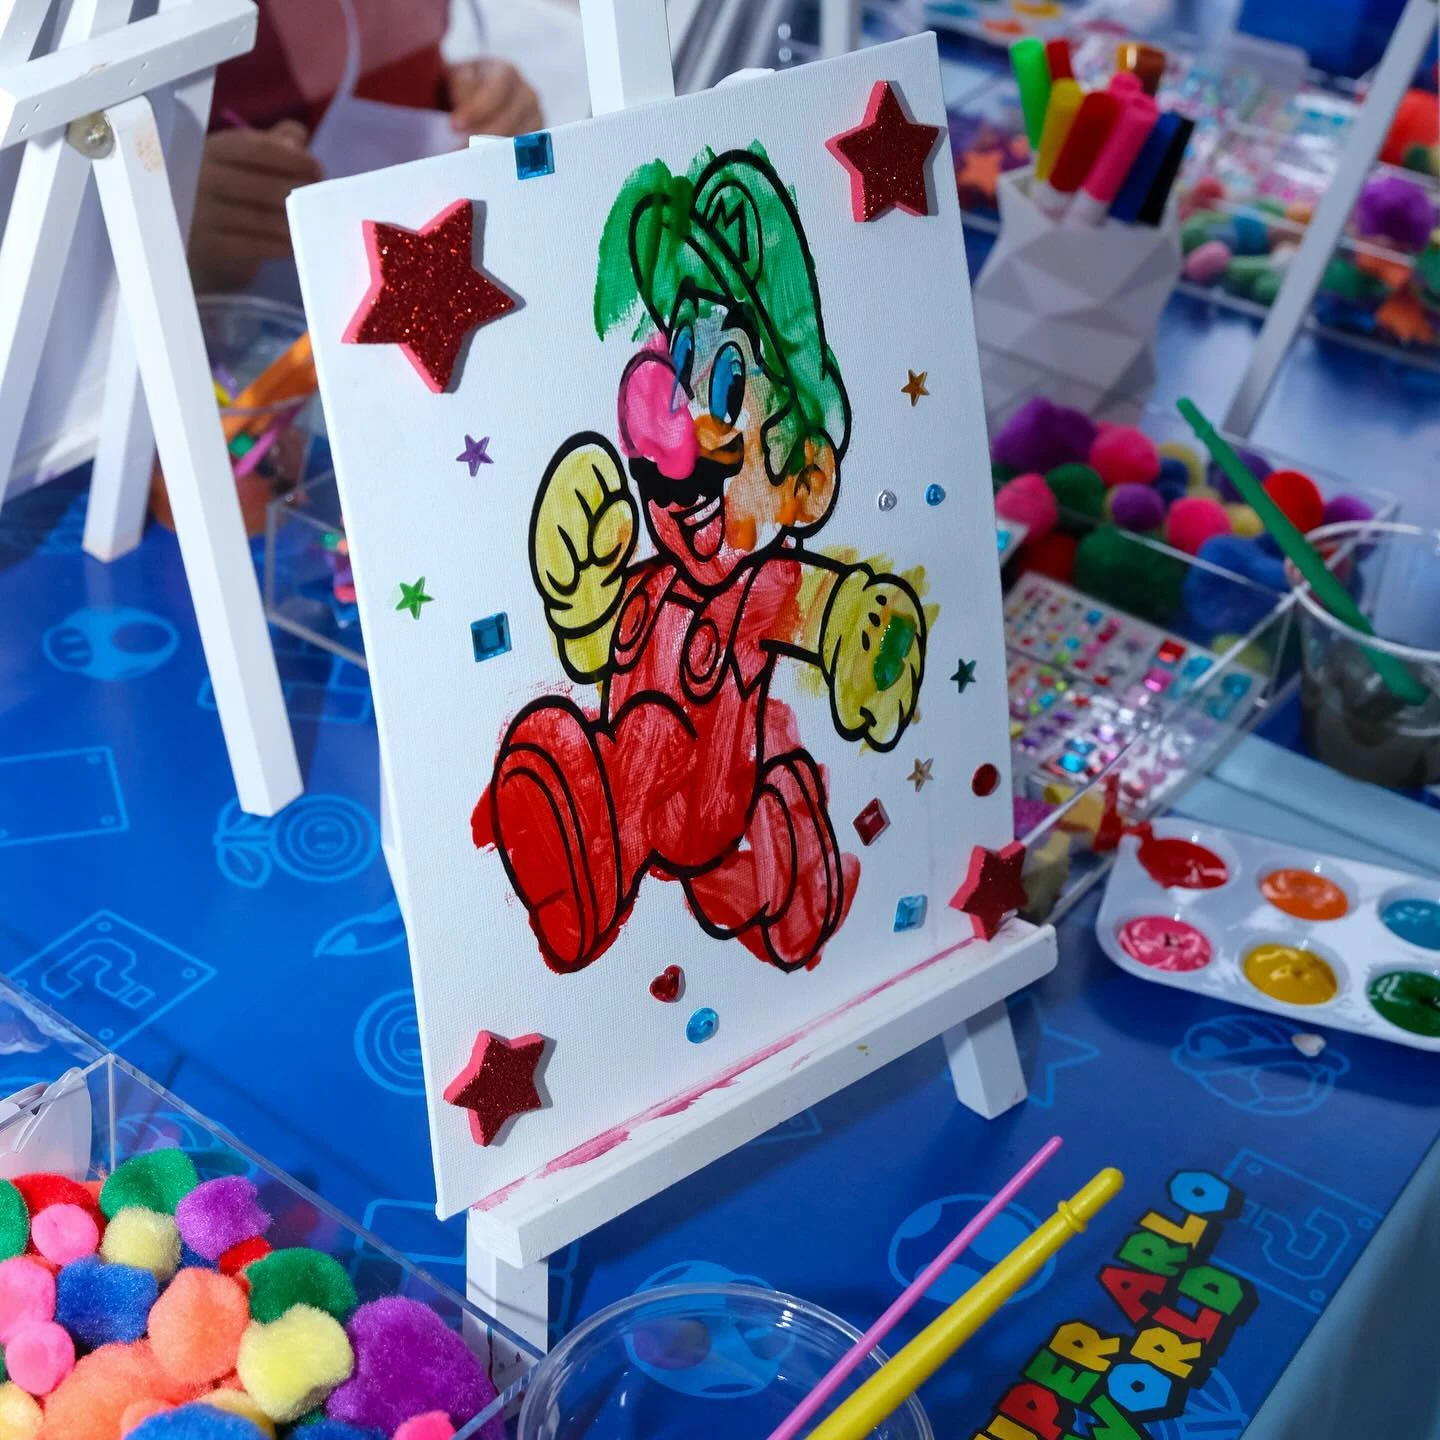
Credit: @sevook / Instagram
Provide a creative outlet with a character painting station that allows guests to customize their favorite game heroes.
Pre-sketched outlines on small canvases ensure that even younger children can produce a recognizable result, while 3D additions like glitter stars and adhesive gems add texture.
Set up tabletop easels to maximize space and use individual paint palettes to minimize mess; choose a themed vinyl table cover to protect surfaces from spills.
37. Custom Power-Up Crafting Station
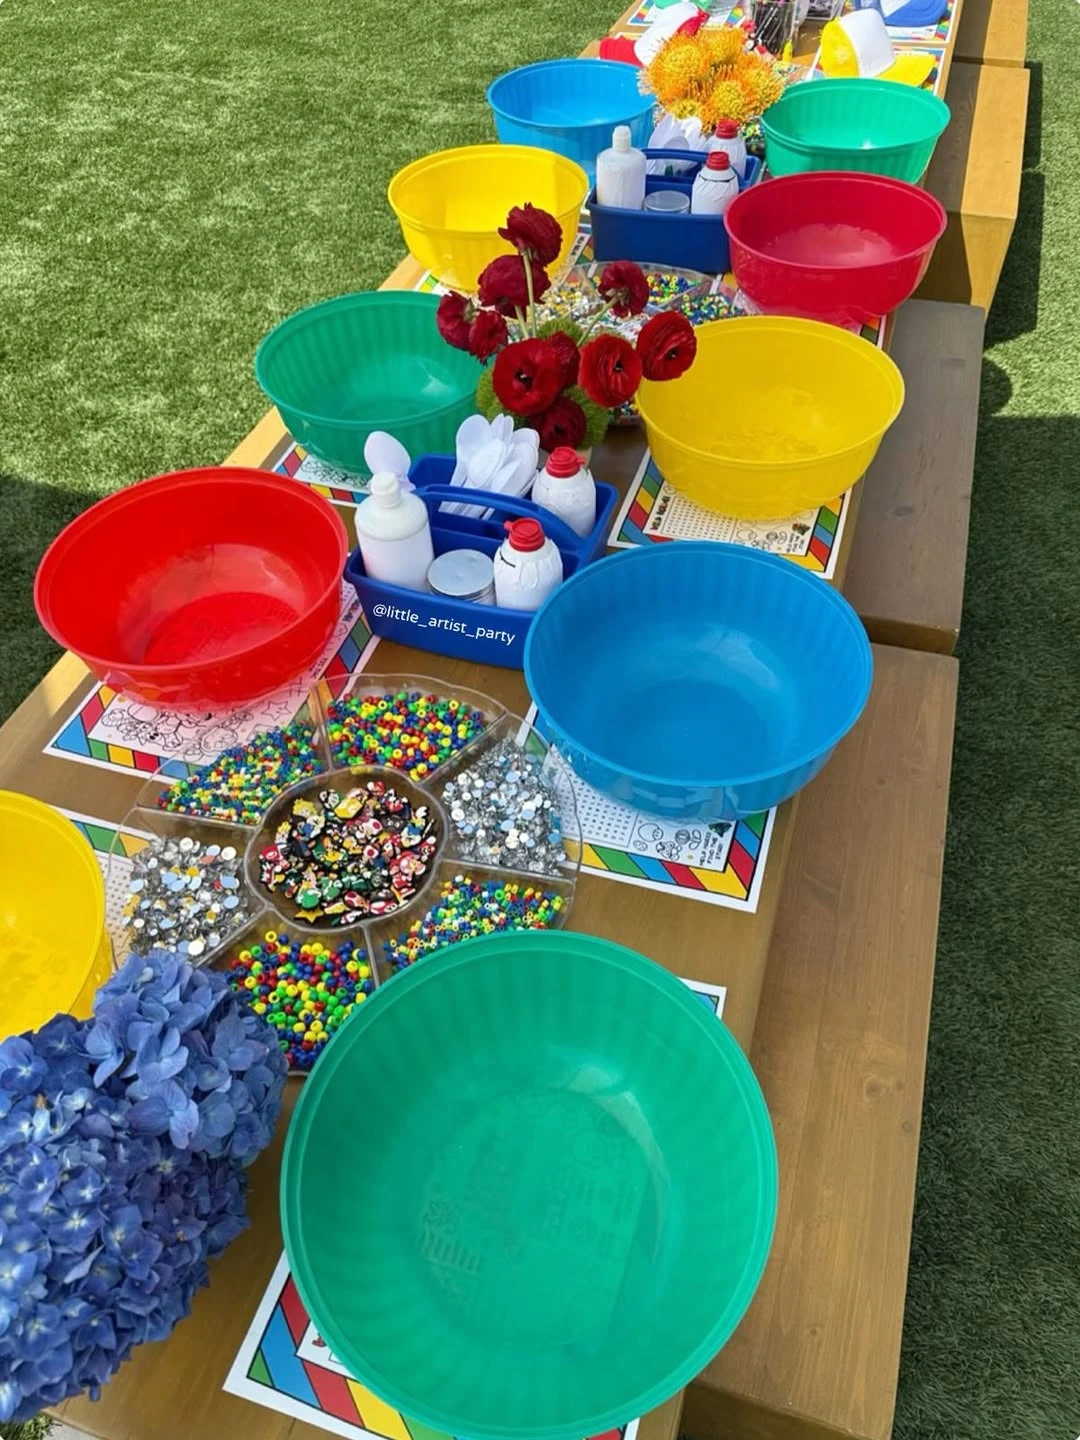
Credit: @little_artist_party / Instagram
Set up a structured DIY zone with color-coded bins for beads, charms, and gems.
Organized supplies allow multiple guests to craft simultaneously without cluttering the workspace.
Place large primary-colored bowls at each seat to contain individual projects and supplies.
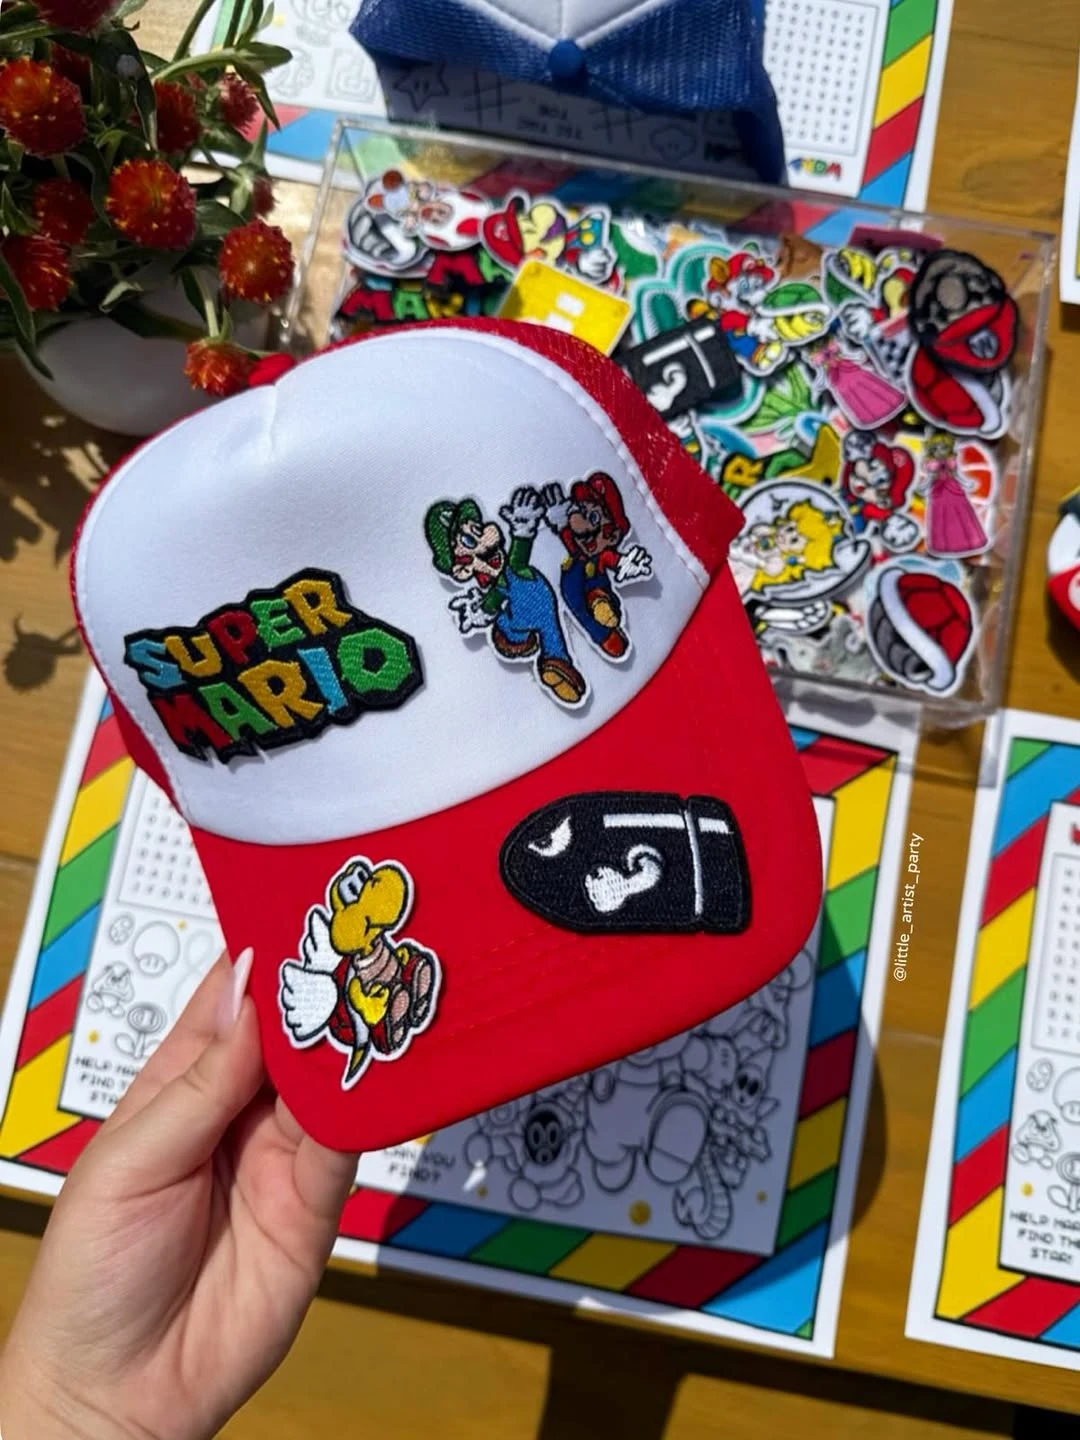
Credit: @little_artist_party / Instagram
Offer character-colored trucker hats as a base for custom patches and pins.
Wearable crafts serve as both a party activity and a functional souvenir for guests.
Use adhesive-backed patches for a tool-free, kid-friendly assembly process.
38. Mario Kart Balloon Race
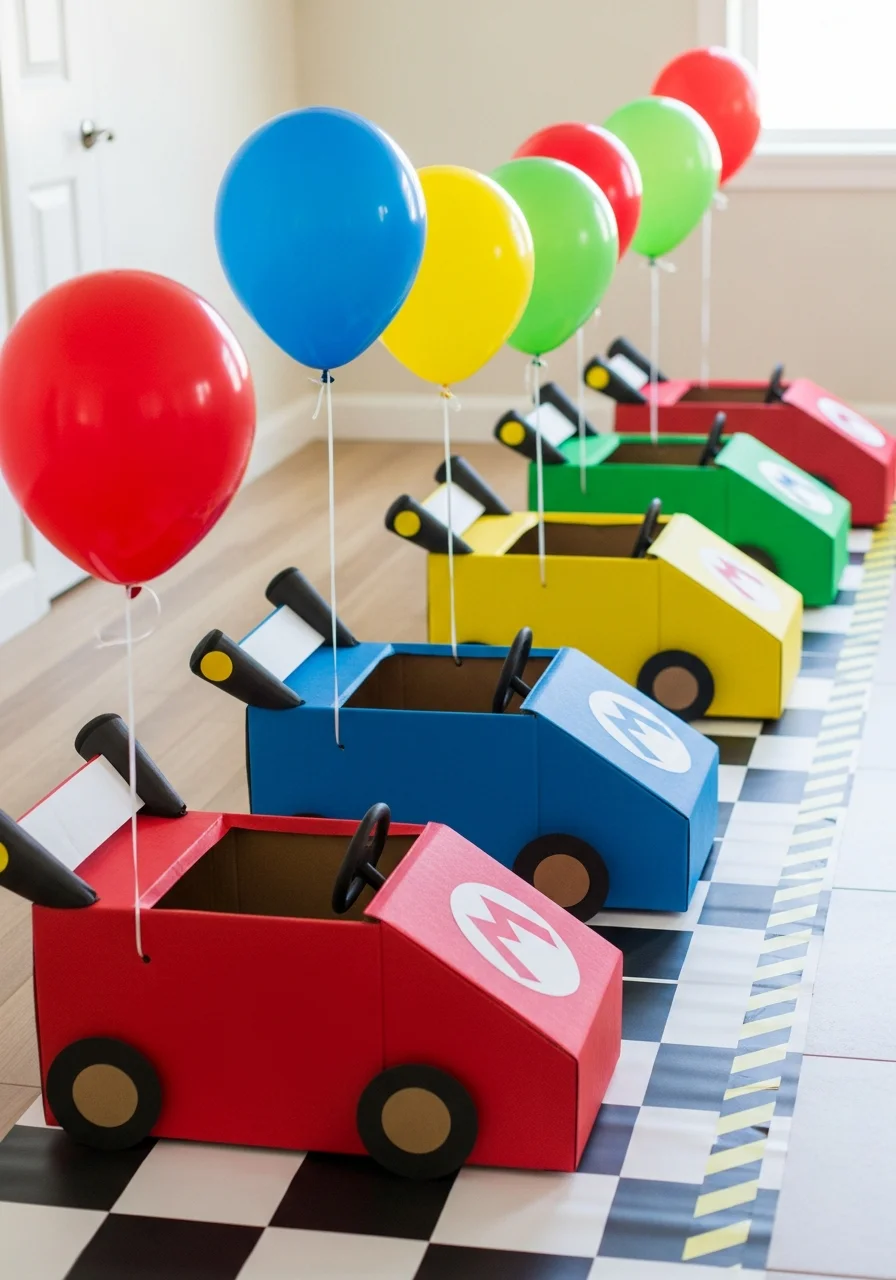
Host a race where guests navigate a track while protecting balloons attached to their ‘karts’.
It provides a safe and interactive way to experience the racing aspect of the franchise.
Construct the karts from large cardboard boxes and paint them in character colors like red, green, and pink.
39. Princess Peach Crown Crafting
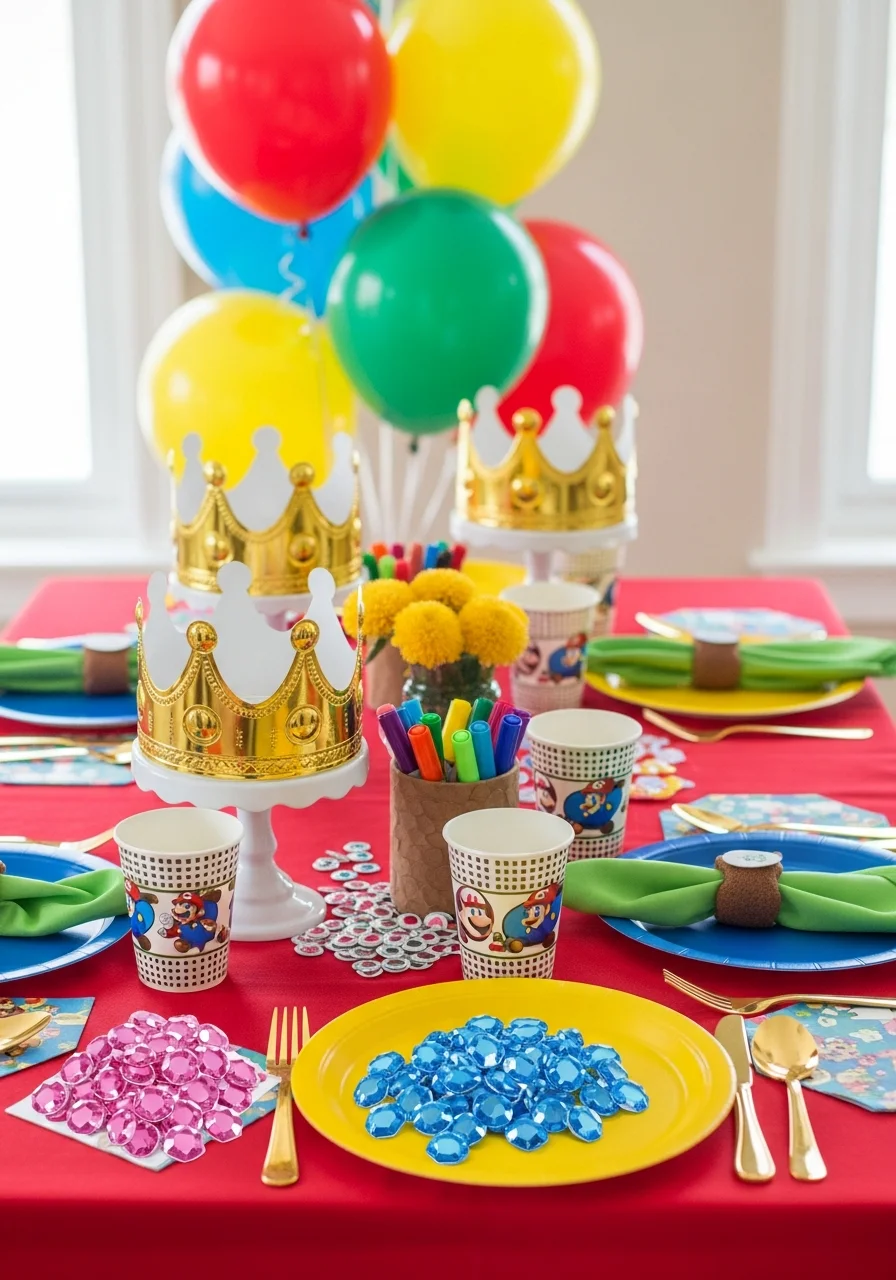
Set up a station where guests can assemble and decorate their own royal crowns.
This provides a creative, hands-on activity that offers a change of pace from high-energy games.
Provide pre-cut gold cardstock shapes and adhesive plastic jewels to minimize the need for glue.
DIY Question Block Favors
40. Custom Level Favor Wall
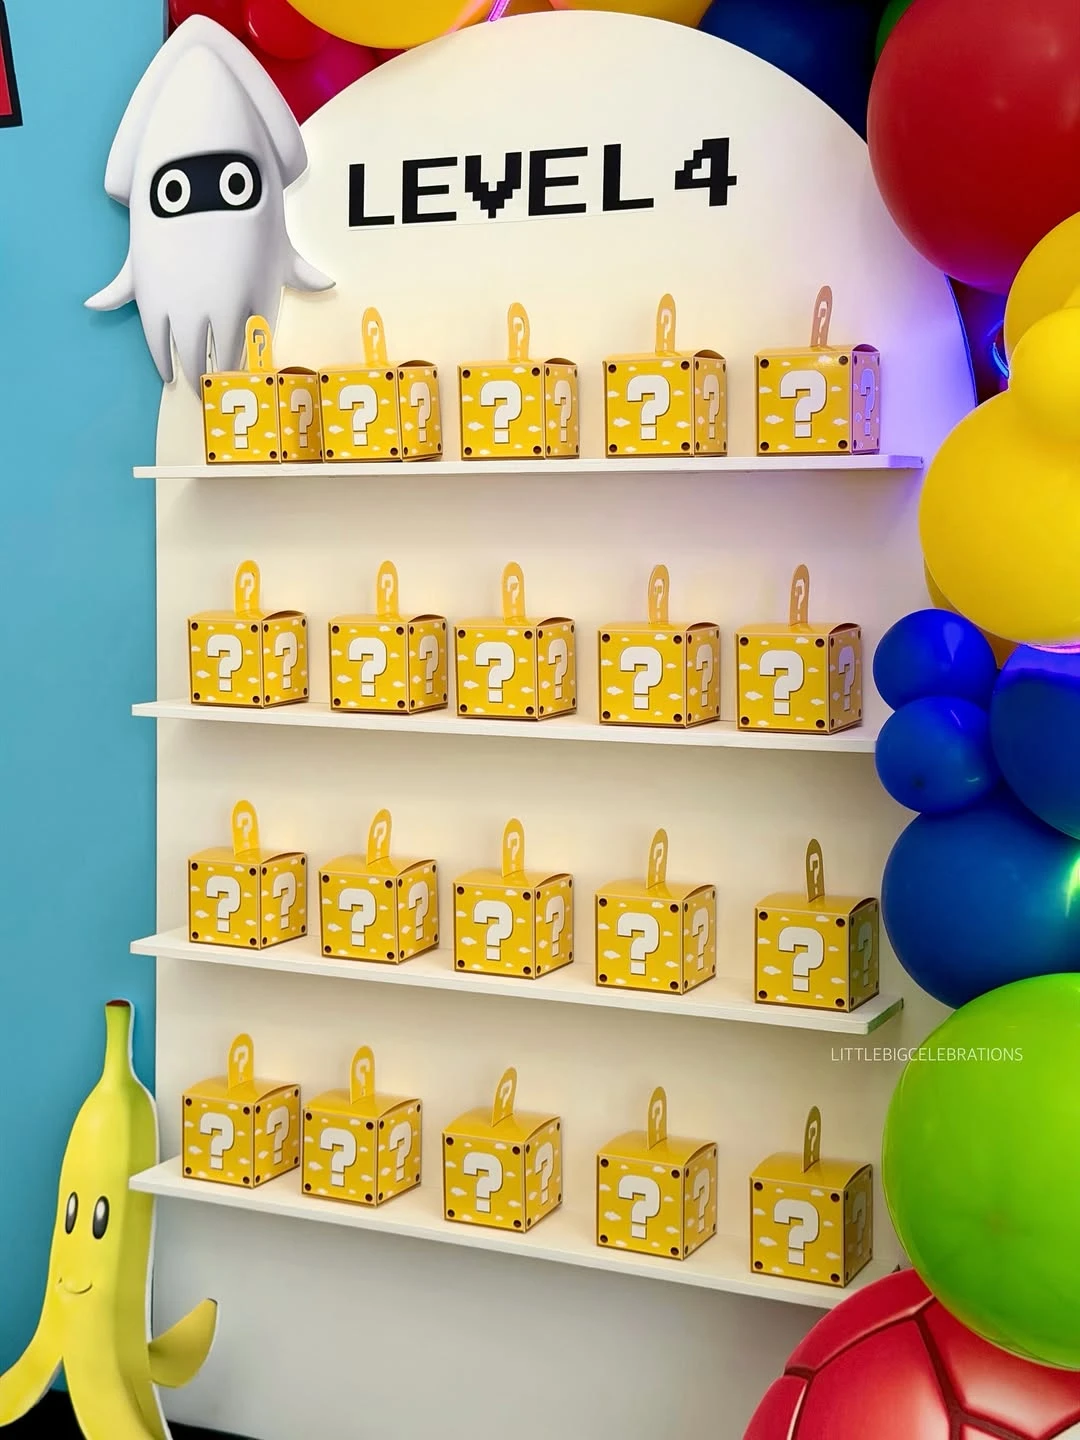
Credit: @marys_hobby_life / Instagram
Arrange yellow mystery boxes on a tiered shelf to represent an in-game item shop.
Using the child’s age as the ‘Level’ adds a personalized touch to the display.
Fill small yellow boxes with gold chocolate coins or star-shaped candies to match the theme.
41. 1-Up Mushroom Mini Terrariums
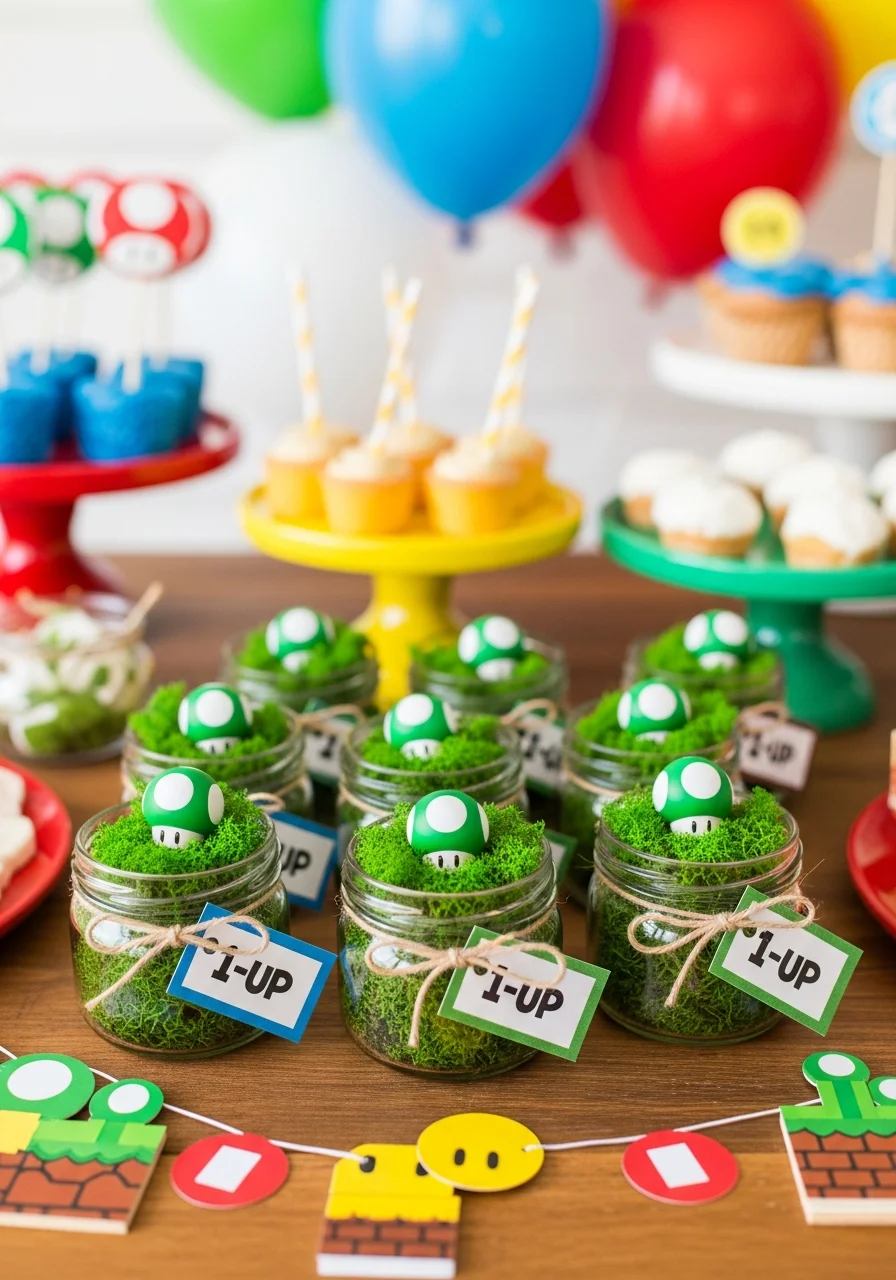
Assemble small glass jars with moss and mushroom figurines as a sophisticated favor.
This is a unique, long-lasting gift that works well for older children or adult fans.
Use preserved moss to ensure the terrariums stay green without needing water or sunlight.
42. Mystery Box Favors
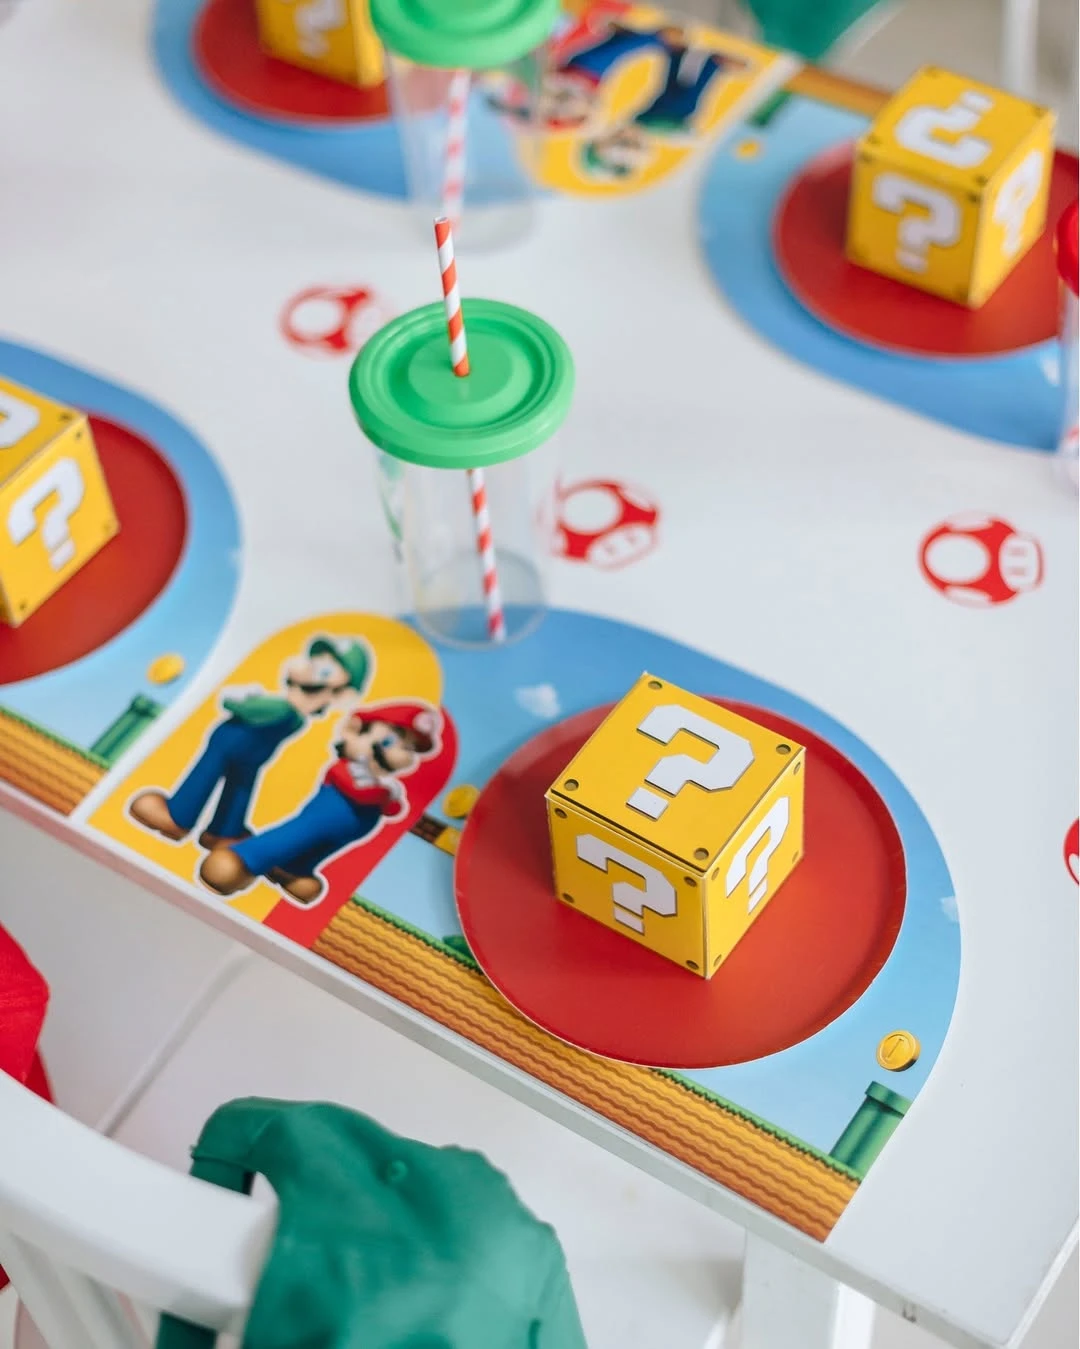
Credit: @peditresdeseos / Instagram
Assemble favor boxes using yellow cardstock and white question mark decals.
These iconic game elements act as both a party reward and a table accent.
Fill boxes with gold chocolate coins or star-shaped candies to match game power-ups.
43. Power-Up Seed Packets
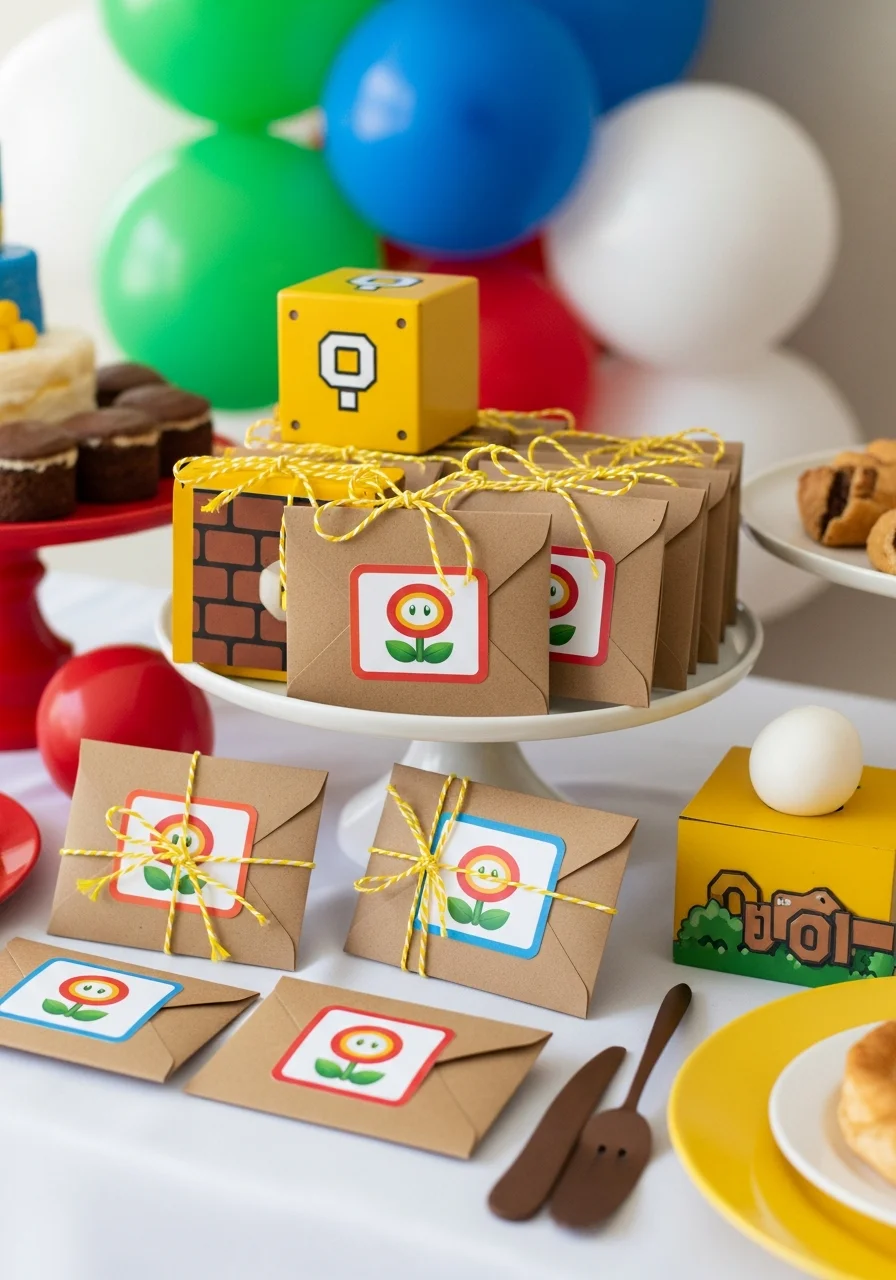
Give out seed packets labeled as ‘Fire Flowers’ or ‘Ice Flowers’ for an eco-friendly favor.
It is a creative way to tie the game’s botanical power-ups to a real-world activity.
Choose sunflower seeds for ‘Fire Flowers’ and white wildflower seeds for ‘Ice Flowers’.
44. Tiered Favor Display Blocks
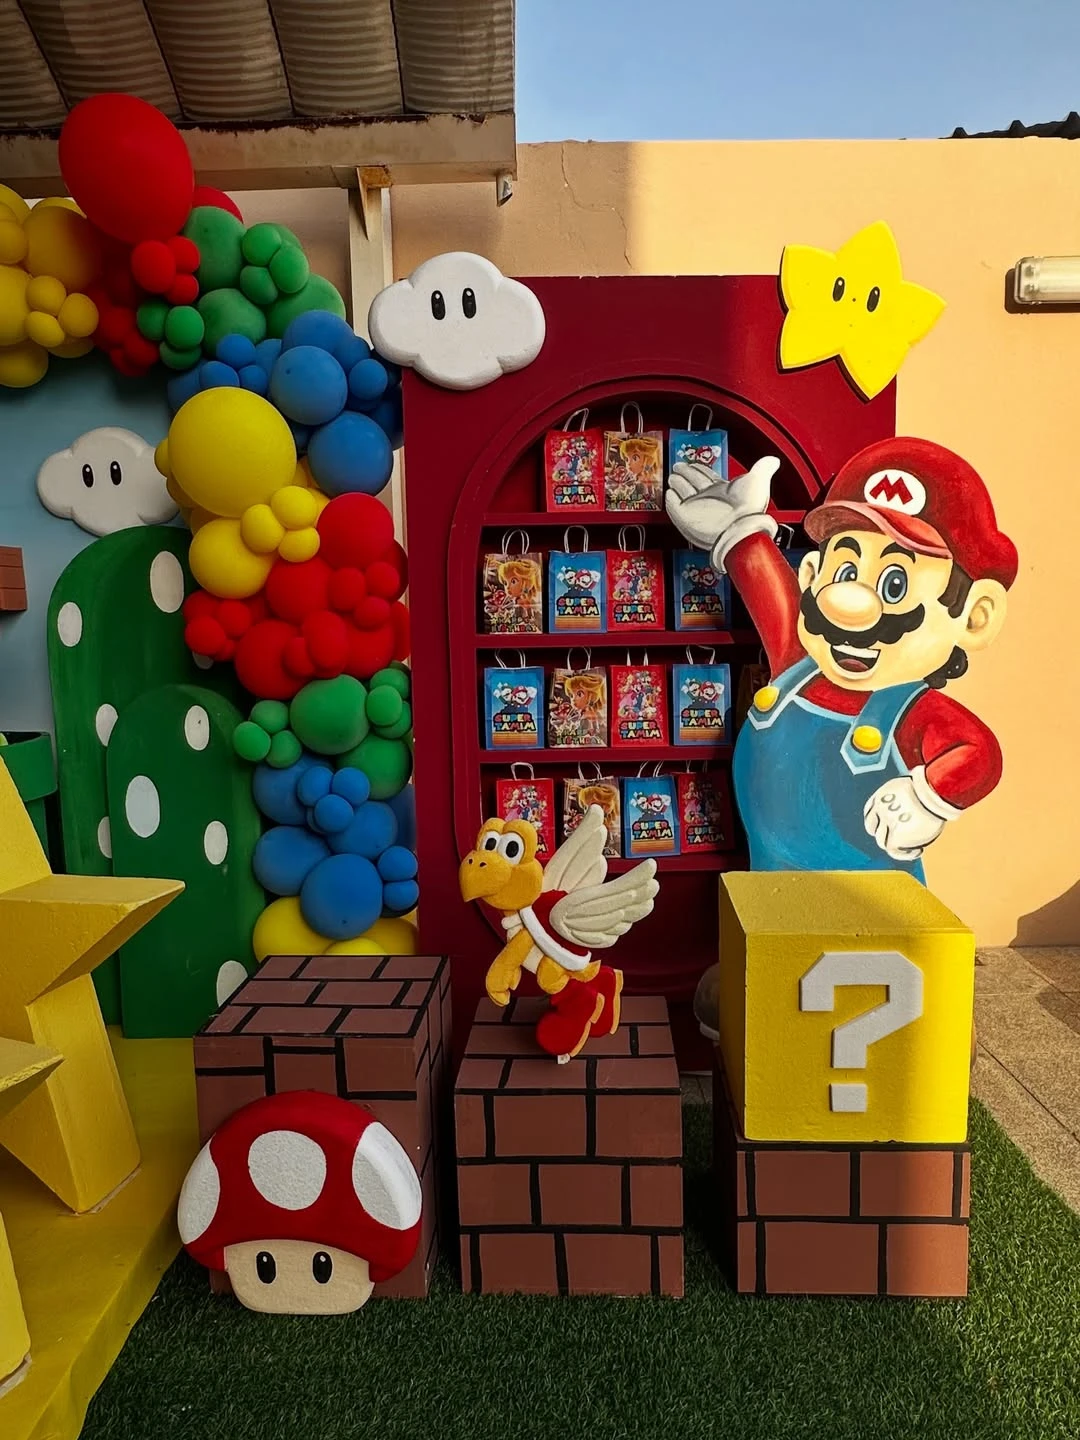
Credit: @parfait_qatar / Instagram
Arrange party bags on themed pedestals and shelving.
Using brick and question blocks adds vertical interest.
Place bags on a red arched shelf for high visibility.
45. Question Block Pedestals
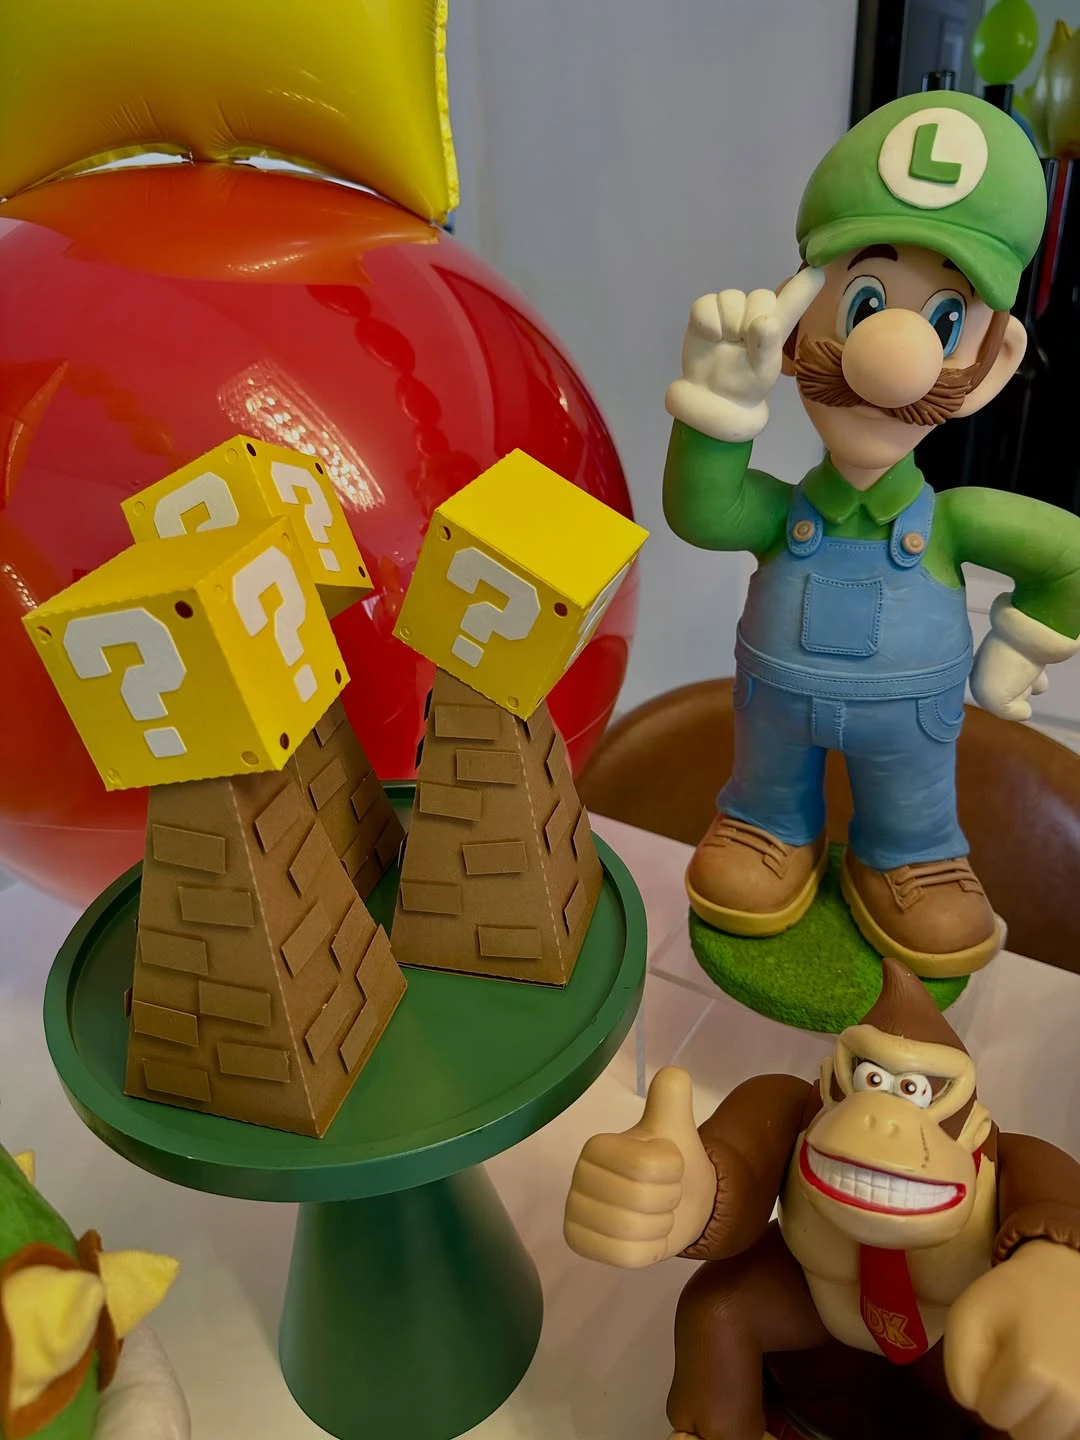
Credit: @jn.partyplanner / Instagram
Assemble yellow question mark boxes and place them on brown brick-patterned pedestals.
This mimics the floating blocks from the game and serves as both decor and favors.
Fill these boxes with gold chocolate coins or star-shaped candies to match the theme.
Frequently Asked Questions
How can a DIY warp pipe be created for the party entrance?
Large cardboard tubes or wide PVC pipes painted in a vibrant green serve as excellent warp pipes. These can be positioned at the entrance to greet guests or used as unique containers for balloon bouquets and photo booth props to instantly set the Mushroom Kingdom scene.
What are some healthy food options that fit the Mario theme?
Fire Flower veggie trays made with bell peppers and carrots, or Piranha Plant fruit skewers using strawberries and grapes, offer nutritious themed snacks. Star-shaped melon slices or sandwiches also provide a simple way to incorporate the ‘Power Star’ element into the menu.
How is a Mario Kart race hosted without using video game consoles?
Organize a physical race using cardboard boxes decorated as karts. Attach three balloons to the back of each kart, and have participants try to pop each other’s balloons while navigating a backyard or living room obstacle course filled with ‘banana peel’ cutouts and ‘mystery box’ checkpoints.
What items work best inside a Question Block favor box?
Fill yellow favor boxes with gold chocolate coins, star-shaped candies, and mushroom-themed stationery. Small items like ‘Power-Up’ stickers, green and red ‘Yoshi Egg’ bouncy balls, or yellow star-shaped glow sticks add to the nostalgic feel for guests of all ages.
How can the venue be transformed into a game level using simple decor?
Focus on the classic color palette of red, blue, and green. Use brown boxes painted with brick patterns to create platforms, hang clusters of white balloons for clouds, and scatter gold paper circles across tables to represent collectible coins. Suspending yellow ‘Question Blocks’ from the ceiling adds vertical interest and mimics the game’s layout.
This post may contain affiliate links: full affiliate disclosure.